
Make Esp8266 Weather Station

Made by raushan-kumar / 3D Printing / Weather
About the project
This project is a wonderful project for IoT beginners who want to learn about retrieving data from an Online Internet server to NodeMCU
Project info
Difficulty: Easy
Platforms: Arduino, Espressif, Panasonic
Estimated time: 1 hour
License: Creative Commons Attribution-ShareAlike CC BY-SA version 4.0 or later (CC BY-SA 4+)
Items used in this project
Hardware components


Story
IOT Weather Station with ESP8266 OLED: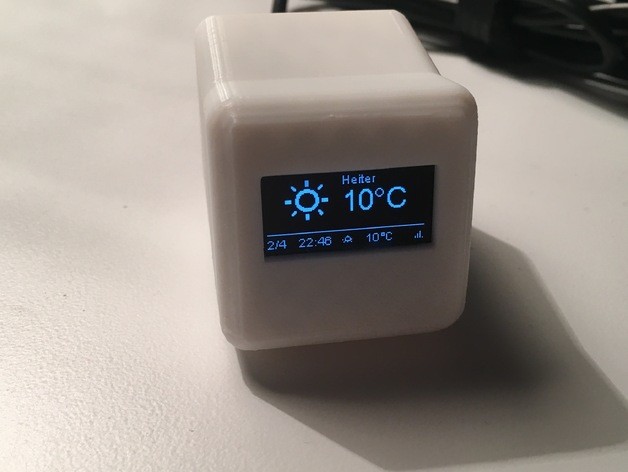
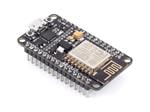
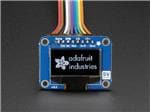
In this Latest IoT project, we will learn how to make an IoT Based Simple Online Weather Station using ESP8266 NodeMCU (wemos D1) Wi-Fi development board and SSD1306 OLED display (128×64 Pixel).
This project is a wonderful project for IoT beginners who want to learn about retrieving data from an Online Internet server to NodeMCU board.
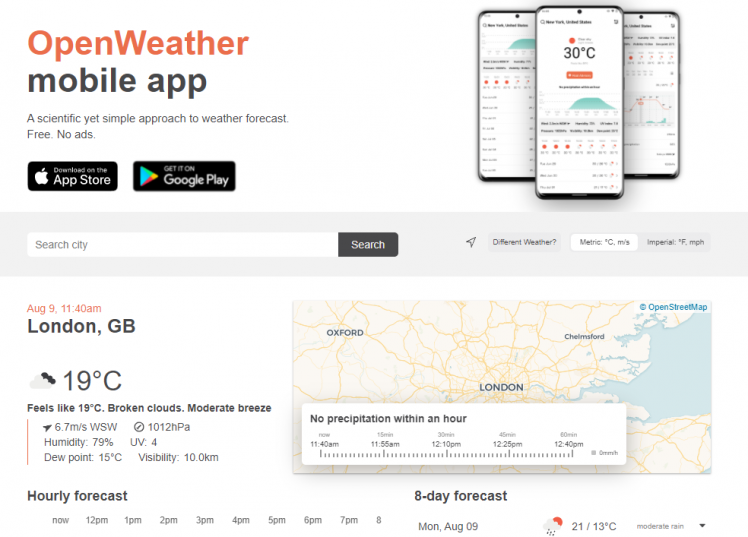
The NodeMCU pulls weather data like temperature, humidity, pressure, wind speed and wind directional degree from weather website called openweathermap.org and display it on SSD1306 screen.
Thank You, NextPCB:
This project is successfully completed because of the help and support from NextPCB. Guys if you have a PCB project, please visit their website and get exciting discounts and coupons.
Only 0$ for 5-10pcs PCB Prototypes https://www.nextpcb.com
Register and Get $100 from NextPCB: https://www.nextpcb.com/register
See more info about PCB Assembly Capabilities: https://www.nextpcb.com/assembly
1: Bill of Materials
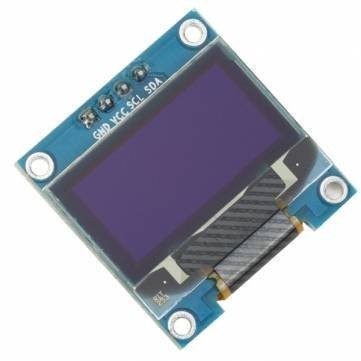
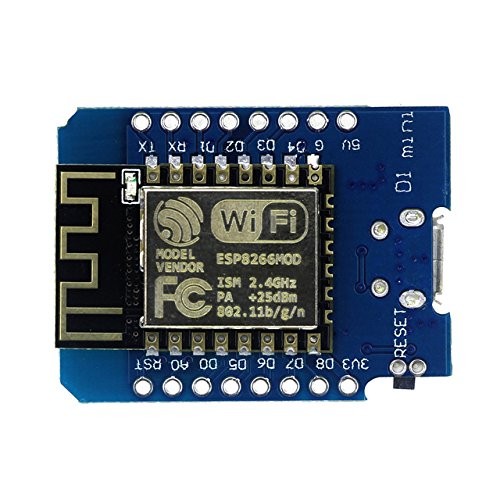
As the topic is clear, i.e IoT Weather Station with NodeMCU OLED & OpenWeatherMap, we just need OLED Display and NodeMCU wifi Module for this project.
You can purchase these components from Amazon.
- Wemos D1 (Amazon.com)
- OLED Display (Amazon.com)
- Connecting Wires (Amazon.com)
Step 2: Block Diagram – IOT Weather Station:
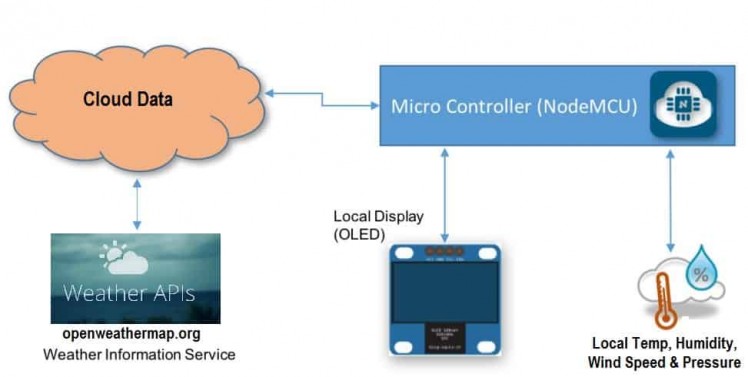
This is a simple block diagram for IoT Weather Station which simply explains how the System works.
The website openweathermap.org provides an online service for weather data and forecast.
The data is upload on a cloud server. ESP8266 Wifi Module collects the data information online and download/retrieve the info like temperature, humidity, pressure, wind speed, and wind directional degree.
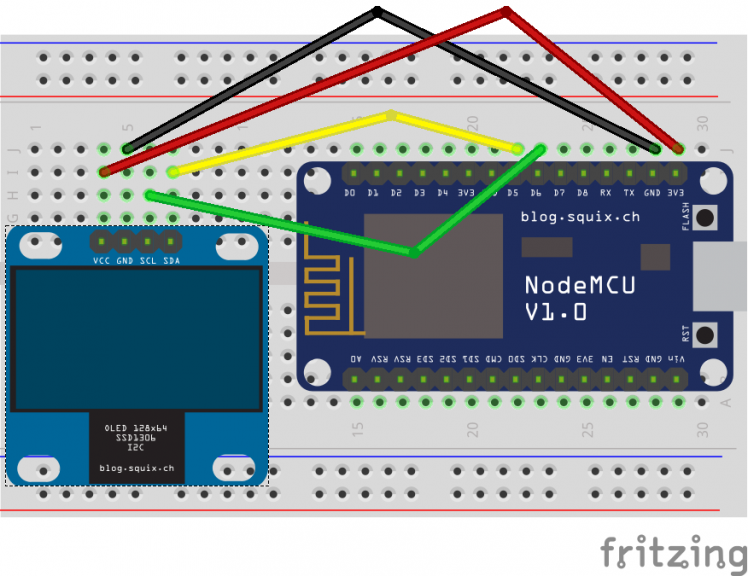
Step 3: Circuit Diagram & Connection:
Step 4: Preparation of Arduino IDE for ESP8266
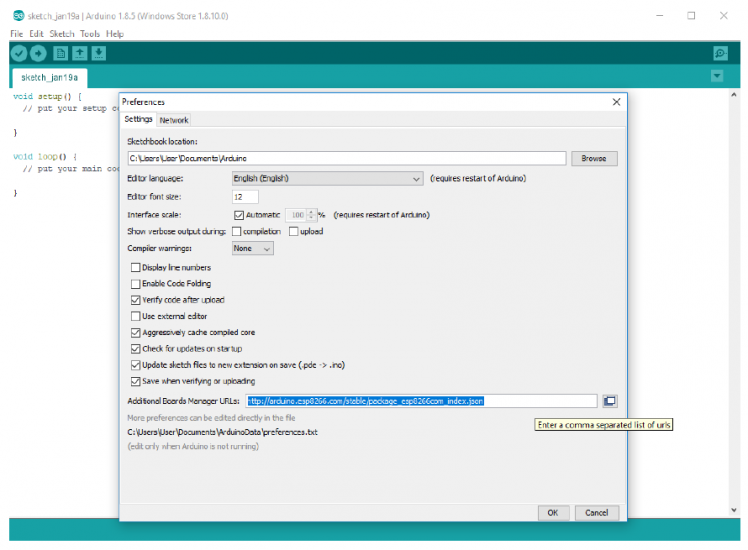
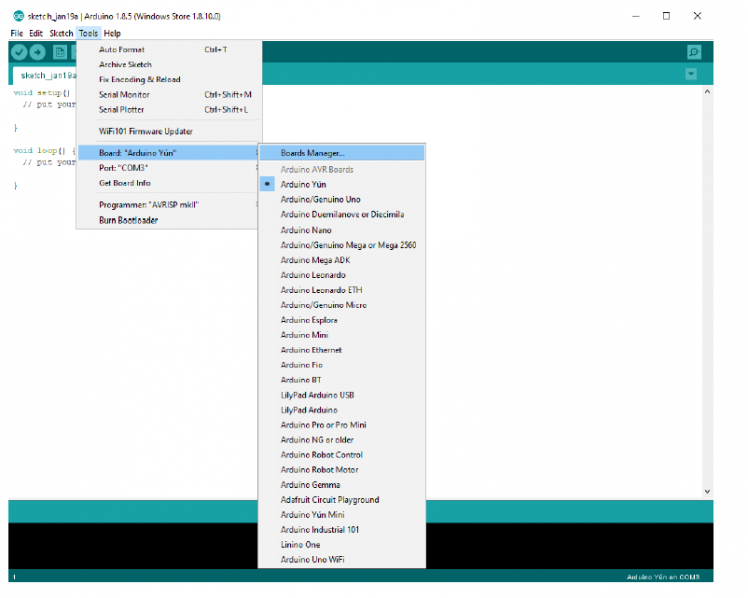
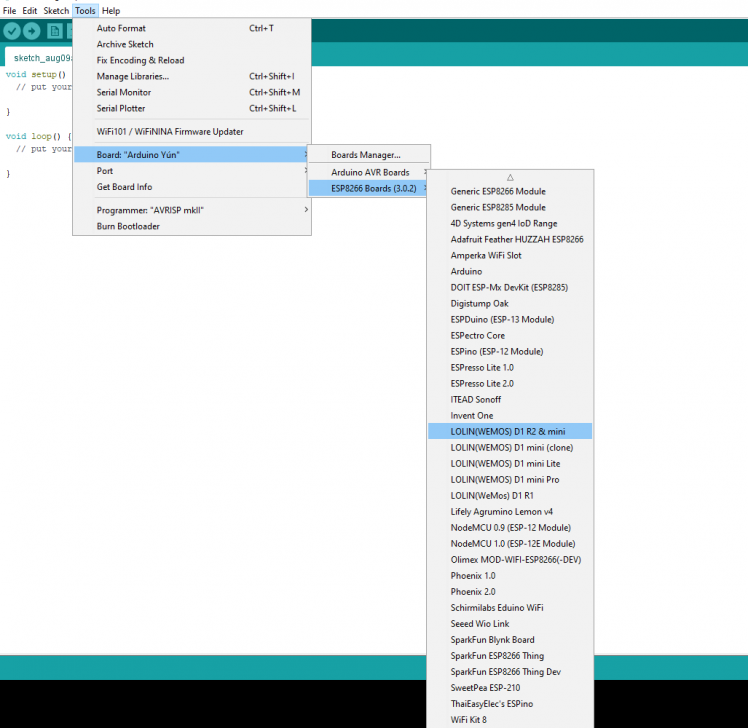
The ESP8266 module isn't part of the Arduino-IDE.
1. We have to install it first. Open file / preferences in the Aduino -IDE and insert the following link in the Additional Boards Manager URLs field: http://arduino.esp8266.com/stable/package_esp8266...
2. this window with the OK Button.
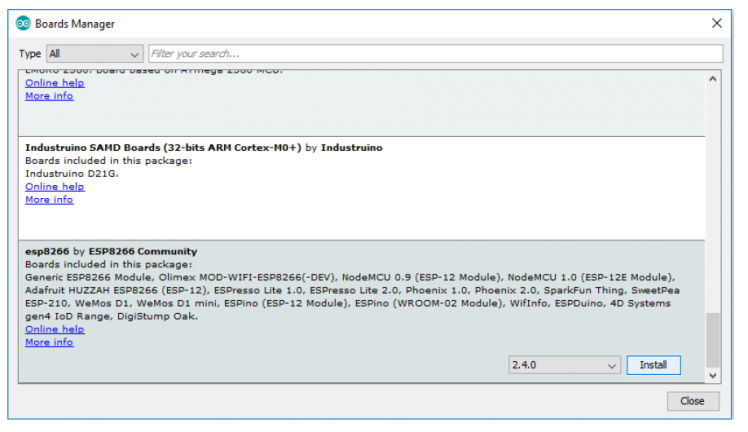
3. Open now the board manager: Tools / Board / Board Manager
4. Go to the ESP8266 board entry and install it now you can choose LOLIN(WEMOS) D1 R2 & mini.
5. Set the CPU frequency to 80MHz, Flash Size to "4MB (FS:3MB OTA:~512KB)", and the COM port.
Step 5: Generating API From OpenWeatherMap:
OpenWeatherMap Access current weather data for any location including over 200,000 cities all over the world. Current weather is frequently updated from more than 40,000 weather stations. The data is available in JSON, XML, or HTML format. We will use the data in JSON format here.
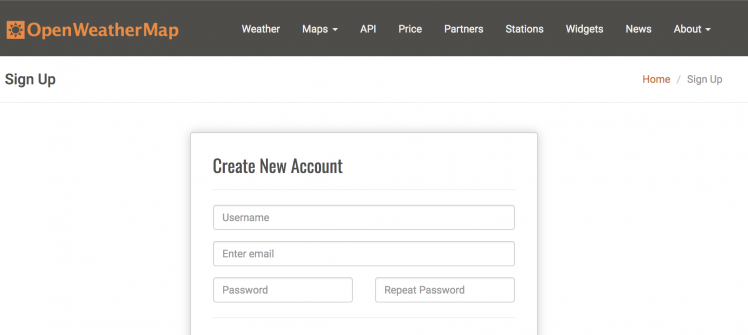
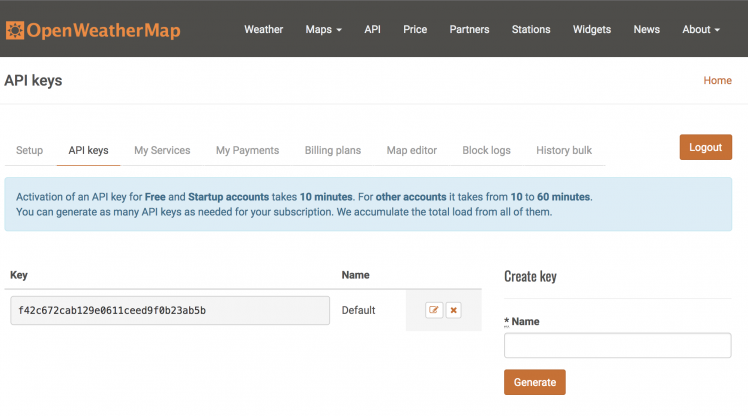
Visit https://openweathermap.org and sign in by creating your account.
Create or Generate your API Key as it is needed for retrieving data.
Select the city and country code by entering your city name. Example: Jaipur, IN here Jaipur is a city, and IN is a country code for India. City name and country code need to be entered on code.
As your device will be displaying data from OpenWeatherMap you need an "API key" from them.
1. Go to https://openweathermap.org/price
2. note of the features in the "Free" column.
3. By using the free plan you are limited to 60 calls per minute.
4. In the "Free" column click on "Get API key and Start".
5. Once the API key is created you can come back to this page any time to edit or delete it. API key which will be required in our code in the next step.
Below is the code for IoT Weather Station with NodeMCU OLED & OpenWeatherMap. You need 3 different libraries for that, i.e Adafruit_GFX.h, Adafruit_SSD1306.h and ArduinoJson.h. You can get all these libraries from the Library Manager.
Enter the WIFI SSID, Password, and City Name with Country Code. Now you can upload this code to NodeMCU Board.
The electronics can be programmed as usual if you have the knowledge. Alternatively there are lot of codes in the internet when looking for: ESP8266 OLED SSD1306.
For example the weather widget I found here: http://blog.squix.ch/2015/05/esp8266-projects-inte
I created a forum where ideas, hints, code, hardware information etc. can be exchanged: http://blog.squix.ch/2015/05/esp8266-projects-inte...
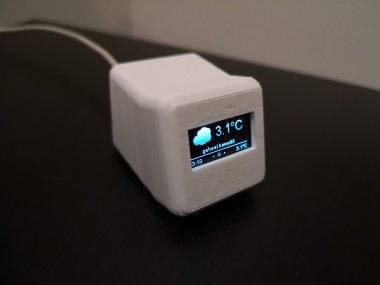
7: 3D Printed Enclouser
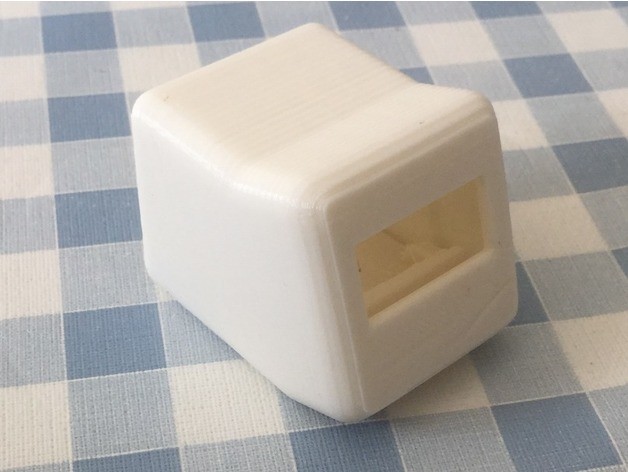
First print the project enclosure
I have used my Ender3 3D printer
It took me about 1 hours to print parts.
The enclosure has 2 parts:1. case 2. Back Cover
My settings are: Print Speed: 60 mm/s
Layer height: 0.2mm ( 0.3 also works well)
Fill Density: 20%
Extruder Temperature: 220degC
Bed Temp: 60deg
Attachments
- widget_body.stlDownloadView in 3D
- widget_body_gesture.stlDownloadView in 3D
- widget_body_knob.stlDownloadView in 3D
Step 8: Install the All Parts in Enclosure
Insert the display into the enclouser.
Install the front Cover
After mounting the display and circuit board The enclosure is designed is not tight clearance, so you need any glue or screw to hold the front covers.
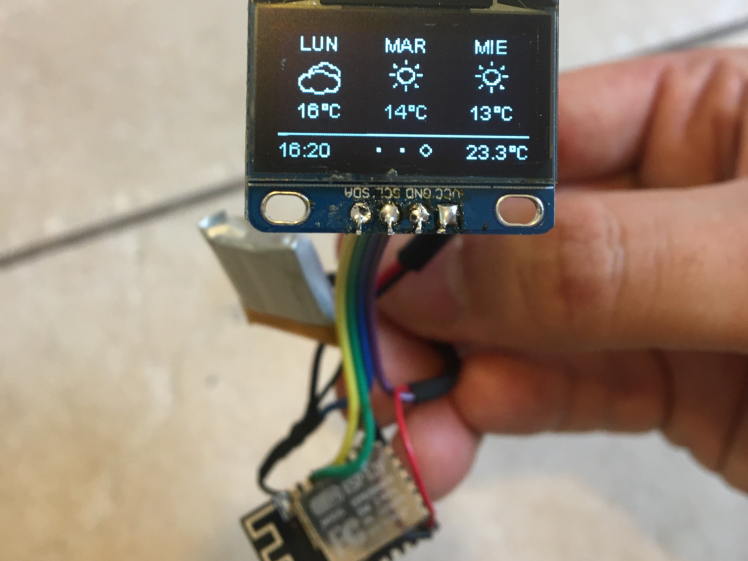
Step 9: Enjoy

It works great
For a quick test, just powering with powerbank The weather station should be turned ON.
Schematics, diagrams and documents
CAD, enclosures and custom parts
Code
Credits
Related products


Leave your feedback...