
Localghost - The Wifi Connector
Made by 8BitsAndAByte / 3D Printing / Art / Communication
About the project
How many ghosts does it take to connect to your wifi? After this project, the answer is hopefully just one!
Project info
Difficulty: Easy
Estimated time: 1 day
Items used in this project
Hardware components

Story
The idea of this project is to write your wifi connection details to an NFC tag or sticker, so when guests hold their phone against it, it will automatically connect them to your wifi.
Project Video NFC Tag
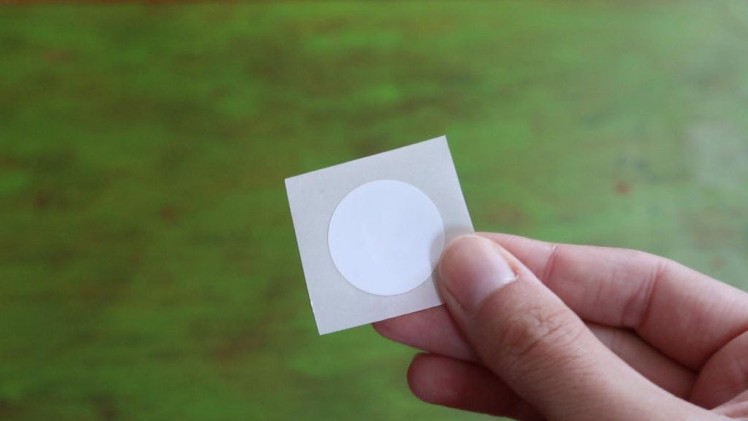
First things first, we’ll need to write the connection details of your home network to the NFC tag.
When choosing an NFC tag, make sure its capacity is big enough to store wifi information and that it can be read from a short distance. For reference, ours can store 144 bytes and can be read at a maximum distance of 5cm, which works perfectly for this project.
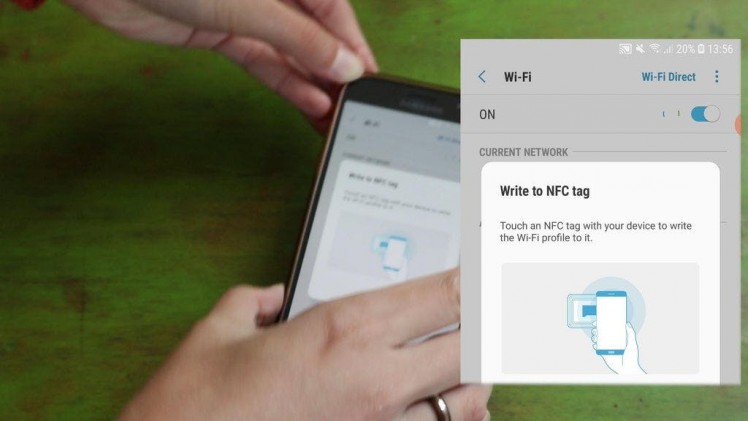
Writing the tag might sound rather difficult, but with an Android smartphone it’s actually pretty easy to do without needing any external apps. We followed the steps outlined in this tutorial.
- Using your smartphone, connect to the wifi that you want to write to the tag.
- Enter your settings menu and switch on NFC.
- Head over to the wifi settings on your phone, and do a long press on the network you’re connected to. A little menu should pop up with the option “write to NFC tag”.
- Click on the “write to NFC tag” option, enter the wifi password and hold your phone to the tag. The connection details should now be written to the tag, hurray!
- Double check that the tag works by disconnecting from wifi network and then holding your unlocked phone to the tag. A popup should appear asking if you want to connect to the network.
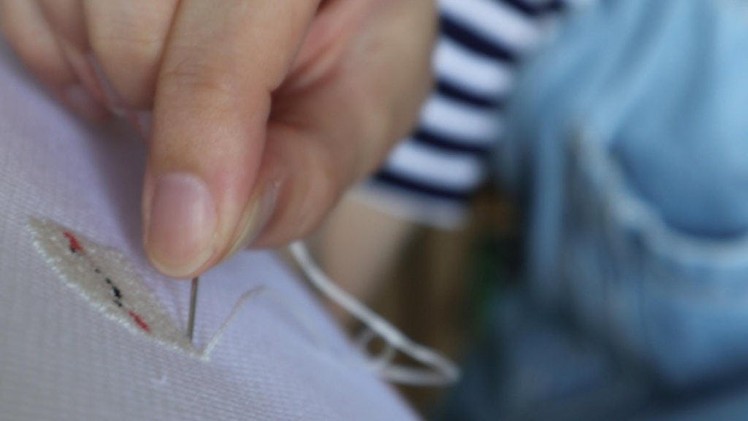
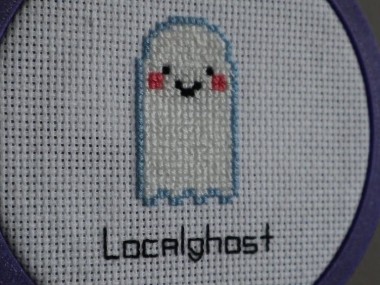
With our tag written, it’s time to hide it somewhere in plain sight, kind of like a ghost. We opted to cross stitch a little ghost and put the NFC sticker inside the frame (see next step).
For the ghost, we followed this “You’re my favourite boo” cross stitching pattern made by Nerdy Little Stitcher.
We added the word “localghost” underneath, a wordplay on the term “localhost”.
Framing
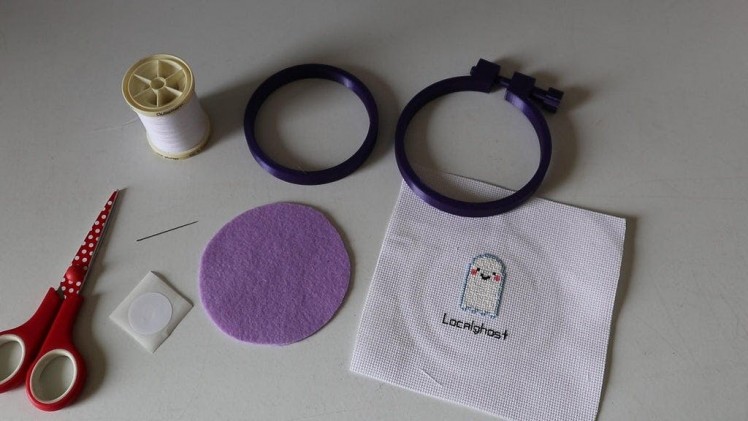
Now for the final part: framing! There are loads of different ways to display a cross stitch, and we opted to put it in a sparkly purple 3D printed embroidery hoop.
We 3D printed the 7.5cm version of these embroidery hoops designed by gvera on thingiverse for our little spooky friend.
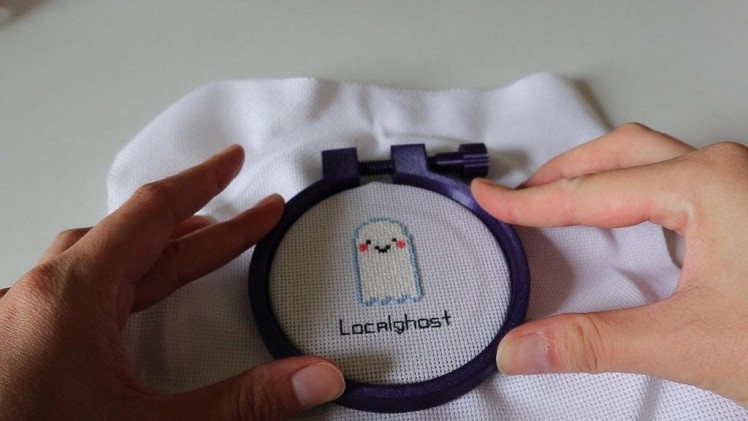
To nicely finish the project, we followed the steps in this tutorial by Susan Fitzgerald on Stitched Modern. Before stitching the back closed, we attached the NFC sticker to the inside of the felt backing fabric.
Enjoy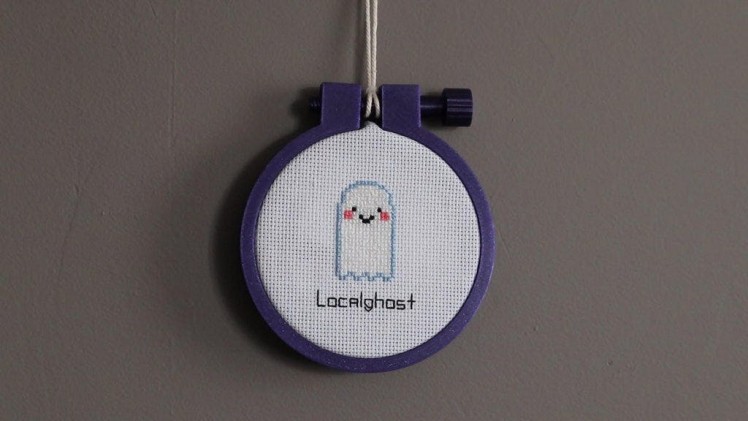

Last but not least, find a nice place to hide your ghost in plain sight!
Now you can kick back and relax, because yelling long passphrases at guests from the back of your utility closet is a thing of the past.
Credits
8BitsAndAByte
We’re Dane & Nicole, two makers that create tremendously terrible tech, which we happily share with you on our channel! https://www.youtube.com/c/8bitsandabyte
Related products


Leave your feedback...