





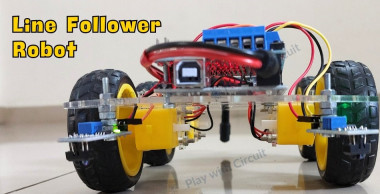
Line Follower Robot Using Arduino

Made by play-with-circuit / Robotics / Sensors / IoT
About the project
Learn how an Arduino-based line follower robot works and how to build one.
Project info
Items used in this project
Hardware components



Story
Line follower robots are one of the most practical beginner projects in robotics. They combine sensing, decision-making, and motion control in a simple but powerful way. These robots are commonly used in automation systems and are also a great learning tool for students exploring embedded systems.
In this guide, we’ll walk through how an Arduino-based line follower robot works, how to build one, and why specific components like the motor driver are essential. For a deeper dive with full implementation details, you can always refer to the complete guide linked below.
Working of a Line Follower Robot
At its core, a line follower robot identifies a path—typically a dark line on a lighter surface—and moves along it. This detection relies on how different surfaces interact with light.
How does a Line Follower Robot navigate?
Navigation is achieved using two sensors and two sets of motors (left and right). Based on sensor feedback, the robot adjusts motor movement:
- When both sensors detect a light surface, the robot moves straight.
- If the left sensor detects the line, the robot steers left.
- If the right sensor detects the line, it turns right.
- If both sensors detect the line, the robot stops.
This logic enables smooth path tracking and quick corrections, making the system reliable even with basic hardware.
Why do we need an L293D Motor Driver Shield?
Arduino pins alone cannot supply enough current to drive motors safely. That’s where the L293D motor driver shield becomes essential.
It acts as an interface between the Arduino and motors, allowing:
- Safe handling of higher voltage and current
- Bidirectional motor control (forward and reverse)
- Simplified wiring through a shield format
Without this component, you risk damaging the microcontroller or getting unreliable motor performance.
Circuit Diagram of Line Follower Robot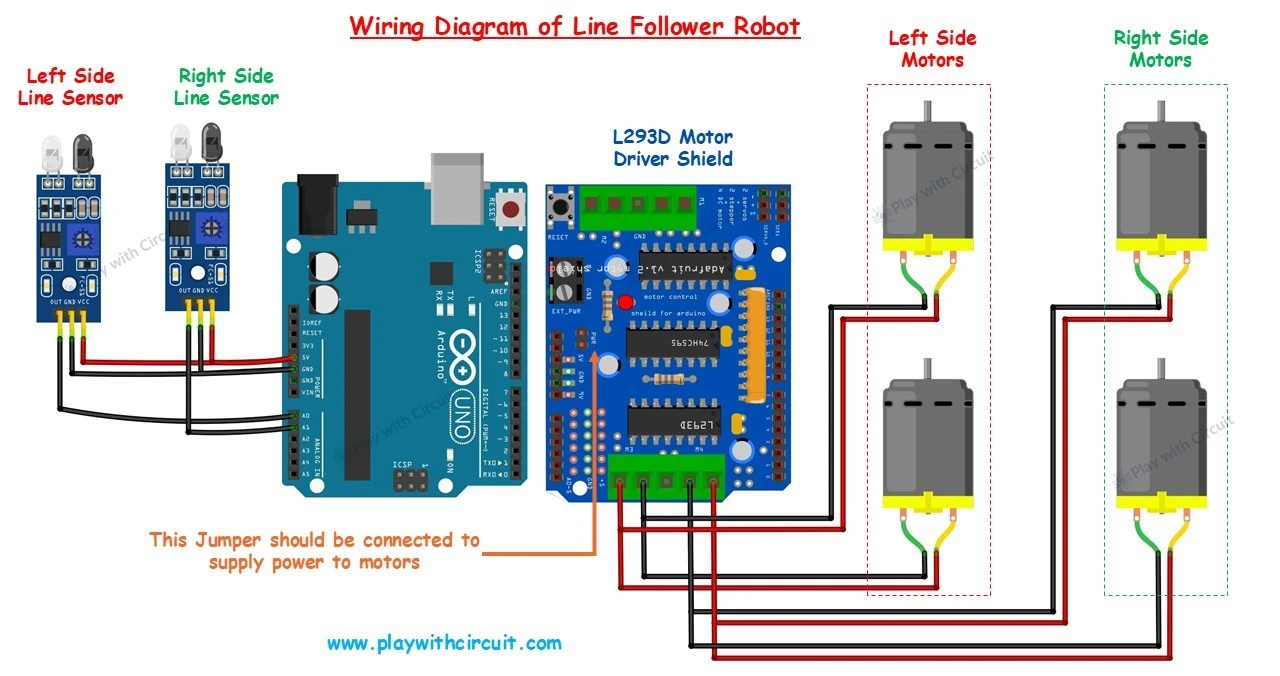
The circuit setup connects sensors and motors through the Arduino and motor driver:
- Line sensors are powered from the Arduino and send signals to analog pins (commonly A0 and A1).
- Motors are connected to the motor driver shield (typically M3 and M4 outputs).
- The motor driver sits directly on top of the Arduino, simplifying connections.
Make sure to disconnect external power when uploading code to avoid hardware issues.
Assembling the Arduino-based Line Follower Robot
The assembly process is straightforward but requires attention to detail:
Start by mounting the motors onto the chassis and attaching the wheels. Fix the line sensors at the front, ensuring proper alignment and spacing for accurate detection.
Next, place the Arduino and motor driver shield securely on the chassis. Connect the motors and sensors according to the circuit design. Maintain proper wire management to avoid interference.
Position the sensors at an appropriate height from the surface (around 2 cm is effective) and ensure they are evenly spaced.
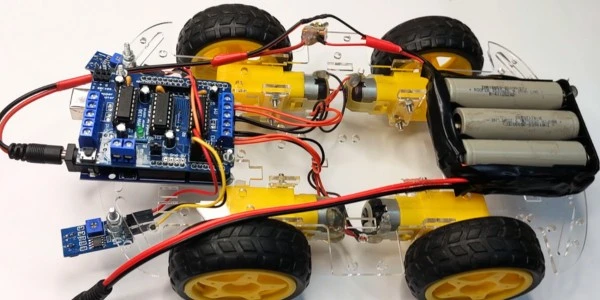
After uploading the code, attach the battery pack and power up the system. Create a track using black tape on a light surface and test the robot’s response.
Project Demonstration
Conclusion
Building a line follower robot is an excellent way to understand how sensors, controllers, and actuators work together in embedded systems. It introduces real-world concepts like feedback control and automation in a hands-on way.
For complete step-by-step instructions and code, check the full guide here:
https://playwithcircuit.com/line-follower-robot-using-arduino/
Credits
Related products





Leave your feedback...