

Lego Raspberry Pirate Skull Hexapod

Made by 314Reactor / Robotics
About the project
My first attempt at a robot with a Lego Pirate theme.
Project info
Difficulty: Moderate
Platforms: Raspberry Pi, SparkFun
Estimated time: 1 hour
License: GNU General Public License, version 3 or later (GPL3+)
Items used in this project
Hardware components


View all
Story

Yo Ho Ho.
First off thanks to ModMyPi for supplying the parts for this project!
And thanks to the person on the Twitter handle hackster.io for helping with the name of the project!
As for the reasons behind the project + overall design:
- Robots
- Lego
- Pirates
A couple of months ago I worked with ModMyPi on my Pi-ron Man project – afterwards they asked if I had any ideas relating to robotics after the recent PiWars Event.
So I had a think about what I could do – I was playing some Doom 3 and saw the cool little sentry bots that you occasionally encounter throughout the game and thought it would be cool to try my hand at making something similar.

This is my first attempt at a robotics project so it is a little rough around the edges; but I learnt an awful lot and had a lot of fun along the way. I found an old random Lego pirate skull laying about (no idea where I got it from) and decided to add a little flair to the project with a Lego Pirate theme.
Booty.
- Lego Pirate Skull
- Varied pirate-themed bits of Lego
- Electrical tape
- General screws
Crow’s nest.
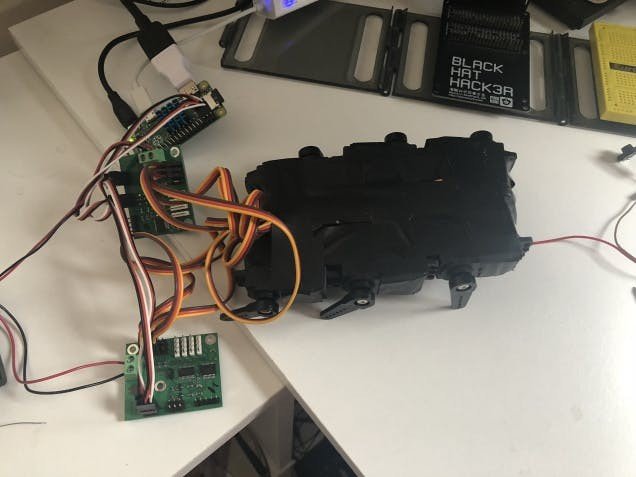
I first followed the instructions here to connect the Ultraborg up to the Pi and the servos + Ultrasonic sensor; you must connect each Ultraborg individually at first to the Pi and run the commands here – under “multiple boards” in order to set an address for each one – it’s best to take note of what board has what address here and mark them on the boards themselves with a marker pen.
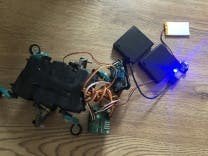
I removed the 5v link jumper from both of the Ultraborg’s and then attached them to each other as above. After that I hooked up the battery packs and put 4xAA batteries in each (totalling 8 batteries overall).
At this point you can boot up an SD Card with Raspbian installed (if you buy from ModMyPi you can choose an SD card preloaded) – or you can use PiBakery to create a minimal install (no GUI really needed).
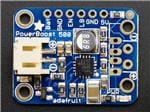
The Powerboost 500c can have a switch attached for easy on/off operation – follow the tutorial here for information on how to do this; then it is simply a case of plugging in the LiPoly battery into the Powerboost board and then connecting the USB cable from the Powerboost to the Pi itself.
The python code available above will allow testing of each servo across each board – its best to mark what board/servo number corresponds to what physical servo here and make notes what one should be front/middle/back – left/right.
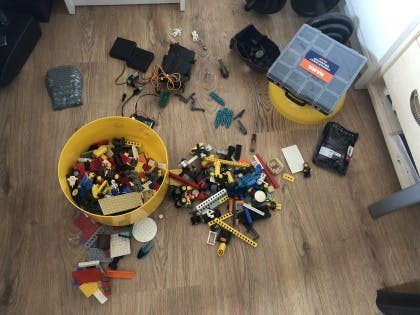
Next I assembled the servos together, using a mix of electrical tape, the odd screw and some tie wraps for additional support. I then broke out my Lego collection and started building.
 IMG_4571
;
;
IMG_4571
;
;
 1 / 2 • IMG_4572
I was going for decent length bricks that I would then put wheels with tires on to provide grip for the feet – I then screwed on the Lego to the servos – in the case of the green legs seen above I also put a tie wrap around to keep the legs straight.
With the middle legs I initially tried to get some sort of adjustable points for them to try and make them be a bit more dynamic in terms of traversing varied terrains, but this didn’t really work out well so I opted for a straight brick with a non-tire wheel on the end.

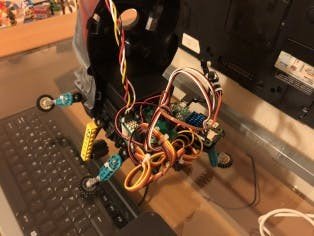
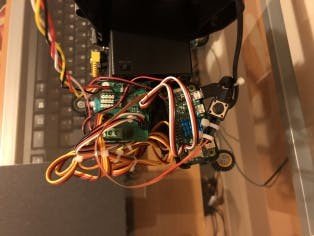
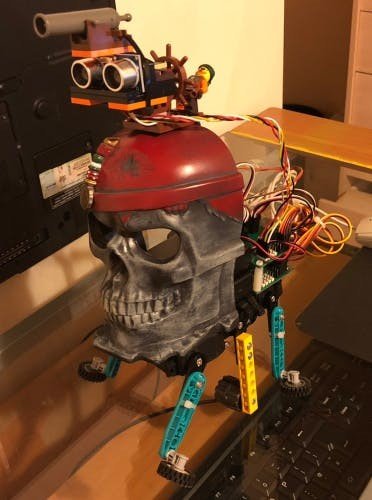
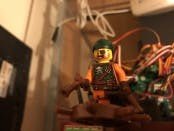
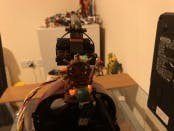
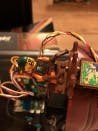
I then Sugru’d on the Lego skull to the front, and then the same for the Ultraborg boards, which I’ve stacked using nylon spacers. I put the Pi itself onto the bottom-side of a Pi case and then Sugru’d that on next to the Ultraborgs. Finally the battery boxes slot in nicely into the skull.
 IMG_4588
 IMG_4589
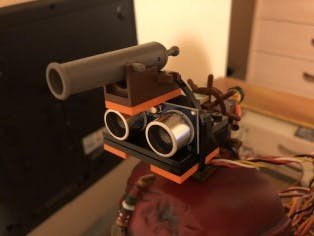
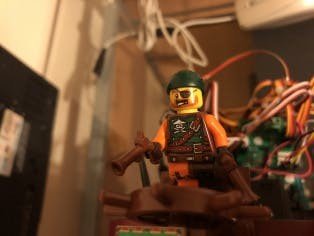
The off-button I have connected in and attached to a Lego anchor, you can learn about connecting an off button here in my Pi-ron man project. The top of the skull I assembled a base that can hold the Ultrasonic module as well as an angry looking crazy pirate with a small cannon out the front to max out the pirate aesthetic.
 IMG_4592
 IMG_4596
Walk the plank.
Initially tried a walk cycle where each servo moved the opposite direction of the one next to it and then looped that kind of motion, it was kind of effective; but overall I felt there was a better way to go.
This is where I sat down and thought about a better pattern; whereby the left middle leg would move, lifting that side up, allowing the other 2 legs to move to a forward position, the middle left leg lowering and then finally the other 2 legs moving back to push the entire bot forward. With the same happening for the legs on the other side, but alternating (so while left side is down and dragging back, the right side is up and moving its legs forward).
With this walk cycle in place I added in a distance check function, using the Ultrasonic sensor to determine how far the bot is away from a wall or something; when it gets below a certain point it will randomly choose to turn left or right and then activate the left walk or the right walk function.
The left/right walk functions use the same motions from the main walk cycle, but only moving one side in order to get the bot to turn, after each motion it then does another distance check; once it determines that there isn’t anything immediately in front of it it will carry on the normal walk cycle.
So essentially the bot should boot up, start walking forward until it gets near a wall and then detect the walk and turn until the wall is no longer in front of it; and then move on walking forward and so on.
You can grab the final code for the main walking/avoidance routines and the code for the off button at my GitHub repo.
Add these scripts into the home directory of the Pi and add into the /etc/rc.local file with the 2 lines (above ‘exit 0’):
python /home/pi/walk_avoid.py &python /home/pi/off.py &Shiver me timbers.
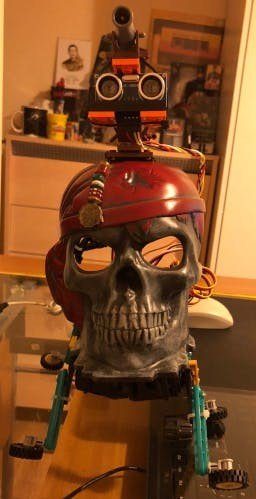
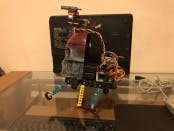
Here are some more pictures of the finished bot:
 IMG_4594
 IMG_4593
 IMG_4596
 IMG_4591
 IMG_4585
 IMG_4587
And a video of the bot in action:
0:00 > 0:26 You can see the bot walking along – it’s like watching Bambi learn to walk.0:26 > 1:00 More walking – this time I changed the rear feet to be thicker Lego tires and it seemed like the back legs weren’t getting enough grip.1.00 > 1:12 This is where the bot avoided a corner (narrowly).1:12 > 1:46 This shows the bot detecting a wall with the Ultrasonic sensor and turning itself away from the wall – you can see it moving one side of its legs to turn.1:46 > 3:57 This is probably the most impressive feat I got the bot to do – it walked into a corner and then managed to turn itself out and walk away on its own without bashing into much, until it got its legs tangled in a USB cable. This is the best example of the bot turning, as you can see its right legs moving to turn itself away from the corner.
Batten down the hatches.
Things I learnt from this project:
- Make a more solid base for servos.
- Knee joints would be very useful.
- Basic walking pattern for a robot.
- General servo use.
I found that trying to get 6 straight legs to walk can be very tricky, as you don’t have a great deal of control over the leg movements without being able to lift the feet off the ground without a knee-joint.
With all the above now under my belt, I’m looking forward to better more advanced projects involving servos and robotics.
There’s obviously a lot of improvements that can be made here as my first attempt at a robot and I have a great deal to learn about construction etc. so feel free to comment!
Of course thanks again to ModMyPi for the parts! They can provide you with all the robotics parts you require for many many Raspberry Pi / Arduino projects.
Code
Credits
Related products


Leave your feedback...