
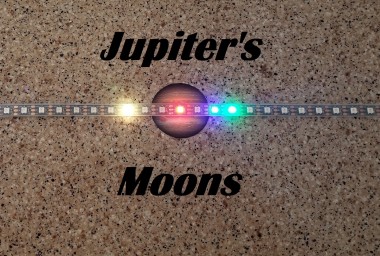
Jupiter Satellite Display
Made by Subsystems / Astronomy / Clocks / Displays / Lights
About the project
This is a fun and easy project that has tons of potential for making an interesting, educational, and conversation starting display. It uses an inexpensive ($10) neopixel light strip to display the current orientation of the four major moons of Jupiter.
Project info
Difficulty: Easy
Platforms: Arduino
Estimated time: 1 hour
License: GNU General Public License, version 3 or later (GPL3+)
Items used in this project


Story
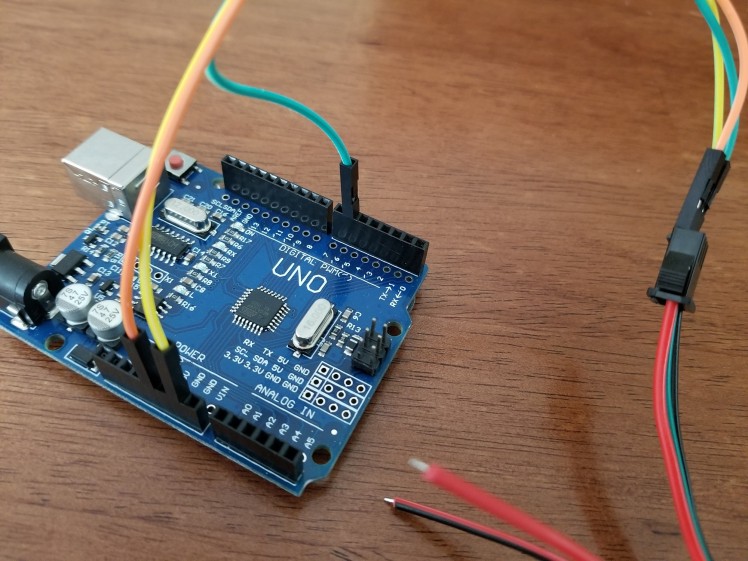
Not much to this. The light strip has three connections;Red for +5V, Black for Ground, Green for signal.
You may have a different light strip than mine so the colors may vary but the connection will be the same.
Connect the following:
Light strip -------- Arduino Pin
Red wire -------------- 5V
Black wire ------------ GND
Green wire ------------ Pin 6 (this can be any pin but my sketch uses 6)
You may want to wait until you program the Arduino before hooking up the light strip. This will prevent a random condition at startup from energizing all of the lights at the same time and potentially overloading the computer USB port.
Load the sketch into the Arduino using any method you are used to.
Note: You will need to have the Adafruit Neopixel library loaded. Thanks to Adafruit for their amazing support of the Maker community!!!
This is a very simple implementation that leaves a lot of room for you to improve on. Currently, you hard code in the date and time (in UTC). Update the variables to your current UTC time. Compile and download the code to your Arduino. You should see the current state of the moons. Jupiter will appear as a RED dot in the middle of the strip. The other moons colors can be changed in the sketch to what ever you wish. Since the date and time at startup is in the sketch, you can now take the display somewhere else and plug it in and it will start at the current time. This allows you to program it and quickly move it somewhere without losing the date or time.
Clearly there are some great ways to improve this if you wanted to make this a beautiful project for your home:
1) Add a battery backed real-time clock. These are very cheap with lots of information available on how to use them. This would allow you to not lose the current date or time when the unit lost power.
2) You could add a couple of switches to the Arduino and come up with the code to set the time just using the light strip as a display. Maybe set each digit of the date and time by how many LEDs you are away from Jupiter (or one end of the strip).
3) I added a small picture of Jupiter to better highlight the planet. Mounting to a star field background would really make this project pop.
4) Currently, the code will overwrite two moons that are at the same pixel. You could modify the code to alternately flash the two colors when they are at the same pixel.
5) Similar to 2 above, you could come up with a scheme to alternate between the moon display and the time. (How you might display time on a linear strip is up to you). The code primarily sets up the display and then calls the subroutine to calculate the positions repeatedly. I added a line in the Loop() subroutine to add 120 seconds to the time every Loop iteration. This allows you to see the moons moving relative to each other more quickly and gives a really cool display of these cosmic dancers.
The video shows the code with this line commented in. You can see how Io rips around Jupiter and Callisto shoots way out there. I hope you enjoy this project. If you make one, please share it with everyone.
Code
Credits
Related products


Leave your feedback...