

Interfacing 16×2 Lcd In Raspberry Pi Using Python & Tk Tools

Made by Aula_Jazmati / Displays / Games & Gaming / IoT
About the project
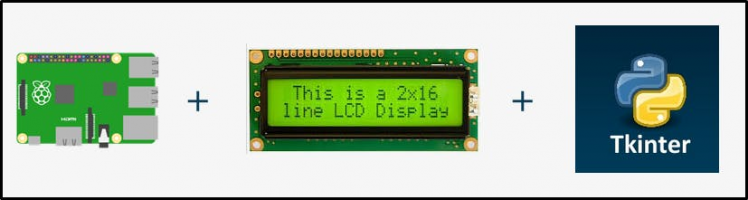
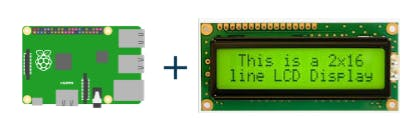
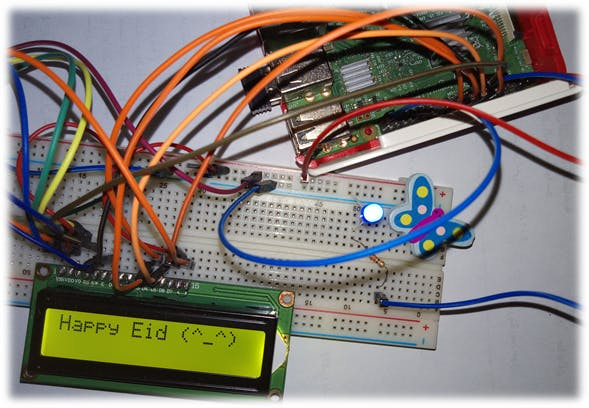
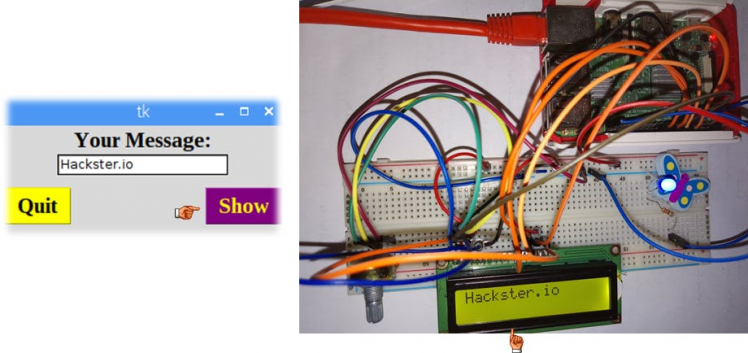
In this project, I go through the steps on how to set up a Raspberry Pi LCD 16×2 to display messages from the Pi Tkinter GUI.
Project info
Difficulty: Moderate
Platforms: Adafruit, Raspberry Pi
Estimated time: 1 hour
License: MIT license (MIT)
Items used in this project

Story
Introduction:
In this project, I go through the steps on how to set up a Raspberry Pi LCD 16X2 to display messages from the Pi Tkinter GUI.

LCD LibraryInstallation
we need to install Adafruit’s library for LCD (Adafruit_Python_CharLCD-master) and (Adafruit_Python_GPIO-master).
To install the library, follow the procedure.
1- Clone the Git directory in Raspberry Pi using following command in Terminal
git clonehttps://github.com/adafruit/Adafruit_Python_CharLCD.git
2- Change the directory where the library is located.
cd./Adafruit_Python_CharLCD
3- Install the setup
sudo python setup.py install
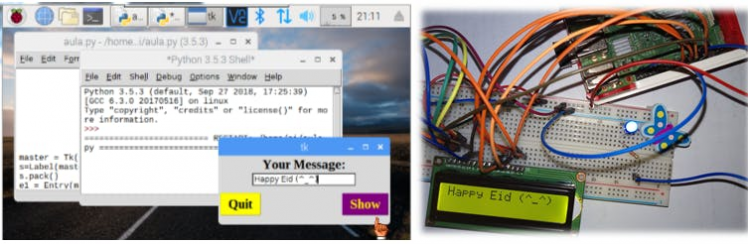
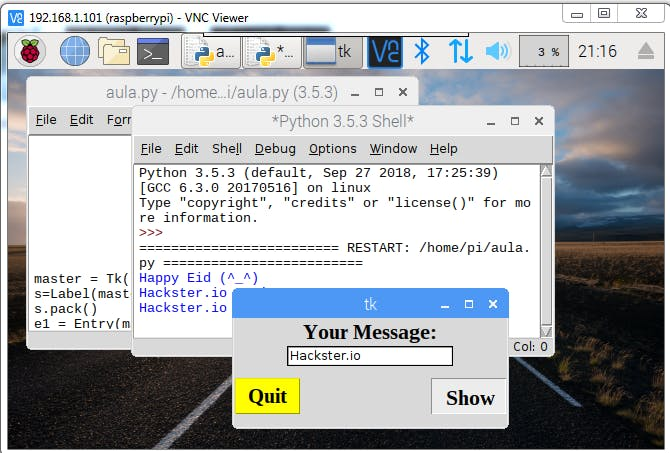
You can start Python3 from the command line
(with python3) then importtkinter.
If you get an error message then exit out of Python3 and call
sudoapt-get install python3-tk to install it.
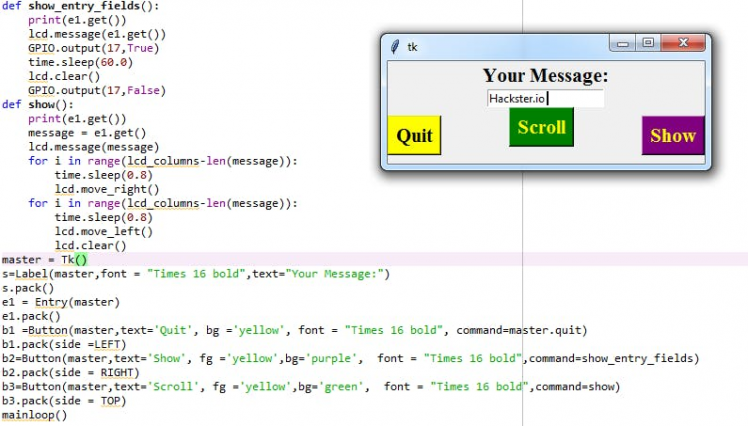
- Entry widgetsare the basic widgets of Tkinter used to get input, i.e. text strings, from theuser of an application. This widget allows the user to enter a single line oftext. If the user enters a string, which is longer than the available displayspace of the widget, the content will be scrolled. This means that the stringcannot be seen in its entirety. The arrow keys can be used to move to theinvisible parts of the string. If you want to enter multiple lines of text, youhave to use the text widget. An entry widget is also limited to single font.The syntaxof an entry widget looks like this: w =Entry(master, option,... )"master" represents the parentwindow, where the entry widget should be placed. Like other widgets, it'spossible to further influence the rendering of the widget by using options. Thecomma separated list of options can be empty.
- The Button widget is a standard Tkinter widget, which is used for various kinds of buttons. A button is a widget which is designed for the user to interact with, i.e. if the button ispressed by mouse click some action might be started. They can also contain text and images like labels.While labels can display text in various fonts, a button can only display text in a single font. The text of a button can span more than one line.
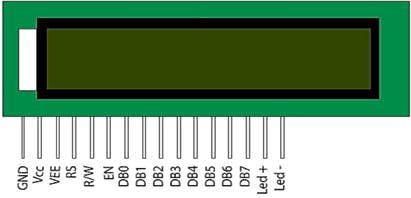
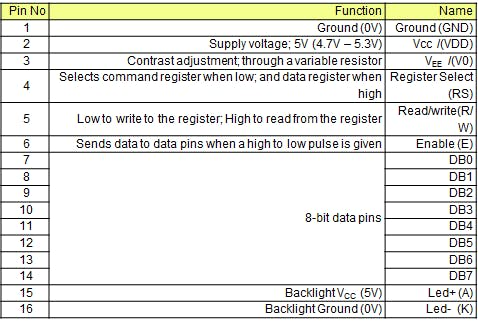
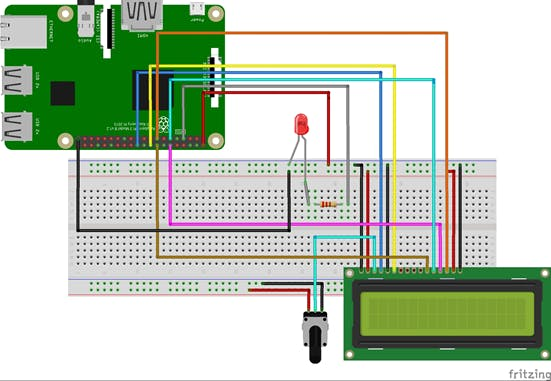
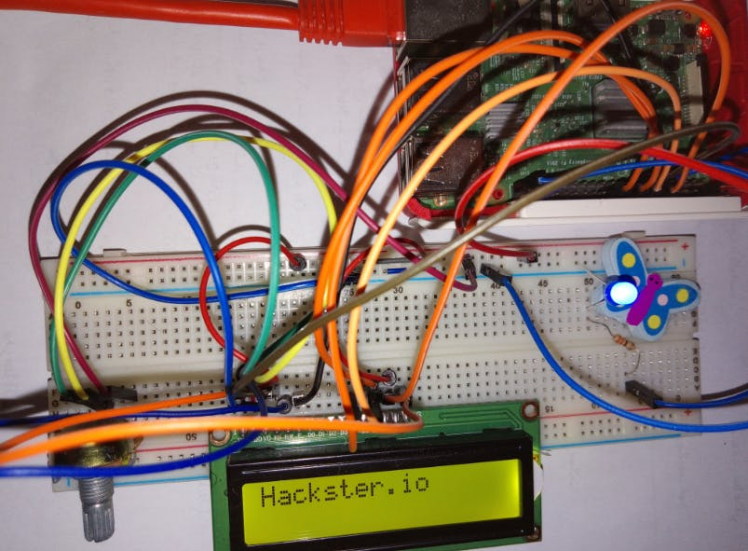
Connect the LCD as bellow:
1. Pin 1(Ground) goes to the ground rail.
2.Pin 2 (VCC/5v) goes to the positive rail.
3.Pin 3 (V0) goes to the middle wire of the potentiometer.
4.Pin 4 (RS) goes to GPIO25 (Pin 22)
5.Pin 5 (RW) goes to the ground rail.
6.Pin 6 (EN) goes to GPIO24 (Pin 18)
7.Pin 11 (D4) goes to GPIO23 (Pin 16)
8.Pin 12 (D5) goes to GPIO17 (Pin 11)
9.Pin 13 (D6) goes to GPIO18 (Pin 12)
10.Pin 14 (D7) goes to GPIO22 (Pin 15)
11.Pin 15 (LED +) goes to the positive rail.
12.Pin 16 (LED -) goes to the ground rail.

Notice :
The project can be developed by adding a button with a new function such as:
3.https://pimylifeup.com/raspberry-pi-lcd-16x2/
4.https://www.python-course.eu/tkinter_buttons.php
5.https://www.python-course.eu/tkinter_entry_widgets.php
6. https://iotguider.in/raspberrypi/16x2-character-lcd-in-raspberry-pi-using-python/
Schematics, diagrams and documents
CAD, enclosures and custom parts
Code
Credits
Related products


Leave your feedback...