
How To Create A 3d Potion Bottle In 3d Modelling Software

Made by simran-khuntia / 3D Printing / Artificial intelligence / Displays / Fire & Pyrotechnics / Productivity / IoT
About the project
In this tutorial blog, we are going to learn the steps to design a 3D potion bottle in SelfCAD.
Project info
Difficulty: Easy
Platforms: Amazon Alexa, Android, Creator, Google, Microsoft
Estimated time: 1 hour
License: Apache License 2.0 (Apache-2.0)
Items used in this project

Story
To make any noteworthy 3D model, you ought to, specifically, pick a 3D modelling software to use in your endeavours. In the wake of deciding the right 3D modelling software, you would then begin learning its tools and different components. In this tutorial article, we're modelling the way that you can design a potion bottle in SelfCAD. We picked SelfCAD as it's more straightforward to learn, and you don't have to have knowledge of 3D modelling to make the decision to utilise it.
Is it right that you are enthusiastic about learning 3D designing? Dread not. SelfCAD is here to moderate your interests. Thus, we should begin with a basic article, for example, a potion bottle!
You can also visit our website and go through our other such articles like how to design a 3D plastic container!
So, let’s get started!
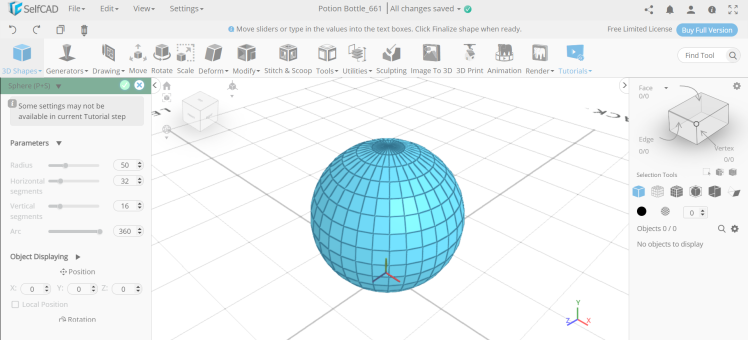
Step1: Insert a sphere
First of all, from the 3D shapes insert a sphere to the working interface. Set the radius to 50 and horizontal segments to 32. Then set solid+wireframe rendering mode.
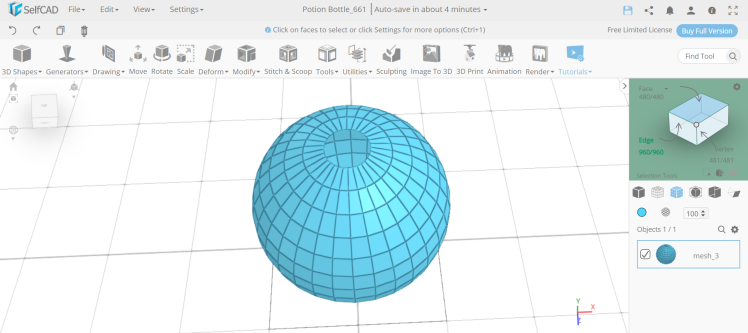
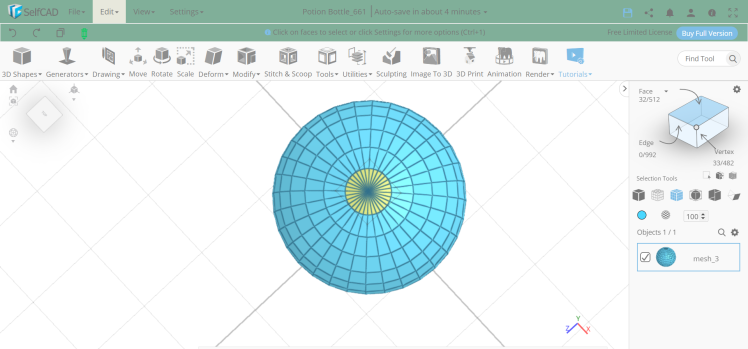
Step2: Delete the top circular face and select the top circular edge
Next, opt for face selection and select the top circular faces as shown in the image. Delete those faces. Then opt for edge selection, set loop settings to true and select the top circular edge.

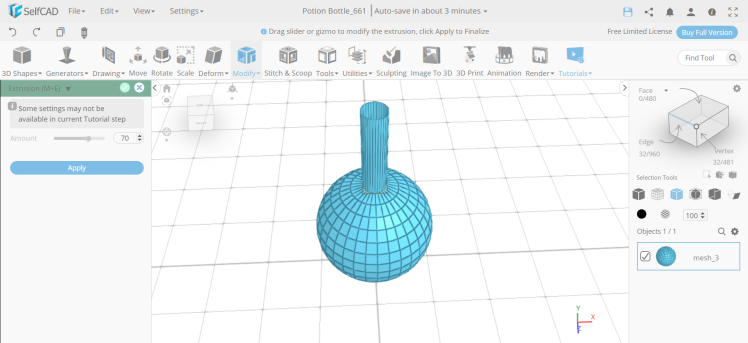
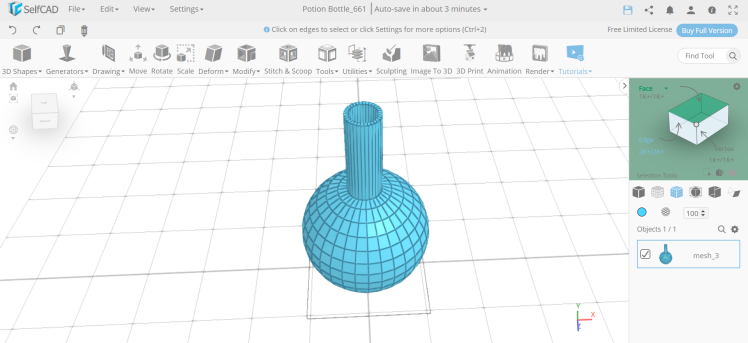
Step3: Extrude the edge and add thickness to the object
Now, from the modify category we will select the extrusion tool. Set amount to 70. Then from the modify category, select the add thickness tool. Set thickness to 3.
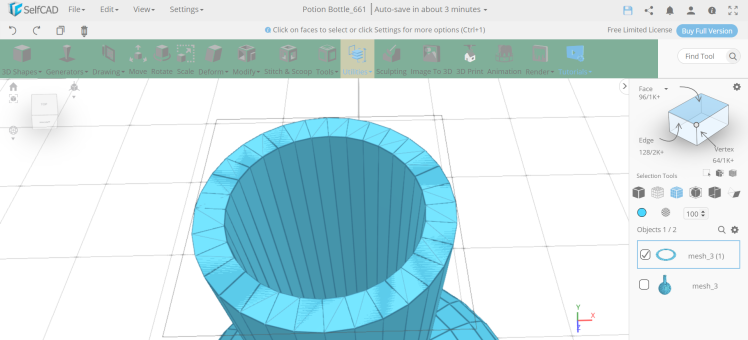
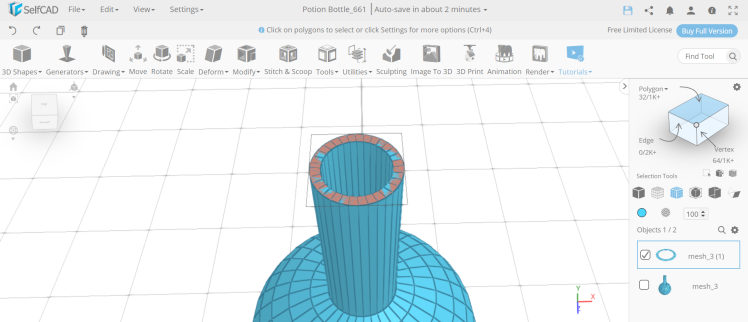
Step4: Copy the top circular face and fill its surface
Next, opt for face selection and set the loop setting to true. Select the top circular faces and copy them using the copy option. Then from the tools category, choose the fill polygons option.

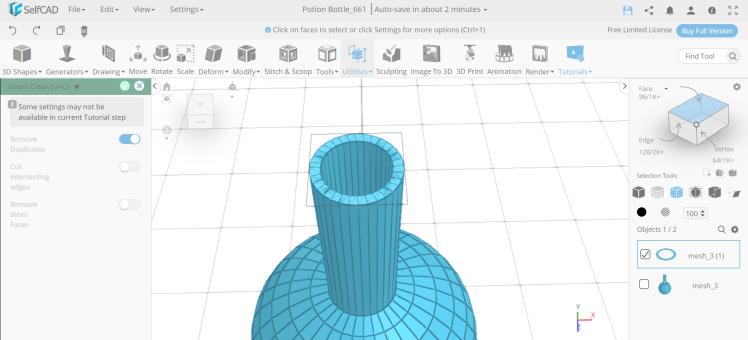
Step5: Geom clean the duplicate faces
Now, from the utilities category, we will select the geom clean option. Set remove duplicates to true. Then, opt for polygon selection and select the top circular face.
Step6: Extrude the faces and and flatten the faces
Next, extrude it to an amount of 4. Then, from the deform category select the flatten tool. Set the amount to 1. After that, select all the objects, go to stitch and scoop and make them a union.
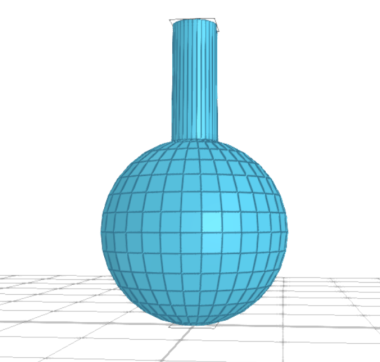
Conclusion: Hence, we have created a 3D potion bottle in SelfCAD
We have effectively 3D designed the potion bottle in SelfCAD. This tutorial blog manages the essential tools of SelfCAD like edge selection and 3D shapes and uses other critical devices like extrusion, add thickness, and fill polygons. Every one of the 3D models made in SelfCAD are 3D printable as they leave no mathematical blunders that could make plans hard to print.
Once wrapped up with the plan cycle, you can utilise the in-gathered slicer of SelfCAD to cut your plan and produce the G-Code record that you can ship off your 3D printer. With everything considered, we trust you notice the tutorial article and notice the technique as enlightening and strong.
Credits


Leave your feedback...