
Hexabitz Glowing Necklace

Made by Aula_Jazmati / Art / Environmental Sensing / Kids & Family / Lights / Wearables
About the project
Create yourself a stylish unique Hexabitz RGB LED Necklace that will glows with warm colors when people approach you
Project info
Items used in this project
Hardware components

Story
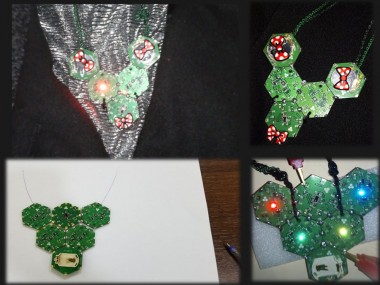
Combine Hexabitz RGB LED modules with costume jewelry for some amazing wear 🏅 Create a stunning addition to your wardrobe in minutes with this light up necklace 😊✨
DIY wearable projects ,fashionable STEM circuit for the makers of tomorrow can be incredibly simple and magnificent at the same time 🌟 😀
Introduction:
Create yourself a stylish unique Hexabitz RGB LED Necklace that will glows with warm colors when people approach you ✨
In this project, the fashion art meets Engineering and technology to form a modern accessories style. In Addition glowing jewelry helps kids get seen on bikes and increase visibility while riding and walking in the dark. You can make any light up accessories (glowing rings, glowing necklaces, glowing wristband, glowing earrings, and twinkle hair bow).
And you can using it as Social Distance Detector to fight COVID-19 🦠 🌟👀
Tools:
1. RGB Led Hexabitz Module (H01R01).
2. IR Hexabitz Module (H08R60).
3. Hexabitz Dual In-series Coin Cell Battery Holders Module (H04R20).
4. FTDI USB to UART Serial cable.
How I built it:This tutorial will teach you to make a Hexabitz RGB LED Necklace.
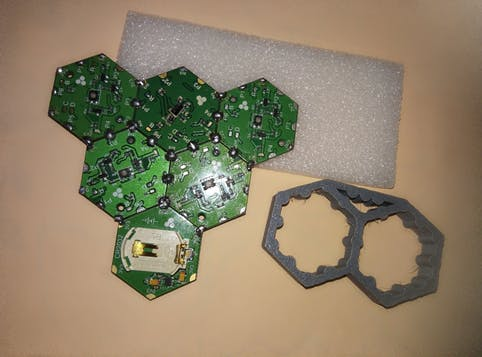
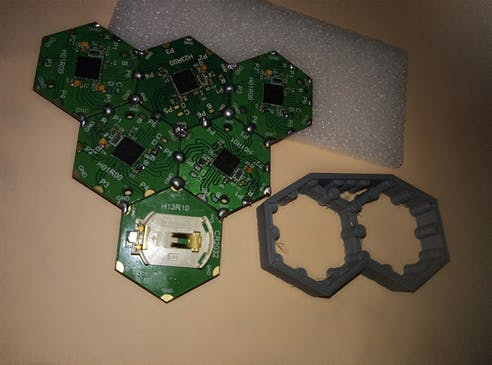
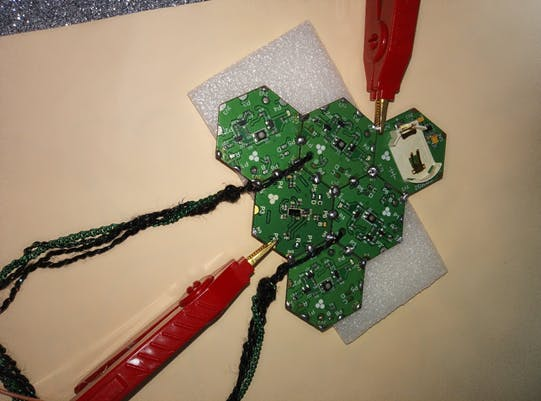
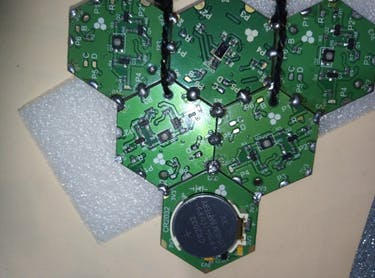
Step 1 - Plan the array and assemble the hardware
· We prepare the project components and plan our array design by aligning modules side-by-side and chose design of the necklaces.
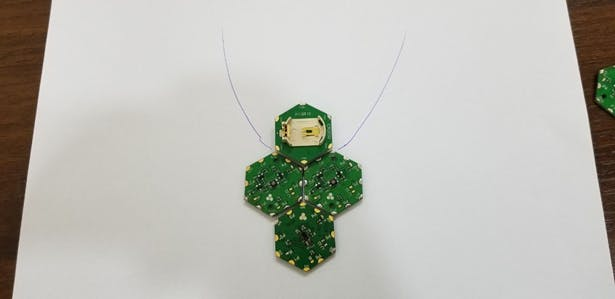
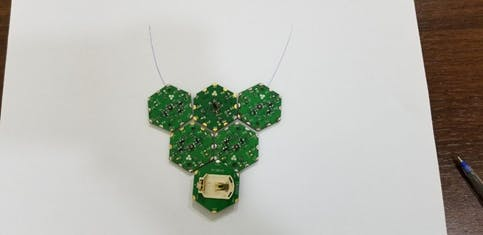
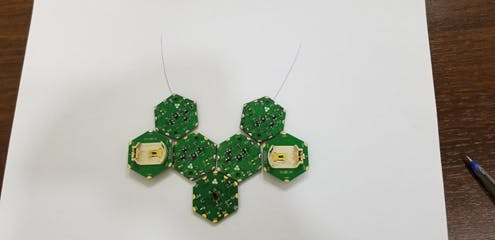

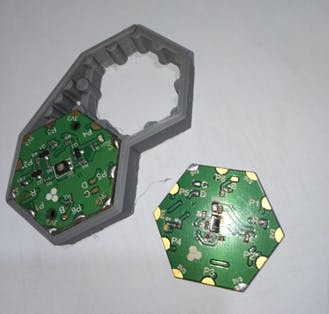
- Then we solder the modules together using Hexabitz Fixture.
Note:
Be sure to download the firmware on each module before soldering.
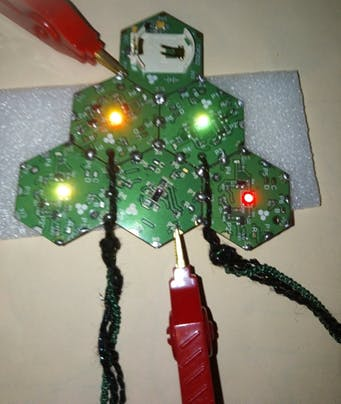
Step 2 - CLI Connection
1. Install MobaXtrem from here for Windows OS or we can install Putty for Linux/MacOS like this guide.
2. Connect the FTDI USB to UART Serial cable to the USB hub.
3. Connect the red wire of the FTDI cable to H08R60 module power port top side.
4. Connect the black wire of the FTDI cable to module power port bottom side.
5. Connect the yellow wire of the FTDI cable to module port P2 top side.
6. Connect the orange wire of the FTDI cable to module port P2 bottom side.
7. You should see a single red indicator LED blink on the modules.
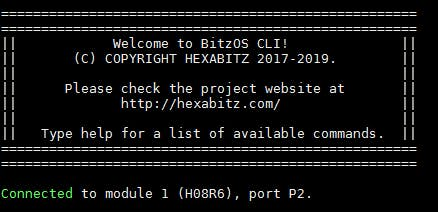
8. Press enter in the Commands window, you should see BOS CLI welcome message. You can use backspace if you misspell a letter.
9. Type status to view a report on module ports, firmware, etc.
Step 3 - Array Exploration:
1. Connect to IR module and type explore, the modules start discovering each other and building their array topology.
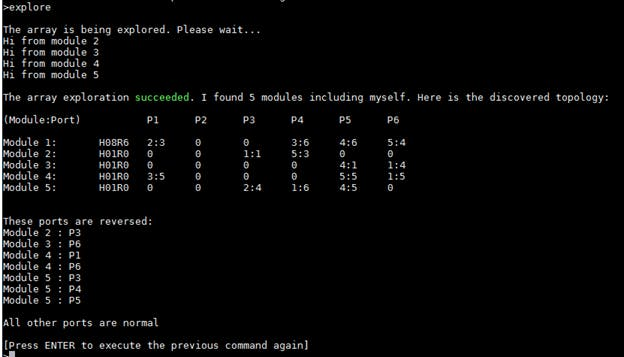
2. Type all.ping, both module will ping.

3. The array topology is stored permanently. If you power cycle, the modules keep their topology and show multiple blinks.
Note:
Type default array to remove the topology and restore native firmware when you decided start a new project.

4. Enable array response with:
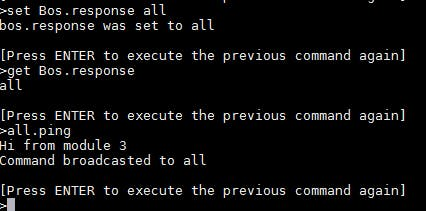
5.Then try sending command to Modules (H01R01) and seeing the result.
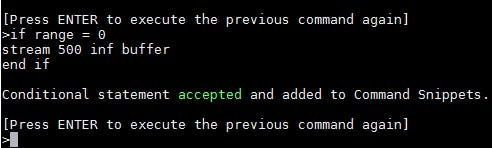
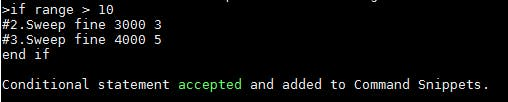
Step 4 - Command Snippets:
1. Type the following commands each on a separate line followed by pressing enter to activate the measurement process:
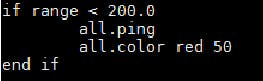
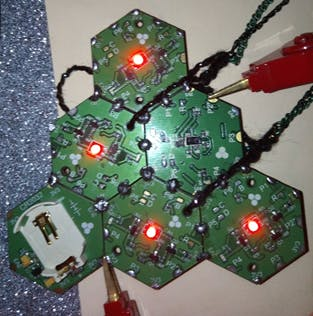
2. Then choose the colors you want and type the commands to display it like this:

Note:
· Type snip, to view the list of Command Snippets, then type del-snip 1 to delete Snippet 1. Snippets and button settings are stored permanently. If you power cycle the module, they are still there.
· You can also activate and deactivate (pause) a Snippet without deleting it.

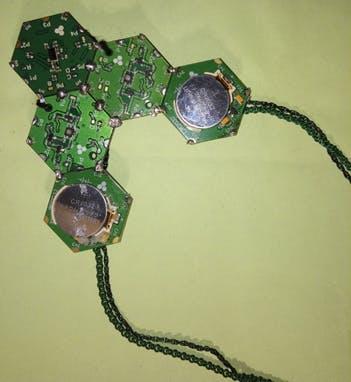
Step 5: Prepare Battery Holder:
To power the Hexabitz Necklace we used (Hexabitz Coin Cell Battery Holders Module (H04R20)). Its contain 2 x CR2032 coin lithium batteries in series.
Note that it's better to write Command Snippets using power from USB cable connection without batteries (to avoid power confusion and reset states). Once done, you can insert the batteries and then remove the USB cable.
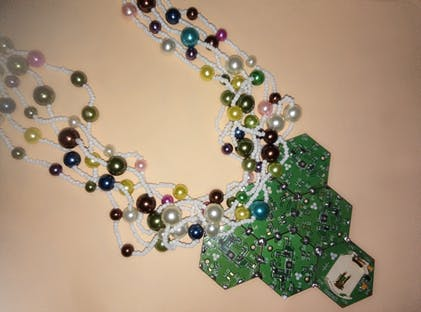
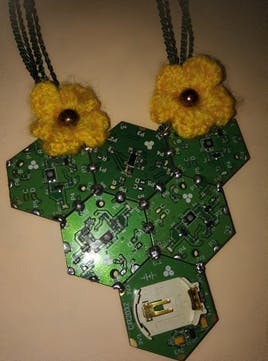
Step6: Wear It!
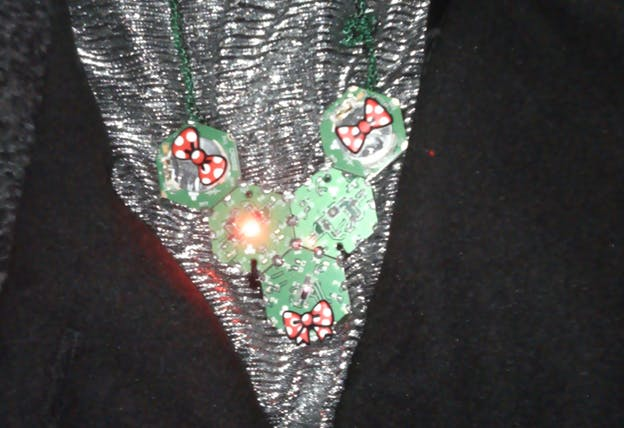
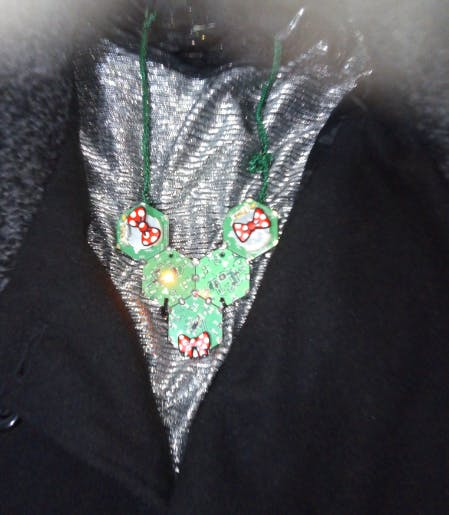
Note:
We can add to Hexabitz RGB LED Necklace design many things like crochet flowers or Pearls to decorate it.
References:
Code
Credits
Related products

Leave your feedback...