
Espcopter And Visuino - Convert Acceleration To Angle

About the project
Convert Acceleration to Angle From Accelerometer and Gyroscope by using ESPcopter and Visuino
Project info
Items used in this project

Story

The ESPcopter is now fully supported by the latest version of Visuino, and this makes it probably the easiest to program drone in existence! :-)
With its Visuino support you can control the motors, the LED, work with the Accelerometer, Gyroscope, and Compass, communicate with the drone over WiFi, experiment with different files to achieve stability in flight, make it communicate with other drones or computers and more...
Attach your own sensors, and customize the drone any way you want!You can program a drone, or even more fun... program a swarm of drones to communicate to each other and work together :-).
ESPcopter is currently crowdfunding, with differing reward levels available depending on the expansion boards and quantity desired.
First Project:
The Compass sends X, Y, and Z heading forces. Often however we need to convert the forces into X, Y, Z 3D angle to determine the 3D Orientation of the sensor.
Step : Start Visuino, and Select the ESPcopter Board Type
To start programming the Arduino, you will need to have the Arduino IDE installed from here: http://www.arduino.cc/.
Make sure that you install 1.6.7 or higher, otherwise this Instructable will not work!
The Visuino: https://www.visuino.com also needs to be installed.
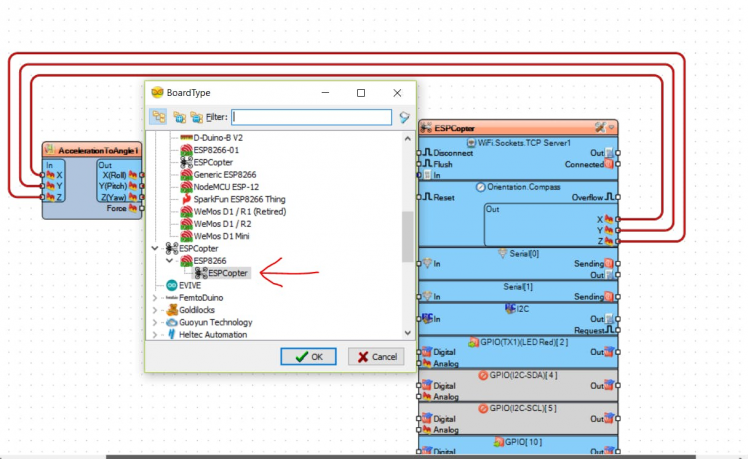
Start Visuino as shown in the first picture
Click on the "Tools" button on the Arduino component in Visuino
When the dialog appears, select ESPcopter as shown
Step 2: In Visuino: Add Acceleration To Angle

First we need to add component to convert the X, Y, Z Compass Heading into 3D X, Y, Z Angle:
- Type "angle" in the Filter box of the Component Toolbox then select the "Acceleration To Angle" component, and drop it in the design area
- Click in the "Out" box of the "Compass" box containing the X, Y, X Acceleration pins of the ESPCopter component to start connecting all the Out pins at once
- Move the mouse over the "X" input pin of the "In" box of the AccelerationToAngle1 component. The Visuino will automatically spread the wires so they will connect correctly to the rest of the pins
To send all the channels data over serial port from Arduino we can use the Packet component to packet the channels together, and display them in the Scope and Gauges in Visuino:
- Type "packet" in the Filter box of the Component Toolbox then select the "Sine Analog Generator" component, and drop it in the design area
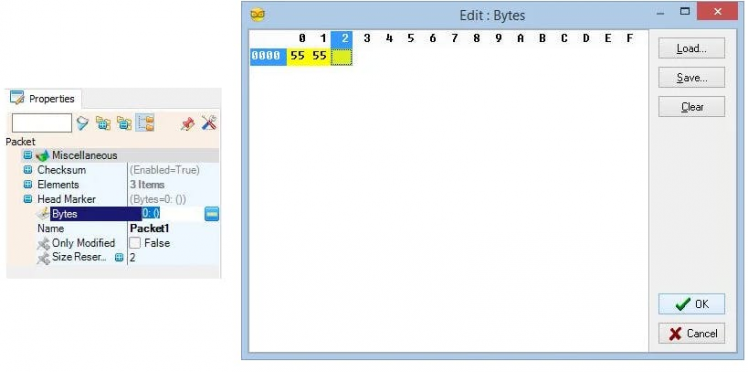
- In the Properties expand the "Head Marker"property
- In the Properties click on the "..." button
- In the Bytes editor type some numbers, as example
- Click on the OK button to confirm and close the editor
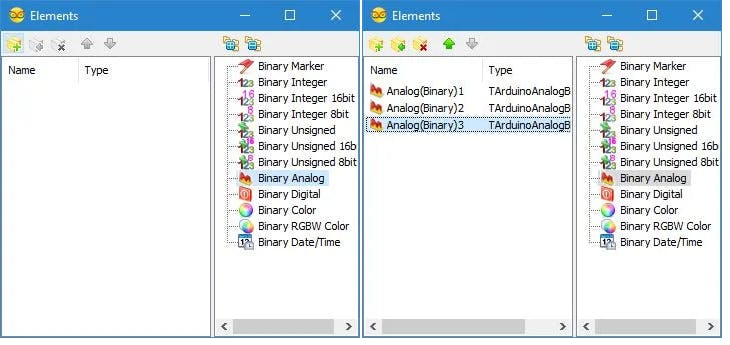
Click on the "Tools" button of the Packet1 component (Picture 1)
- In the "Elements" editor select the “Binary Analog” element, and then click on the "+" button 3 times (Picture 2) to add 3 Analog elements (Picture 3)
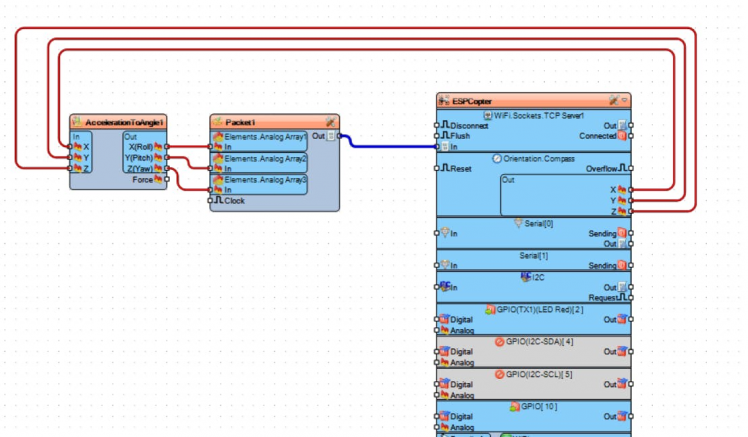
- Click in the "Out" box of the "Accelerometer" Box containing the pins of the AccelerationToAngle1 component to start connecting all the Out pins at once (Picture 4)
- Move the mouse over the "In" pin of the "Elements.Analog(Binary)1" element of the Packet1 component. The Visuino will automatically spread the wires so they will connect correctly to the rest of the pins (Picture 4)
- Connect the "Out" output pin of the Packet1 component to the "In" input pin of the "Serial[ 0 ]" channel of the "Arduino"component (Picture 5)
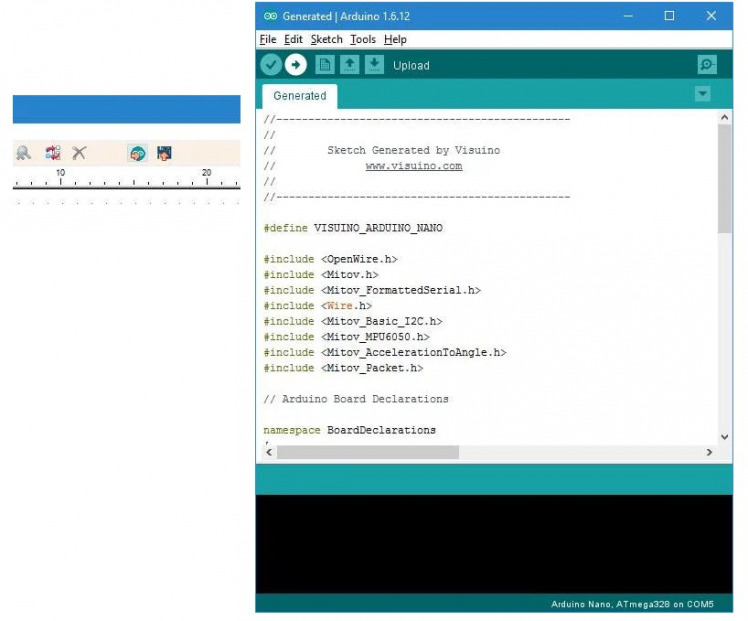
- In Visuino, Press F9 or click on the button shown on Picture to generate the Arduino code, and open the Arduino IDE
- In the Arduino IDE, click on the Upload button, to compile and upload the code
ESPcopter is currently crowdfunding, with differing reward levels available depending on the expansion boards and quantity desired.
Credits
Related products


Leave your feedback...