
Env Iv In Micropython

Made by AJB2K3 / Environmental Sensing / Garden / Weather / IoT
About the project
How to program the M5Stack ENV IV to run on an RP2040 or a UIFLow2 Compatible M5Stack Controller.
Project info
Items used in this project
Hardware components

Story
This guide is kindly sponsored by M5Stack.
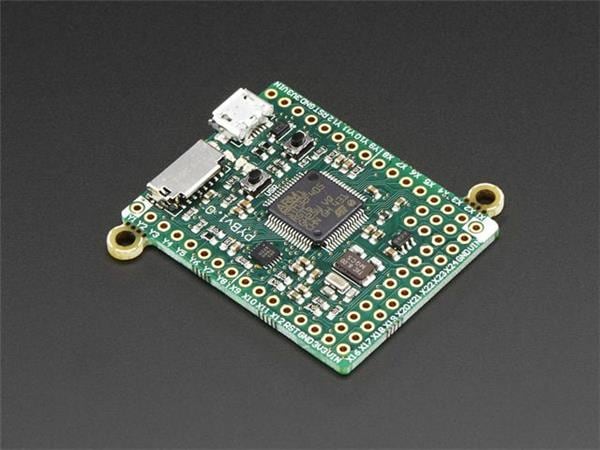
IntroductionNormally I spend my time working on guides for M5Stack Products but like any normal hobby engineer, I also have a pile of Raspberry Pi Pico W's.
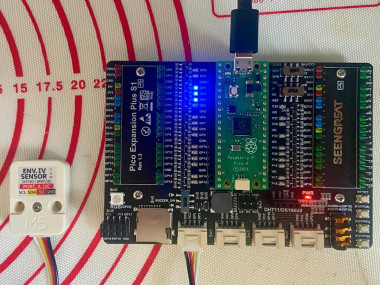
While working on a guide on using the ENV IV unit on the M5Go version of the M5Stack Core found in the IoT Starter Kit (which normally comes with the ENV I Unit), I started wondering how to connect it to the RPI Pico W. While cables exist to connect the M5Stack Units to breadboards, I wanted an expansion board to connect to the RPI Pico W using only grove connectors. It took me a while to find a suitable expansion board but I eventually came across the SeenGreat Pico Expansion Plus S1 PCB.
SeenGreat Pico Expansion Plus S1

SeenGreat Pico Expansion Plus S1
I purchased this board from Amazon and waited for it to arrive.
The ENV IV Unit (available here) using the Sensation SHT40 sensor for Temperature and Humidity measurements along with the Bosch BMP280 for Barometric Pressure sensing.
In UIFlow2 the library for controlling the SHT4x is already included and can be selected by selecting the ENV IV unit from the Unit selector panel.
UIFlow2's Unit Selector panel.

UIFlow2's Unit Selector panel.
Once the ENV IV Unit is selected we retrieve values with only three blocks:
UIFlow2's ENV IV query Blocks.

UIFlow2's ENV IV query Blocks.
And then we can display them on the M5Go's screen with this simple program:
Simple program in UIFlow2 for getting the Temperature, Pressure and Humidity from the ENV IV Unit.

Simple program in UIFlow2 for getting the Temperature, Pressure and Humidity from the ENV IV Unit.
The big problem With the M5Stack Units is that the drivers are only available with the matching UIFlow2 firmware. If we want to use the ENV IV unit with raw micropython firmware like on the RPI Pico W, we need to download librarys to the memory of the controller.
For this guide, I am using the SHT4x library that can be found here: https://github.com/jposada202020/MicroPython_SHT4X
And the BMP280 Library found here: https://github.com/dafvid/micropython-bmp280
Using an IDE like Thonny, you need to download the micropython_sht4x folder to the internal storage of the controller.
Thonnys IDE showing the micropython_sht4x folder uploaded to the RPI Pico

Thonnys IDE showing the micropython_sht4x folder uploaded to the RPI Pico
The folder contains two files __init__.py and sht4x.py and both files need to be present. Once the micropython_sht4x folder are saved to the Pico's storage we then need to add the BMP280 library to the root folder.
bmp280.py added to the folder.

bmp280.py added to the folder.
Once we have the libraries installed in the correct places we can then just run the following code to view the Temperature Pressure and Humidity from the sensors.
# RPI ENV IV Example
#I2C access to the ENV IV's BMP280 and SHT40
from machine import I2C, Pin
import bmp280
from micropython_sht4x import sht4x
import time
i2c = I2C(1, sda=Pin(2), scl=Pin(3), freq=100000)
sht = sht4x.SHT4X(i2c)
bmp = bmp280.BMP280(i2c)
bmp.oversample(bmp280.BMP280_OS_HIGH)
while True:
bmp.use_case(bmp280.BMP280_CASE_WEATHER)
temperature, relative_humidity = sht.measurements
print(f"SHT40 Temperature: {temperature:.2f}°C")
print(f"SHT40 Relative Humidity: {relative_humidity:.2%}%")
print("")
print("BMP280 tempC: {}".format(bmp.temperature))
print("BMP280 pressure: {}Pa".format(bmp.pressure))
print("")
time.sleep(0.5)
BMP280 and SHT40 sensor readings from Thonnys output shell.

BMP280 and SHT40 sensor readings from Thonnys output shell.
Contact Me.If you find this useful then there is more crossover guides coming. You can drop a Message in Hackster.io message box below of find me via the following links:
https://twitter.com/Cpt_J_Purcell
https://bsky.app/profile/jamespurcell.bsky.social
On Discord (if I ever work out how to share the profile!)https://mastodonapp.uk/@AdamBryant
And on the M5Stack Facebook group and community forum.
Code
Credits
Related products


Leave your feedback...