
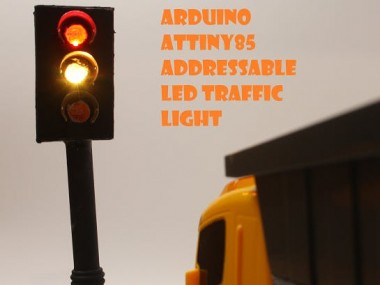
Diy Attiny85 Digispark-inspired Traffic Light
Made by talofer99 / Automotive / Kids & Family / Lights
About the project
A kids traffic light!
Project info
Difficulty: Moderate
Platforms: Digispark, Microchip
Estimated time: 3 hours
License: GNU General Public License, version 3 or later (GPL3+)
Items used in this project


Story
I decided to build traffic light for my kid.
I have played with addressable led many times and it’s my preferred go to LED if I can – just from the ease of use, mainly if you have more then two-three.
So I took a bit of cardboard and formed and painted a traffic light top, took parts from a clipper lighter to make the hoods.
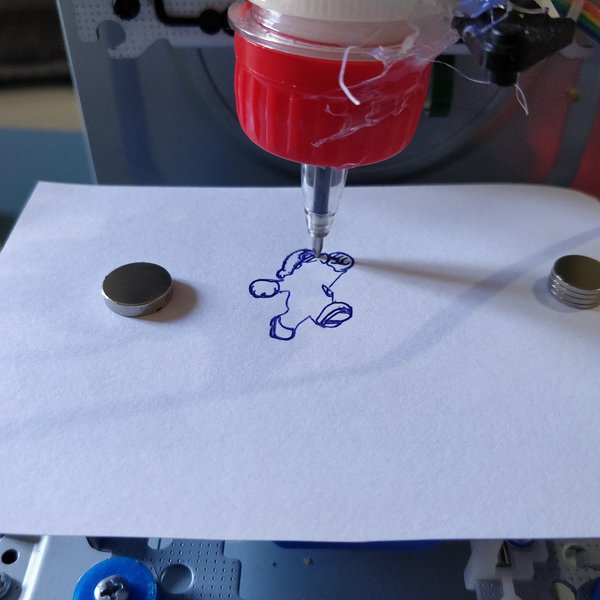
Next step was to create the board, I used a digispark inspired board, which allow me to program the ATtiny85 directly via a USB cable without the need for external SPI programmer nor FTDI.
I used this two tutorial on the way: https://learn.sparkfun.com/tutorials/how-to-install-an-attiny-bootloader-with-virtual-usb/allhttps://www.instructables.com/id/Digispark-DIY-The-smallest-USB-Arduino/
You can view the entire process in this video.
Leave your feedback...