
Control An Led W/ Digital Output Or Pwm Ports Using Meadow

About the project
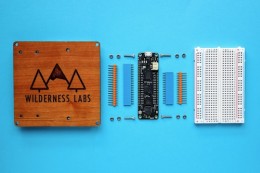
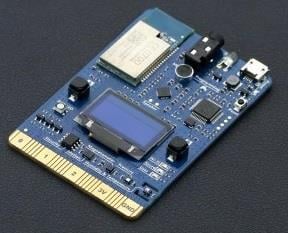
Try Meadow. Foundation, a powerful platform to build connected things quickly and easily with Meadow F7 Micro.
Project info
Difficulty: Easy
Platforms: Microsoft
Estimated time: 1 hour
License: Apache License 2.0 (Apache-2.0)
Items used in this project
Hardware components


Story
The intention of this project is to show you how to use Meadow.Foundation to instantiate LEDs as objects and use their intuitive APIs that will simplify your hardware solution at the software level.
If you're new working with Meadow, I suggest you go to the Getting Started w/ Meadow by Controlling the Onboard RGB LED project to properly set up your development environment.
Working with LED
In this first section, we'll work with an LED driver in Meadow.Foundation known as Led using one digital output port.
When instantiating an Led object, we need to pass a IDigitalOutputPort. Once initialized, we can use the IsOn property to turn the LED on and off, or call StartBlink() method to make the LED turn on and off indefinitely or until we call the Stop() method to stop the animation. We'll see all this in action further down.
Assemble the circuit
To wire the LED, simply connect the shorter leg (cathode) to GND, and for the longer leg use a 220 ohm resistor to connect it with the D01 pin. The circuit should look like this:

Led Circuit Diagram
Create a project
In Visual Studio 2019, create a new Meadow Application project, and in the MeadowApp class, copy the following code:
using System;using System.Collections.Generic;using System.Threading;using Meadow;using Meadow.Devices;using Meadow.Foundation.Leds;namespace HelloLed{ public class MeadowApp : App<F7Micro, MeadowApp> { Led led; public MeadowApp() { Console.WriteLine("Initializing..."); led = new Led(Device.CreateDigitalOutputPort(Device.Pins.D01)), TestLed(); } void TestLed() { Console.WriteLine("TestLeds..."); while (true) { Console.WriteLine("Turning on and off each led for 1 second"); for (int i = 0; i < 2; i++) { led.IsOn = true; Thread.Sleep(1000); led.IsOn = false; Thread.Sleep(1000); } Console.WriteLine("Blinking the LED for a bit."); led.StartBlink(); Thread.Sleep(3000); led.Stop(); } } }}In the MeadowApp constructor, we initialize an Led object, passing a IDigitalOutputPort by creating a digital output port on Meadow doing Device.CreateDigitalOutputPort(Device.Pins.D01));
Once led has been initialized, from the constructor it calls TestLed() method, where the app goes inside an infinite while loop where the LED turns on and off for one second using the Led.IsOn property, and after it calls led.StartBlink() to make the LED blink for three seconds,
Run the project
Click the run button in Visual Studio to see your LED turn on/off and blink! It should be similar to the following gif:

Controlling an LED using Meadow.Foundation.Leds.Led
Working with PwmLed
In the previous section we can see that working with digital output ports, we can make the LED to only either fully turn it on or off. What could we do to control the brightness of the LED so we can do things like a pulsing animation, or depending of a certain value we can get feedback just by observing how bright the LED is. To do that we'll use PwmLed, an LED driver that is controlled with pulse-with-modulation capable port.
Important Note: Meadow only supports PWM ports from pins D02 to D13.
Pulse With Modulation is a way of controlling voltage digitally to emulate an analog signal. Meadow boards generate this signal as a square wave. The two key parameters under the control of the developer are the frequency and duty cycle. You can read more here.
In the above diagram, the time where the signal is high is the same as the time where the signal is low. The percentage of time the signal is on (high) is called the duty cycle. So, in the above, the signal is high 50% of the one cycle and so the duty cycle is 50%.
 is called the duty cycle. So, in the above, the signal is high 50% of the one cycle and so the duty cycle is 50%.")
In the above diagram, the time where the signal is high is the same as the time where the signal is low. The percentage of time the signal is on (high) is called the duty cycle. So, in the above, the signal is high 50% of the one cycle and so the duty cycle is 50%.
Assemble the circuit
For this section of the project, you no longer need the resistor to connect the LED. Connect digital pin D02 directly to the anode of the LED.

PwmLed circuit diagram
Write the following code
In our existing project (or feel free to create a new project), copy the following code:
using System;using System.Collections.Generic;using System.Threading;using Meadow;using Meadow.Devices;using Meadow.Foundation.Leds;namespace HelloLed{ public class MeadowApp : App<F7Micro, MeadowApp> { PwmLed pwmLed; public MeadowApp() { Console.WriteLine("Initializing..."); pwmLed = new PwmLed(Device.CreatePwmPort(Device.Pins.D02), TypicalForwardVoltage.Red); TestPwmLed(); } void TestPwmLed() { Console.WriteLine("TestPwmLed..."); while (true) { Console.WriteLine("Turning on and off each led for one second"); pwmLed.IsOn = true; Thread.Sleep(500); pwmLed.IsOn = false; Console.WriteLine("Blinking the LED for three seconds..."); pwmLed.StartBlink(); Thread.Sleep(3000); pwmLed.Stop(); Console.WriteLine("Pulsing the LED for three seconds..."); pwmLed.StartPulse(); Thread.Sleep(3000); pwmLed.Stop(); Console.WriteLine("Increasing and decreasing brightness..."); for (int j = 0; j <= 3; j++) { for (int i = 0; i <= 10; i++) { pwmLed.SetBrightness(i * 0.10f); Thread.Sleep(100); } for (int i = 10; i >= 0; i--) { pwmLed.SetBrightness(i * 0.10f); Thread.Sleep(100); } } } } }}In the MeadowApp constructor notice that we're now instantiating a PwmLed object passing a IPwmPort calling Device.CreatePwmPort(Device.Pins.D02) and also specifying the desired forward voltage for red LED.
TestPwmLed() shows all the methods you can call with the pwmLed object, from the basic methods we covered in the previous section, to PWM specifics like StartPulse() and SetBrightness(int value) to set an specific brightness value ranging from zero (off) to one (full brightness).
Run the project
Click the run button in Visual Studio to see your LED turn on/off, blink, pulse, and even increase and decrease brightness! It should be similar to the following gif:

Controlling an LED using Meadow.Foundation.Leds.PwmLed
Check out Meadow.Foundation!
This project is only the tip of the iceberg in terms of the extensive exciting things you can do with Meadow.Foundation.
- It comes with a huge peripheral driver library with drivers for the most common sensors and peripherals.
- The peripheral drivers encapsulate the core logic and expose a simple, clean, modern API.
- This project is backed by a growing community that is constantly working on building cool connected things and are always excited to help new-comers and discuss new projects.
References
Schematics, diagrams and documents
Credits
Related products


Leave your feedback...