
Getting Started W/ Meadow By Controlling The Onboard Rgb Led

Made by jorgedevs / Productivity / IoT
About the project
Learn how to make Full. NET apps running on Meadow, starting by controlling the onboard RGB LED.
Project info
Difficulty: Easy
Platforms: Microsoft, Netduino
Estimated time: 1 hour
License: Apache License 2.0 (Apache-2.0)
Items used in this project
Hardware components

Story
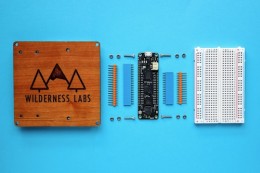
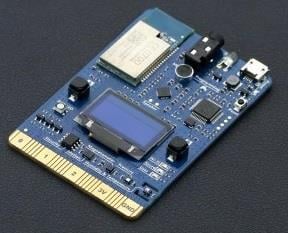
In this project we're going to show you how to get your Meadow device up and running with Visual Studio 2019 and deploying your first application that will control the onboard RGB LED.
Step 1. Download and Install the Development Tools
Windows
Download and install Visual Studio 2019. You can use the Community Edition which is free for personal use.
You’ll need to ensure the .NET Framework 4.7.2 development tools are installed. To verify, run the Visual Studio Installer and click Modify. Under Installation details, expand .NET desktop development and ensure that .NET Framework 4.7.2 development tools is checked.

Ensure .Net Framework 4.7.2 is checked
Once installed, run Visual Studio and Click Extensions -> Manage Extensions. In the Manage Extensions window, search for VS Tools for Meadow.

Installing VS Tools for Meadow extension
Once found, click install to add the extension to your IDE. You can now close this window.
macOS
Download and install the latest version of Visual Studio for Mac. There is a Community Edition which is free for personal use.
Launch Visual Studio and click Extensions... on the menu bar. This should open the Extension Manager window. Select the Gallery Tab, type Meadow in the search box and you should see one result.

Installing Meadow extension in Visual Studio for Mac
Select the Meadow extension and click the Install... button. It will prompt you with a dialog stating that it will install the Meadow v0.4.0 package. Click Install to proceed with the installation.

Prompt window to confirm installation for Meadow extension
Once installed, go the the Installed tab, and ensure the extension is listed and enabled.

Enable Meadow Extension
Step 2. Deploy latest version of Meadow OS.
Before creating your first Meadow project, you need to make sure that the board has the latest Meadow OS version deployed.
Step 2.1: Install dfu-util
we'll use the dfu-util app to flash the firmware files to Meadow.
Windows
- Open Visual Studio 2019 and select Continue without code. Click on View -> Other Windows -> Meadow to open the Meadow Device Explorer panel.
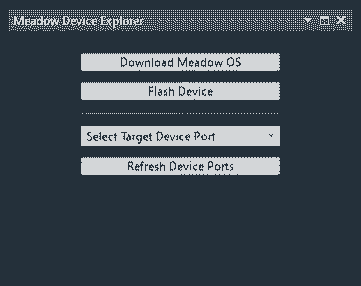
- Click Download Meadow OS.
- Connect your Meadow device in bootloader mode by connecting your device while holding down the BOOT button.

- Click Flash Device. This will take a couple minutes to complete.
- Choose the correct port in Select Target Device Port dropdown. Hint: open Device Manager and expand Ports (COM & LPT), the correct Meadow device COM port is USB Serial Device.
macOS
For macOS, you’ll first need to install Brew, if you don’t already have it. Once brew is installed, you can use it install dfu-util:
- Open the terminal.
- Execute the following command:
brew install dfu-utilStep 2.2: Put the device into DFU bootloader mode
To update the OS, Meadow must be in DFU bootloader mode. To enter this mode, the BOOT button needs to be held down while the board boots up. This can be accomplished one of two ways.
If the board is disconnected: hold the BOOT button down and connect the board to your computer via a Micro USB Cable.
If the board is connected: hold the BOOT button down, and then press and release the RST (Reset) button. Then release the BOOT button.
Connect your meadow while holding the boot button

Connect your meadow while holding the boot button
Step 2.3: Upload Meadow.OS
-
Unzip the Meadow.OS.zip package. It should contain
Meadow.OS_Kernel.binandMeadow.OS_Runtime.binfiles. - Open the Command Prompt (Windows) or Terminal (macOS/Linux).
- Navigate to the folder the contains the Meadow bin files.
-
Enter
dfu-util --listto see a list of dfu enabled devices:

Copy the Meadow serial number
Note: Meadow will show four (4) DFU devices when in bootloader mode. All four devices will have the same serial number.
- Select and copy the serial number of your Meadow board.
-
Execute the following commands, replacing
[DEVICE_SERIAL]with the serial number you found in the previous step. Each command should complete withFile downloaded successfully
dfu-util -a 0 -S [DEVICE_SERIAL] -D Meadow.OS.bin -s 0x08000000When the flash is complete, press the reset (RST) button to exit DFU bootloader mode and boot into Meadow.OS.
Your board is now ready to have a Meadow application deployed to it!
Step 3. Create and run a Hello, World Project
Windows
In Visual Studio, you can now click File => New Project. Search for Meadow Application and click next.

Select Meadow Application project type
In the Configure your new project window, name your project HelloWorld.

Name your Meadow Application HelloWorld
Click Create to open your new Meadow Application project.
macOS
In Visual Studio, click on File => New Solution... to open the New Project template dialog window. Go to the Meadow section, and there select App on the left panel. Select Meadow Application in the main panel and click next.

Select Meadow Application project type
Name the project HelloWorld, and click Create.

Name your Meadow Application HelloWorld
Understanding the ProjectTemplate
When creating a new project, in the Solution Explorer you'll get the following files and Dependencies

Dependencies
Notice that every Meadow Project comes with a group of Meadow NuGet Packages:
- Meadow.Foundation is a framework that greatly simplifies the task of building connected things with Meadow, by providing a unified driver and library framework that includes drivers and abstractions for common peripherals such as sensors, displays, motors, and more.
- Meadow is the main package that contains Meadow application and OS classes, enabling you to interact with the Meadow.OS
- WildernessLabs.Meadow.Assemblies contains all the underlying dependencies for Meadow.
MeadowApp.cs
Let’s take a brief look at the MeadowApp class:
using System;using System.Threading;using Meadow;using Meadow.Devices;using Meadow.Hardware;namespace HelloWorld{ public class MeadowApp : App<F7Micro, MeadowApp> { IDigitalOutputPort redLed; IDigitalOutputPort blueLed; IDigitalOutputPort greenLed; public MeadowApp() { ConfigurePorts(); BlinkLeds(); } public void ConfigurePorts() { Console.WriteLine("Creating Outputs..."); redLed = Device.CreateDigitalOutputPort(Device.Pins.OnboardLedRed); blueLed = Device.CreateDigitalOutputPort(Device.Pins.OnboardLedBlue); greenLed = Device.CreateDigitalOutputPort(Device.Pins.OnboardLedGreen); } public void BlinkLeds() { var state = false; while (true) { int wait = 200; state = !state; Console.WriteLine($"State: {state}"); redLed.State = state; Thread.Sleep(wait); blueLed.State = state; Thread.Sleep(wait); greenLed.State = state; Thread.Sleep(wait); } } }}Meadow Namespaces
These are the typical minimum set of namespaces in a Meadow app class and provide the following functionality:
-
Meadow- The root namespace contains Meadow application and OS classes, enabling you to interact with the Meadow.OS. -
Meadow.Devices- Contains device-specific definitions for different Meadow boards, such as the F7 Micro Dev board, or the F7 Micro embeddable board. -
Meadow.Hardware- This namespace contains hardware classes that enable you to interact directly with hardware IO. -
Meadow.Foundation- Meadow.Foundation is a set of open-source peripheral drivers and hardware control libraries that make hardware development with Meadow, plug-and-play.
MeadowApp Class Definition
Notice that MeadowApp application class inherits from App, and has two generic arguments, in this case F7Micro, and MeadowApp:
public class MeadowApp : App<F7Micro, MeadowApp>All Meadow applications should inherit from the App base class. Under the hood, App registers itself with the Meadow.OS. It also provides hooks for getting notified during system events, such as the board being put to sleep.
App requires two parameters; first, the current device definition, and second, the type definition of your custom IApp class. These are passed to provide a strongly-typed reference to the current device, as well as the current instance of the application from anywhere in the app.
The device class defines properties and capabilities of the current device such as the pins, via the Device property on the App base class, and allows you to access them using autocomplete, via the specific device type:
var redLed = Device.CreateDigitalOutputPort(Device.Pins.OnboardLedRed);Controlling the Onboard LED via Ports
Direct access to hardware Input/Output (IO) is generally available via ports and buses. In this case, we create a IDigitalOutputPort for each color component (red, green, and blue) of the onboard LED:
IDigitalOutputPort redLed;IDigitalOutputPort blueLed;IDigitalOutputPort greenLed;...redLed = Device.CreateDigitalOutputPort(Device.Pins.OnboardLedRed);blueLed = Device.CreateDigitalOutputPort(Device.Pins.OnboardLedBlue);greenLed = Device.CreateDigitalOutputPort(Device.Pins.OnboardLedGreen);Ports are created from the device itself, and the Pins property provides named pins that map to the pins available on the particular device specified above in the App definition.
Digital Output
To vary the color of the light emitted via the onboard LED, we can write to the internal pins that are connected to the LED, via the State property, causing them to have a voltage of HIGH/ON, or LOW/OFF:
public void BlinkLeds(){ var state = false; while (true) { state = !state; Console.WriteLine($"State: {state}"); redLed.State = state; Thread.Sleep(500); blueLed.State = state; Thread.Sleep(500); greenLed.State = state; Thread.Sleep(500); }}Program.cs
If you’ve created a.Net console app before, the Program class should look familiar; it’s very simple and only includes a static void Main() method that instantiates our Meadow app:
using Meadow;namespace HelloWorld{ class Program { static IApp app; public static void Main(string[] args) { // instantiate and run new meadow app app = new HelloMeadow(); } }}This pattern allows us to have an App instance, in which all things Meadow are done.
Step 4. Time to run the project
Now you're project is all set and ready to run. Click the run button on visual studio and observe the files being transferred to Meadow in the Output window. If this is the first time running your app, it will take longer since Visual Studio will transfer all the core libraries like mscorlib.dll, System.dll and System.Core.dll, so be patient while it finishes transferring and you will eventually see the onboard LED lighting up.

Running HelloWorld Meadow app
At this point, when making any code changes in the project, the deployment will be much faster, since Meadow has all the necessary files and the extension is smart enough to replace only those files that have been modified which in your case, will be the actual App.exe file.
References
Credits
Related products


Leave your feedback...