

Camera Bot Using Firebeetle 2 Esp32-s3

Made by pradeeplogu0 / Home Automation / Security / IoT
About the project
This tutorial will show you how to craft a live camera bot with the powerful FireBeetle 2 ESP32-S3 board.
Project info
Difficulty: Easy
Platforms: DFRobot
Estimated time: 1 hour
License: GNU General Public License, version 3 or later (GPL3+)
Items used in this project

Story
FireBeetle 2 ESP32-S3 is a powerful mcu based on the ESP32-S3-WROOM-1-N16R8 module. This module has 16MB Flash and 8MB PSRAM for more data storage. It also has a built-in accelerator for neural network and signal processing tasks, making it suitable for various applications like speech and image recognition. Also, it features an onboard camera interface that connects easily with the camera. Moreover, it has an onboard GDI connector that simplifies the wiring for using a screen. So, you can easily connect your camera and display without any hardwires.
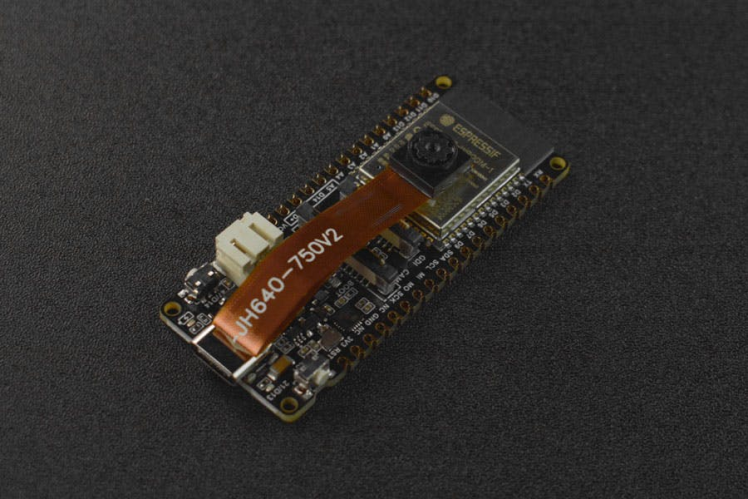
Also, it contains an onboard battery management system. So, you can stream your camera data 24/7 without any interruption. It will be more suitable for low power IoT and ML applications.
Image from DFRobot

In this tutorial, I will guide you how to build a live telegram bot, which can take photos and send that to you in real time.
Setting up the Telegram Bot ?:
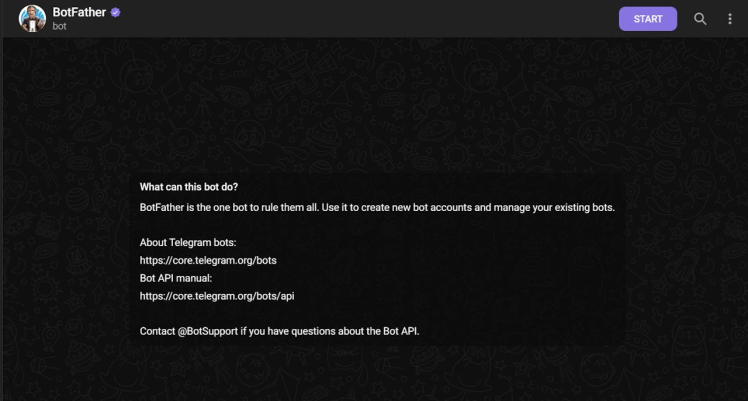
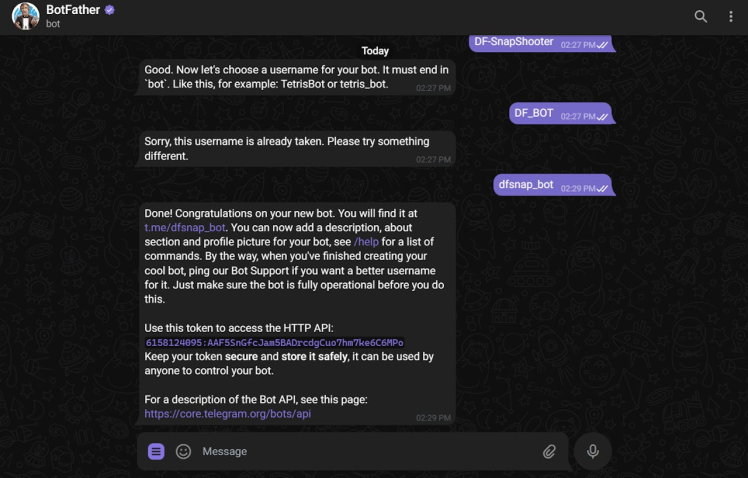
Go to Google Play or App Store, download, and install Telegram. In my case I'm using telegram web. First, search for “botfather” and click the BotFather as shown below.
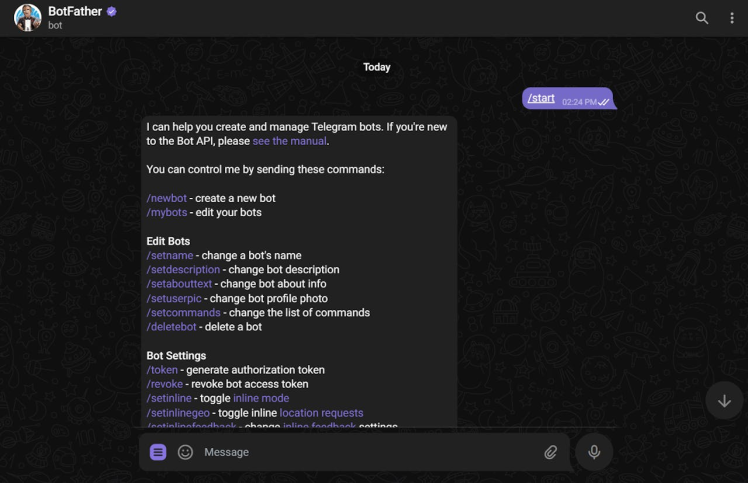
Next start the BotFather, and use /newbot to create new bot.
Next, name your bot.

Then, mention the username.
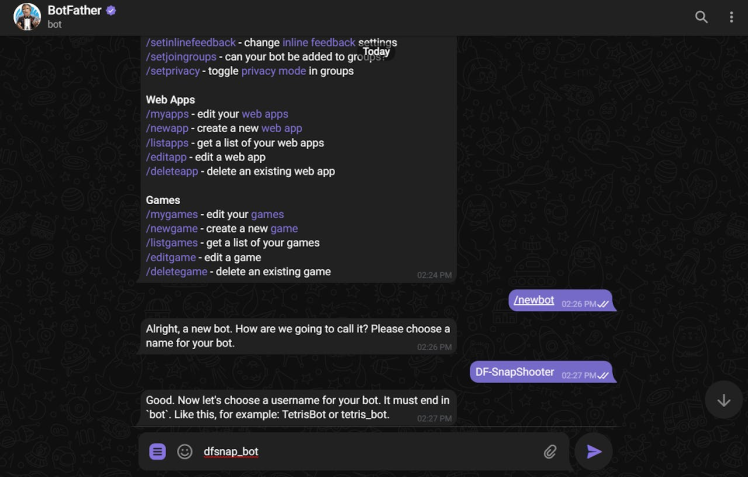
Finally, it will show you the api key.
Anyone that knows your bot username can interact with it. To make sure that we ignore messages that are not from our Telegram account (or any authorized users), you can get your Telegram User ID.
In your Telegram account, search for “IDBot”
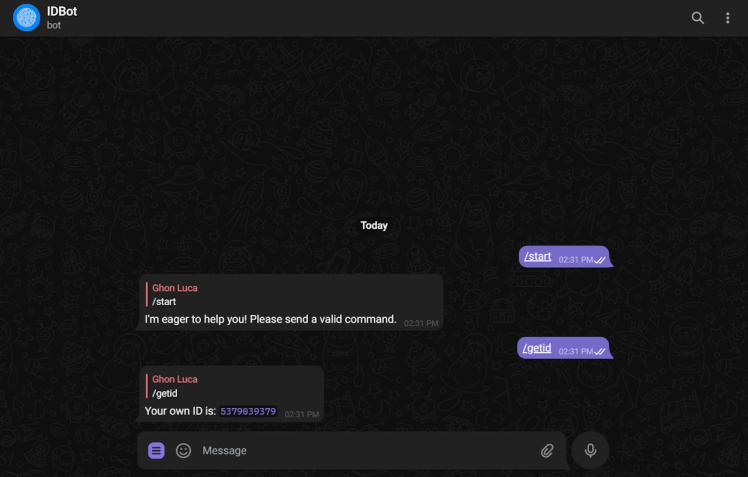
Start a conversation with that bot and type /getid. You will get a reply with your user ID. Save that user ID because, because you’ll need it later in this tutorial.
Arduino IDE Preparation ?:
First you need to install two new libraries to initiate communication between the ESP32 S3 and Telegram.
Next open the Arduino IDE and copy paste the following code.
#include <Arduino.h>
#include <WiFi.h>
#include <WiFiClientSecure.h>
#include "soc/soc.h"
#include "soc/rtc_cntl_reg.h"
#include "esp_camera.h"
#include <UniversalTelegramBot.h>
#include <ArduinoJson.h>
#include "DFRobot_AXP313A.h"

DFRobot_AXP313A axp;

const char* ssid = "ELDRADO";
const char* password = "amazon123";

// Initialize Telegram BOT
String BOTtoken = "5846867606:AAGS9FTjwwGbcgrJRe8K0G83Ibnp0nEvFu0";
String CHAT_ID = "5379039379";

bool sendPhoto = false;

WiFiClientSecure clientTCP;
UniversalTelegramBot bot(BOTtoken, clientTCP);

#define FLASH_LED_PIN 21
bool flashState = LOW;

int botRequestDelay = 1000;
unsigned long lastTimeBotRan;

#define PWDN_GPIO_NUM     -1
#define RESET_GPIO_NUM    -1
#define XCLK_GPIO_NUM     45
#define SIOD_GPIO_NUM     1
#define SIOC_GPIO_NUM     2

#define Y9_GPIO_NUM       48
#define Y8_GPIO_NUM       46
#define Y7_GPIO_NUM       8

#define Y6_GPIO_NUM       7
#define Y5_GPIO_NUM       4
#define Y4_GPIO_NUM       41
#define Y3_GPIO_NUM       40
#define Y2_GPIO_NUM       39
#define VSYNC_GPIO_NUM    6
#define HREF_GPIO_NUM     42
#define PCLK_GPIO_NUM     5

void configInitCamera() {
  axp.enableCameraPower(axp.eOV2640);//设置摄像头供电
  camera_config_t config;
  config.ledc_channel = LEDC_CHANNEL_0;
  config.ledc_timer = LEDC_TIMER_0;
  config.pin_d0 = Y2_GPIO_NUM;
  config.pin_d1 = Y3_GPIO_NUM;
  config.pin_d2 = Y4_GPIO_NUM;
  config.pin_d3 = Y5_GPIO_NUM;
  config.pin_d4 = Y6_GPIO_NUM;
  config.pin_d5 = Y7_GPIO_NUM;
  config.pin_d6 = Y8_GPIO_NUM;
  config.pin_d7 = Y9_GPIO_NUM;
  config.pin_xclk = XCLK_GPIO_NUM;
  config.pin_pclk = PCLK_GPIO_NUM;
  config.pin_vsync = VSYNC_GPIO_NUM;
  config.pin_href = HREF_GPIO_NUM;
  config.pin_sscb_sda = SIOD_GPIO_NUM;
  config.pin_sscb_scl = SIOC_GPIO_NUM;
  config.pin_pwdn = PWDN_GPIO_NUM;
  config.pin_reset = RESET_GPIO_NUM;
  config.xclk_freq_hz = 20000000;
  config.pixel_format = PIXFORMAT_JPEG;

  //init with high specs to pre-allocate larger buffers
  if (psramFound()) {
    config.frame_size = FRAMESIZE_UXGA;
    config.jpeg_quality = 10;  //0-63 lower number means higher quality
    config.fb_count = 2;
  } else {
    config.frame_size = FRAMESIZE_SVGA;
    config.jpeg_quality = 12;  //0-63 lower number means higher quality
    config.fb_count = 1;
  }

  // camera init
  esp_err_t err = esp_camera_init(&config);
  if (err != ESP_OK) {
    Serial.printf("Camera init failed with error 0x%x", err);
    delay(1000);
    ESP.restart();
  }

  // Drop down frame size for higher initial frame rate
  sensor_t * s = esp_camera_sensor_get();
  s->set_framesize(s, FRAMESIZE_CIF);
}

void handleNewMessages(int numNewMessages) {
  Serial.print("Handle New Messages: ");
  Serial.println(numNewMessages);

  for (int i = 0; i < numNewMessages; i++) {
    String chat_id = String(bot.messages[i].chat_id);
    if (chat_id != CHAT_ID) {
      bot.sendMessage(chat_id, "Unauthorized user", "");
      continue;
    }

    // Print the received message
    String text = bot.messages[i].text;
    Serial.println(text);

    String from_name = bot.messages[i].from_name;
    if (text == "/start") {
      String welcome = "Welcome , " + from_name + "n";
      welcome += "Use the following commands to interact with the ESP32-CAM n";
      welcome += "/photo : takes a new photon";
      welcome += "/flash : toggles flash LED n";
      bot.sendMessage(CHAT_ID, welcome, "");
    }
    if (text == "/flash") {
      flashState = !flashState;
      digitalWrite(FLASH_LED_PIN, flashState);
      Serial.println("Change flash LED state");
    }
    if (text == "/photo") {
      sendPhoto = true;
      Serial.println("New photo request");
    }
  }
}

String sendPhotoTelegram() {
  const char* myDomain = "api.telegram.org";
  String getAll = "";
  String getBody = "";

  camera_fb_t * fb = NULL;
  fb = esp_camera_fb_get();
  if (!fb) {
    Serial.println("Camera capture failed");
    delay(1000);
    ESP.restart();
    return "Camera capture failed";
  }

  Serial.println("Connect to " + String(myDomain));


  if (clientTCP.connect(myDomain, 443)) {
    Serial.println("Connection successful");

    String head = "--DFRobotBotrnContent-Disposition: form-data; name="chat_id"; rnrn" + CHAT_ID + "rn--DFRobotBotrnContent-Disposition: form-data; name="photo"; filename="esp32-cam.jpg"rnContent-Type: image/jpegrnrn";
    String tail = "rn--DFRobotBot--rn";

    uint16_t imageLen = fb->len;
    uint16_t extraLen = head.length() + tail.length();
    uint16_t totalLen = imageLen + extraLen;

    clientTCP.println("POST /bot" + BOTtoken + "/sendPhoto HTTP/1.1");
    clientTCP.println("Host: " + String(myDomain));
    clientTCP.println("Content-Length: " + String(totalLen));
    clientTCP.println("Content-Type: multipart/form-data; boundary=DFRobotBot");
    clientTCP.println();
    clientTCP.print(head);

    uint8_t *fbBuf = fb->buf;
    size_t fbLen = fb->len;
    for (size_t n = 0; n < fbLen; n = n + 1024) {
      if (n + 1024 < fbLen) {
        clientTCP.write(fbBuf, 1024);
        fbBuf += 1024;
      }
      else if (fbLen % 1024 > 0) {
        size_t remainder = fbLen % 1024;
        clientTCP.write(fbBuf, remainder);
      }
    }

    clientTCP.print(tail);

    esp_camera_fb_return(fb);

    int waitTime = 10000;   // timeout 10 seconds
    long startTimer = millis();
    boolean state = false;

    while ((startTimer + waitTime) > millis()) {
      Serial.print(".");
      delay(100);
      while (clientTCP.available()) {
        char c = clientTCP.read();
        if (state == true) getBody += String(c);
        if (c == 'n') {
          if (getAll.length() == 0) state = true;
          getAll = "";
        }
        else if (c != 'r')
          getAll += String(c);
        startTimer = millis();
      }
      if (getBody.length() > 0) break;
    }
    clientTCP.stop();
    Serial.println(getBody);
  }
  else {
    getBody = "Connected to api.telegram.org failed.";
    Serial.println("Connected to api.telegram.org failed.");
  }
  return getBody;
}

void setup() {
  WRITE_PERI_REG(RTC_CNTL_BROWN_OUT_REG, 0);
  // Init Serial Monitor
  Serial.begin(115200);

  // Set LED Flash as output
  pinMode(FLASH_LED_PIN, OUTPUT);
  digitalWrite(FLASH_LED_PIN, flashState);

  while (axp.begin() != 0) {
    Serial.println("init error");
    delay(1000);
  }

  // Config and init the camera
  configInitCamera();

  // Connect to Wi-Fi
  WiFi.mode(WIFI_STA);
  Serial.println();
  Serial.print("Connecting to ");
  Serial.println(ssid);
  WiFi.begin(ssid, password);
  clientTCP.setCACert(TELEGRAM_CERTIFICATE_ROOT); // Add root certificate for api.telegram.org
  while (WiFi.status() != WL_CONNECTED) {
    Serial.print(".");
    delay(500);
  }
  Serial.println();
  Serial.print("FireBeetle 2 ESP32 S3-CAM IP Address: ");
  Serial.println(WiFi.localIP());


}

void loop() {
  if (sendPhoto) {
    Serial.println("Preparing photo");
    sendPhotoTelegram();
    sendPhoto = false;
  }
  if (millis() > lastTimeBotRan + botRequestDelay)  {
    int numNewMessages = bot.getUpdates(bot.last_message_received + 1);
    while (numNewMessages) {
      Serial.println("got response");
      handleNewMessages(numNewMessages);
      numNewMessages = bot.getUpdates(bot.last_message_received + 1);
    }
    lastTimeBotRan = millis();
  }
}
In this code rename the Wi-Fi credentials and the Telegram Bot credientials. Once the are done, just upload the code to the FireBeetle 2 ESP32 S3 board.

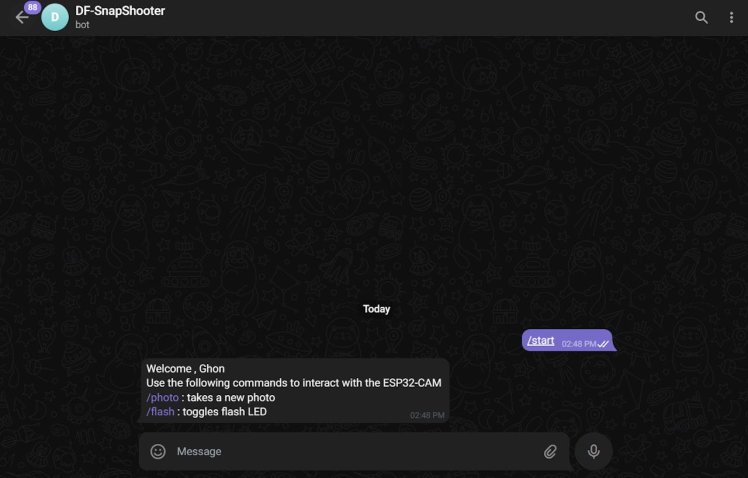
Open the Telegram Bot and start the bot.
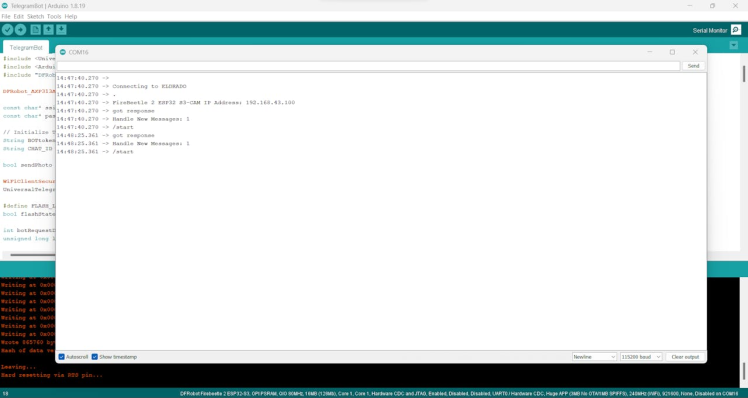
Then open the serial monitor and look for the response. Youresponse.You can see the Telegram API response.
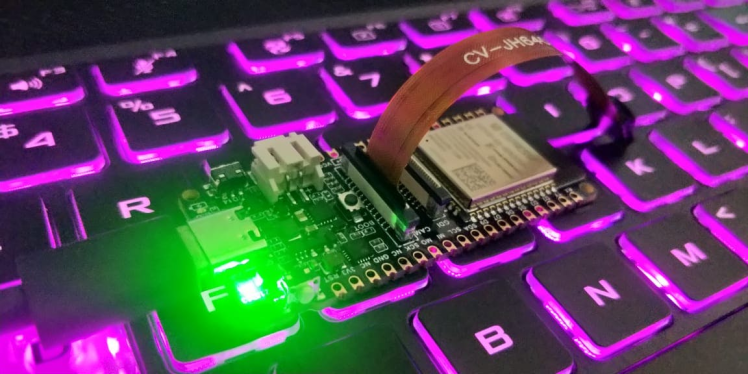
Type /flash in the bot, it will powerup the green led on the board.
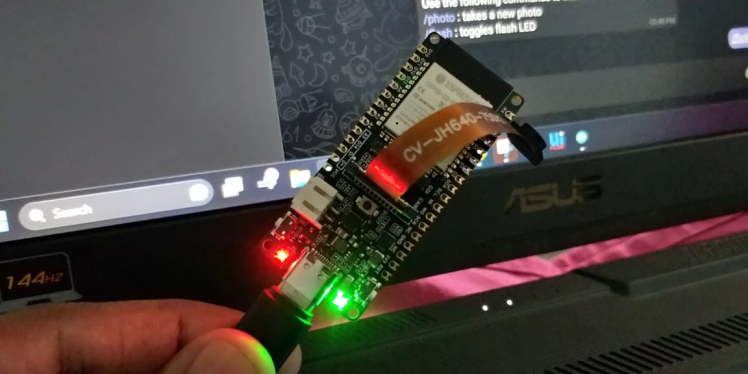
Next, type/photo on the bot. It will take a photo and send it to you via the Telegram Bot itself.

Wrap-Up ?:
You just need your smartphone to access the camera. Now you can get a photo from your FireBeetle2 ESP32 S3 anytime and anywhere. This lets you keep an eye on your device from any location.
Credits
Related products


Leave your feedback...