
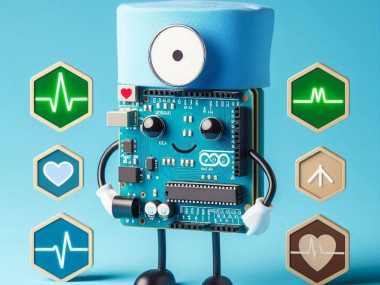
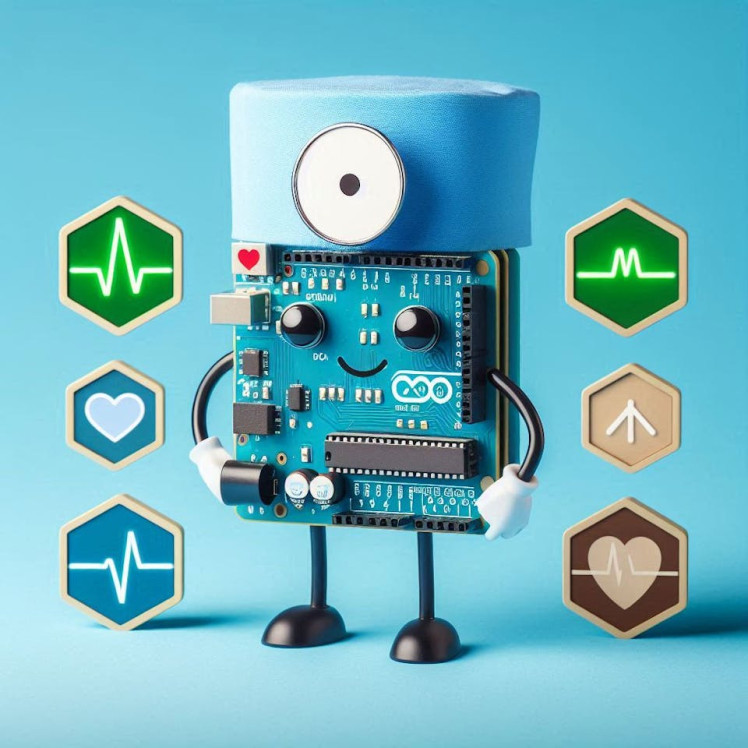
Bio-signal Plotting: Hexabitz Exg & Arduino Integration

Made by Aula_Jazmati / Displays / Environmental Sensing / Health / Kids & Family / Sensors
About the project
Use an Arduino with the Hexabitz Single-Lead EXG Monitor Module (H2BR0) to plot analog signals on a plotter for visualizing biosignals.
Project info
Items used in this project
Hardware components

Software apps and online services
Story
In this project, we will use an Arduino board in conjunction with the Hexabitz Single-Lead EXG Monitor Module (H2BR0) to plot analog signals on a plotter for visualizing biosignals such as ECG (Electrocardiogram) and EMG (Electromyogram).
- Arduino Uno
- Connecting cables
- Electrode pads
- Computer with Arduino IDE installed
- Single-Lead, EXG Monitor (H2BR0x):
Hexabitz Single-Lead, EXG Monitor Module (H2BR0) is one of a kind module that can record publication-grade biopotential signals from your body be it from the heart (ECG), brain (EEG), eyes (EOG), and muscles (EMG).
What makes it different?
- Record publication-quality biopotential signals like ECG, EMG, EOG, or EEG.
- Small size allows easy integration into mobile and space-constrained projects.
- H2BR0 is based on STM32G0 MCU.
- Program advanced C code with our easy-to-use APIs.
- You can connect to external hardware or combine with other Hexabitz modules!
1 / 2 • Hexabitz EXG Monitor Module(Top)
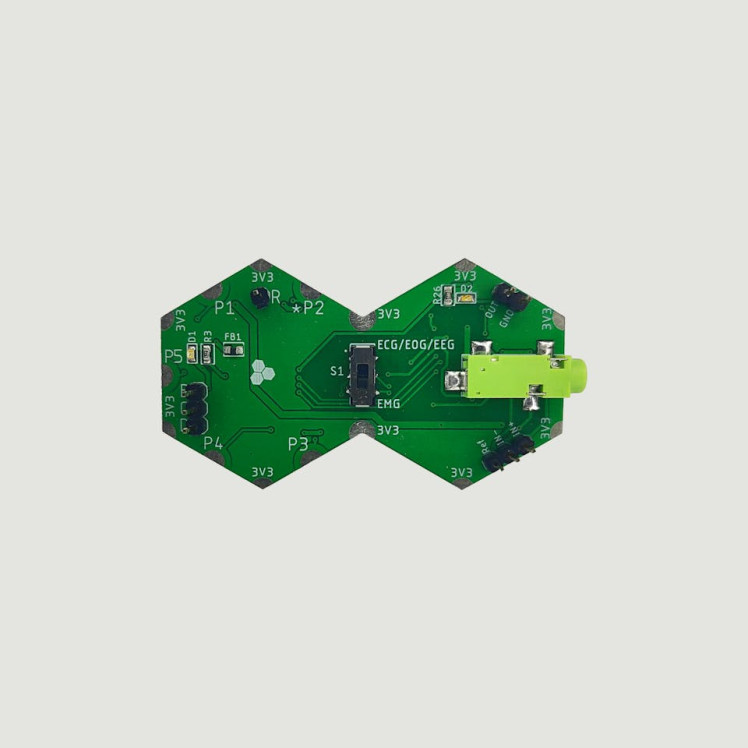
Hexabitz EXG Monitor Module(Top)
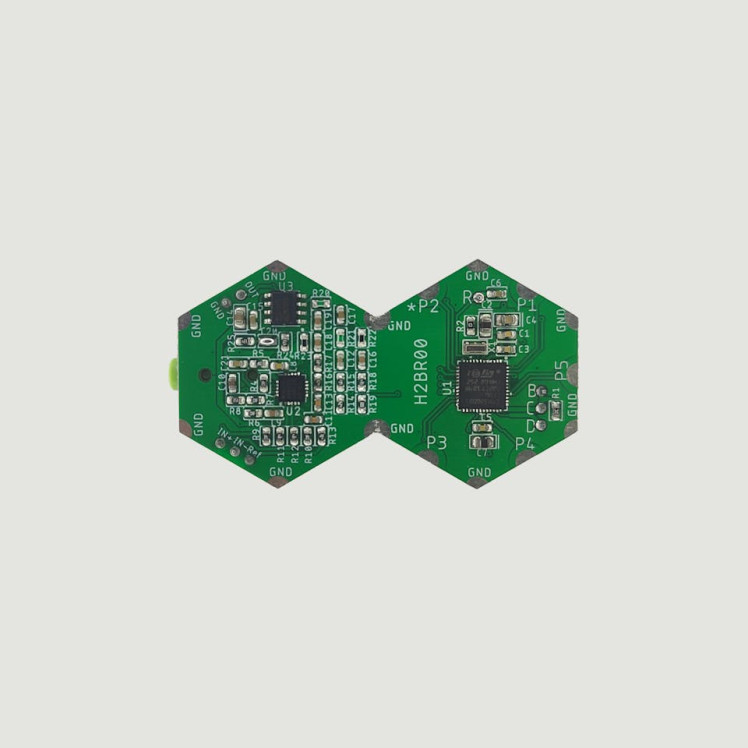
Hexabitz EXG Monitor Module(Bottom)
Steps:Setup the Hardware:
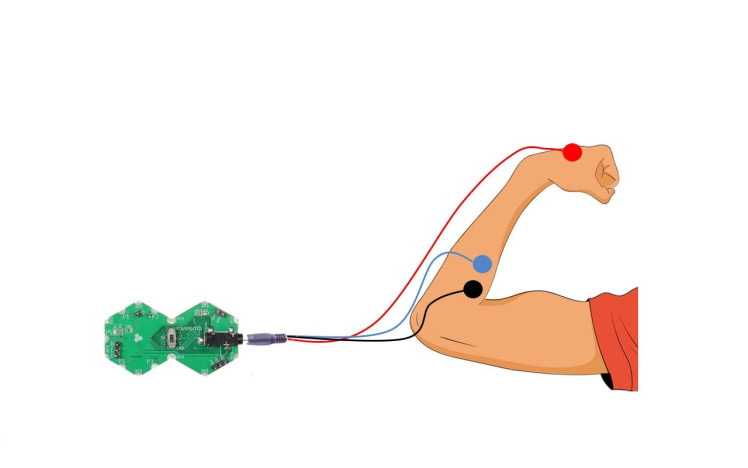
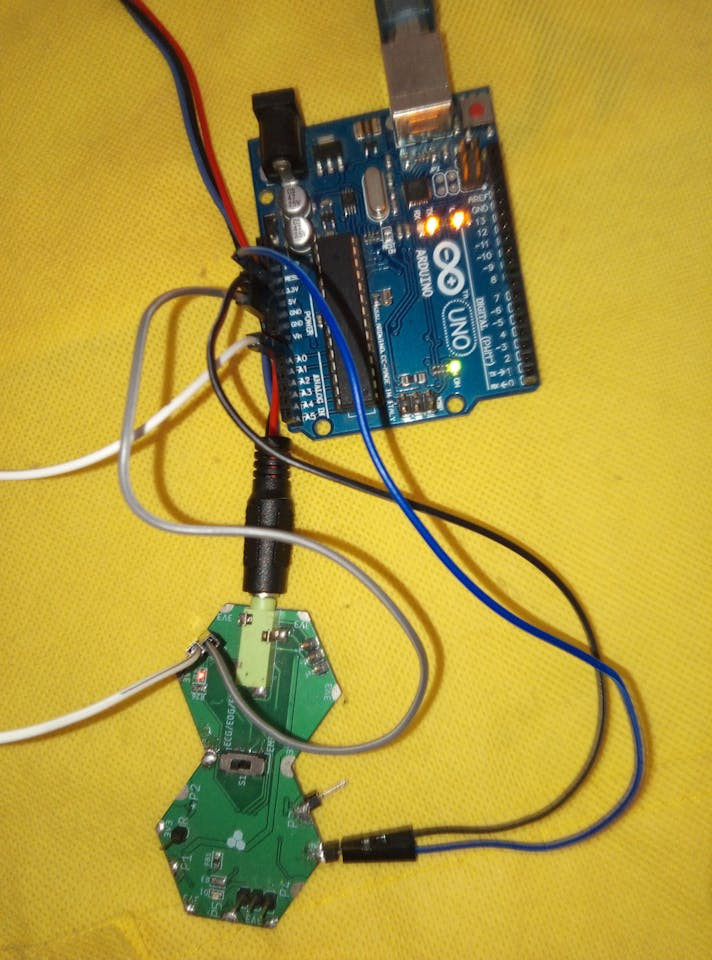
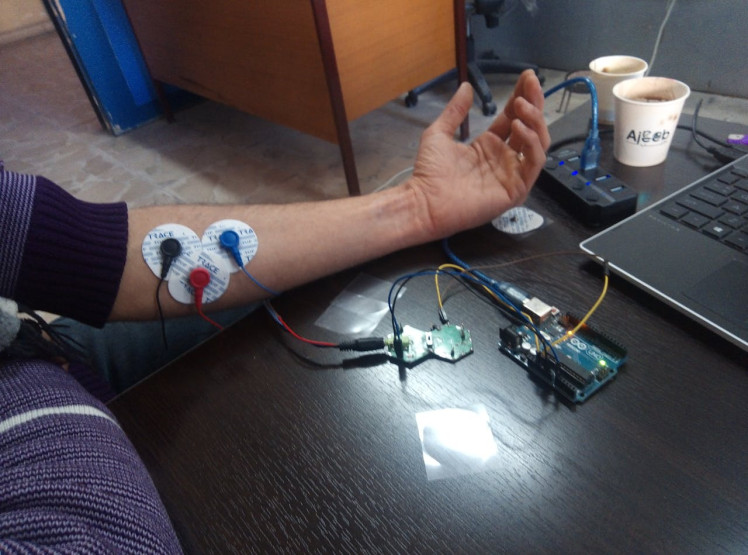
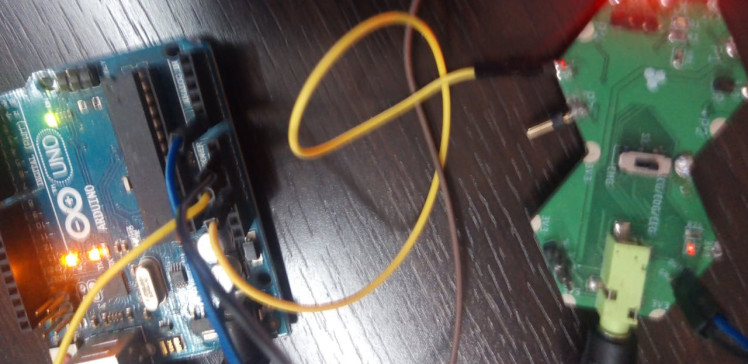
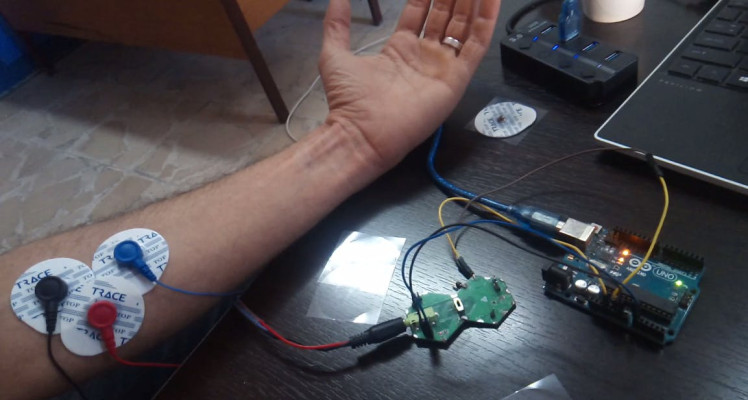
- Connect the Hexabitz EXG Monitor Module to the Arduino Uno (A0- GND) using the provided connecting cables.
- Attach the electrode pads to the subject's body as per the instructions provided with the Hexabitz module.
- Ensure all connections are secure and the module is properly powered.
Hexabitz EXG Monitor Module Specifications

Hexabitz EXG Monitor Module Specifications
1 / 3 • Electrode locations In order to measure EMG signals
Electrode locations In order to measure EMG signals
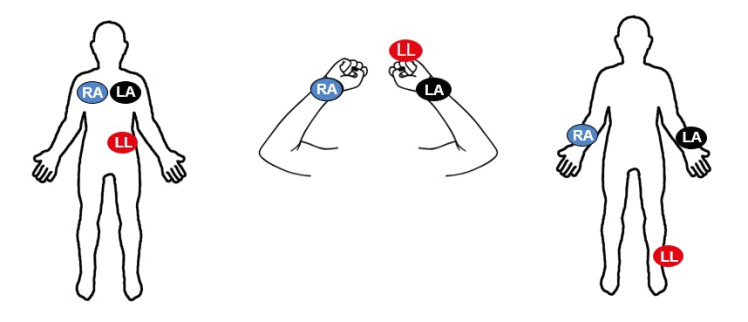
Electrode locations In order to measure ECG signals
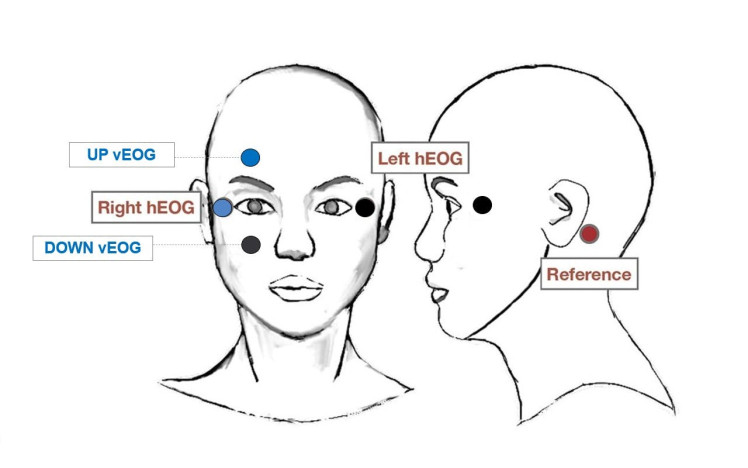
Electrode locations In order to measure EOG signals
Programming the Arduino:
- Open the Arduino IDE on your computer.
- Write or upload the code to read the analog signals from the Hexabitz module and send the data to the serial plotter.
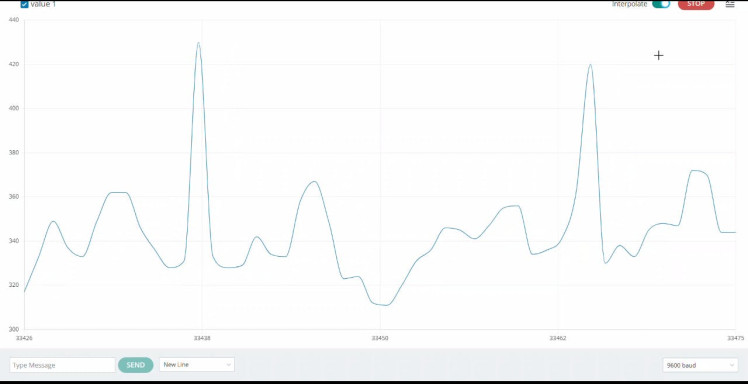
Visualizing the Data:
- Once the code is uploaded, open the serial plotter in the Arduino IDE.
- Observe the real-time plotting of the biosignals on the plotter.
- Adjust the settings and parameters as needed to get a clear and accurate visualization of the signals.
ECG Signals
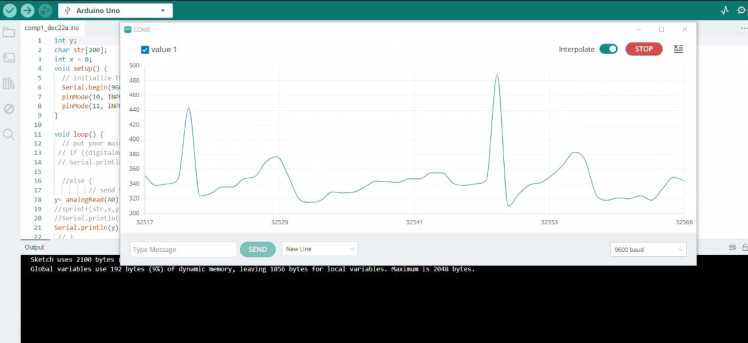
ECG Signals
int y;
int x = 0;

void setup() {
  // initialize the serial communication
  Serial.begin(921600);
 }

void loop() {
  y = analogRead(A0);  // Analog output of ExG
  Serial.println(y);  // Send the analog value to the serial plotter

  if (x == 300) {
    x = 0;
    Serial.println("C");
  }
  x++;
  delay(30);
}
Here's the explanation for the code:
1. Variables:
- `int y;` declares a variable `y` to store the analog value read from the ExG monitor.
- `int x = 0;` initializes a counter variable `x` to 0.
2. Setup Function:
- `Serial.begin(921600);` initializes the serial communication at a baud rate of 921600. This allows the Arduino to send data to the computer.
3. Loop Function:
- `y = analogRead(A0);` reads the analog value from pin A0, which is connected to the ExG monitor, and stores it in the variable `y`.
- `Serial.println(y);` sends the analog value `y` to the serial plotter for visualization.
4. Counter Logic:
- `if (x == 300) {... }` checks if the counter `x` has reached 300.
- If true, it resets `x` to 0 and prints "C" to the serial plotter.
- `x++;` increments the counter `x` by 1.
- `delay(30);` introduces a delay of 30 milliseconds to prevent overwhelming the serial communication.
The code continuously reads the analog value from the ExG monitor and sends it to the serial plotter for real-time visualization. The counter and delay help manage the data flow and ensure smooth plotting.

1 / 5

By following these steps, you can successfully integrate the Hexabitz Single-Lead EXG Monitor Module with an Arduino to visualize biosignals. This setup can be used for various applications, including health monitoring and research projects.
Schematics, diagrams and documents
Code
Credits
Related products


Leave your feedback...