
Automated Pill Dispenser

Made by Mellow_Labs / 3D Printing / Health / Home Automation / Sensors
About the project
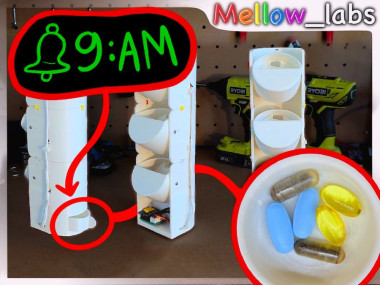
Do you struggle to remember when to take your medication? If so, you need an automatic pill dispenser.
Project info
Difficulty: Moderate
Platforms: Android, MicroPython
Estimated time: 5 hours
License: Creative Commons Attribution-NonCommercial CC BY-NC version 4.0 or later (CC BY-NC 4+)
Items used in this project
Hardware components

Hand tools and fabrication machines
Story
If you're like me, you probably have trouble remembering to take your medication every day. Maybe you have a busy schedule, or maybe you just forget sometimes. Either way, it can be frustrating and even dangerous to miss your doses.

I've always wanted some kind of a pill dispenser that would remind me when to take my pills and dispense them for me. But looking around online, I was disappointed by the options available. Most of them were either cheap plastic containers that made me feel like a pensioner, or expensive machines that cost more than my rent. There were also some subscription models that required me to pay a monthly fee for a physical object. No thanks!
So I decided to design my own pill dispenser, one that would suit my needs and preferences. And after a lot of tests and revisions, I ended up with a build that works for me.
I will be summarising about a years worth of work so if you'd like to see how I got to this point there is a YouTube playlist with 4 videos going over the design process.
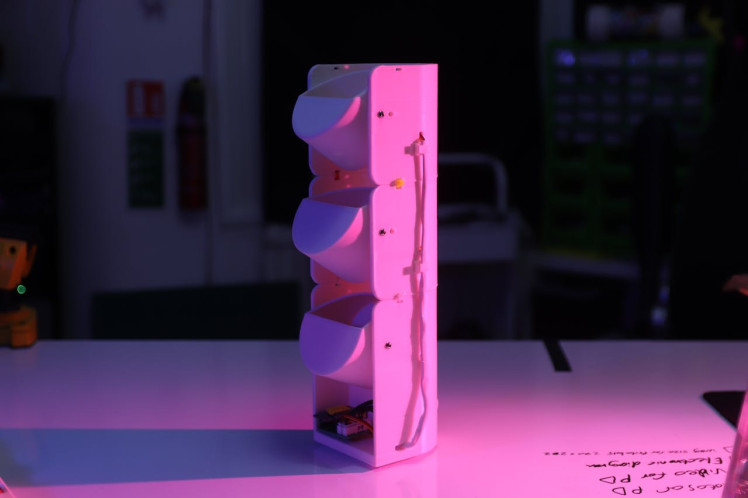
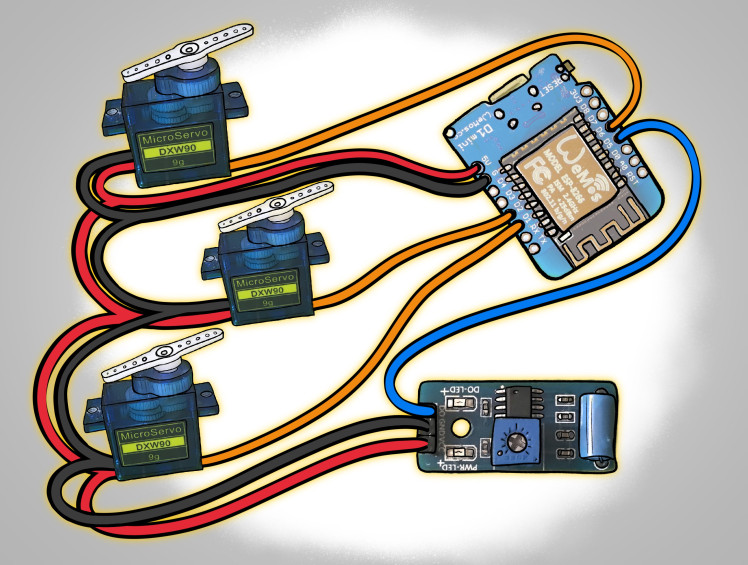
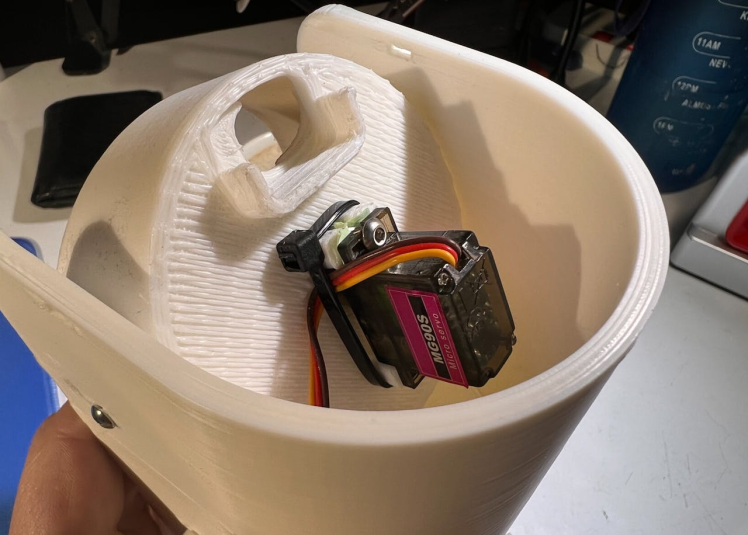
To make the base configuration You only need four parts to print: the base, the container, the shield and the cup. And for the electronics, you just need a servo, a D1 Mini and a vibration sensor.
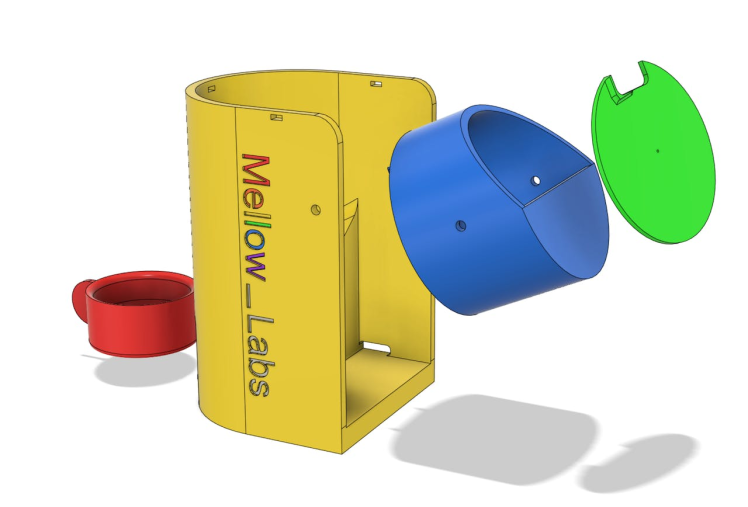
First, attach the servo to the container and secure it with some M3 screws. You can use some threaded heat inserts to make it stronger, but it's not essential.
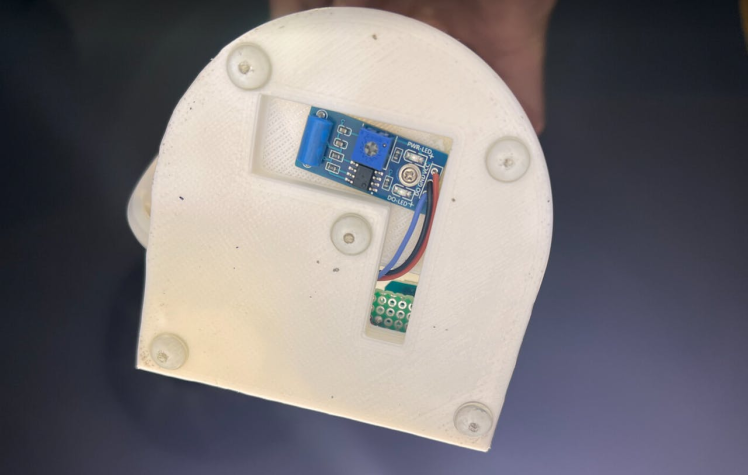
Then, screw on the vibration sensor at the bottom of the base. This is how you will know when a pill has been dispensed. Power it up and adjust the potentiometer until it stays on for a few milliseconds after you tap the base. Be careful not to make it too sensitive, because you don't want the servo to trigger it.
Next, screw on the container to the base with some M3 nuts and screws. You can add some washers if you like, but I didn't bother. Then run the servo wire through the hole on the side of the base. If you want to make it look neat, use some heat shrink tubing to cover it.
1 / 2

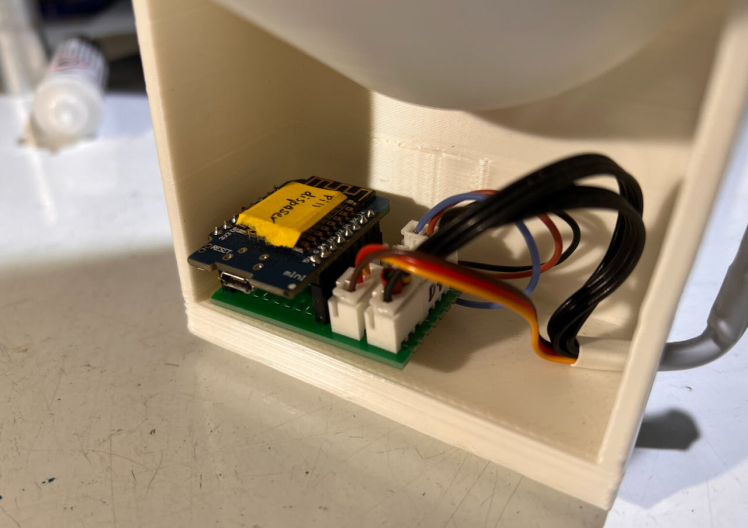
Finally, solder your D1 Mini to a PCB board and connect it to your components with some connectors. This will make it easier to upgrade later if you want to add more features. But if you're feeling lazy, you can just solder everything directly to your D1 Mini.

finally you can configure and upload the micropython Script To The D1 Mini and run the servo test, this will put the servos in the default position so you can easily install the Shields. make sure the cut-out is facing up in that you screw it in properly. please keep in mind the Shield cut-out may have to be customised for the particular pills you were using, I have provided blanks for you to customise in the model files.
The pill dispenser is designed to easily be extended upwards. Simply print out an extension piece, a new container and a new shield, and you're good to go. The electronics assembly is the same as the previous container.
1 / 2

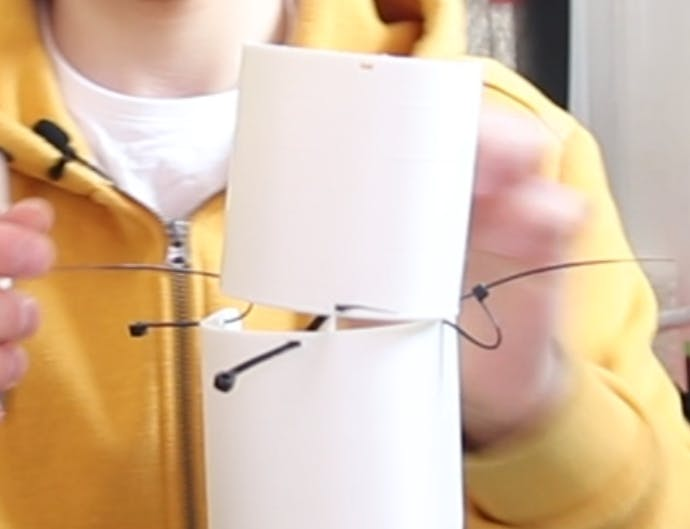
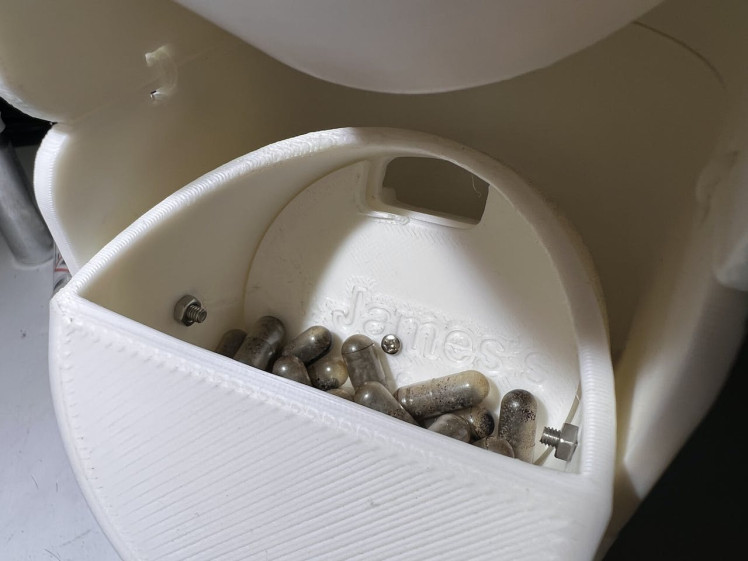
To attach the extension piece to the base, use zip ties for convenience. However, from my experience, I would suggest sticking to 3 extensions to avoid structural instability. Also, keep in mind that you may need to adjust the code to compensate for the time it takes for the pill to drop to the bottom. While you can tinker with the dispenser to achieve accuracy, it's always best to double-check and ensure you're getting the correct doses. I highly recommend using this dispenser only for supplements.
If you liked this project, please consider supporting me on Patreon where you can get access to more cool stuff like this. Your support helps me keep making these fun projects for you and sharing them with the world. You can find my Patreon link below:
https://www.patreon.com/Mellow_labs
Thank you so much for reading this blog post and watching my video. I hope you enjoyed it as much as I did making it. Let me know what you think in the comments section below And don’t forget to subscribe to my channel if you haven’t already for more awesome DIY projects like this one! See you next time!
CAD, enclosures and custom parts
Code
Credits
Related products


Leave your feedback...