
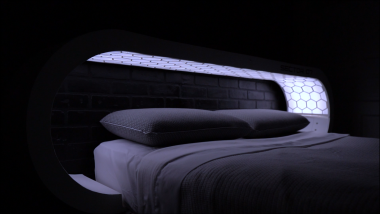
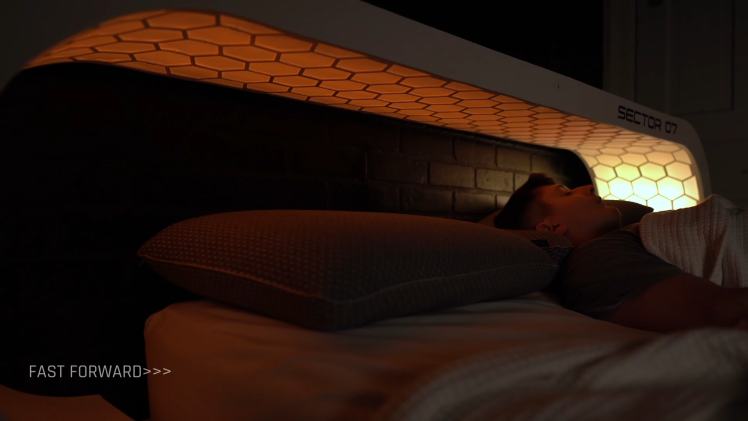
Artificial Sunrise Headboard With Voice Assistant And Coffee

Made by SECTOR_07 / 3D Printing / Displays / Home Automation / Productivity / Voice
About the project
This project is an immersive artificial sun simulation with an integrated voice assistant and semi-automated coffee maker. I call it Project Lumen, powered by my own voice assistant named PRISMA. Its gradual waking sequence makes waking up almost effortless.
Project info
Items used in this project
Hardware components


View all
Software apps and online services
Hand tools and fabrication machines
View all
Story
Disclaimer/Note:
This project is a version one prototype so although it works and is stable there may still be minor bugs or things that could be improved. The Arduino program is written in a way that I understand but it may not be everyone's cup of tea. I am including all necessary documentation. That being said if anyone has suggestions or improvement ideas I am open to hearing them. Also, a lot of the images in this guide are screenshots from the YouTube video because I didn’t decide I was going to share this project until afterward so I didn’t take step by step photos. All documentation, files, and code will be attached at the end of this guide. This project is an expansion of my original YouTube video project.
Want to replicate?
I want to preface this project by saying that it is fairly complex and a bit resource intensive. This project probably isn't a good fit for a beginner but rather someone with intermediate to advanced skill. However, if you have a basic understanding of Arduino, wiring, and basic woodworking there's no reason you can't build this piece of sci fi tech for yourself. Just follow the guide and don't be afraid to ask questions.
What is this thing?
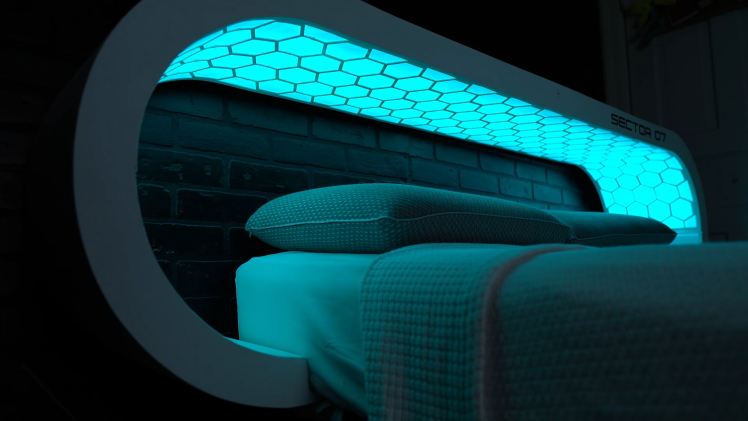
The basic description of this project is that its an immersive artificial sun simulation with an integrated voice assistant and semi-automated coffee maker. It makes waking up nice. I call it Project Lumen, powered by my own voice assistant named PRISMA.
What is it for?
The original idea for this concept comes from the sci-fi world of deep space travel. What people often forget is that there are vast gaps of space between solar systems. In the not so distant future when we are exploring beyond our galaxy that means there is no sun to shine on those faraway adventurers. Just lots and lots of black emptiness. Lack of sun can result in vitamin D deficiency which can be remedied by taking vitamin supplements but what about the psychological effects? Imagine spending months at a time in darkness. But the ships would have lights right? Okay, sure there would be interior lighting but science says that’s not quite enough. The sun does more than just shine light on us and allow us to see. It also powers our internal clocks.
Humans rely on the sun to regulate our circadian rhythm or rather our sense of time. It’s how we can guess at the passing of time without ever checking a clock. If you’ve ever been exploring a cave system or have been without light for a few days you may have experienced time differently. It might almost seem like it was all one long day. Without the sun to separate day and night you would have no indication of time passing. This problem shows itself in lots of strange ways. The most prevalent being sleep. Without the external que of a sunset our body doesn’t realize it's night and we can have trouble falling asleep. In the same sense, once asleep it may be hard to wake up because our body still has no indication that a new day has arrived.
Any setting that involves unregulated periods of light and dark, or inversely, constant light or dark for long periods can wreak havoc on our bodies. Couple that with what would likely be tight quarters, a high stress environment, and long stretches of boredom and you have greater potential for mistakes which in deep space could be disastrous.
How does this device fix that?
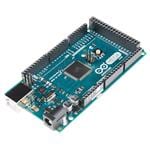
This random thought rabbit hole occurred to me while driving to work one day and eventually led to what I call Project Lumen. This device is meant to help regulate circadian rhythm with a primary focus on waking. All based on the Arduino Mega platform.
This is achieved by tapping into the body's natural wake up sequence which involves mimicking the light, color, and intensity of a sunrise and by playing the sounds of an actual rainforest soundscape. These subtle stimuli are meant to pull the user into a lighter stage of sleep and then wake them with as little resistance as possible. The reason for the slow and gradual increase in light and sound is to reduce sleep inertia. "Sleep inertia is the feeling of grogginess, disorientation, drowsiness, and cognitive impairment that immediately follows waking. Sleep inertia generally lasts for 15 to 60 minutes." (Sleep Inertia, Sleep Foundation). This waking process makes getting up nearly effortless and helps maintain proper circadian rhythm in conditions of constant darkness whether that be fictional space travel or just the very long nights of winter in the American Midwest. To top it all off the semi automated coffee maker is ready to brew a cup to kickstart your morning.
In keeping with the futuristic space faring aesthetic I also built in a voice assistant I call Prisma. Prisma’s job is to control the automated system at the user’s request. She is also the one who wakes you up and makes sure you get out of bed.
She can be quite persuasive, especially since she controls the automated coffee maker. So if you like to wake up to a fresh cup of coffee she can have it prepared for you right away.
For a better look at the general functionality you can check out the YouTube video. It will give you a better understanding of how everything works and briefly touches on the steps I took in building it but also has a science fiction story element to it that doesn’t really pertain to replicating this project. That's just for cinematic funzies. The video doesn't provide enough info to build it though. For that you must read on!
Building the Frame
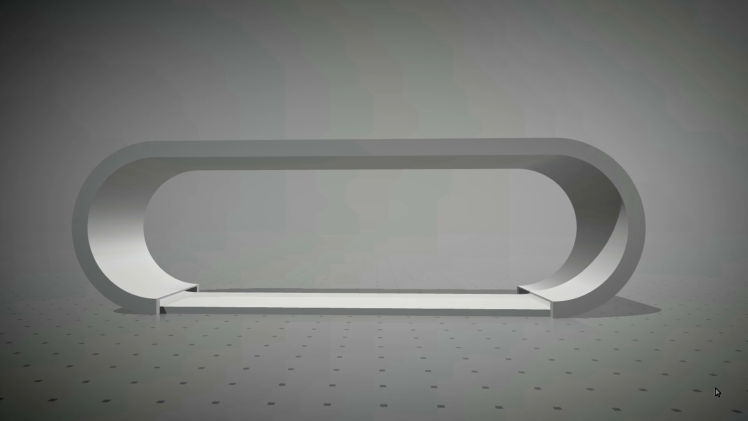

The first step in replicating this project involves building the frame. I chose to use plywood to keep costs down and so I could utilize the kerf bending technique to create the curved ends of the loop. For the kerf bending process I cut the slits in the plywood and then filled the slots with construction adhesive. I also cut two pieces of plywood for each curved end that had the same inner radius of the curve. Then wrapped the kerf cut piece over the two curved pieces and clamped them together to make sure the curved piece held the correct shape while the adhesive cured. I did the same process for the other end and let them sit for a couple days.
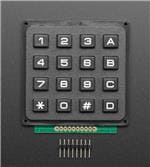
The remaining pieces are just flat cutouts from the plywood. These pieces include a top and bottom section and then a front and back piece. Each piece was cut and then assembled using wood dowel pins and a bit of wood glue. To get accurate dowel pin holes I used a dowel pin jig. Don’t forget to drill the microphone hole on the front piece. Refer to the drawing for more info and measurements.
After assembly, I sanded down the plywood and filled in any seams with wood filler putty. After all the wood filler was dry and re-sanded I painted everything white using two or three coats. My painting process involved brushing on the paint fairly thick and allowing it to slightly dry and then roller over it with a dry paint roller. This technique plus using flat paint gives the surface a slightly rough but uniform texture that suppresses any small defects, bumps, or cracks and gives it the illusion of being all one piece.
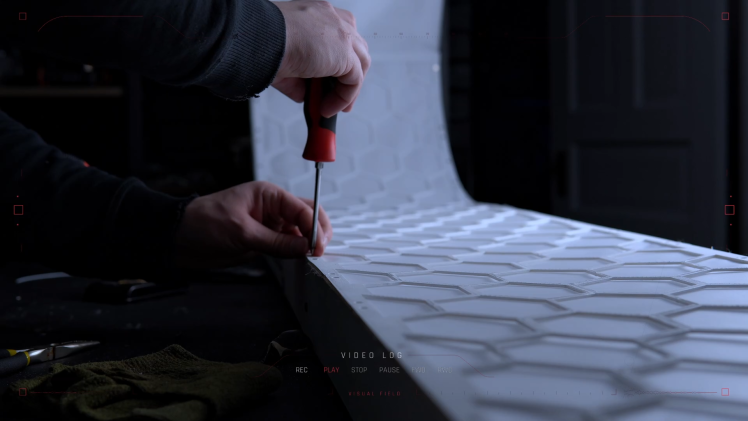
Fusing 3D Printed Panels

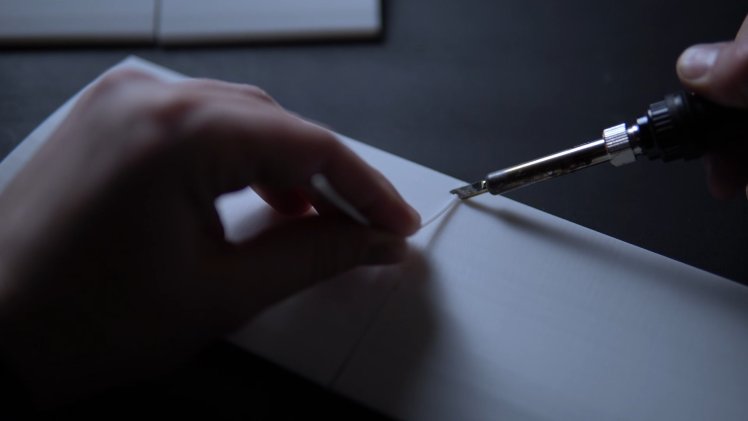
All of the electronics fit into a custom 3D printed panel. The panels are quite large so I printed each of them out in seven sections. I rejoined the sections by using the 3D printer filament and a soldering iron with a flat tip to plastic “weld” them back together. There is also a 3D printed keypad cover which is held in place using a section of solid wire that acts as a hinge. For each part I sanded down the seams and painted them white to match the outer frame. I followed the same steps for the opposite interior curved panel. The files for both are included in the project file, both segmented and full versions.
Assembling the Circuit
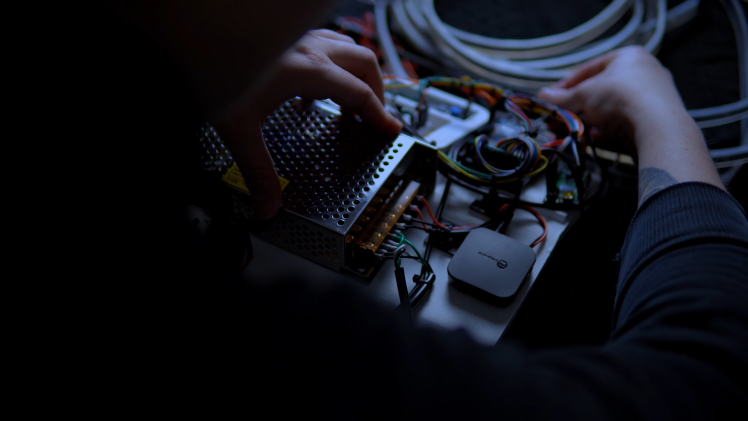
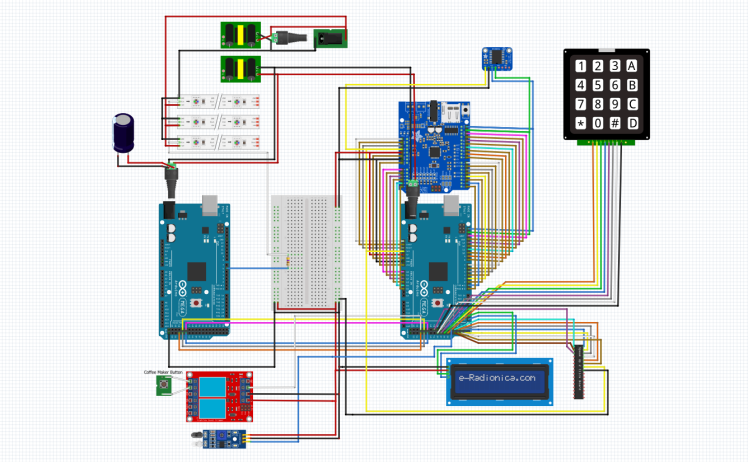
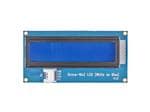
Next is the hardware and controls. Everything has a predefined location on the panels we previously discussed and each has a set of mounting holes except for the power supplies. I used m3 screws to mount everything. There are holes for the keypad and LCD screen as well but the friction fit was sufficient for me to just press them into place. To mount the coffee cup presence sensor simply drill about a 1/4" hole through the housing of the coffee maker close to where the cup will normally be. Then, making sure the IR transmitter and receiver (they look like LED's) poke though the hole use a copious amount of hot glue to hold it in place. As far as wiring I have to trust you can follow a schematic for this one. It's too involved to explain wire by wire connections. So for this step refer to the fritzing diagram and parts list provided with the documentation to prototype the circuit. They should have all the information you need.
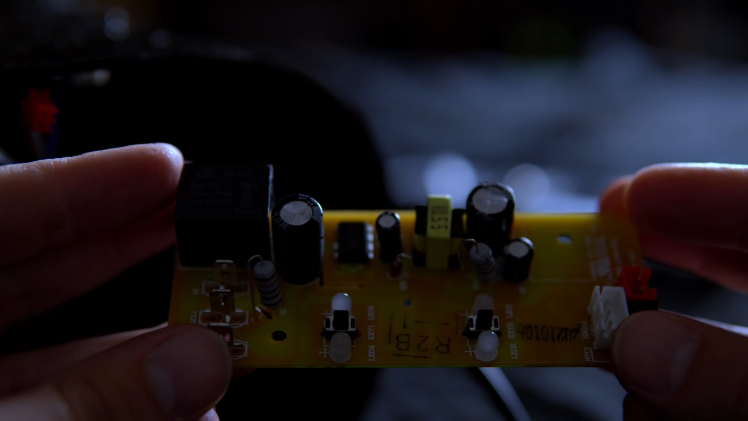
The only thing that may differ is hacking the coffee maker portion. If you use the same coffee maker as me you’ll have a heck of a time getting out the control board but once you do all you have to do is solder a wire to each side of the pushbutton switches and wire them to the relay module as seen in the diagram. If you chose a different coffee maker I would only recommend getting one that has a similar one button press functionality. Then bypass that button with a relay in the same fashion. Another thing that is not shown in the fritzing diagram is the aux cable. This connects the music maker shield to any speaker of your choosing.
Configure the Software

After assembling the panel, installing electronics, and wiring is done it’s a good time to start configuring the software. You’ll find both Arduino programs in the project files so go ahead and upload those to the Arduino Megas.
The Adafruit mp3 shield is what is responsible for playing audio but before any sound can be played you’ll need to include the audio files. The Adafruit mp3 shield has a micro sd card slot, this is where you will store all the files for this project. I could go step by step on this but it will be much easier for you to follow Adafruit's tutorial. You don’t have to do anything with the Arduino program. The only thing you will need to worry about is soldering the pins, creating/finding audio files, and how to name them properly. Specifically every track must be labeled like “track001” up to “track999”. You can read up on that here: https://learn.adafruit.com/adafruit-music-maker-shield-vs1053-mp3-wav-wave-ogg-vorbis-player
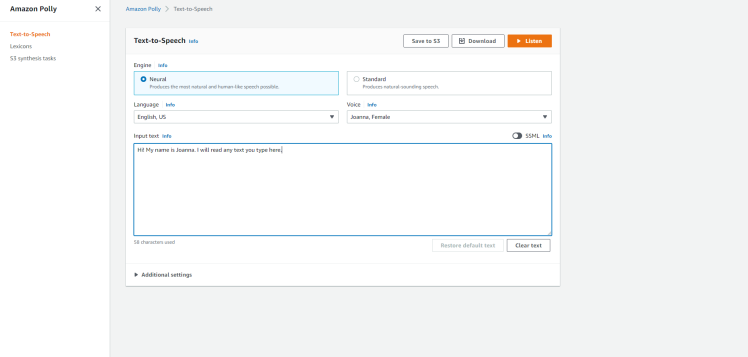
I generated all of Prisma’s speech/voice files using Amazon’s Polly text to speech software. Once you sign up, it's a free service and it works simply by typing in the text you want, selecting a voice, and downloading the mp3 file. https://aws.amazon.com/polly/
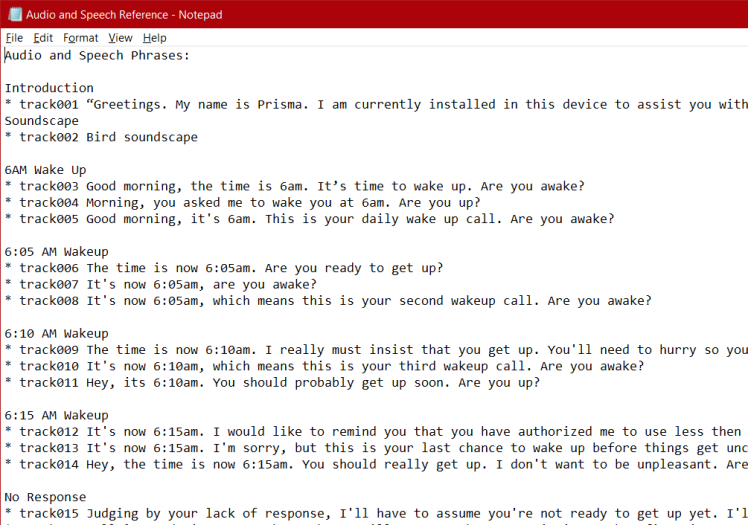
Here’s where you will have to do some work. This project contains 63 audio tracks. I have included a list of what each file said or did in my original project. For example “track001” says “Greetings, my name is Prisma. I am currently…” and so on. Using this list you can generate your own audio files to say whatever you like and if you stick to the track reference it will play at the right time and instance within the program. I did not include the audio files in the project because I think the voice assistant and audio aspect is largely what makes this so unique so for anyone who wishes to make their own it provides an opportunity to express your own creativity.
Next, you’ll need to set up the SpeakupClick board. This is what is responsible for understanding what you say and communicating that to the Arduino program. You can find the manual and software under the downloads tab at this link https://www.mikroe.com/speakup-click
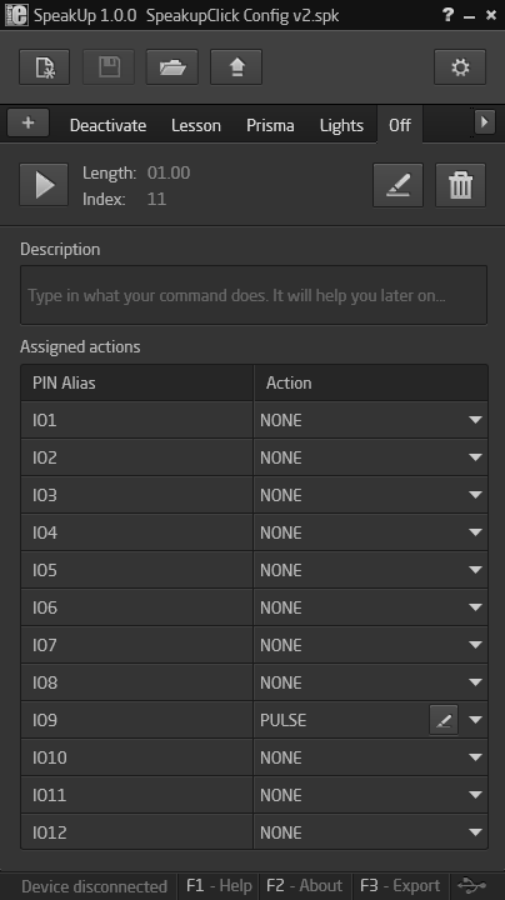
I have included the configuration file in the main project file so all you will have to do is open it in the software and record your own voice saying the commands. Begin by plugging the microphone into the audio jack and then plug the board into a pc. Open the software and then open the configuration file. Each command such as “Yes” is a tab near the top and they are labeled with their intended function. To edit each command with your own voice simply click the edit button and then record yourself saying the command. Work your way through each tab and then hit the arrow at the top to upload it to the board. You may need to tweak some of the settings to get the best results in your noise environment so refer to the manual if you have issues with this part.
Mount the Neopixel RGBW LED Strips
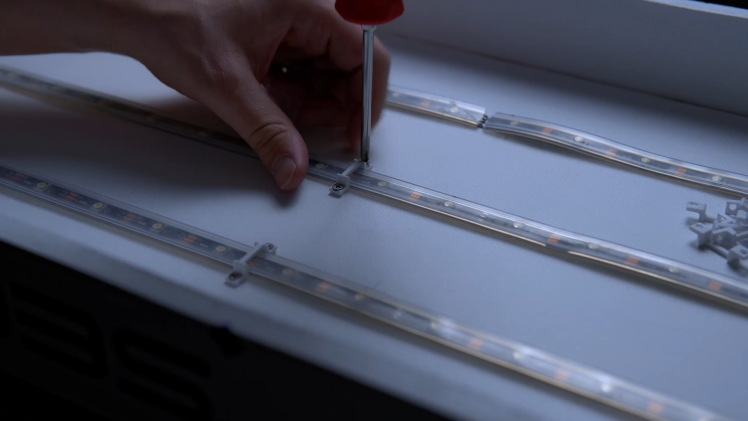
At this point you should have a frame, a working circuit, curved panels, and updated audio files. Next up is installing the LED strips inside the frame. I used three strips to get as much light output and uniformity as possible. To attach these strips to the ceiling of the frame I designed a very tiny 3D printed clip that uses two 1/4inch long screws to hold it in place. I spaced these between LED sections at approximately 12 to 16 inch intervals to hold the strips in place. Once they are all set, wire them to the rest of the circuit. Reference the wiring diagram if needed. At this point we are done messing with the electronics so now is a good time to mount the curved panels. Use the same ¼ inch screws to fasten them to the outer frame.
Let's Check to Make Sure it All Works
Time for a test. At this point in the build everything is connected and programmed so you should give it a test before buttoning everything up. Power it on and wait for the startup sound effect and light animation. Check out the YouTube video if you need to hear and see what that's supposed to look like.
When Prisma is done talking, try out some of the voice commands. Test out the coffee maker by saying “Prisma” and then “Coffee”. Does everything work? If you answered yes, like wow, really? With a project this complex that never happens on the first try. If you answered no, don't worry, refer to the troubleshooting guide. It has the most common or possible issues you might run into based on my own troubleshooting experience. And if your still stuck let me know and I can help you resolve issues.
Build and Install Diffusion Screen

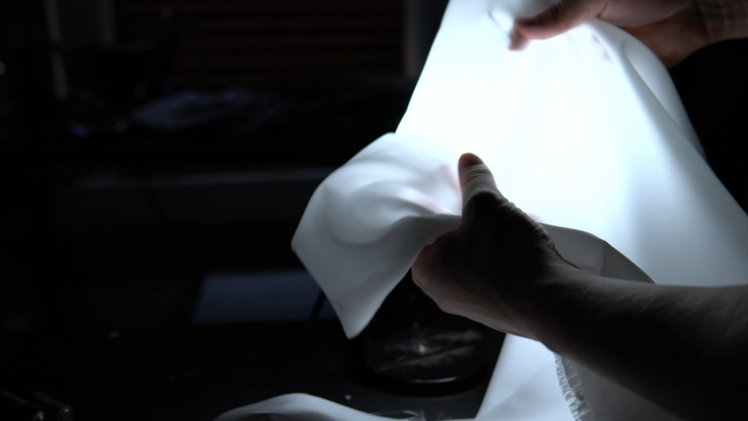
After everything is verified in full working order, it's time for the diffusion screen. This is a 3D printed hexagon screen with a nylon diffusion fabric backing. Its purpose is to evenly distribute the light from the LED’s. It reduces the harshness of the LED light and blends it to make it much more appealing to look at. To make the hexagon or honeycomb screen I designed another 3D part. This part is a single piece of a pattern that when multiplied and fused end to end creates this giant screen.
Use the same filament welding process as before. After that is all assembled you can cut the nylon fabric to match the dimensions of the screen. I used four layers of this fabric to get it diffused to my liking. Each layer was then hot glued together and glued then to the frame. There are small slots in the back of the printed screen for this purpose. Make sure to try and keep everything taught while gluing to avoid ripples or wrinkles in the fabric. Next, using the same ¼ inch screws the screen can then be mounted to the frame.
How to Operate
That’s it for assembly and programming. You should now have a fully functional voice assisted immersive sun simulator with a semi-automated coffee maker. Plug in the power cord, fill up the coffee maker, hookup a speaker and your in business. Now how do you actually operate it? Keep reading to get a better understanding of how it all works and how to use it.
Let’s begin with the startup sequence. To add a layer of uniqueness to the project I included a bootup sequence that is as cool as it is functional. After the startup sound effect, PRISMA initiates the headboard by animating all LEDS in order which lets you check for failed LEDs. After that PRISMA introduces herself and explains how everything works. This way you get verbal instructions on how to use it. Charming and utilitarian also.
The wakeup time is set using the keypad. You can switch between screens to either enter the wakeup time, see the saved set time, or see what time it currently is. Pressing "A" brings you to the main screen which displays the current time. Pressing "B" shows you the current saved wakeup start time. Pressing "C" allows you to set the wakeup time (set this to half an hour before you actually want to wake up). After entering the time press "B" or "A" to save.
- The next morning, 30 minutes prior to the desired wakeup time the sun animation begins to illuminate the loop and progress across the arc. Sound also starts to play through the speakers which slowly rises over time. The system is currently running a recording of a rainforest sunrise but it can be whatever audio file you choose. After the 30 minute wake up the sun reaches its zenith or top center of the loop and the "sky" turns blue around the sun.
- Then Prisma announces the time and asks if your awake because right now she has no sensor input to see or determine that you are.
- You can say no and she will wait 5 minutes before trying again.
- Or you can say nothing which means your probably still asleep and unresponsive and after 30 seconds she will assume you are still sleeping and try again five minutes later.
- This snoozing function can happen three times with increasingly urgent messages from Prisma to wake up
- The fourth snooze plays a loud but awesome soundtrack that will loop until you say that yes I’m up. Although the system is meant to slowly awaken the user there must still be a failsafe to ensure that you do wake up.
- You can say yes anytime she ask if you are up and then she will ask if you'd like coffee now that your awake.
- If you say yes to wanting coffee, she will start the coffee machine. She also knows if there is a mug or not and will tell you if there isn’t. This prevents an accidental dispense in case you forgot to leave one there the night before.
- If you say no to wanting coffee she will just say something encouraging for the day.
- After that, Prisma is on standby until the next morning to wake you up at the same saved set time or another if you change it.
That's a summary of Prisma's main function but she can still do a few things at any time day or night. She can make a coffee anytime she is asked, tell a story, disable or enable the morning alarms, and turn on the headboard lights. You can ask for any of these things by saying "Prisma" followed by the proper commands such as "Coffee" to start the coffee maker.
That's It, Don't Forget the Documentation
I am linking the documentation at the end of this section since I am not able to upload all files necessary to the online platform. This includes the frame drawing with dimensions, all 3D printable .stl files, parts list with links, fritzing diagram, SpeakUp board config file, Arduino programs, speech file reference, and troubleshooting reference. If an issue pops up that isn't covered in the reference let me know and I'll add it. I hope this cool piece of sci fi tech brings joy to your morning routine and I look forward to seeing what kind of voice assistants you all create. Good luck and feel free to reach out with questions.
Click here to download: Documentation
Schematics, diagrams and documents
Code
Credits
Related products


Leave your feedback...