Arduino Nano And Visuino: Infrared Remote Control Receiver
About the project
Connect Infrared Remote Receiver Sensor to Arduino and decode IR Remote commands - Quick and Easy!
Project info
Difficulty: Easy
Estimated time: 1 hour
License: GNU General Public License, version 3 or later (GPL3+)
Items used in this project
Software apps and online services
Story
I have been planning to add Infrared Remote support to Visuino for over a year, but always other sensors or features took priority. Finally couple of weeks ago I received a great Robot KIT from Elegoo, and since the kit came with Infrared Remote and Infrared Receiver Sensor included, I could not resist, but try programming it with Visuino. I added the necessary components, and started playing with the robot. I will be making Tutorials on the robot including Infrared control ones. Here I decided to show you first the basics of the Infrared Receiver support in Visuino.
In this Tutorial I will show you how easy it is to connect Infrared Receiver Module to Arduino Nano and program it with Visuino to decode the commands.
Step 1: Components
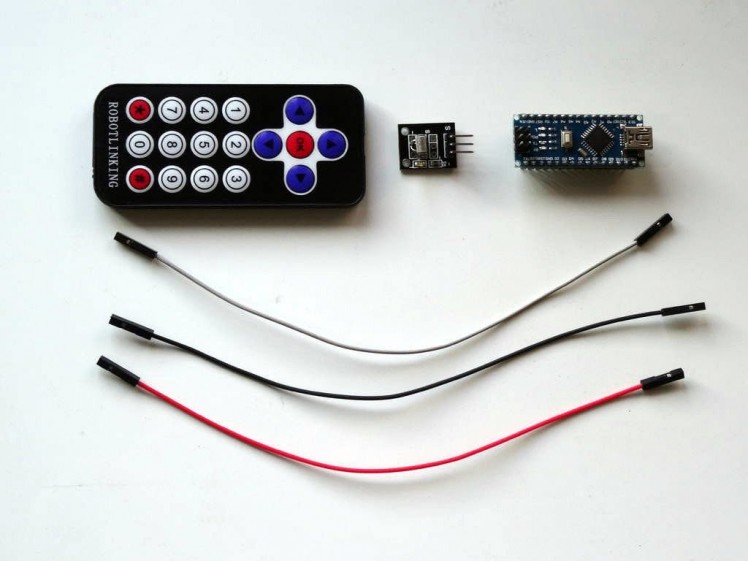
- One Arduino compatible board (I use Arduino Nano, because I have one, but any other will be just fine )
- One Infrared Remote - I got my one form an Arduino Robot KIT donated by Elegoo but you can use very much any remote from a TV, VCR, DVD/CD Player or anything else. My one uses NEC protocol but the project should work with other protocols as well. 3 Female-Female jumper wires
- One Digital Infrared Receiver Module I got from this cheap 37 sensors set.
1 / 4 • Picture 1
Picture 1

Picture 2
Picture 3
Picture 4
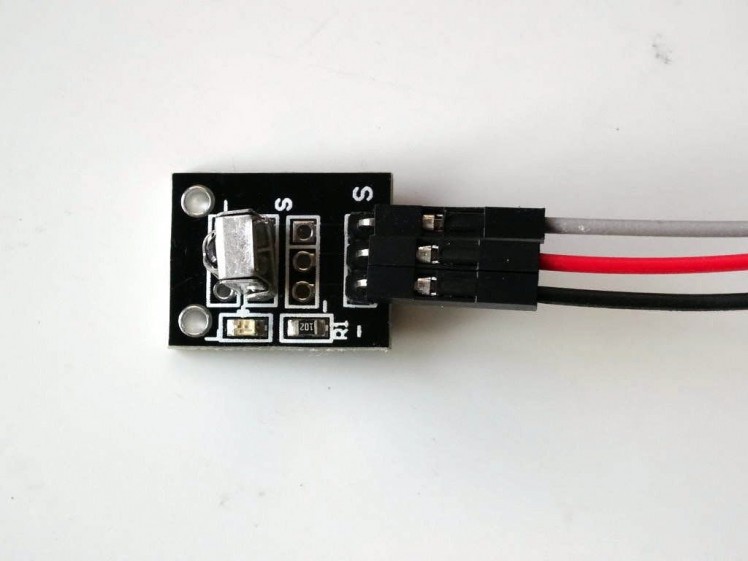
- Connect Ground(Black wire), Power(Red wire), and Data(Gray wire) to the Infrared Receiver Sensor Module (Picture 1)
- Connect the other end of the Power wire(Red wire) to the 5V power pin of the Arduino board (Picture 2)
- Connect the other end of the Ground wire(Black wire) to Ground pin of the Arduino board (Picture 2)
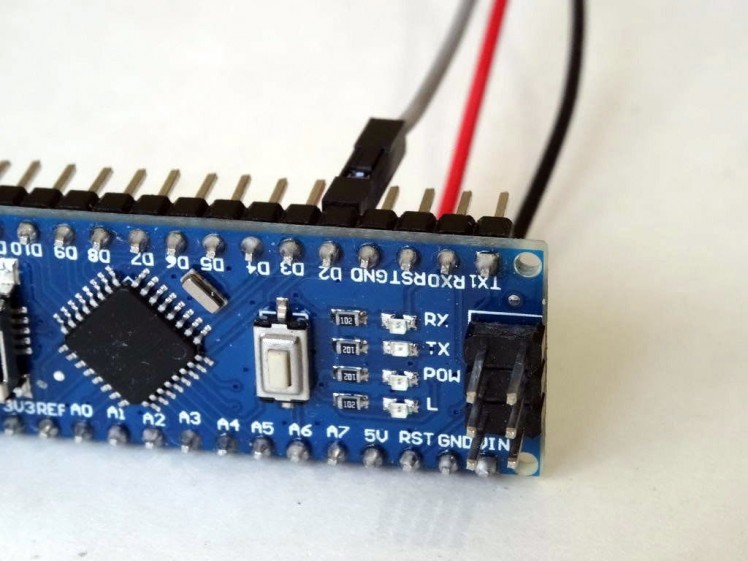
- Connect the other end of the Data wire(Gray wire) to Digital pin 2 of the Arduino board (Picture 3)
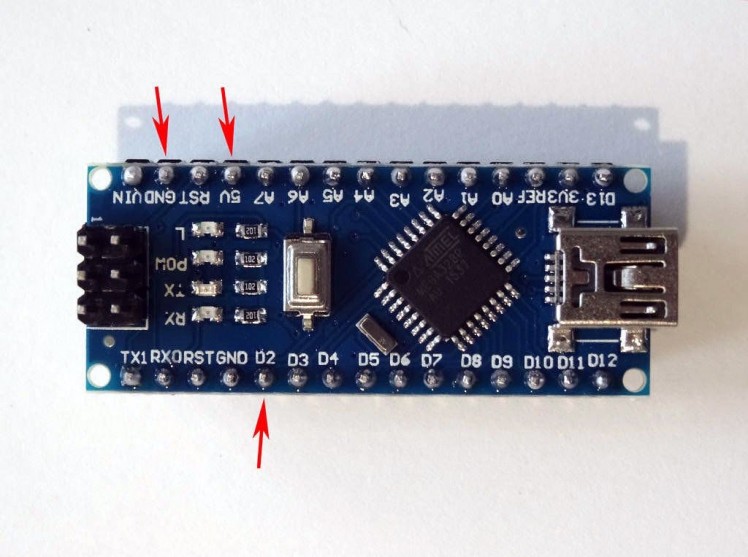
- Picture 4 shows where are the Ground, 5V Power, and Digital 2 pins of the Arduino Nano.
1 / 2 • Picture 1

Picture 1
Picture 2
To start programming the Arduino, you will need to have the Arduino IDE installed from here: http://www.arduino.cc/.
Make sure that you install 1.6.7 or higher, otherwise this Tutorial will not work!
The Visuino: https://www.visuino.com also needs to be installed.
- Start Visuino as shown in the first picture
- Click on the "Tools" button on the Arduino component (Picture 1) in Visuino
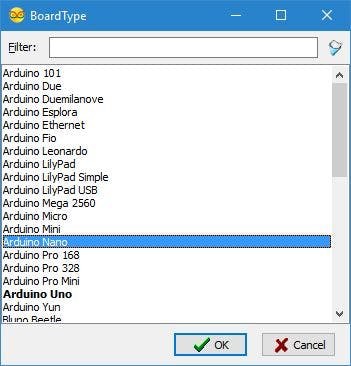
- When the dialog appears, select "Arduino Nano" as shown in Picture 2
1 / 3 • Picture 1
Picture 1
Picture 2
Picture 3
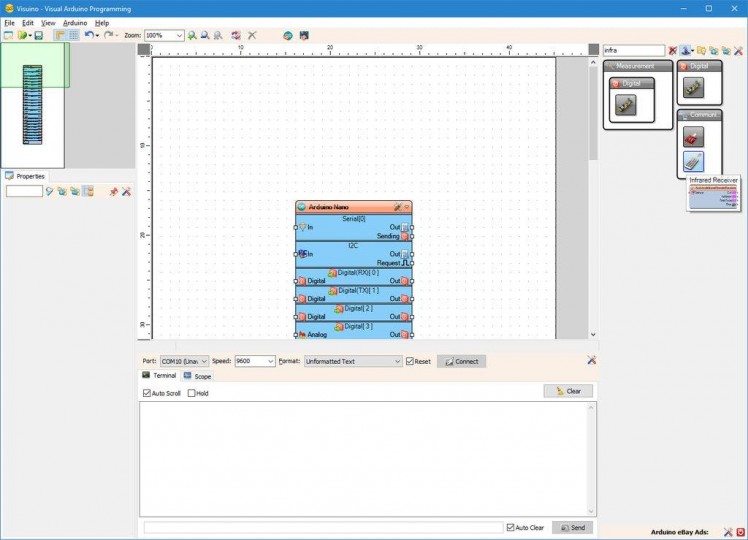
- Type "infra" in the Filter box of the Component Toolbox then select the "Infrared Receiver" component (Picture 1), and drop it in the design area
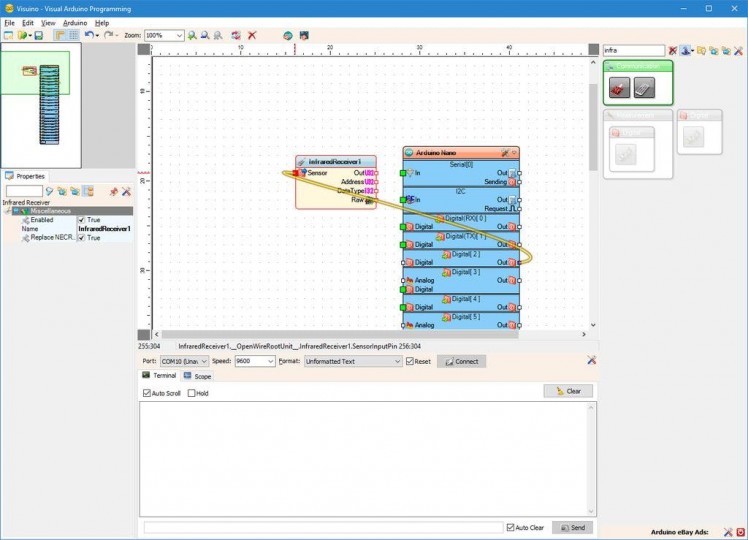
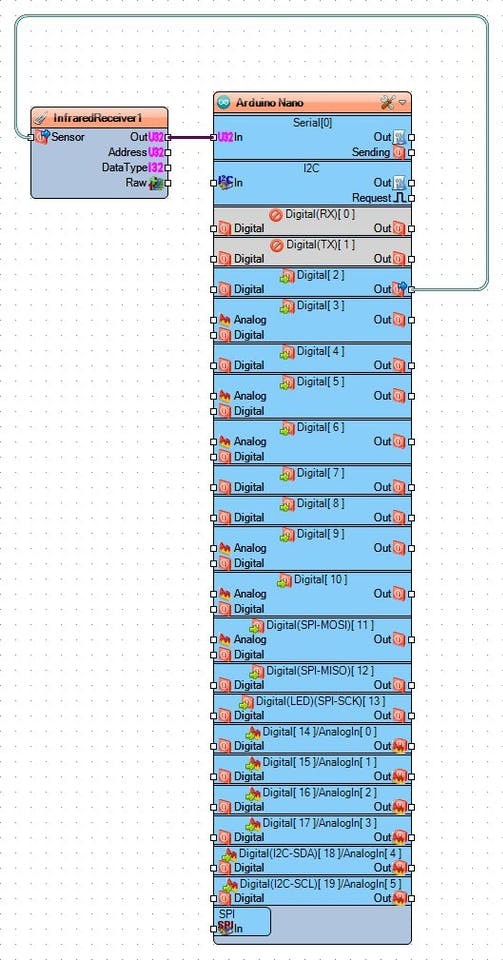
- Connect the "Out" output pin of the "Digital[ 2 ]" channel of the Arduino component to the "Sensor" input pin of the InfraredReceiver1 component (Picture 2)
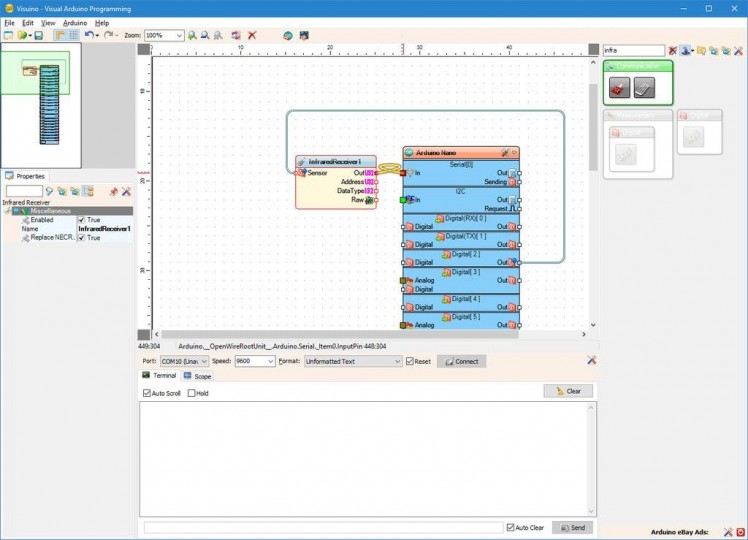
- Connect the "Out" output pin of the InfraredReceiver1 component to the "In" input pin of the "Serial[ 0 ]" channel of the Arduino component (Picture 3)
1 / 2 • Picture 1
Picture 1
Picture 2
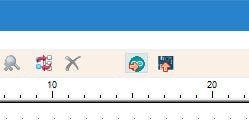
- In Visuino, Press F9 or click on the button shown on Picture 1 to generate the Arduino code, and open the Arduino IDE
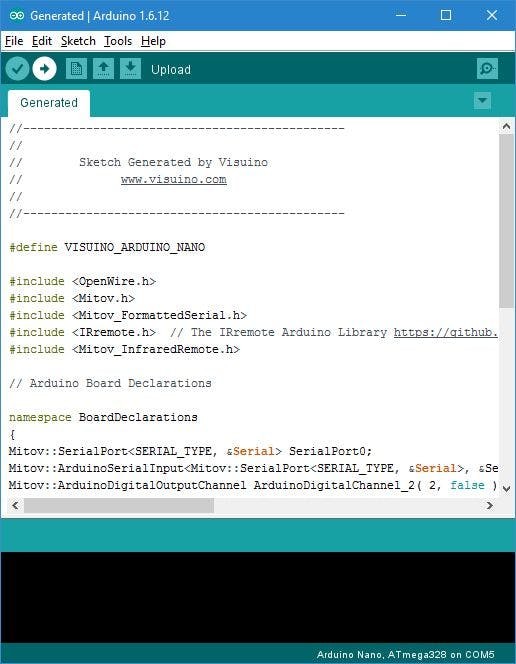
- In the Arduino IDE, click on the Upload button, to compile and upload the code (Picture 2)
If you get compiler error in the Arduino IDE, this means that you are missing the following library: https://github.com/z3t0/Arduino-IRremote
Look at the Next Step to see how to install it!
Step 6: If not installed: Install the Arduino-IRremote library
1 / 4 • Picture 1

Picture 1
Picture 2
Picture 3
Picture 4
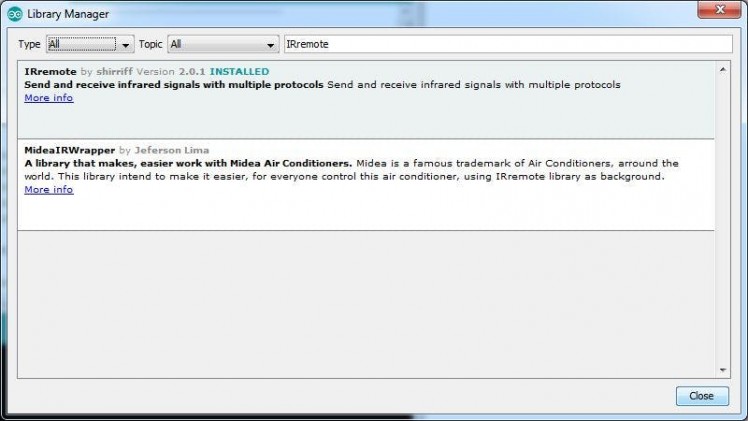
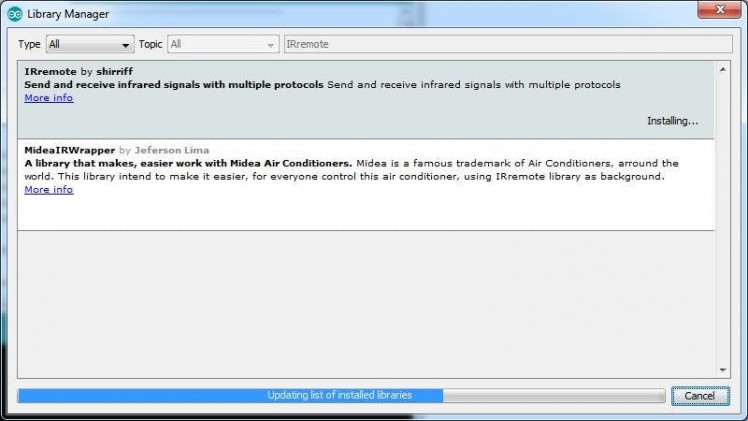
If you don't have the IRremote library already installed, follow these steps:
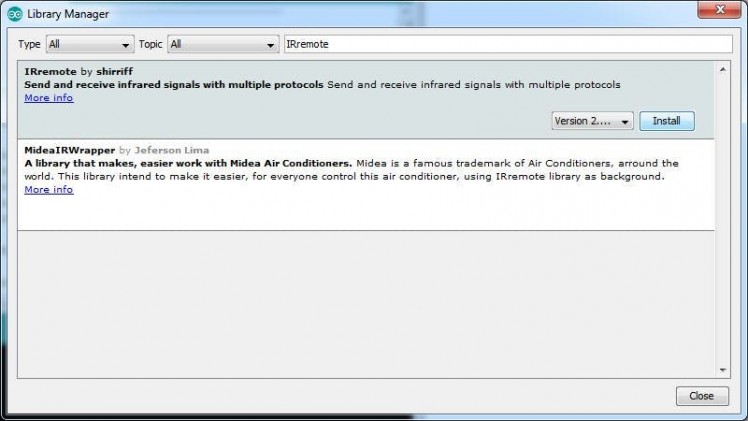
In the Arduino IDE menu, select |Sketch|Include Library|Manage Libraries...| (Picture 1) Type "IRemote" in the filter box (Picture 2) Select the IRemote by shirriff library, and click the Install button (Picture 2) The dialog will show the progress of the install (Picture 3)Click on the Close button (Picture 4) In the Arduino IDE, click on the Upload button, to compile and upload the code.
Step 7: And play...
1 / 4 • Picture 1
Picture 1
Picture 2
Picture 3
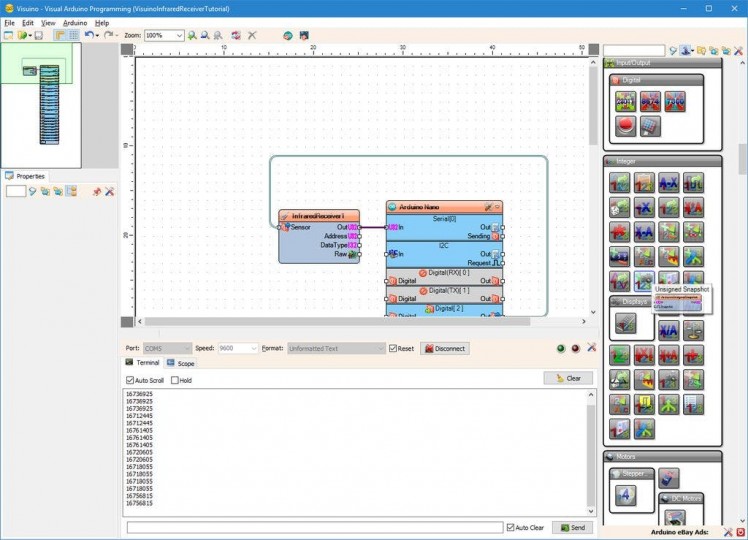
Picture 4
On Picture 1 you can see the complete Visuino diagram.
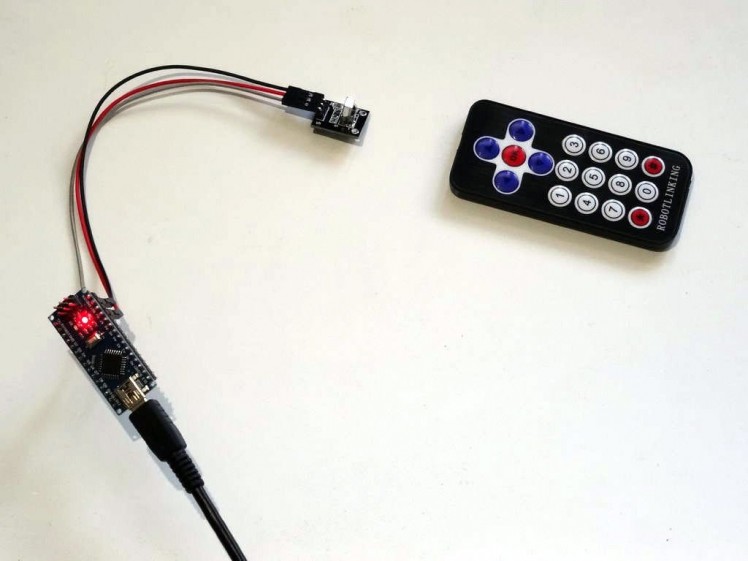
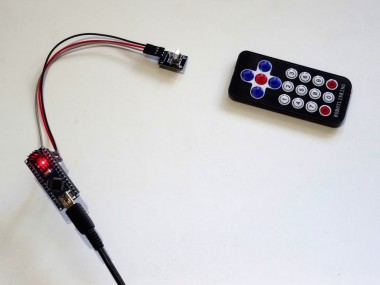
On Picture 2, and in the Video, you can see the completed and running project.
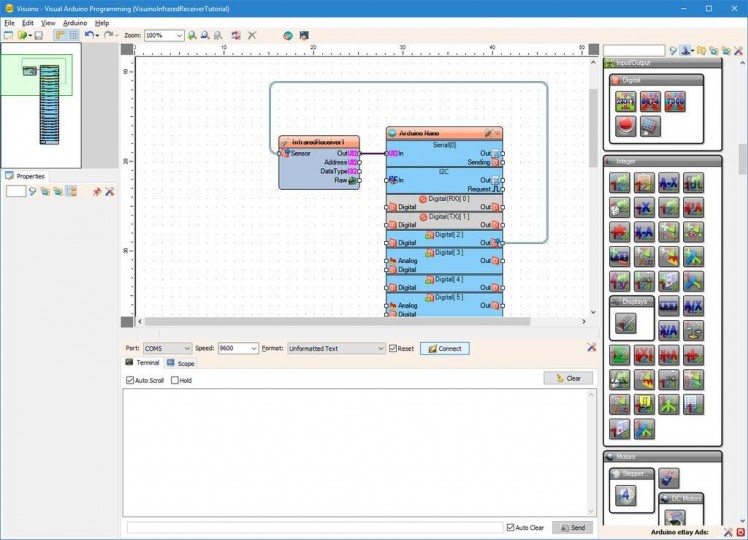
- In Visuino select the Serial Port and click the Connect button (Picture 3)
- If you point the infrared remote to the sensor and press some buttons, in the Serial Terminal you will see the decoded button codes received by the sensor (Picture 3)
Congratulations! You have learned how to connect Infrared Remote Receiver to Arduino, and how to program it with Visuino.
Also attached is the Visuino project, that I created for this Tutorial. You can download and open it in Visuino: https://www.visuino.com




Leave your feedback...