
A (not So) Electric Bike

Made by collin-wentzien / 3D Printing / Bikes / Displays / Lights / Vehicles
About the project
A system that gives my bike front and tail lights, a turn signal, and a speedometer, all in a clean and simple design.
Project info
Difficulty: Moderate
Estimated time: 1 week
License: GNU General Public License, version 3 or later (GPL3+)
Items used in this project
Hardware components

View all
Hand tools and fabrication machines
Story
Hello! My name is Collin Wentzien, and I am a 15 year old maker and electronics enthusiast. For these past few weeks, I’ve focused my attention away from video games and towards a project which I call the smart bike. I’m going to give you all a quick overview on how it works, and then I’ll talk about why I made it, how I made it, and then show you some footage of using it in the real world. Let’s hop into it.
Now, real quick, I just want to get something out of the way. This is not an electric bike. It has no motor and does not speed up my biking in any shape or form.
Here is a quick video describing the functions of the system.
Alright, now that you see what my project is about, I’m going to briefly talk about why I made it. Aside from building things and doing schoolwork, I also partake in cross country and soccer. However due to a recent injury, I’ve been unable to do either for the past seven weeks. My only form of exercise at this point is biking, and while biking, which I now do nearly every day, I often struggle to communicate with drivers. I mean, think about it: a car has ways to communicate, as you have front and back lights, turn signals, and a horn. On a bike however, you only have two things: your voice and your hands. It’s quite difficult to talk to drivers, especially if their window is rolled up, and hand gestures can often come across as rude. And that’s my problem. I just can’t seem to be able to communicate with drivers.
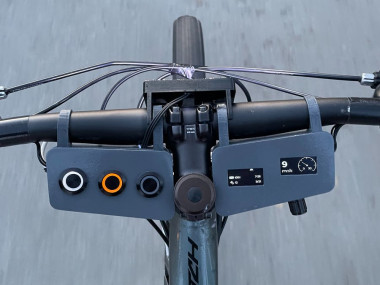
That’s where the smart bike system comes into play. It features a front light for night time biking, a brake light to alert drivers when you are slowing down or stopping, a turn signal, and a small piezo buzzer to notify nearby pedestrians of your presence. In addition to all that, the bike system also includes a GPS, letting me get time, date, and most importantly, my speed. And I was able to do all of this, for under $120.
Now, to building it. A list of all the parts is available at the top of the page. To power the smart bike system, I chose to use an Arduino MEGA Pro. There were a few reasons behind this approach, the main two being that I needed a decent amount of digital pins, and that my sketch size was almost double the capacity of an Arduino Nano, my original board. To drive the user interface, I used two 1.4 inch displays. I’ve used these little things more times than I can count, and I absolutely love them. To make the lights, I used some RGB addressable LEDs. Not only are they plenty bright for my application, but the fact that they’re multi-colored and addressable means that I can minimize the amount of wires needed. To detect my speed, I went with the NEO6M GPS module. This module works wonderfully with the TinyGPS++ library, which I ended up using in my code. Finally, for the power, lights, and horn buttons, my perfectionism opted into buying three stainless steel, LED-lit buttons. They were a bit pricey, but boy do they look nice. There’s a few other components I used, such as a piezo buzzer for the pedestrian horn, two endstop switches for the brake and alternate horn button, and an on-off-on toggle switch.
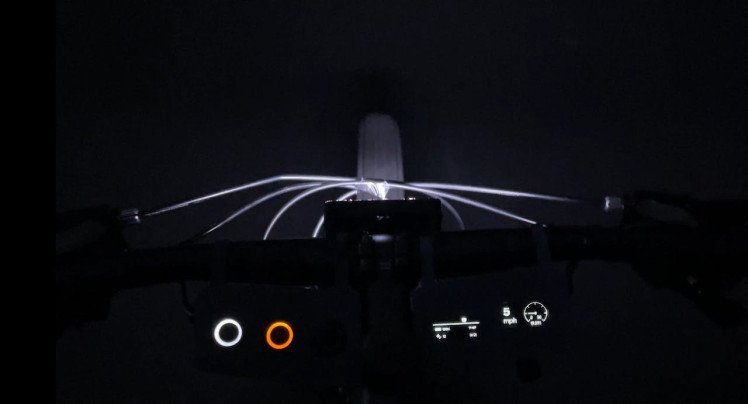
Here's an image of me using it at night, with the front light illuminated. It's a lot brighter in person!
And that's practically it! I'm finally going to go over a few improvements I would make next time, and clear up some questions anyone might've had.
For one, there is a reason why I put two horn switches on the bike system. The stainless steel switch on the main housing was originally intended to power a louder horn that cars could hear, while the switch on the handlebars of the bike would control the small piezo buzzer. That way, I could communicate with both cars and people, without scaring people or being too inaudible for cars. However, the horn I picked out drew too much power, and just wouldn’t work with a 9v battery. I would have probably been able to get it to work, but I already had other larger problems to deal with.
Another question you might ask is, “Why not use a motor or a hall effect sensor to detect the amount of times the wheel rotates for speed instead of using a GPS?” The answer is simple. I wanted to keep as many things on the handlebars of the bike as possible. That way, if I needed to remove the system for any reason, it would be a lot easier than removing multiple things from ten different parts of the bike. Another reason, mainly for the motor idea, would be the noise generated. Plus I wouldn’t want anyone thinking that my bike is an electric bike (if they don’t think that already).
With that all being said, there are definitely improvements I would like to make. I would probably replace the two small screens with a larger one, or just make the entire system a touchscreen. There are also other minor details that I would change, such as the color of the paint or the way the system attaches to the handlebars.
Another interesting change would be to make the system itself a bit safer. As of now, anyone can turn on the system and use it, so it would be interesting to try out different methods of unlocking the system, like a key or even an NFC card. That way, I could incorporate a garage door remote or something similar without the worry that someone could use it without authorized access.
However, there’s always room for improvement, and especially for the time being, I’m happy with my current design.
That about wraps it up! A smart bike system that converts my boring mountain bike into almost a car, except without an engine. And while this project definitely wasn’t necessary or easy, it was still very practical and fun to make. Plus, as Mark Rober puts it well, “if something isn’t exactly the way you want it… you just make it exactly the way you want it.”
LinksYouTube - www.youtube.com/c/CollinWentzien
Instagram - @collin.wentzien
Schematics, diagrams and documents
CAD, enclosures and custom parts
Code
Credits
Related products


Leave your feedback...