
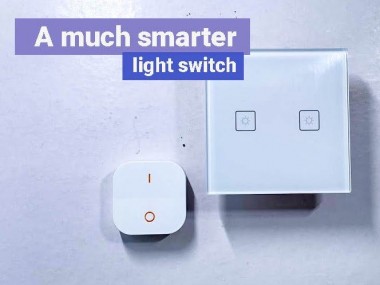
A Much Smarter Light Switch

Made by NotEnoughTech / Home Automation / Lights / IoT
About the project
What if you could do much more than just toggle your lights with this switch. N+1 principle in action!
Project info
Difficulty: Moderate
Platforms: Everything ESP, Raspberry Pi
Estimated time: 2 hours
License: Creative Commons Attribution CC BY version 4.0 or later (CC BY 4+)
Items used in this project

Story
I decided to change the light switch in my bedroom. It’s a single gang, traditional flip switch, wired to the UK standards. You are probably right expecting a plot twist in this project, as replacing this switch with a one gang smart equivalent wouldn’t be interesting enough. After a week of testing, I’m ready to share why you should consider the famous n+1 formula for calculating the gangs in your room.
More is not always better unless you have a plan

The burning question is: why n+1? Why bother with extra gangs? The answer is as usual, complicated but can boil down to: “because I can” and that the home automation suppose to be tailored and personal. Plus the extra gang usually cost you $2-3.
Armed with “everything you should know about smart light switches” and a Zemismart WiFi smart light switch (no neutral, touch, 2 gangs) I proceed to reimagine the bedroom lighting system. I’m not going to stop on adding voice controls, I want to add something fancier.
After all, my bedroom is home to the cinema system build around Xiaomi DLP projector (review) linked with Röth&Meyer amp (review) and smart motorised curtains from Zemismart (review) already.
The master (bedroom) plan
I’m already running NodeRED server with Zigbee2MQTT integration, which opens my door to IKEA range. The smart light switch doesn’t support dimming, but I have other plans for that. Here are the options I came up with.
- 1st gang – control main lights
- 2nd gang – control bedside lamp
- Automatic Cinema Mode – when the projector is in use
- Close curtains – when the projector is in use (pending)
- IKEA Dimmer – control main & bedside light
- IKEA Dimmer – override cinema mode
- IKEA Dimmer – timed switch off
- Alexa, Google Assistant integration
That’s more bullet points that I initially imagined, but there is plenty you can do with smart light switches… as long as you are willing to hack it! There are plenty of switches out there and most of them will be either WiFi or Zigbee based. I have these:
- 1-3 Gang Zigbee Click N SmartThings
- 1-3 Gang Zigbee Click LN Alexa/Google
- 1-3 Gang WiFi Touch N Alexa/Google
- 1-3 Gang Zigbee Touch no wires Alexa/Google
- 1-3 Gang Zigbee Touch N Alexa/Google
Hackmaster 3000
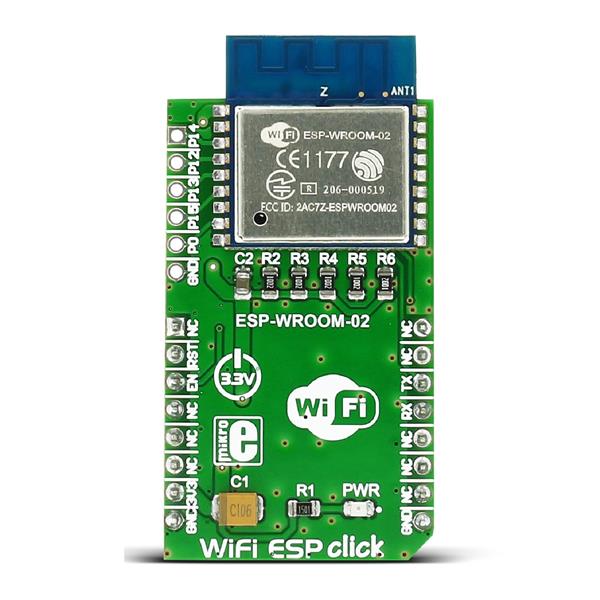
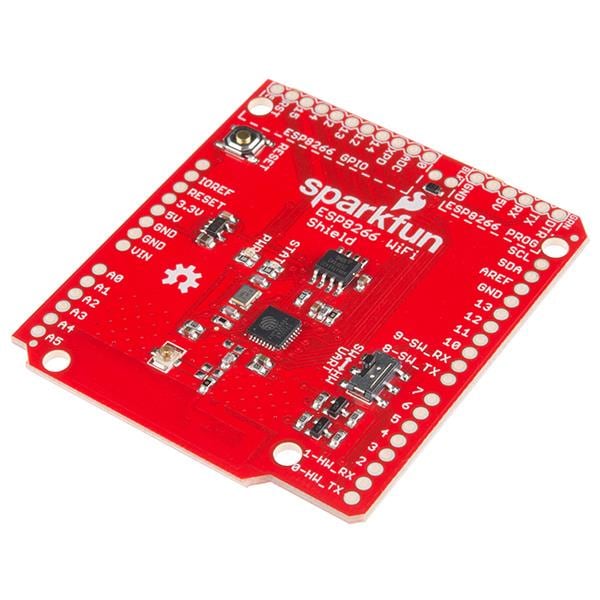
That’s the catch. The WiFi light switch has to be hacked to play nice with NodeRED. Thankfully, the smart toggle is ESP8266 based and thanks to Tasmotizer, hacking this baby is as easy as identifying the pins on the chip, and carefully connecting wires with your excellent soldering skills.
Don’t panic, which this guide and reasonably small soldering iron (take a look at this MiniDSO TS80 –review) you will get it done in 30 min! If this is your 1st time, you will learn something as you go along too!
This is the complicated part, except it's not

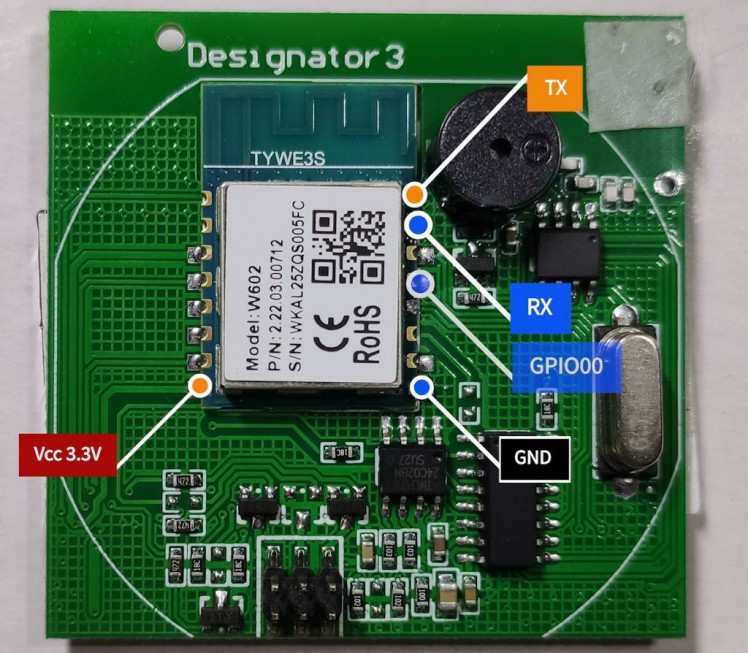
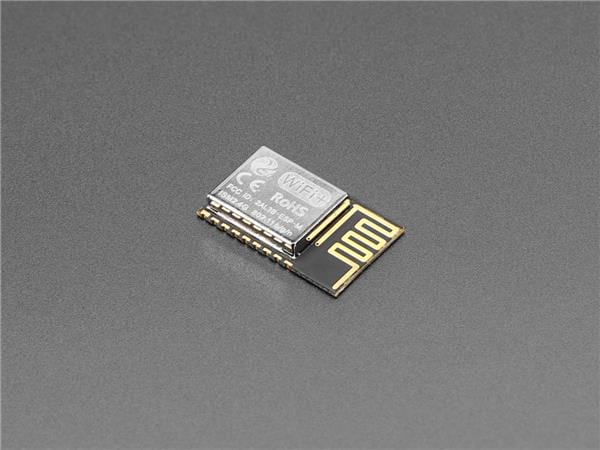
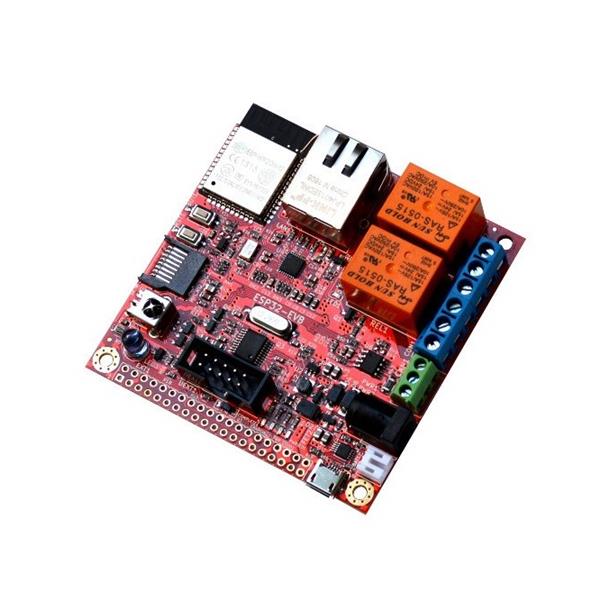
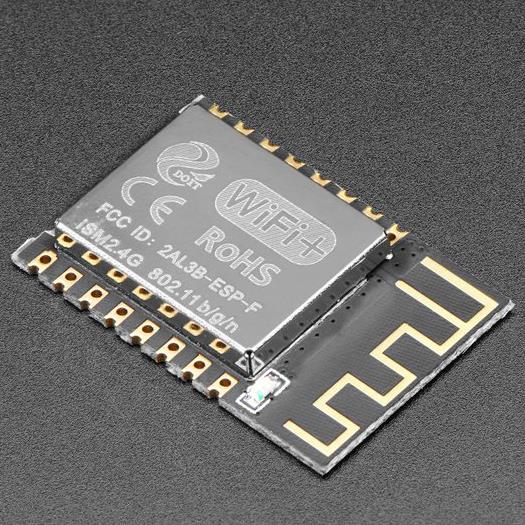
Accessing the switch is easy, as the plate meant to be open. pull out the control board and marvel at the design for a moment, until you locate the ESP in question. If you have a similar, but not an exact light switch, identify the ESP model number and look up the datasheet to identify all pins we are going to use (GPIO00, RX, TX, Vcc, GND). Map other GPIOs too as you will need it later on.
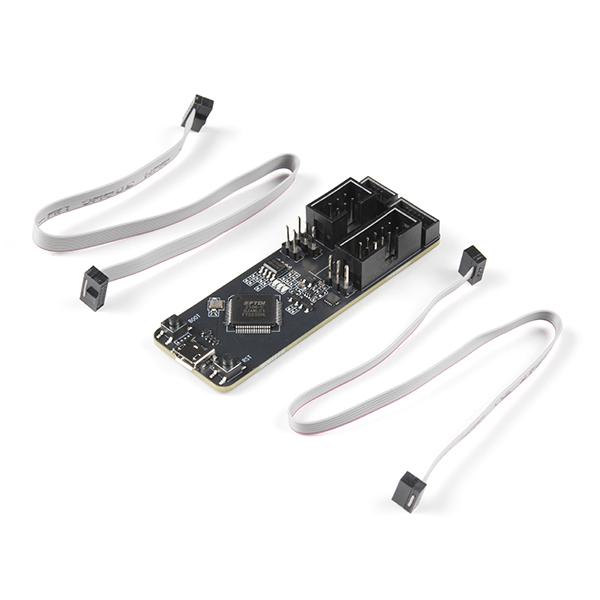
FTD1232    Light Switch
Vcc 3.3V   Vcc
GND        GND
RX         TX
TX         RX
GND        GPIO00
I looked up the ESP8266 (TYWE3S or ESP W602) that is soldered to my Designator 3 (3000 sounds better) board and marked the pins in use. I will be hunting for these later.
Careful, the right side shows the pinout from the bottom side

Careful, the right side shows the pinout from the bottom side
Carefully solder dupont cables to the pins required. Make sure the cables do not touch the metal shielding, as this would cause a short. Once you are happy, use Tasmotizer and this guide to backup (important), erase and flash new tasmota-light.bin (there is no need for sensors).
Pin Hunter
This is where you get to play a detective. I have asked you to note all connected pins with traces. These will operate the relays, keep the LEDs on and let you use buttons. Unless you have the exact version of the WiFi switch as mine, your pinout may vary.
There are no shortcuts here. You have to test each pin and see what it does. Each GPIO can perform one of 3 functions: relay, button, LED. Select “generic” option in Tasmota configuration and try setting your GPIOs to these functions. Take notes, so you don’t go in circles.
GPIO      Function (comp #)
GPIO04    Relay 2 (22)
GPIO12    Button 1 (17)
GPIO13    Relay 1 (21)
GPIO14    Button 2 (18)
GPIO16    LED1i (56)
In Tasmota, you can apply reverted settings as well, so feel free to experiment with your component assignment. You can start with my template and modify to your needs:
{"NAME":"Generic","GPIO":[0,0,0,0,22,0,0,0,17,21,18,0,56],"FLAG":0,"BASE":18}Wonderwall
IMPORTANT! You are playing with HIGH VOLTAGE, take extra care, in doubt consult professional
Take a look at this post to get yourself familiar with wiring standards. My WiFi light switch needs a capacitor across the bulb to work. I powered down the light circuit for safe installation and wired the switch inside the wall. Before connecting, identify the L wire in your wall (if you are using no Neutral version) and secure the terminals.
Flux Capacitor required :)
")
Flux Capacitor required :)
Turn on the power supply. If everything is configured, you should be able to toggle the lights from the switch. It’s time to open up NodeRED and add special features.
NodeRED magic!
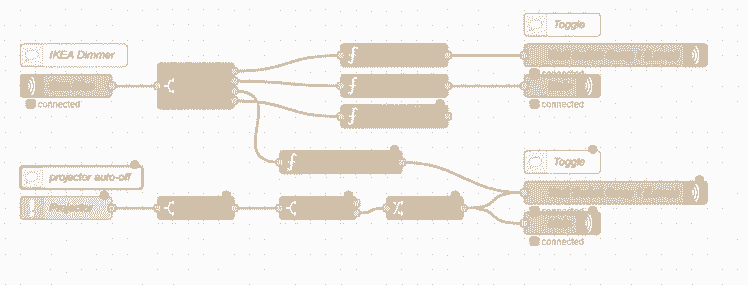
Time to make the whole system special. Feel free to pick the features you want, discard the ones that you find useless and add yours that will make your master bedroom shine (oh that pun!). I will walk you through the features I added to the project.
- 2nd gang– control bedside lamp
- IKEA DimmerControl– control main & bedside light
- Lights Auto-off– when the projector is in use
- IKEA DimmerOverride– override auto-off for the lamp (long press 1)
- IKEA DimmerTimer– timed switch off (long press 0)
- Alexa, Google Assistant integration
- Close curtains – when the projector is in use (pending)
The spare gang sends updates to the MQTT server every time the status changes, so I can use this in NodeRED to control any NodeRED enabled device.
2nd Gang – bedside lamp
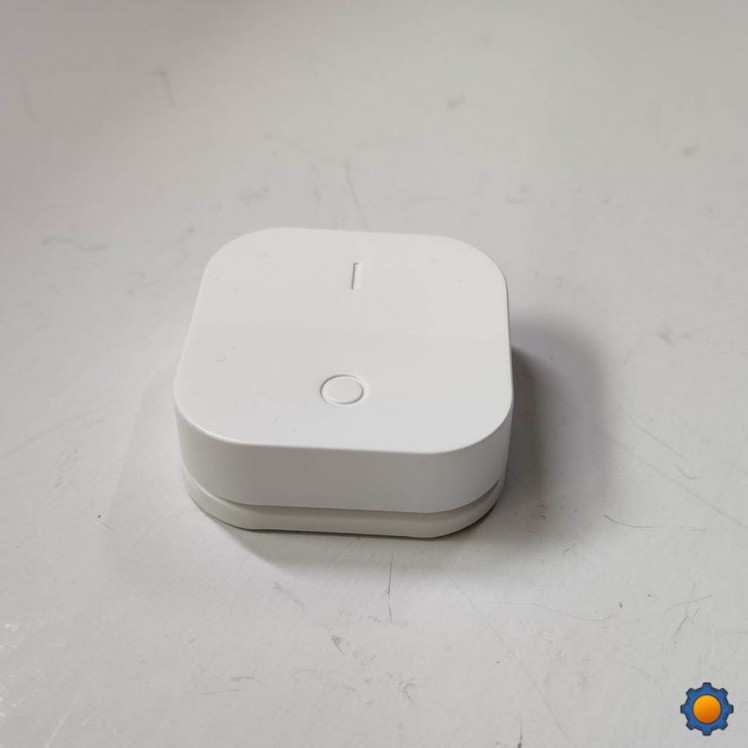
Inside the WiFi light switch, there is a 2nd relay which is useless. Thanks to Tasmota, the relay is reporting back to my MQTT broker. NodeRED uses this info to control a bedside lamp connected via smart socket.
The smart socket in question is the Koogeek Smart Socket (review). It’s one of my favourite smart sockets due to UK plug size. Most of the smart sockets simply take way too much space. This socket is also hackable and flashed with Tasmota – see the tutorial here. You can pick other smart sockets that can be hacked with Tasmota (Sonoff Smart Socket, Oittm Smart Socket) or pick another compatible NodeRED device.
Note, that I’m actually using updates from the smart light switch changes to control the smart socket. I don’t control the bedside lamp directly. This way smart light switch always displays correct lights.
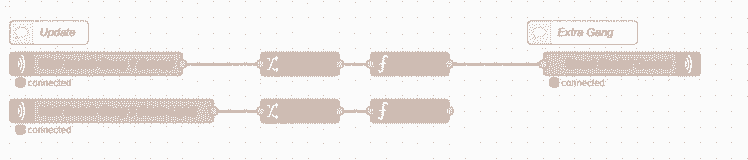
To make things uniform, I used a switch node to change the values to boolean and store it in flow variables There is one for each source of light.
IKEA Dimmer control
I have a whole article showing you how to use IKEA Trafri dimmer in NodeRED. Once connected you can map 4 actions of the dimmer to anything you want. In this section, I will create 2 toggles to turn the lights independently.
- on (1) – toggle lamp
- off (0) – toggle main
I already have the current status of the lights stored in the flow variables, I can use a simple function node script to check the status of the light and return the opposite value. I need to update the status change as well.
FUNCTION NODE: Lamp Toggle
var x = flow.get("bedroom_lamp");if(x === false){ msg.payload = true; flow.set("bedroom_lamp", true); flow.set("bedroom_lamp_override", true); return msg;}else{ msg.payload = false; flow.set("bedroom_lamp", false); flow.set("bedroom_lamp_override", true); return msg;}Instead of sending the payload to MQTT out directed at the lamp, I update the smart light switch instead and let the previous chapter handle the rest. In the same way, script the main lights.
FUNCTION NODE: Main Toggle
var x = flow.get("bedroom_main");if(x === false){ msg.payload = true; flow.set("bedroom_main", true); flow.set("bedroom_lamp_override", true); return msg;}else{ msg.payload = false; flow.set("bedroom_main", false); flow.set("bedroom_lamp_override", true); return msg;}Auto-off when Projector in use

Since I got the Xiaomi DLP projector (review), I get to enjoy a home cinema in bed. The films are best watched in the comfort of the bed, so I made automatic lights off profile to showcase my laziness!
I used a ping node (node-red-contrib-ping) to check if the projector is online. The moment it connects, I can send the signal to turn the lights off. I check the ping values every 7 sec, and if the value is an int>0 I send a msg.payload = false to both my light sources.
Without further modifications, this profile will turn the lights each time they are turned on, as long as the projector is connected. To remedy this, I created an override profile.
IKEA Dimmer override
A long press of the IKEA Tradfri button sends a brightness_up message. I use this to enable the bedside lamp, and stop the ping messages from turning the lights off.
This way, if I want to have the bedside lamp on while the projector is running, I can do that with a single press of the button. To suppress the messages coming from ping node – I have added a switch override which is controlled by the bedroom_lamp_override flow variable.
Timer
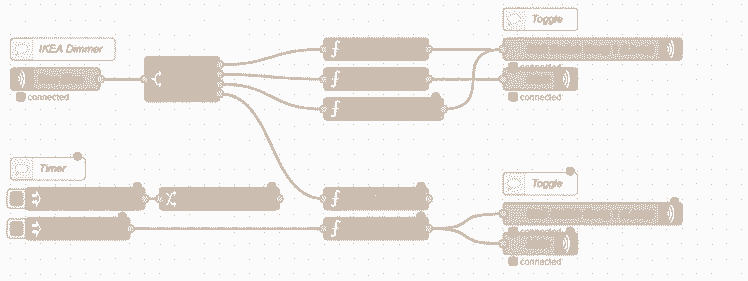
I have 4 actions that I can map, so the last action brightness_down is used to start a timer. You can specify the number of minutes after which lights in use will turn off.
Press and hold the 0 button to capture the time in ms and use the timeout value to set an alarm.
FUNCTION NODE: Lamp Timer
var seconds = Date.now();var timeout = flow.get("timeout");var timer = (timeout * 60000) + seconds;flow.set("timer_state", true);flow.set("timer", timer);return msg;Setting the alarm will change the value of the timer to time in seconds and the timer_state to true. These are monitored every minute by the inject node paired with a function node: watch timer.
FUNCTION NODE: Watch Timer
var timer = flow.get("timer_state");var now = msg.payload;if(timer === true){ if(now > timer){ msg.payload = false; flow.set("timer", 0); flow.set("timer_state", false); flow.set("bedroom_lamp_override", true); return msg; }}The timer triggers with the msg.payload = false, when the now > timer, triggering lights shut down. I’m sending this message to every light, so it doesn’t matter which light is on.
Smart assistant integration
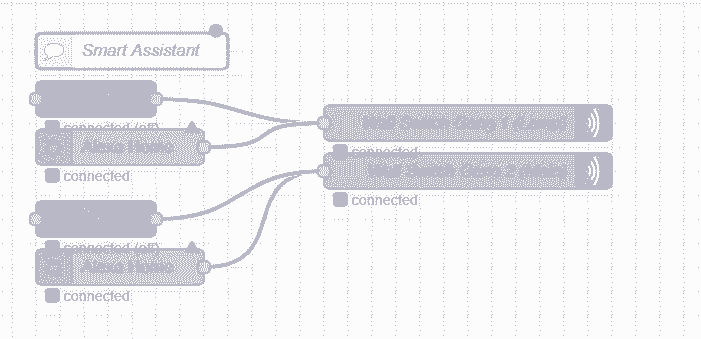
It wouldn’t be true automation without voice controls, so I have added both assistants to NodeRED.
Alexa
I talked about Alexa in NodeRED before, it’s the simplest way to add your devices to the Alexa ecosystem. Log in to your Alexa Bridge account and add a device for each light you want to use.
Configure the node, and select the correct devices from the dropdown list.
Google Assistant
I decided to give NORA (node-red-contrib-nora) a go, since the gBridge won’t be working after 15th March 2020 (alternatives). The premise is very similar to Alexa in NodeRED. Create your account and add the NORA skill to Google Home. The names of the devices will correspond with the node names.
Both nodes send true/false based on your voice command, so the hookup is very simple. Just name the lights accordingly and assign it correct rooms.
Conclusion
I will consider adding smart curtains to the mix, but first I need to have a closer look at the WiFi controller that comes with it. I will be tempted to add the 3rd gang in my smart light switch so I could control all 3 light sources: main, lamp & curtains. Let me know what would you like to automate with the n+1 rule?
If you want to get the latest updates to this project you can follow me via your preferred social media:
And if you feeling like buying me a coffee or supporting me in a more continuous way:
I hope you have enjoyed the project!
Code
Credits
NotEnoughTech
Some say I run a decent tech blog online. The truth is I needed to find a hobby that fits between my bicycle rides. Robotics engineer in making at Labman.
Related products


Leave your feedback...