
Taking a shortcut - Using the Jaco Burge TouchPad
We’ve used keyboard shortcuts for years, from the humble copy/paste to exiting vi. Shortcuts save us time, but in some applications, such as CAD / CAM they are a necessity. So when the JacoBurge TouchPad Kickstarter went live in early 2018, we have to get one for a test. So let's take a look at what we get.
What’s in the box?
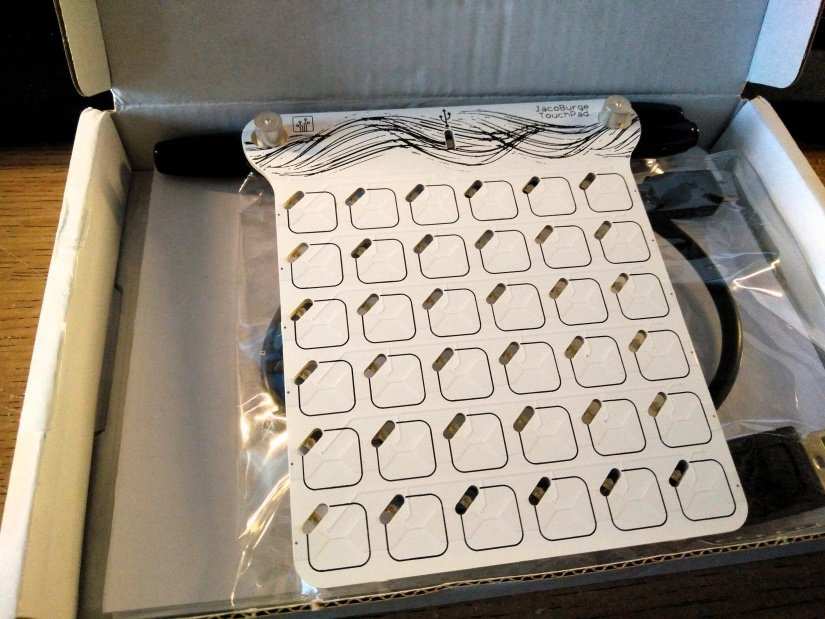
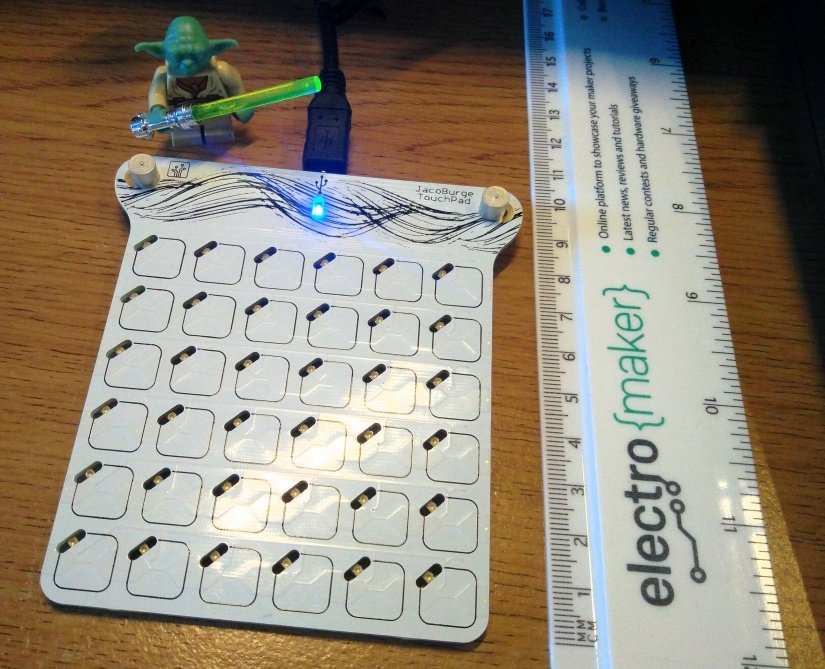
In the box we find the TouchPad, USB lead, some clear plastic overlays, and a permanent marker pen.
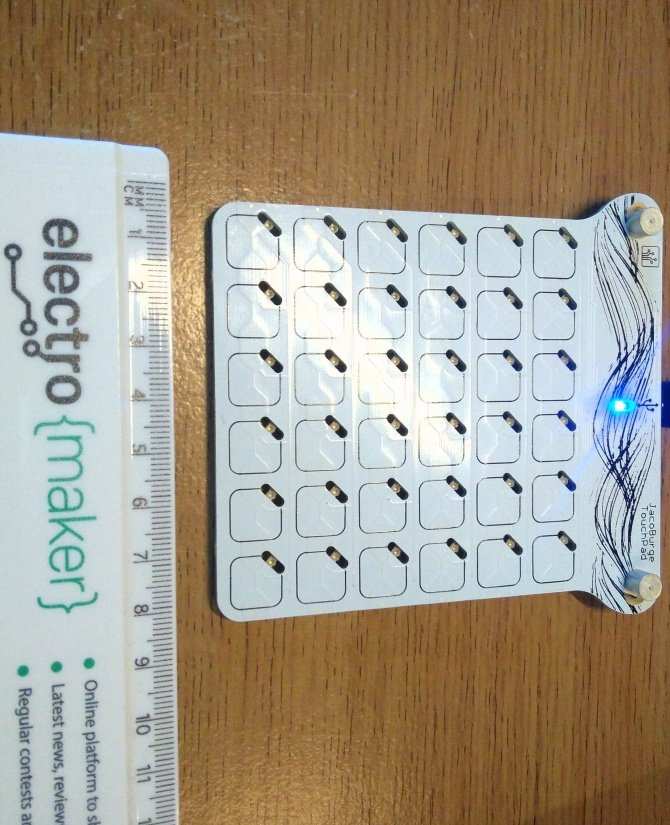

The TouchPad measures 92mm wide, 100mm tall and 12mm thick and the main feature of the board is a grid of 6 x 6 capacitive touch pads, a total of 36 inputs. Each pad has a corresponding LED to provide feedback to the user. There are also five sections of 36 (180 possible inputs ... wowzer!) pads, selectable on start by swiping horizontally across the TouchPad. This is a cool feature as we now have access to many more inputs. It is just a shame that we need to reset the TouchPad to change the selection.
To programme the TouchPad we need to open a blank text editor document and then insert the USB cable into the TouchPad and the computer. Then stroke the pad from top to bottom, so that we slide across six pads vertically.
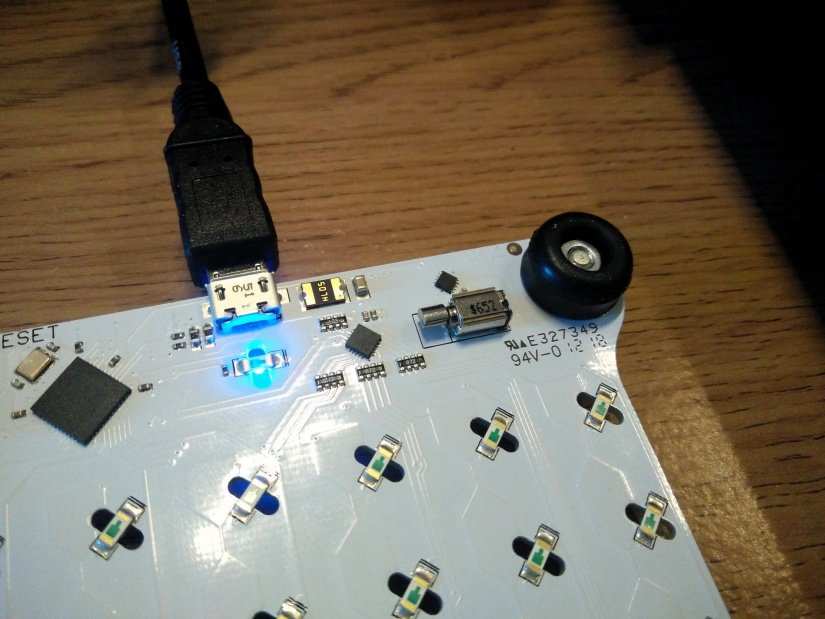
Once correctly triggered the TouchPad will vibrate using a small vibration motor on the underside of the TouchPad. This will then trigger the board to “write” a user interface in the text editor. Yes you read that right, rather than a fancy UI which needs installing, we use a text editor to display the configuration of the board.
Using the text editor, we can follow the on-screen instructions to configure the pads to handle any manner of key combinations and include advanced features such as delays between each key press (handy for exiting applications.) We simply press the pad that we wish to use, then using the instructions we choose what keypresses to assign to it. All of the programming is done on the TouchPad, we do not need to use the keyboard/mouse at all. Once programming is complete, all we need to do is swipe up and the TouchPad is ready for use. Just press the programmed pad and watch the shortcut happen. For our first test we set the bottom right pad to open a terminal on our Ubuntu machine and now we can easily open a terminal at the press of a key! We then repeated the programming steps to enable a one key lock screen for when we leave our desk.
So who is this really aimed at?
As we mentioned earlier, there are members of the community who need to use shortcut keys in their job. Typically the power users are CAD/CAM and electronics designers who rely on keystrokes to reduce the time it takes for a sequence to complete. This board delivers the goods and we are sure that it can provide a streamlined experience for those users.So what powers the TouchPad?
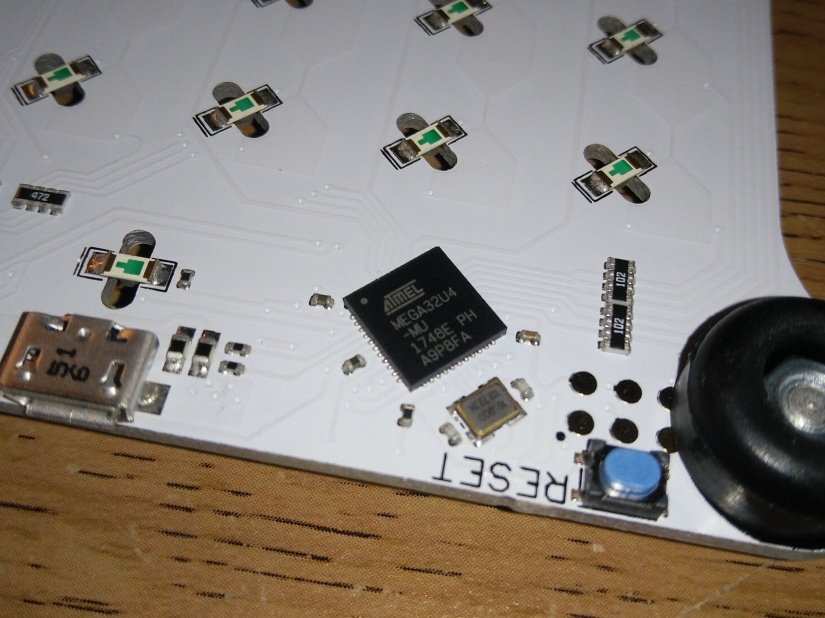
Inside the TouchPad is an ATmega32u4, the same microcontroller as used in many Arduino boards, but chiefly the Leonardo. This means that the TouchPad is basically an Arduino and we can add our own custom firmware to the TouchPad using the Arduino IDE. Very handy for advanced makers who demand the ability to refine the product.
Customisation
As we briefly mentioned, in the box we have a series of overlays, clear plastic cutouts on to which we can draw or write what each key will do. Now, this is fine for general use, but being makers we need the function and the form to be equal, in other words, it needs to look pretty. Luckily JacoBurge provides us with a downloadable template which we can edit in Inkscape, and then design our own icons (or download Creative Commons icons) for use on the overlay. The provided template is easy to edit and within a few minutes we had our basic design ready. For a test, we flipped the icons and the template horizontally so that we could print the icons on the ‘underside’ of the transparency with a view to preserving the print quality.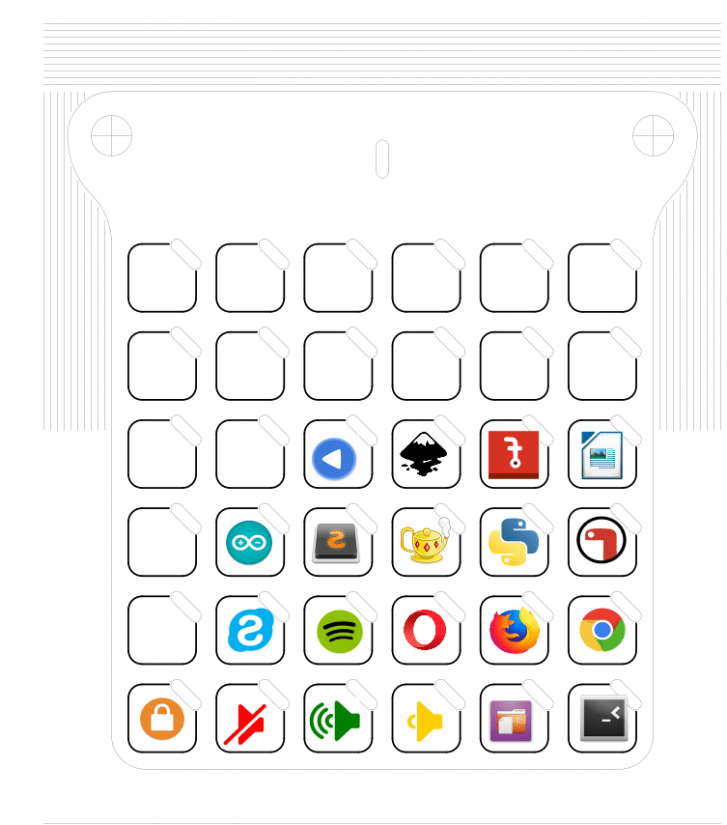
Then all we need is some OHP plastic transparencies which can be used in printers. Print off and trim the overlays, then remove the two metal screws from the top left and right of the TouchPad. Line up your overlay, then screw it into place. Power up the TouchPad and start using your new overlay!
Conclusions
This is a specialised product, but one that demands your attention. Sure, we can use it to streamline our productivity or control our music. But let's think like a maker for a moment “What could we do with it?” Well, dear reader, we can use it trigger audio samples, control animations using neopixels and a Raspberry Pi, or program a robot just like Big Trak! This is a fun piece of kit that works across platforms, so we can use the TouchPad with Windows, Mac and Linux and that means we can use it for many different purposes. So, the sticking point is the price, £57 is a lot for what is really just a capacitive grid and an Arduino, but we are paying for a maker’s time and effort to make such as simple to use and functional piece of kit.
Electroscore: 5/5 ![Electroscore: 5]()

Pros:
- Very easy to use
- 180 Inputs at your disposal
- Works across all operating systems
Cons:
- Pricey
- Micro USB port is fragile
- LEDs are very fragile
Price: $5,700.00
Link: jacoburge.co.uk/shop/

Les Pounder loves hacking and tinkering with Arduino, Raspberry Pi and new technologies. He passes on his skills and discoveries to Electromaker readers via tutorials and reviews.


Leave your feedback...