
Anet A8 3D Printer Review

3D printers are getting cheaper and cheaper. Some are even as cheap as £99 / $135 (101 Hero), but with this level of cost-cutting, something has to give and, generally, it is in the parts that are used. So when I saw the Anet A8 on Gearbest for £118 / $163 delivered, I thought “Is this another cheap, low-quality printer?” So off to Google I went and I discovered a whole community of makers who have taken this cheap printer and made it into something wonderful. So let's take a few moments, grab a coffee, and look at the pros and cons of the Anet A8 3D printer.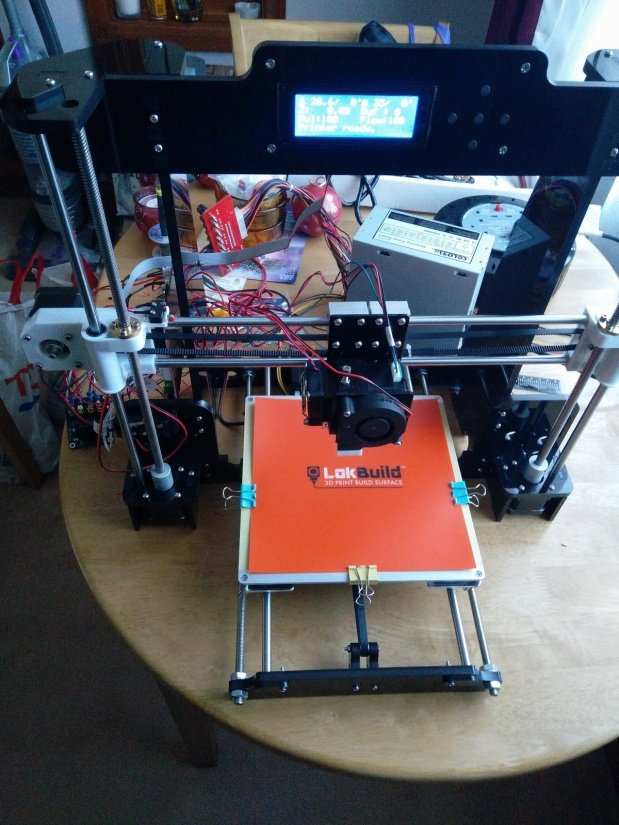
The Anet A8 comes as a DIY kit in a well-packaged box, with lots of protection for the contents, and inside the box, we find everything we need to assemble the kit. No I mean it, they even provide the tools to assemble the kit, the flush cutters are particularly lovely! The 3D printer chassis is made from 8mm thick acrylic and assembled using various machine screws and nuts. Assembly should take about half a day and the full guide for assembling the printer is provided as a PDF on a flash drive/micro SD in the box. There is also a great YouTube tutorial for those that like watching the process. Take your time with the assembly and always make sure that you understand the step before you take it. Assembly is pretty easy. Of course, we made a few mistakes with our build but nothing a little patience couldn’t solve.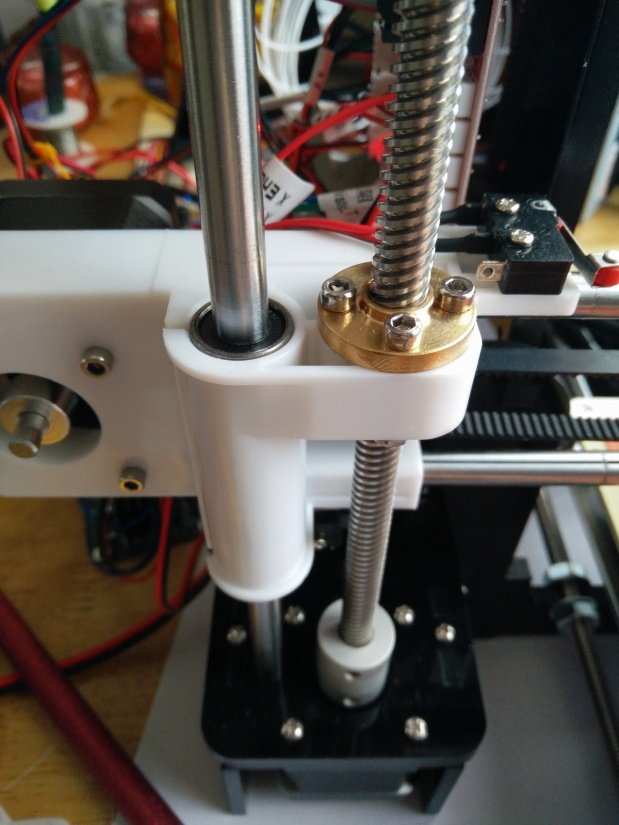
Once assembled the printer will need to be calibrated. To do this use a piece of A4 paper and turn off the stepper motors for the printer, then move the extruder to each corner of the printer and check that the paper can slide freely under the extruder. There should be a slight amount of resistance, but the paper should move with little or no force. If not, then use the screw points at the edge of the bed to alter the bed height. With the corners checked, move the extruder to the centre of the print bed and do the same test.
When you are ready, load up the included filament and try out one of the test files found on the micro SD card. Of course, the first print won’t go to plan, but it will give you an indication as to how you can tweak the printer and this is a printer that can be tweaked. To ensure that prints stay on the print bed, the bed itself is heated, to around 60C (but you can go higher), a nice touch for 3D printers at this price as cheap printers often rely on glue sticks and masking tape to help prints lift from the bed.


Tweaking and testing
If you love tinkering and, come on, everyone who visits Electromaker loves tinkering, then the Anet A8 is the place for enhancements and hacks, but first, we need to learn the basics.
The Anet A8 is not just a “plug in and play” printer, and there are many tweaks and caveats in its operation. Firstly, the print bed needs to be manually levelled and adjusted (but there is an aftermarket kit that can be used to auto level the bed). Secondly, the x and y-axis need to be tightened and tweaked to ensure print quality (again there are many community hacks for this). In our tests the y-axis was loose and caused a judder when moving the print bed, so we tightened the track and everything went well. Also, the wingnuts on the underside of the print bed tend to come loose. One even got caught on the frame and made a horrible juddering/grating noise, so make sure the wingnuts are secure before printing. The acrylic frame, while sturdy and strong, can become loose, requiring a little maintenance. But the community has your back and you can print out extra parts to further strengthen the frame. Another “interesting” hack is one to reduce the noise generated by the Anet A8 … oh yes, it is rather noisy.
Software
The controller board for the Anet A8 is a typical ATMEL ATMEGA and this connects the stepper motors, extruder, etc., for use with gcode, a language that instructs the printer to perform actions at a certain point, the same language is used with laser cutters such as the K40 laser cutter and other computer controlled devices.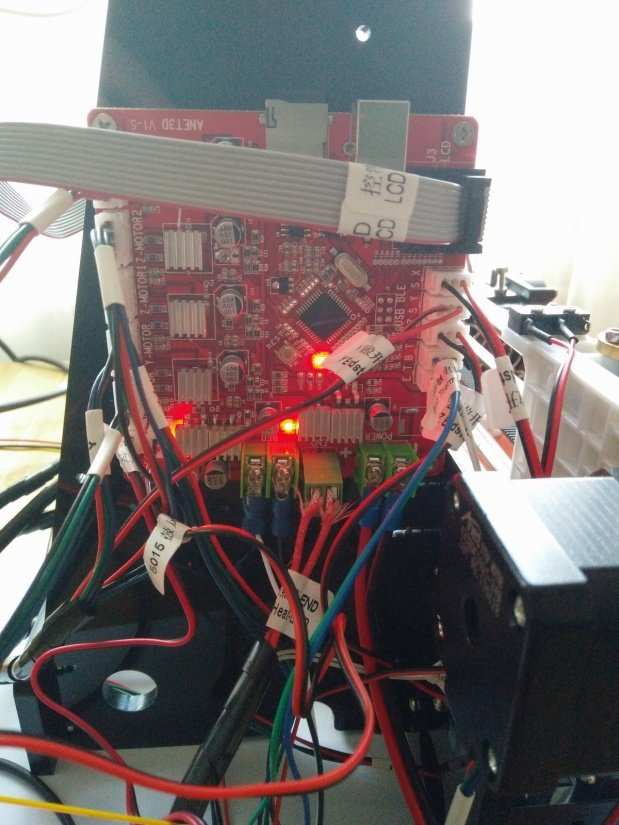
So how do we get this gcode? Well, we use software to convert .stl files, 3D printable objects into gcode and the most popular choice is Cura ( https://ultimaker.com/en/products/ultimaker-cura-software )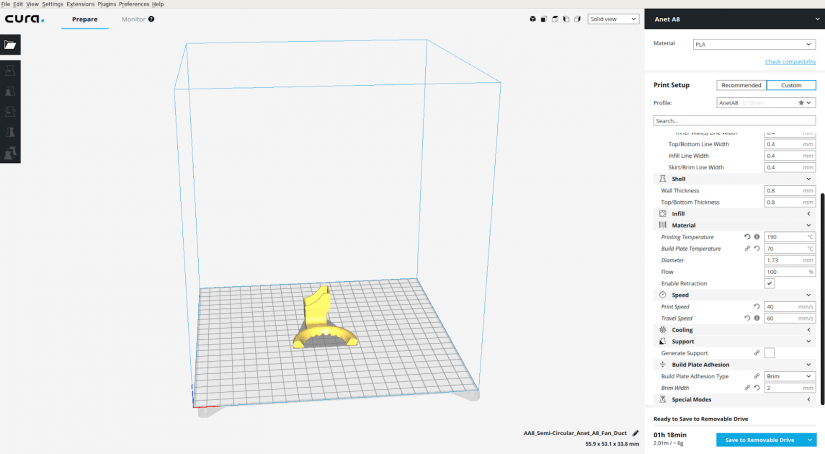
Cura is available for all the major operating systems and it comes with a list of pre-configured printers. Sadly the Anet A8 isn’t one of those, so we have to manually create the settings based on a little Google-Fu!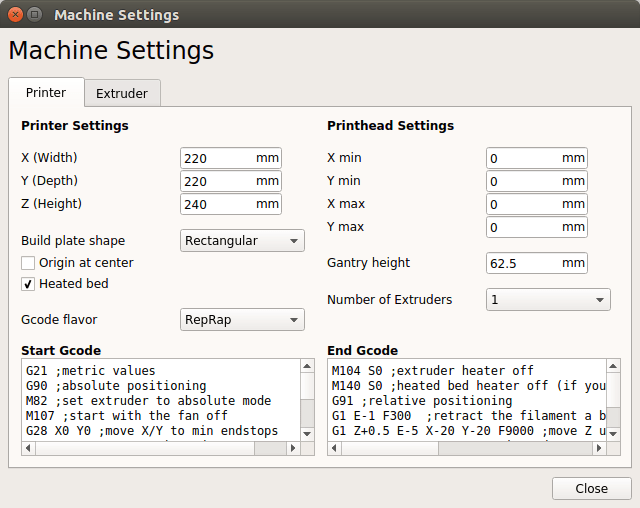
Once our machine settings are entered and saved as Anet A8, we can then import .stl files from places such as Thingiverse ( https://www.thingiverse.com/ ) or we can create our own objects using CAD applications such as Tinkercad ( https://www.tinkercad.com/#/ )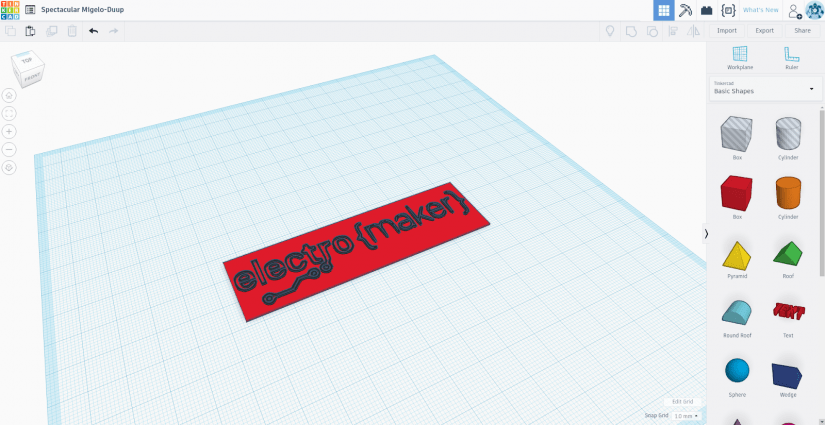
Let's say that we create something in Tinkercad. Our workflow would be to create the object in Tinkercad, download it as an .stl file. Open the file in Cura. Edit the object and print settings, save the gcode to our microSD card, then insert that into the Anet A8. Mount the SD card, select the file and then print. Phew! Don’t worry this will become second nature after a few projects.
Safety
The Anet A8 3D printer has achieved some notoriety for catching fire, and this has been attributed to the included power supply unit getting rather warm, and that the mainboard is handling control of the motors, extruder and heated bed, that is quite a lot of amps for something so small.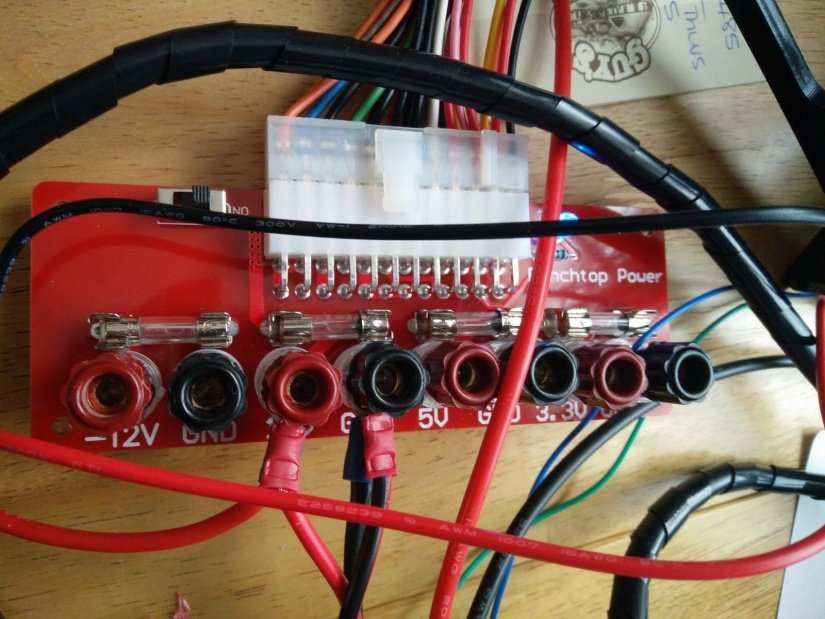
So, to offset the risk of fire, we chose to repurpose an old PC ATX power supply using a benchtop power supply, which handily gives us 12V, 5V and 3.3V. This removes the included PSU from the fire safety risk, but the next modification was to purchase two MOSFETs (electronic switches designed to handle a higher current) one for the heated bed and another for the extruder.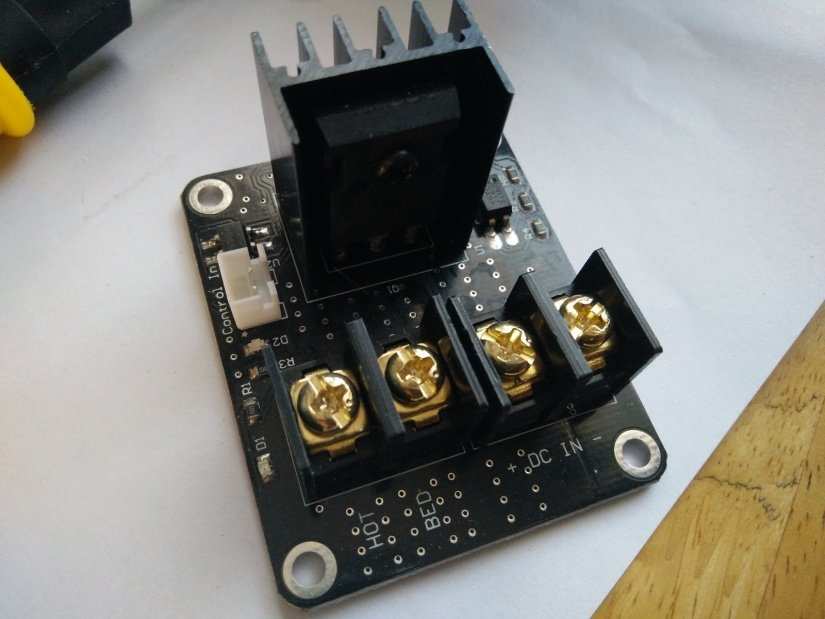
These MOSFETs remove the load from the control board, and ensure we have a safe printing experience. So far we have installed the MOSFET for the heated bed, and it has worked remarkably well. Costing only £6 from eBay, this should be the first purchase that you make, well after the printer! The golden rule is to never leave a 3D printer unattended!
Community
The community that has formed around this printer is impressive. There are hacks and guides on how to get the most, including many enhancements that are available to download and print, most users print these enhancements first, to improve the Anet A8 experience. There are many videos to be watched and objects that can be printed, so take a look at the vast selection and decide what is important to you. For us, we printed a replacement extruder fan funnel as it made a horrible whistle noise when at 100% fan speed. This semi-circular fan shroud provides better air flow over the print bed.
So is the Anet A8 any good?
Quite simply yes. This printer produces decent quality prints after a little tweaking. If you have the time and knowledge, then this printer can be further tweaked to provide better quality prints. This is not a printer that you can just purchase and print, for that you will need an Ultimaker and also deep pockets as they retail for around £1000. The Anet A8, for £140 (current price, but this does fluctuate and has been as low as £95!) is a bargain. What you save in money you will need to invest in time, but it will help you learn more about 3D printers, how they work and how they can be fixed.
For makers and hackspaces, the Anet A8 is a challenging project and ongoing platform for manufacturing. You will get good prints from this printer, but not out of the box. Enjoy learning more about 3D printers
The Anet A8 is a great 3D printer and deserves your time. You will save plenty of money compared to other “consumer” printers, and you will learn how to maintain and use a 3D printer.
Electroscore: 5/5 ![Electroscore: 5]()

Pros:
- All the tools are in the box so you can start building.
- Good prints out of the box
- Heated bed, great at this price point
Cons:
- Noisy
- PSU is not safe
- Wires … everywhere
Price: $14,300.00
Link: www.amazon.com/dp/B076CH9MBS/

Les Pounder loves hacking and tinkering with Arduino, Raspberry Pi and new technologies. He passes on his skills and discoveries to Electromaker readers via tutorials and reviews.


Leave your feedback...