
Wemos Esp32 With Oled Display Using Micropython

Made by feiticeir0 / Home Automation / IoT
About the project
How to use the Wemos Lolin32 ESP32 Oled with MicroPython
Project info
Difficulty: Easy
Platforms: MicroPython
Estimated time: 1 hour
License: GNU General Public License, version 3 or later (GPL3+)
Items used in this project
Hardware components

Story
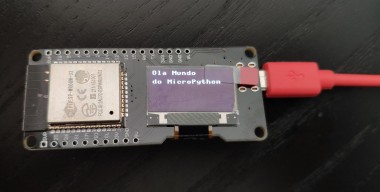
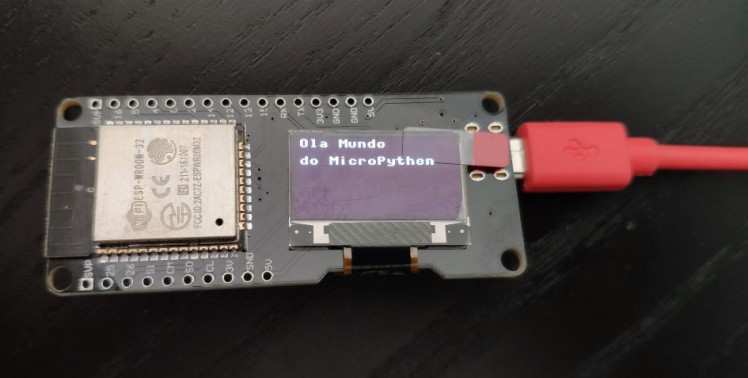
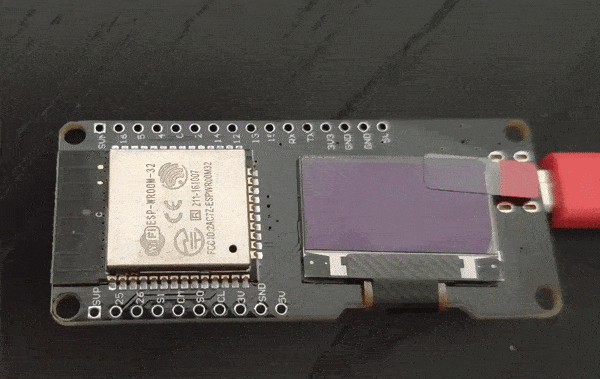
The Wemos Lolin32 ESP32 it's a ESP32 dev board with a small 0.96 inches display, with 128x64 pixels of resolution that we can use in our projects without any additional hardware.
Before we proceed, your board has to have MicroPython in it . You can see here (another project here on Electromaker) for more information.
To start using the display, we need a library to work with.
Library
Adafruit created a library to work with this driver. Despite a warning about the library being deprecated - in favor of CirtuitPython - we can still use it and it works very well with MicroPythonYou should now have a ssd1306.py file. Let's copy it to the ESP32 board.To do that, we're going to use ampy - a small tool developed by Adafruit to copy files to MicroPython devices.NOTE: MicroPython creates a small drive where to you can copy files
- ampy -p /dev/ttyUSB0 put ssd1306.py
- -p /dev/ttyUSB0 is the port - change for yours
- put is the command to execute - "put" to put files in the ESP32
- ssd1306.py is the file to copy
To confirm that it was copied to the ESP32, lets list its contents
- ampy -p /dev/ttyUSB0 ls
- boot.py
- ssd1306.py
OLED Display
Let's now try to write something in the displayI'm going to use minicom (Linux Terminal).
- minicom /dev/ttyUSB0
NOTE: If you don't get a prompt (because you already have there main.py and it's executing), just reset the board and press Ctrl+C
To try the library and show something on the display, just type:
- >>> import ssd1306
- >>> import machine
- >>> # initialize I2C
- >>> i2c = machine.I2C(scl=machine.Pin(4), sda = machine.Pin(5))
- >>> # inicialize the display
- >>> oled = ssd1306.SSD1306_I2C(128,64, i2c)
- >>> oled.fill(0)
- >>> oled.text('Ola Mundo ',0,0)
- >>> oled.text('do MicroPython',0,15)
- >>> #show contents
- >>> oled.show()
As soon as you press <enter> on the last line, what you wrote in the lines OLED.TEXT will show on the display
Communication
The following line:
- i2c = machine.I2C(scl=machine.Pin(4), sda=machine.Pin(5))
will start the I2C communication in PINS 4 and 5 - SCL and SDA on the Wemos ESP32 OLEDThe ssd1306 library uses the same functions as the frame buffer library from MicroPython, which you can read here:
http://docs.micropython.org/en/latest/library/framebuf.html
Boot
If we want the code to execute every time we turn on the ESP32, we must write the code in main.py file, remove any that could already be there and copy the new file over.Just copy the code above to a file main.py and copy it to the ESP32 board
- ampy -p /dev/ttyUSB0 rm main.py
- [bvsantos@darkrider ~]$ ampy -p /dev/ttyUSB0 ls
- boot.py
- ssd1306.py
- [bvsantos@darkrider ~]$ ampy -p /dev/ttyUSB0 put main.py
- [bvsantos@darkrider ~]$ ampy -p /dev/ttyUSB0 ls
- boot.py
- ssd1306.py
- main.py
Now, everytime you start the ESP32 board, the code will run and show your text in the OLED display.
Credits
feiticeir0
Linux and Raspberry PI lover!Systems Administrator, programmer, kind of a Nerd! Love to create things that may or not work, but could save the world someday ! ?
Related products


Leave your feedback...