
Using Balena On Pi To Make A Radiation Monitor

Made by ungineering / Environmental Sensing / Notifications / Sensors
About the project
Build a system that will send you a message to your cellphone if the radiation reaches dangerous levels. You will only need two components: a Raspberry Pi and a compatible geiger counter.
Project info
Difficulty: Easy
Platforms: Raspberry Pi, balena
Estimated time: 1 hour
License: GNU General Public License, version 3 or later (GPL3+)
Items used in this project
Hardware components


Story
Intro
"Nuclear" and "Radiation" are one of those mysterious, sometimes scary words that get thrown around without much understanding. People get scared of Nuclear Magnetic Resonance Imaging. Some complain about the radiation coming from their microwave.
In this project I want to demystify radiation, its measurement, and more importantly, build a device that can monitor it and send alerts if it becomes dangerous.
The Basics
The term "radiation" is very broad. We are exposed to all kinds of radiation 24/7 and there is no hiding from it. Studies proved largely inconclusive regarding the long-term low-level RF radiation exposure. What is 100% certain, however, is that high levels of particle and high-energy radiation is very dangerous.
This is why I'll focus the project on monitoring the latter.
Some elements fall apart in a process called radioactive decay, emitting radiation in the form of various particles. A detector placed in the way of those particles can measure the levels of radiation. While there are several devices that can measure radiation, I'll focus on one of them - the geiger counter. It has been around for well over 100 years, its function is well understood, and you can buy one easily.
The Build
Hardware prep
In order to build the device, first you'll need to sign up for a free account on balena.io. It's a platform for easily managing your IoT applications. They provide an easy way to develop, deploy and maintain your code, so you don't have to worry about the infrastructure.
Once you've signed, up, you'll need to create a fleet. A fleet is a group of device that run the same code. This grouping makes it easy to deploy the same update to all the devices at once.
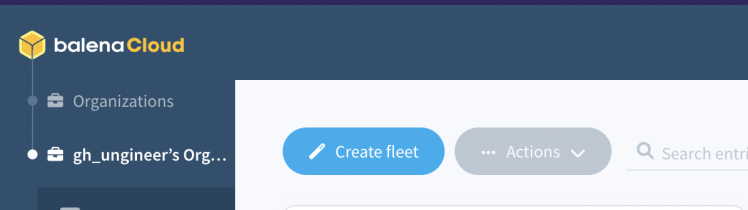
Come up with a name, I named mine "geiger". Select the default device you plan to use (Raspberry Pi if that's what you're using). The default device type is only a convenience option, it won't restrict you to that specific device. Finally, click "Create New Fleet".
Now that the fleet is created, Make sure your fleet is selected in the left menu, and click "+ Add Device". Now you'll need to select the specific device you want to use (if it's different from the default you selected earlier).
Development version will give you more flexibility to modify your application and offer less restrictions. Production version will provide more security. If you're building this for fun, Development version might be a better choice.
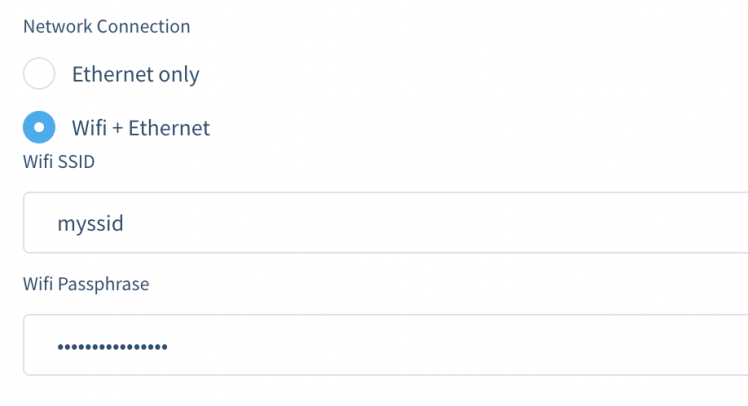
To connect your device to network, balena offers a neat feature that will let you enter your WiFi credentials ahead of time, so you can do a completely hands-free deployment. If you want to use WiFi, select that option and enter those credentials in this window.
Now you have an option to either flash the image directly (you'll need balenaEtcher installed) by clicking Flash. Or you can click the down arrow on the button and download the image. Then use whichever application you prefer to flash the image to your microSD card.
After flashing, insert the sd card in your Raspberry Pi and power it up. Wait about a minute and you should see your device appear in your balena dashboard.
Next is to build the application
Software
Create a new folder somewhere, and clone two repos into it:
telegram: https://github.com/just4give/telegram-block
gmc300: https://github.com/builder555/balena-gmc300
The gmc300 repo is a microservice can talk to the geiger counter and get the readings. The Telegram microservice can send those readings to your telegram account.
In order to get the notifications, set up a telegram bot.
Now, in the same directory create a docker-compose.yml file that will look similar to mine. Here you'll need to enter the Token ID and Chat ID for your telegram bot. This file specifies how the two microservices should be deployed on your device.
Next, copy the app.py file from here into the balena-gmc300/ directory, replacing the one that's there already - this step is required to send the readings in the right format for the telegram block to understand.
If you haven't already done so, install balena cli.
Now you need to authorize your balena cli to communicate with your account. Run
- balena login
in terminal and select Web Authorization.
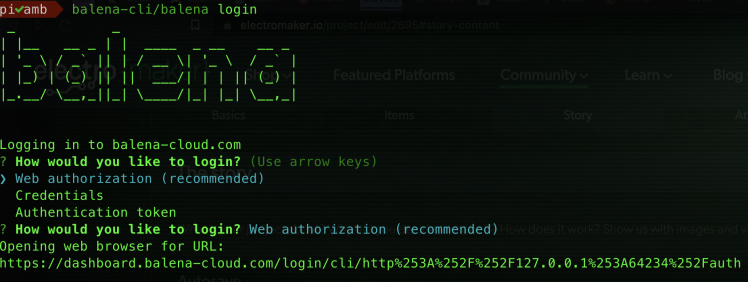
It will most likely open a new browser window, but in case it doesn't, copy/paste the URL that's displayed in terminal.
If all is done correctly, you'll see "Successfully logged in as: <your username>" message.
Finally, you can push the code to your device. Run
- balena push
from the same directory as your docker-compose.yml file.
It will take a couple of minutes to upload the code and build it.
At this point your work is done, if your GMC300 isn't connected yet, connect it to your Pi and wait. It might take a few minutes, but once the code is up and running, your geiger counter will turn on automatically and start measuring radiation.
In the video below you can see how I tested the alerts. If you don't have radioactive materials, simply lower the CPM_LIMIT value in the docker-compose.yml file to around 10, that will start sending alerts pretty quickly.
Code
Credits
Related products


Leave your feedback...