
Tuya Link Sdk Iot Smart Environment Sensing And Humidifier

Made by vilaksh01
About the project
Within less than 15 minutes build smart Raspberry Pi based Smart Home Environment Sensing and Humidification device
Project info
Difficulty: Easy
Platforms: Raspberry Pi, SparkFun, Seeed
Estimated time: 2 hours
License: GNU General Public License, version 3 or later (GPL3+)
Items used in this project
Hardware components

Story
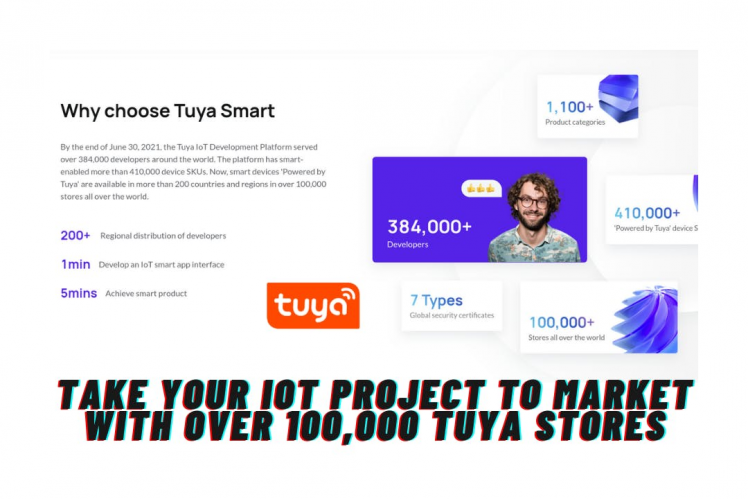
I had been exploring the Tuya IoT platform for the past few months and they never fail to amaze me with their ever-growing list of features, it had never been so easy for developers to grab a bunch of sensors, modules and make a fully-functional IoT device work as similar as any private IoT device company. You might have come across connecting Tuya IoT Cloud and Platform with Arduinos using their Embedded SDKs but how about using it for rapid prototyping with Raspberry Pi's (With more than 34 million units sold, the Raspberry Pi is not only one of the world's most popular computers; it's also one of the most important when it comes to building a versatile hobby as well as industrial projects. I bet you can see it on every geek's desk). This tutorial is all about using Tuya Link SDKs to connect Raspberry Pi to your Tuya Cloud and IoT platform account and by the end of this article, I will also show to add environmental sensors and a water atomization module to control via Link SDK.
So let's get started but before then if you haven't made a Tuya account yet, do make one and get free device licences and show and tell us all your unique projects and experiences with Tuya IoT here ?
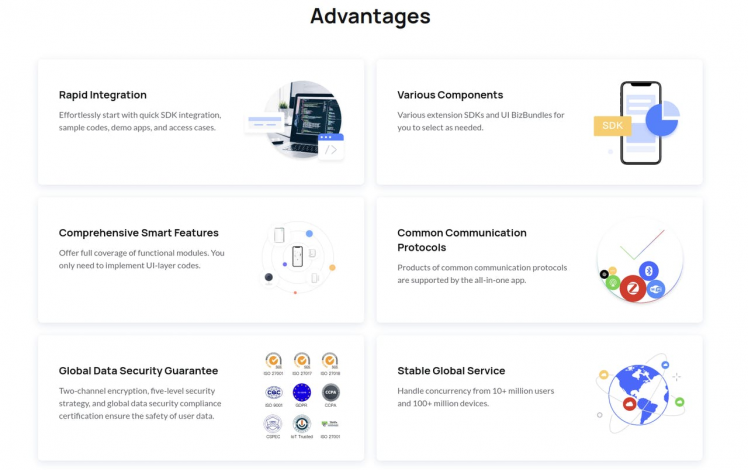
Well, SDKs make your life a lot easier. It helps you efficiently create cloud development projects regarding the OpenAPI or message subscription capabilities. You can now put all the focus on business or project logic without taking care of server-side programming or relational databases. Tuya Link SDK is one such SDK that provides interface encapsulation of basic services such as device activation, DP (DataPoints)upstream and downstream, and firmware OTA(Over-The-Air) upgrade. It is suitable for developers to connect the logic services of a self-developed device to the cloud. Check the advantages of using the SDKs - now you would be confident as a developer ?
To use Tuya Link SDK, we will need to make a product to interact and connect to Tuya IoT Cloud. Go to your Tuya IoT account and log in, if you haven't registered for an account register one click here.
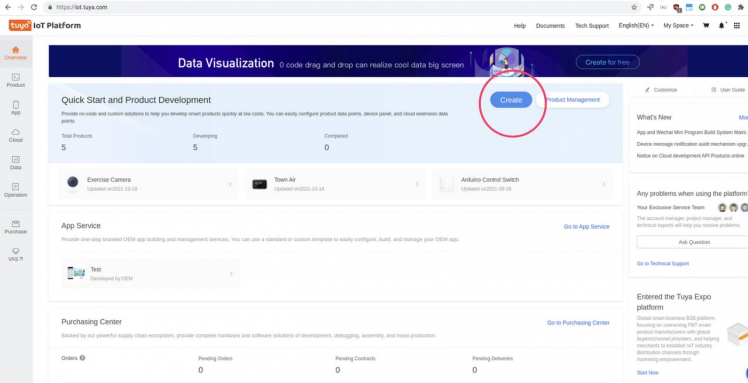
Step 1: Create a product by clicking on Create button on the home page
Step 2: A page will appear where you will need to select a category for your product (you can try exploring different SKUs offered by Tuya, tomorrow it might have one made by you ?) Since we are going to use Raspberry Pi as our custom device so we will need to click on "Can't find the category" and enter the details as shown
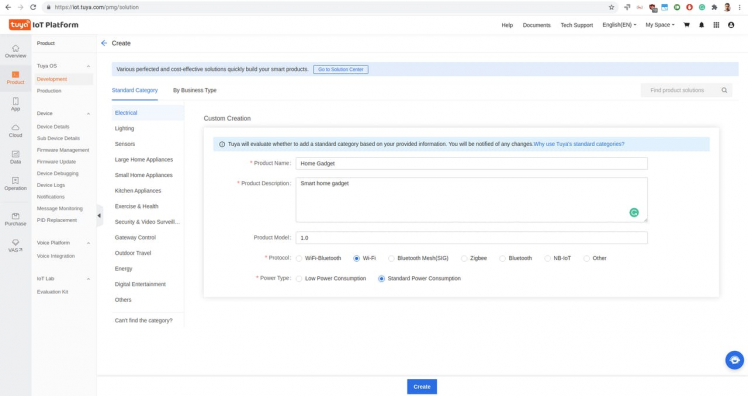
Step 3: Create custom functions to send data and control the device, we made the custom functions for CO2, Humidity, Temperature and Humidifier switch. The custom function requires a few important things like Data type, Transfer type and most importantly Id and Identifier. Also, keep note of PID we will need it later as well.
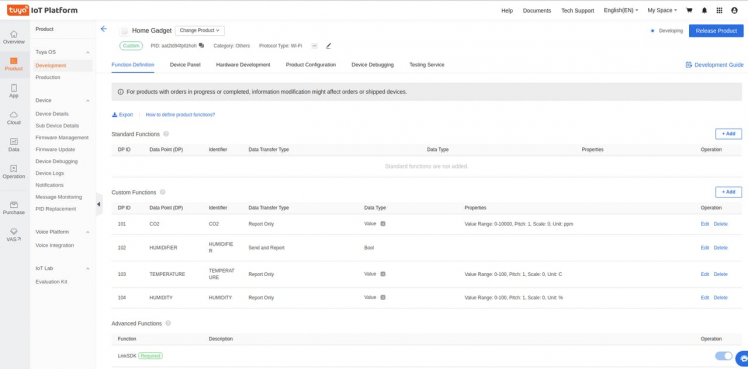
Refer here for a complete overview of Custom Functions https://developer.tuya.com/en/docs/iot/custom-functions?id=K937y38137c64
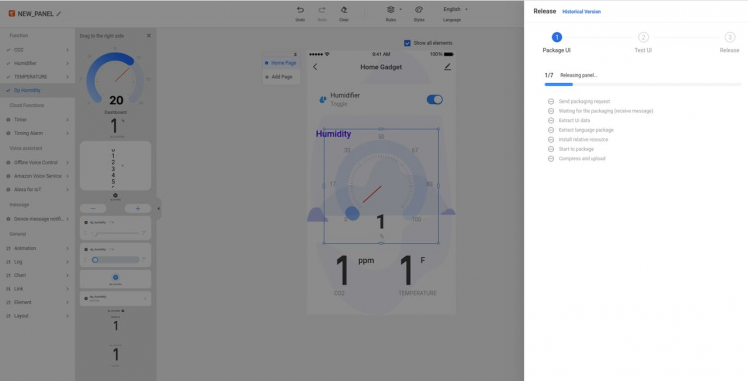
Step 4: To interact with the device we need to have a beautiful Panel with all required functionalities, although you can make Panels using Tuya Android and iOS SDKs, yet drag and drop UI panel designer is more exciting and faster for someone like me who loves exploring most things in lesser time ? For your defined Data Points (Dp) you would find all sorts of drag and drop widgets, add as many as you can and make it look professional.
1 / 2
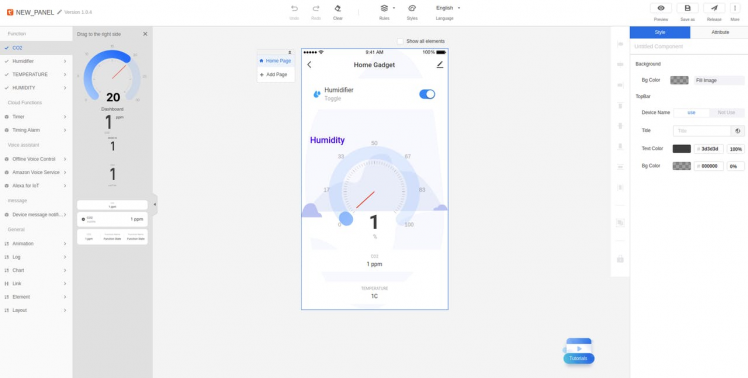
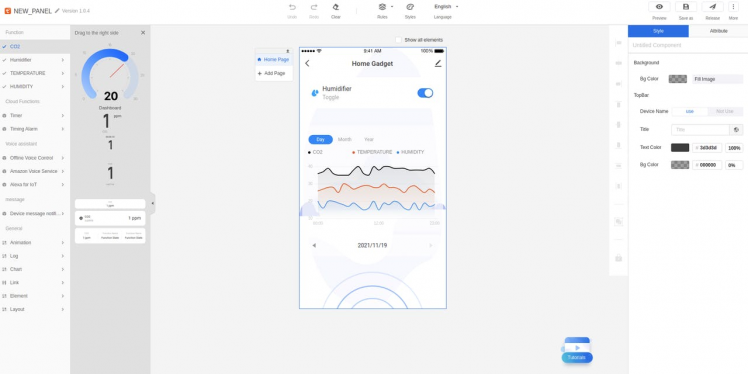
Once you are finished building the Panel, click on the Release buttons and wait for it to finalize the Panel for you.
If you were successful in the above step without any kind of serious UI planning that means you are a sweet developer ?. Now it's time to connect with Link SDK.
Step 5: Go to the Hardware Development Section of your product and click on Link SDK. But you will need a License to use Link SDK. Don't worry you will not need to spend any money on it but you can spend it on Starbucks to buy you a cup of coffee ☕ while we do the rest of the development.
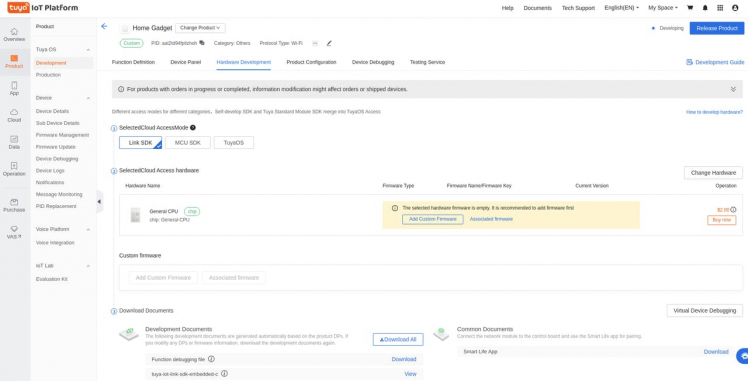
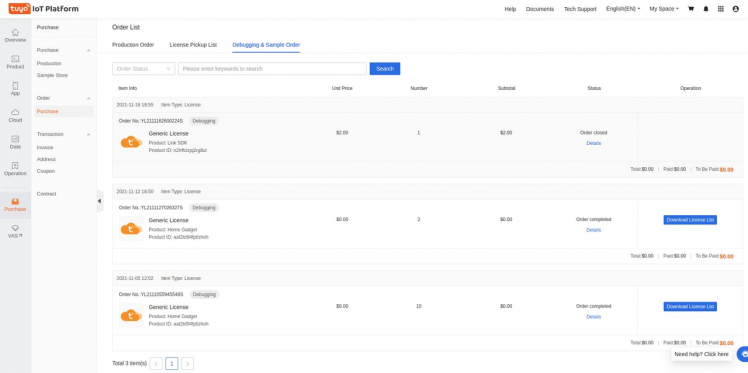
For Raspberry Pi we are going to use General CPU as a hardware type, also you would see an option to generate a free license if you are new to the platform. Click place the order and download the License list. The license is composed of tuya UUID and AuthKey which are needed to authorize the device to receive and send data to the Tuya Cloud.
With a total of five steps, we are done with major parts of this tutorial. Let's move on to the hardware part and set up a few sensors and actuators to use with Link SDK.
Hardware Setup:Grab your raspberry pi with OS installed and fire up the terminal (I prefer to use VNC viewer to play with my Raspberry Pi). Check the circuit.
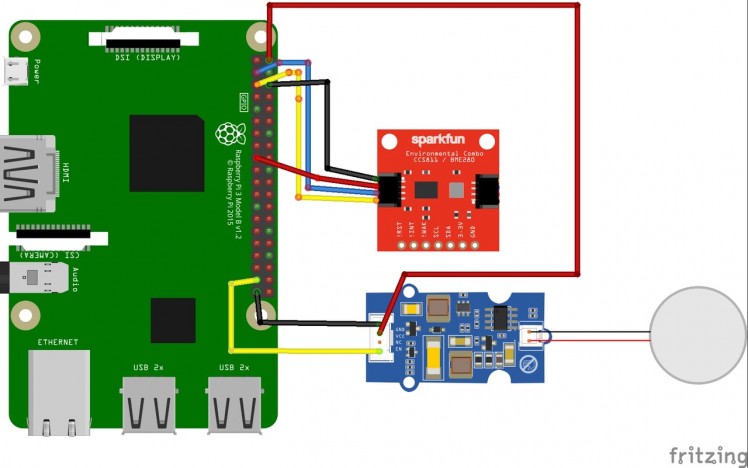
Make sure that thetheI2C interface is enabled through the raspberry Config console. We are now going to install the Sparkfun Quiic sensor package,
$ sudo pip3 install sparkfun-qwiicInstall Tuya LINK SDK from the source,
$ git clone https://github.com/tuya/tuyaos-link-sdk-python.git
$ python3 -m pip install ./tuyaos-link-sdk-python
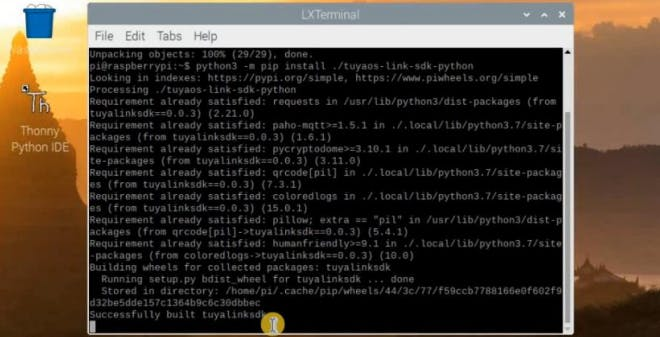
Once you have successfully installed it, we are now going to understand what goes into the code.
Firstly we are importing all required packages,
from __future__ import print_function, division
import qwiic
import time
import sys
import time
import coloredlogs
from tuyalinksdk.client import TuyaClient
from tuyalinksdk.console_qrcode import qrcode_generate
import RPi.GPIO as GPIO
Now let's set up credentials and sensor objects,
coloredlogs.install(level='DEBUG')

client = TuyaClient(productid='aat2td94fptlzhoh', uuid='tuyacb7c4616a0b51697', authkey='JEHlft0ZrDCUo33jBpE0T5vVS9onUBT9')

bme = qwiic.QwiicBme280()
ccs = qwiic.QwiicCcs811()

GPIO.setmode(GPIO.BCM)
GPIO.setwarnings(False)
humidifier= 26
GPIO.setup(led1,GPIO.OUT)

bme.begin()
ccs.begin()
We are just modifying the sample code provided in the Tuya Link SDK guide, to interact with Data Points that we made in the previous steps. The DP id is playing a major role here in identifying the response and updating data to and from the Mobile App Panel.
def on_dps(dps):
print('DataPoints:', dps)
if(dps == {'102':True}):
GPIO.output(humidifier, GPIO.HIGH)
elif(dps=={'102':False}):
GPIO.output(humidifier, GPIO.LOW)
# send environmental sensor data
dps['103']= bme.get_temperature_celsius()
dps['104']= bme.read_humidity()
ccs.read_algorithm_results() #updates the TVOC and CO2 values
dps['101']= ccs.get_co2()
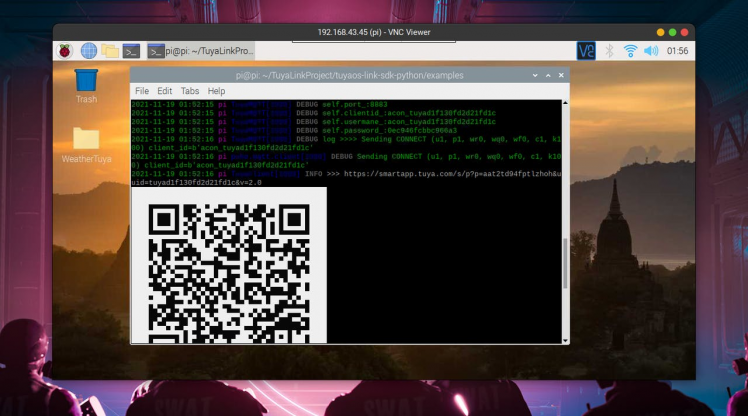
client.push_dps(dps)Once you run the whole script (don't forget to replace it with your own set of UUID, product ID and
$python3 quick.pyIt would generate a QR code that can be scanned by Tuya Smart App on your mobile phone and then it would be fun to test, check the gif for the process
1 / 2
See the full working video of implementing Tuya Link SDK and Raspberry Pi as Smart Environmental Sensor and Humidifier Control.
Troubleshooting Guide:1. If the QR code is not being generated by the script running on raspberry pi ensure that you have a proper internet connection also the Raspberry Pi device and mobile should be on the same Wifi network (2.4GHz supported).
2. If you get errors like being unable to authenticate, make sure your UUID, PID and AuthKey are correct.
3. If connection times out or frequently disconnect from Wifi, check your power supply (I am using a 5V - 3A - 15W power supply for Raspberry Pi)
Schematics, diagrams and documents
Code
Credits
Related products


Leave your feedback...