
Turning A Broken Nintendo 64 Into A Raspberry Pi 4 Case!

Made by controlfreak / Games & Gaming / Retro Tech / Upcycling
About the project
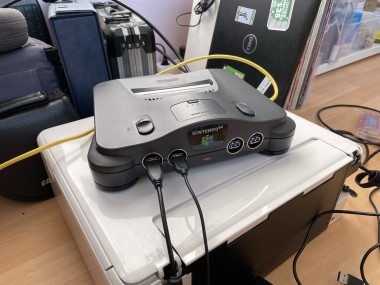
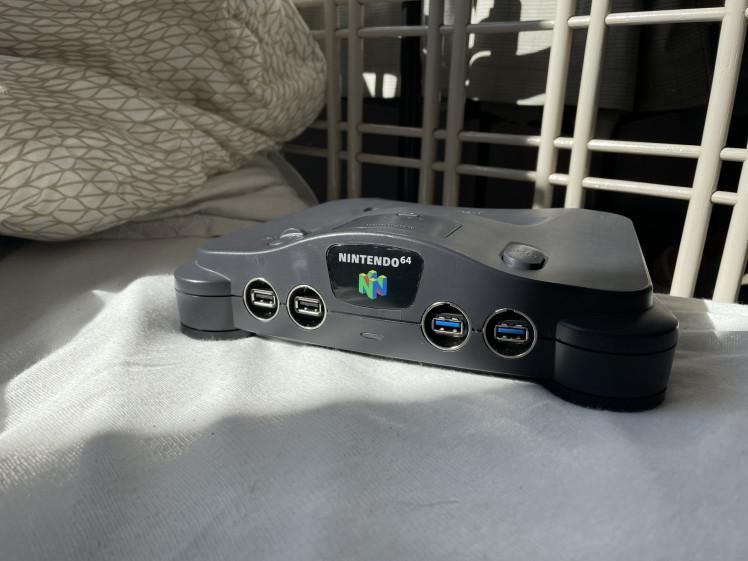
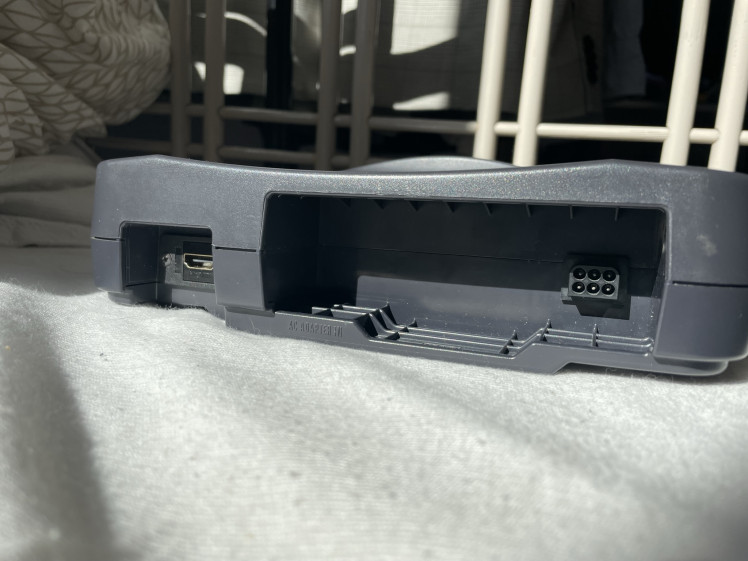
I took a broken Nintendo 64 console and turned it into a new home for a Pi4. It features a full size HDMI port, an Ethernet port, easy access to the micro SD card slot and I even managed to reuse the original N64 power switch. But the heart of the project are the USB ports which replace the controller ports and fit very well.
Project info
Difficulty: Difficult
Estimated time: 4 days
License: GNU General Public License, version 3 or later (GPL3+)
Items used in this project
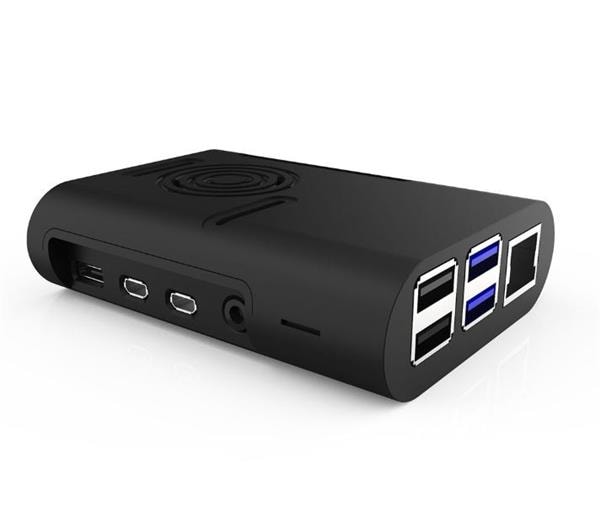
Hardware components

View all
Hand tools and fabrication machines
Story
It all began when I wrecked my N64 while I was trying to install a RGB modchip. Well .. I didn't have much (if any) experience with soldering on a PCB/small ICs. I didn't give up and picked up another N64 from some local dude and eventually I successfully installed the modchip. While the installation succeeded and I am now a proud owner of a RGB modded N64, I ended up with a broken console.
One evening, while holding the housing of the broken console in my hands I tried to think of a way to reuse this precious thing. It was already clear that it would be something with a Raspberry Pi involved.
My first idea was to solder some weird adapter cables which would allow me to plug a USB device into the controller port of the N64 but soon I realized that USB 2.0 requires 4 wires. Since the controller port of the N64 only has 3 pins I had to figure out something else.
I had the idea of swapping the controller ports for some nice Neutrik USB mounting sockets since these sockets also have a round housing.
It was at that point when this whole idea really took off. I made a list of all the parts and additional gear which I would need to get the result I imagined. I didn't really care about whether it would work or not, I was so excited and confident that it would work.
Fast forward, the day everything arrived I checked whether the USB sockets would fit or not. I already checked the diameter on the drawings they have on their website but I wanted to see for myself. They did fit pretty well but you had to force them in a little. Since I always want things to be close to perfect I ended up modifying the case later so they would fit almost perfectly.
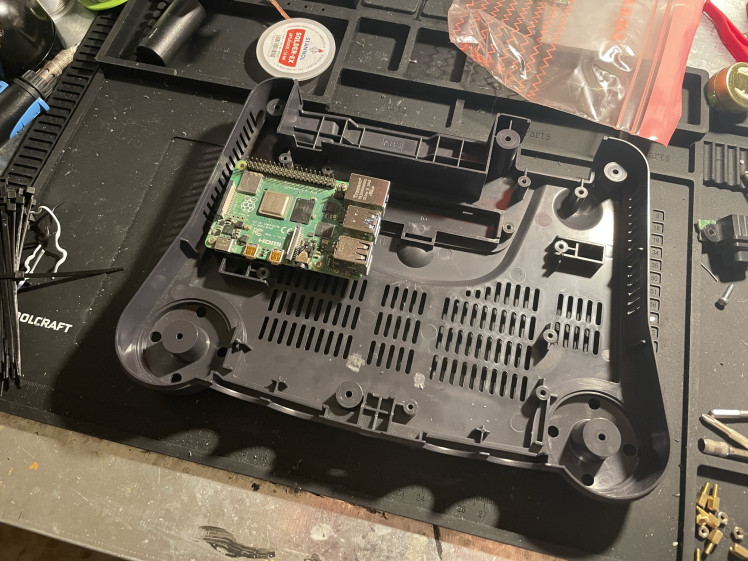
Ok, the parts are here, now comes the tough part... A lot of case modification and tinkering had to be done. Thinking about the ideal position for the Pi inside the N64 housing was probably one of the most challenging problems that I had to solve. The USB sockets are quite deep and the IO of the Pi also had to be accessible while the whole board had to fit inside the case with the top piece on. My choices were quite limited. After some time I ended up with this position:
I wanted to keep everything as authentic and "original" as possible so I even bought a broken N64 power supply since I wanted to be able to plug the power supply into the "console" like you would usually.
After frying one Raspberry Pi power supply I managed to fit the electronic components of another one into the housing of the Nintendo PSU.
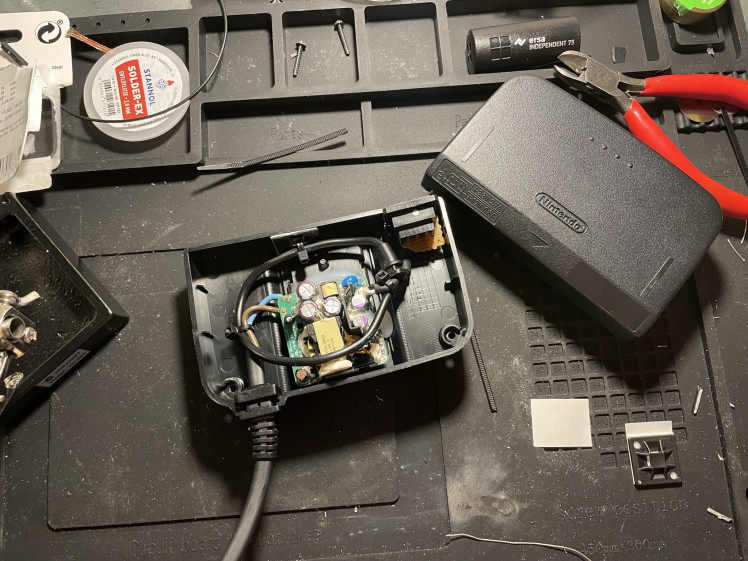
The next day I cut out the piece of the N64 motherboard where the power comes into the console.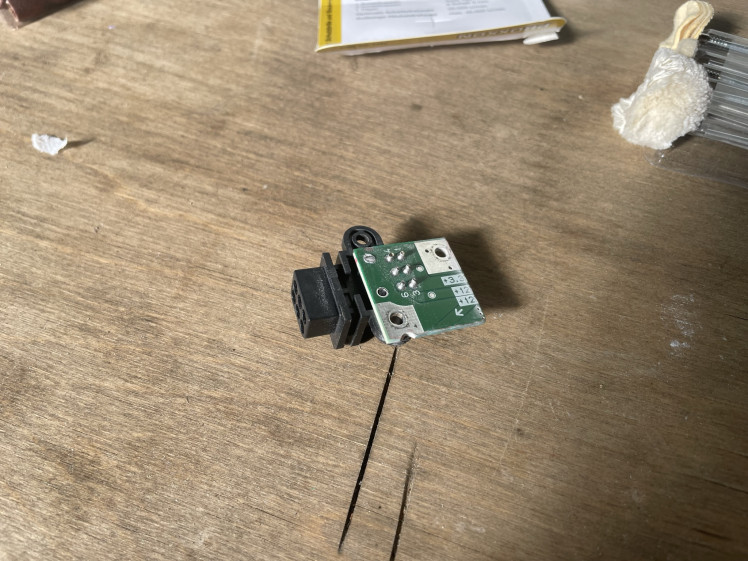
I took the USB-C cable which I cut earlier when opening up the Pi power supply and soldered the open ends to the part I just cut out. It ended up looking like this: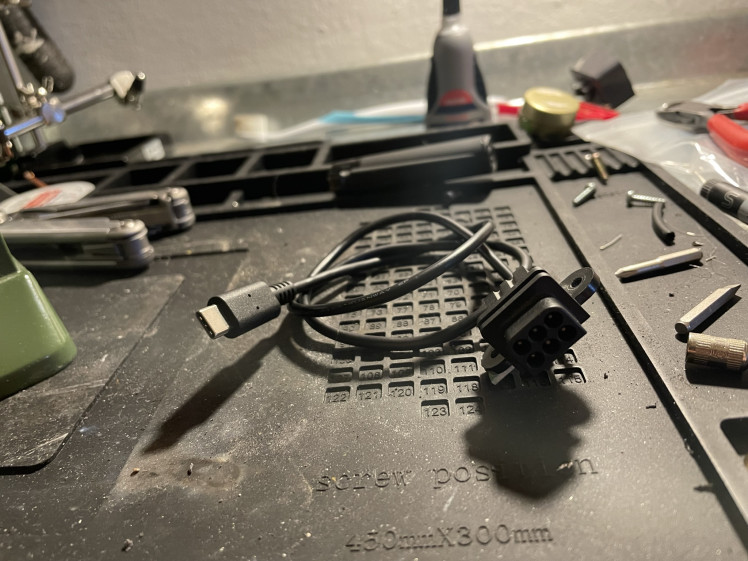
Note: I later changed this since I wanted to be able to switch power with the OG N64 power switch.
After finishing up the custom power supply, soldering the wires to the corresponding pins on the little motherboard cutout and mounting it, I went ahead and gave it a test and voilà: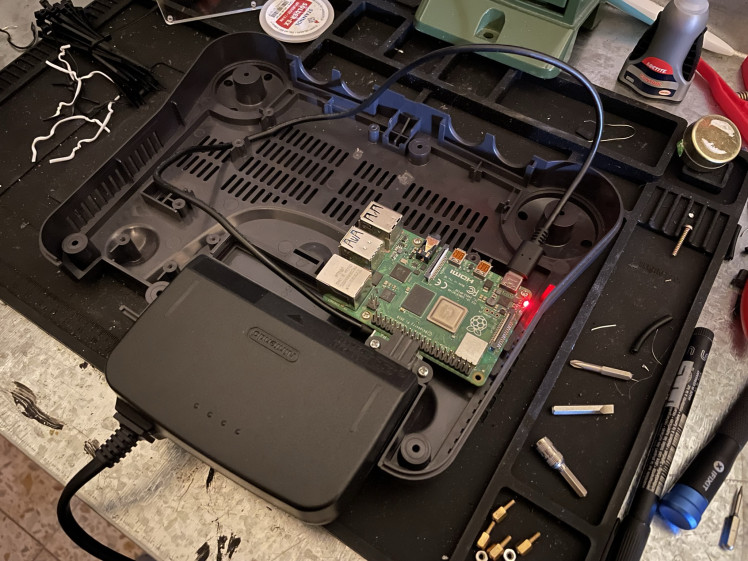
It's alive!!
Next up was the HDMI port. That was quite a tricky one but I managed to get a good result. I wanted to reuse the original "Multi AV Out" plastic piece of the console so I drilled two holes into it, did some cutting and mounted the HDMI mounting socket to it. Well .. it was waaay more complicated but eventually it ended up looking like this: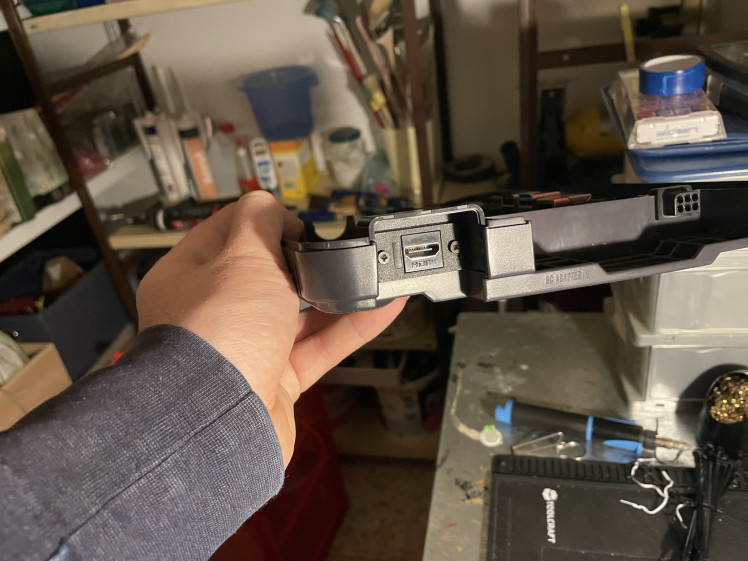
Since I used some countersunk screws which I found laying around I had to modify the port which I did a little later.
I then hooked up the HDMI cable which I ordered along all the other items.
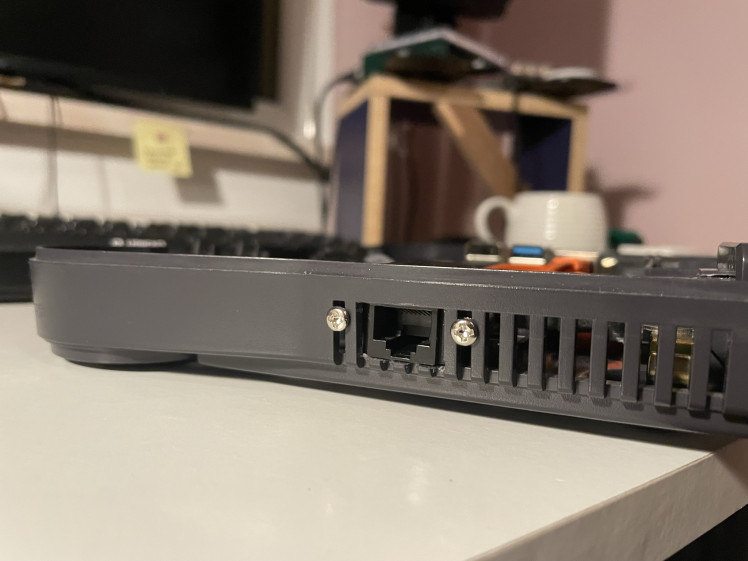
Next up was the Ethernet port. Luckily that was quite easy since the holes lined up almost perfectly with the vent gaps of the console case. I just had to cut some of the Ethernet socket's plastic to make it fit well.
CAT6a cable plugged into the Pi and into the socket it ended up looking like this: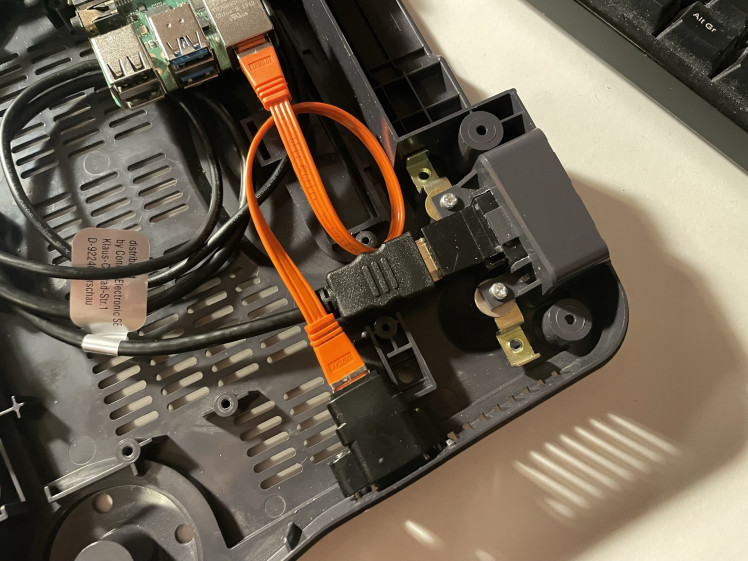
Inside
 Outside
It's not perfect since the port faces a little upwards but I think it's okay since plugging an Ethernet cable in isn't a problem at all.
I then decided to test things out in order to make sure nothing was broken or malfunctioning.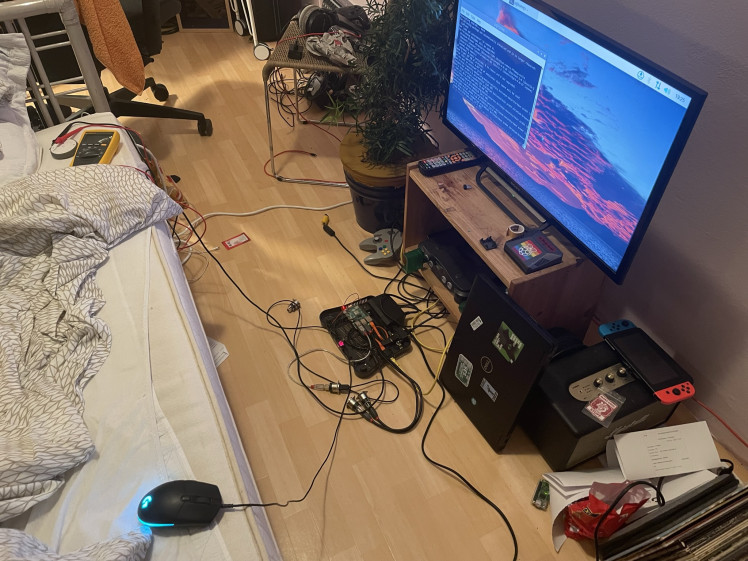
Turns out that nothing blew up and everything works as it should. Only one USB 2.0 cable was broken so I had to order a new one. I also hooked up the LED which I de-soldered from the N64 motherboard to the 3.3V GPIO pin on the Pi and made sure that it works. Apart from the USB cable issue, all set and ready to continue.
Side note: My first test failed since I was unable to swap the micro SD card for a different one with the desired OS on it.
I then cut out a little hole to make the micro SD card slot accessible.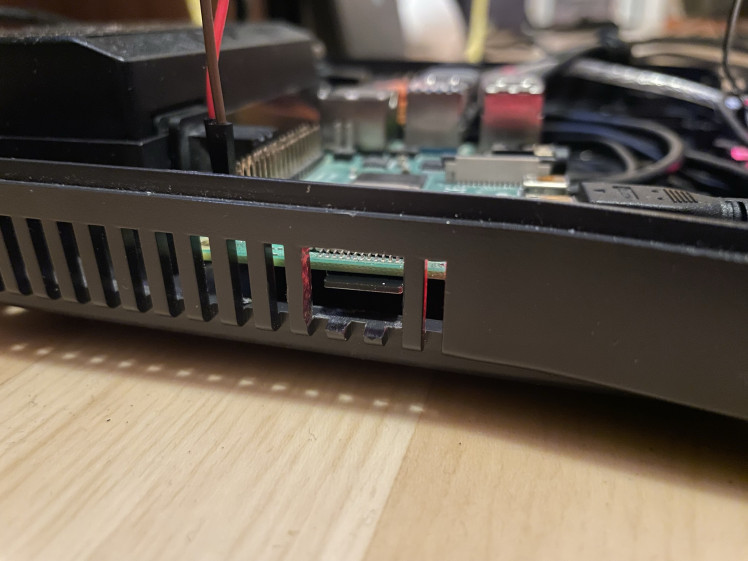
A few days later I was very excited to finally get to the point where I mount the Neutrik USB sockets.
It was a little challenging since at first I thought that the hot glue wouldn't make it stay in place but after quite a lot of work, mainly grinding, polishing and test-fitting, I ended up with a very pleasing result.
At that point I was almost done. I went ahead and wired everything up. Making the N64 power switch fit above the USB socket on the left was pretty challenging but I managed to solve the issue.
In this stage I also re-soldered the power line so I would be able to turn the power off and on using the N64 power switch. I also mounted the LED using hot glue. (I ended up using a LED with a different color)
I had to cut some plastic off one of the USB plugs but then everything was in place.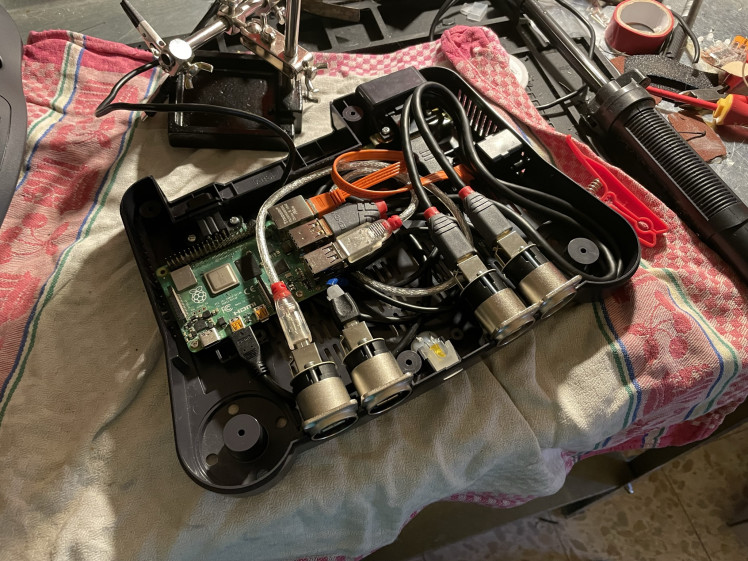
It might look a bit messy but hey, remember: No one is gonna see it once it's finished. :P
This is how it looked like with the LED wired up and the power switch mounted.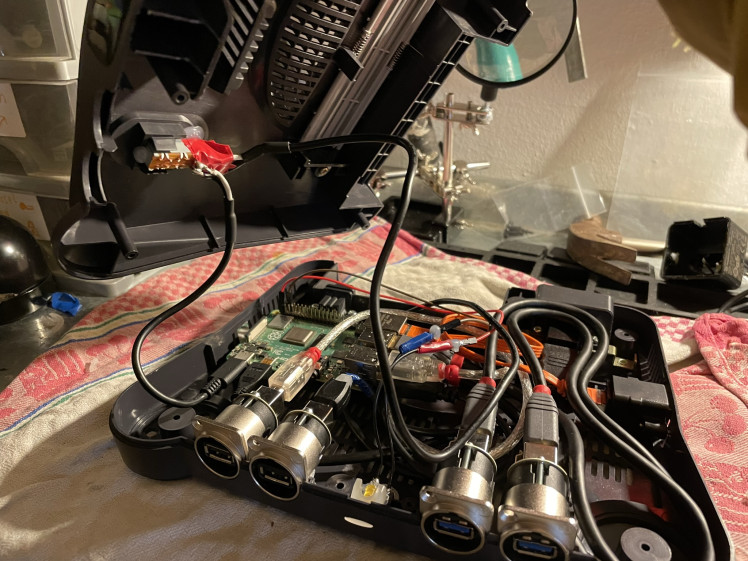
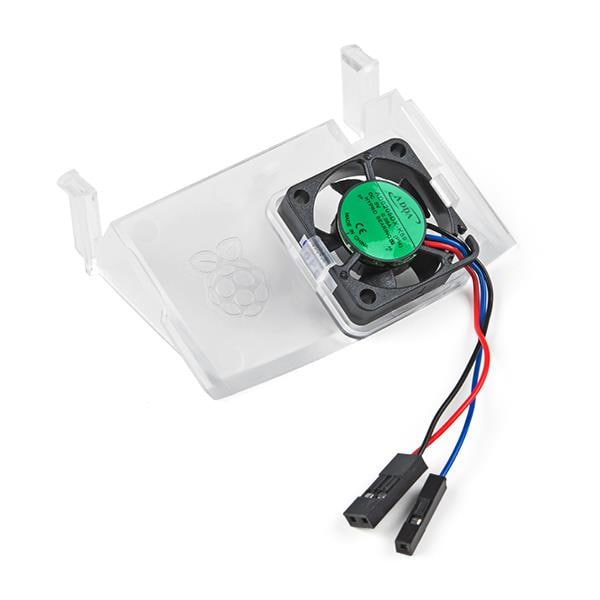
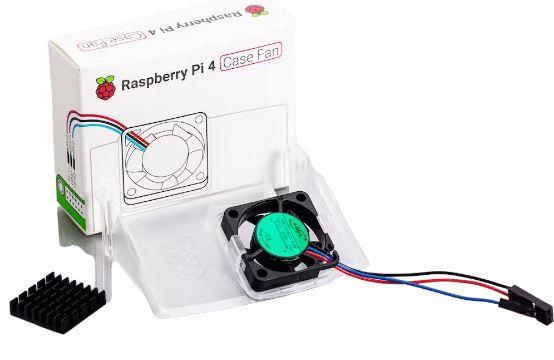
Before closing it up I thought about a cooling solution and I ended up ordering some heat sinks and a little fan to keep things cool.
After mounting the fan and wiring it up I was pretty much done.
Time to close it up and take some pictures!

The two screws on the left hold the fan in place.
I was so damn happy with how it turned out and couldn't wait to do some CPU stress tests in order to make sure my cooling solution was working.
Here you can see my bad boy in action:
Well, that's it folks.
This project was a total blast. It's frustrating and fulfilling at the same time when you encounter problems and have to come up with solutions. It's always an opportunity to learn something new and gain experience.
I absolutely love tinkering and implementing ideas like this one.
Thanks for reading/having a look at this!
Here's a link to my Reddit profile if you want to stay tuned for my upcoming projects or if you just want to chat a little: My Reddit profile
Have a great day!
Felix aka controlfreak aka wuschelhead
Credits
controlfreak
I am a young technology enthusiast. I love tinkering around, coming up with ideas and implementing them. I am also a hobby music producer and I used to be a somewhat semi-professional photographer. I love tech and I love combining technology with creativivity. I have kind of an addiction to retro consoles and technology in general. I enjoy modding things and making them do things they initially weren't supposed to.
Related products


Leave your feedback...