
The Guitar Active Pickguard – Version 2
About the project
Crossing Over with the Nordic nRF7002 Wi-Fi 6 Companion IC and the NXP i.MX RT685
Project info
Items used in this project
Hardware components

Story
Introduction
This article is not about adding Wi-Fi as a gimmick to an existing product. Nor will be about yet another implementation of streaming audio over an IP connection. Nor is it this a way to extract dollars for yet another monthly SASS subscription. The combination of the NXP i.MX RT685 Audio SOC and the Nordic nRF7002Wi-Fi 6 Companion IC will transform of how one interacts with their instrument. The transformation will map to three features that will be enabled by nRF7002, the first of which will be described in this article.
In 2011, I entered the Freescale (now NXP) Make It Challenge with the “Guitar Active Pickguard”. The Freescale Kinetis microcontroller family was the first mass market device that implemented the ARM Cortex M4 core with the hardware floating point option. Ten Semifinalists were awarded $1000 USD to implement a concept with the mandate:
“What can you do with a Freescale Kinetis MCU?”
An important detail was that the semifinalists were chosen based upon a short technical proposal of the idea. The time between notification of the award and delivery of the demonstration video was *4 weeks*. Instead of using the Freescale Tower Platform (think evaluation kit), I chose to fully implement the concept in-situ. My brain was screaming to me that the Active Pickguard prototype should be more than a Dr. Frankenstein style dev kit project. I took the risk with keeping with the mindset of “Dress for the job you want, not the job you have.”
It was a busy four weeks.
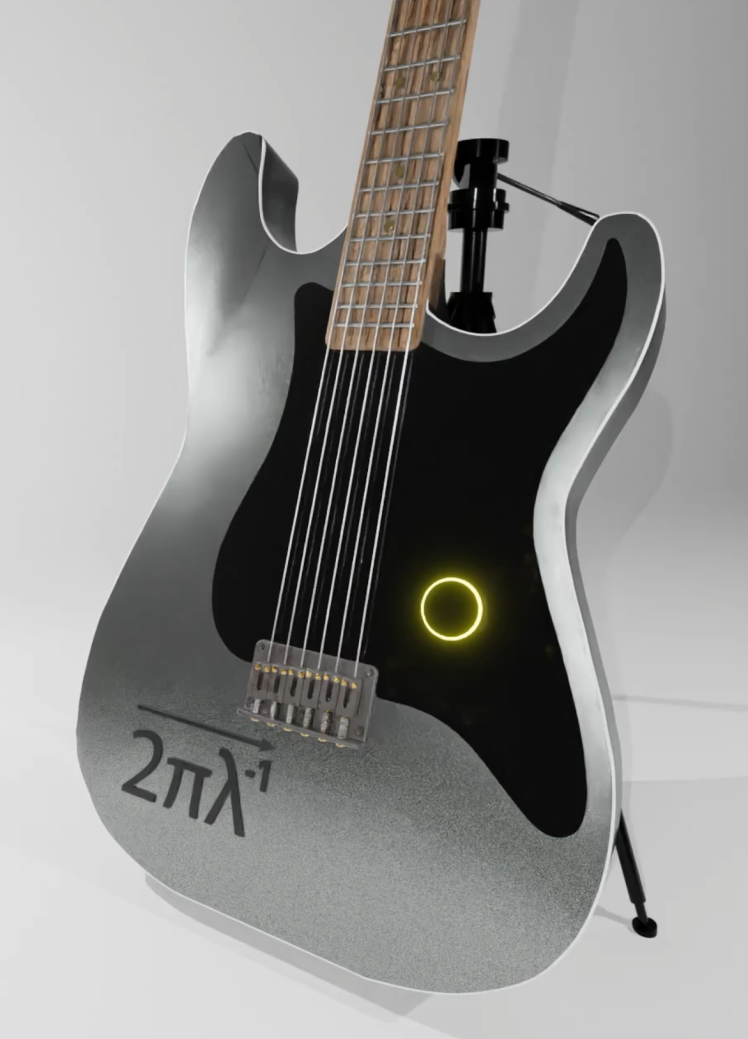
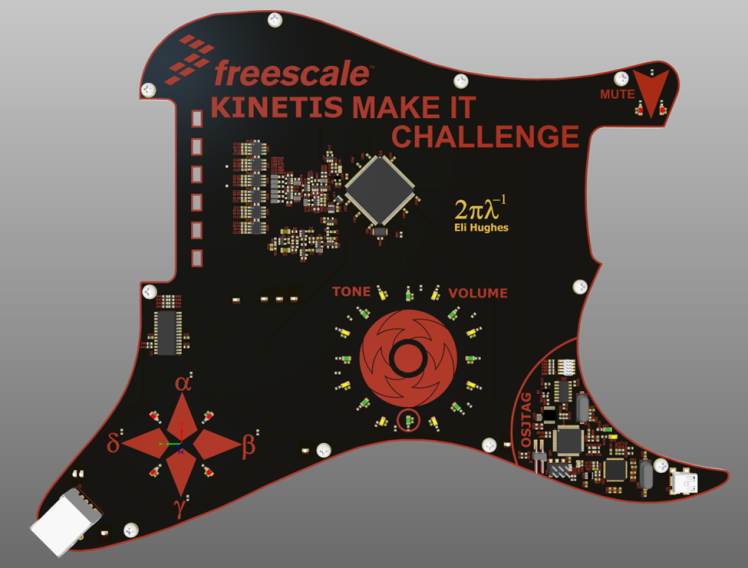 The Active Pickguard – Version 1
Some of the design choices were driven by contest. The “iPod” style touch wheel was to showcase the hardware touch peripheral. The piezo saddle pickups were sampled with the built-in 16-bit ADC.
The AES3 digital audio output used the I2S peripheral. The built in DAC was used for a “classic” analog output with balanced lined capabilities. Although, the AES3 output was what I was really after. AES3 is real-time, sample by sample digital audio streaming protocol that can be sent over a differential pair. It always blew my mind that we accept pickup buzz and unbalanced signal transmission.
What you heard in the video was a direct feed into the camera through an AES3 receiver circuity that I also designed and constructed for the Make It Challenge. The USB Interface on the Kinetis implemented a CDC class device for a command line terminal interface. There was even a USB hub on board as I had an “OSJTAG” debugger circuit. You could debug code, have a command line interface, and even get digital audio to the PC!
The active pickguard used piezo saddle pickups, rather than coils. I hold a graduate Degree in Acoustics from Penn State University, and I had a lot to say on why you would choose this pickup technologies.
You can learn more about the pickup technology, differential charge amplifiers and TDM digital audio here:
The Active Pickguard was never intended to be a product. There have been similar devices on the market, such as the Line6 Variax. However, I used it as a way push the technology into a new direction. I was never interested in modeling the guitars of the past. Line6 had already done a good job of that. It just so happened that the Make It Challenge offered some money for a prototype.
The genesis of the concept came several years prior in an FPGA course I was teaching at Penn State University. While teaching students about digital filter implementations in Xilinx Spartan and Virtex Device using Verilog HDL, I presented a concept of a guitar body built completely from layers of FR4. The “stack” would route traces and bury the FPGA into a nifty cavity that only the creator would find. This of course was cost prohibitive…. and would be *heavy*. I would love to see the quote from the PCB house for a 45mm thick stackup with buried components!
The Active Pickguard was economically feasible and the ARM Cortex M4 had enough capability to pull off some of the DSP I needed. I had little time left to implement so good patches for the video, but I was able to “sell the dream.”
The Next Evolution of Active Pickguard
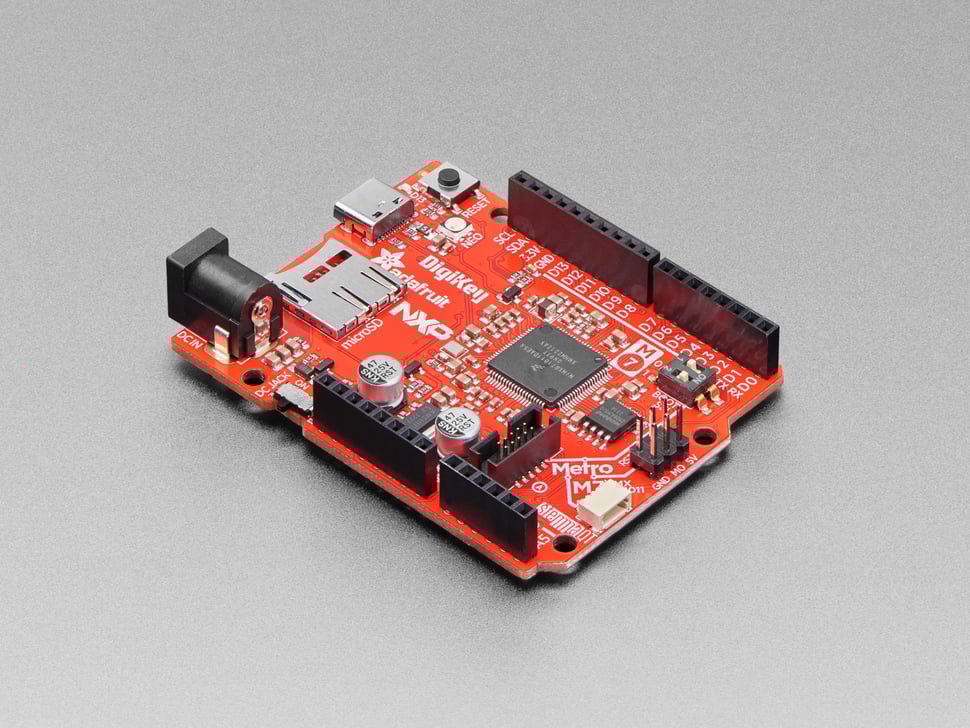
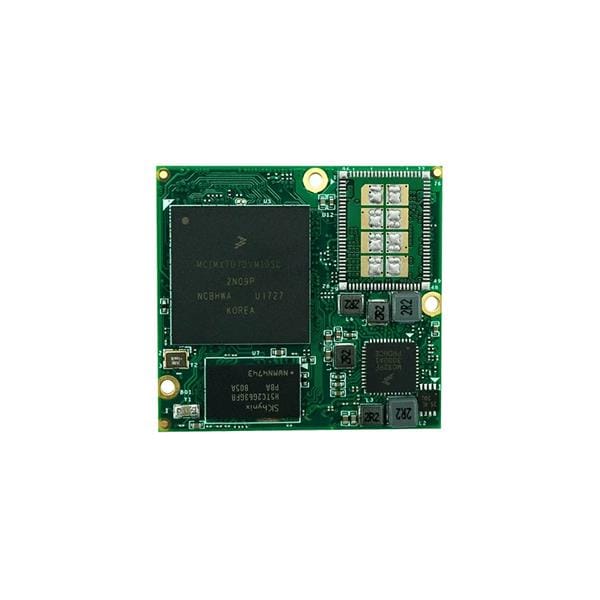
I offered some of the backstory of the Active Pickguard as it has never actually been told. This article will dive into the NRF7002 Wi-Fi companion IC and what it will add. However, the historical context is important. As have been thinking about where I want the concept to go, technology has progressed significantly. I have adopted the NXP i.MX RT685 for the next gen processors. It combines a 300MHz Cortex M33 core with a 600MHz Tensilica HiFi4 DSP. I built the i.MX RT685 SuperMonkey as my 1st step into modularized the “CPU” card that will plug into the guitar main board.
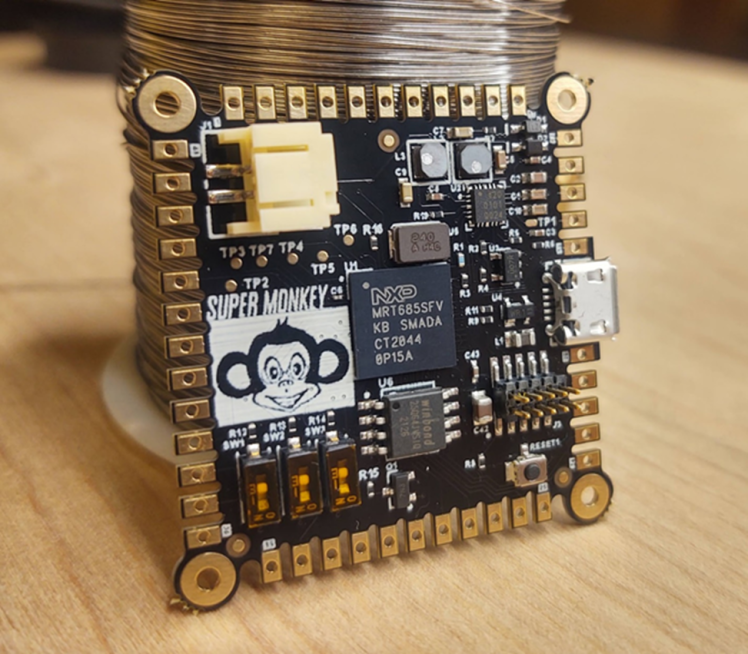 The RT685 SuperMonkey “Rev B”
I also have a “Rev C” which is celebration of the classic “Pin Grid Array” technology.
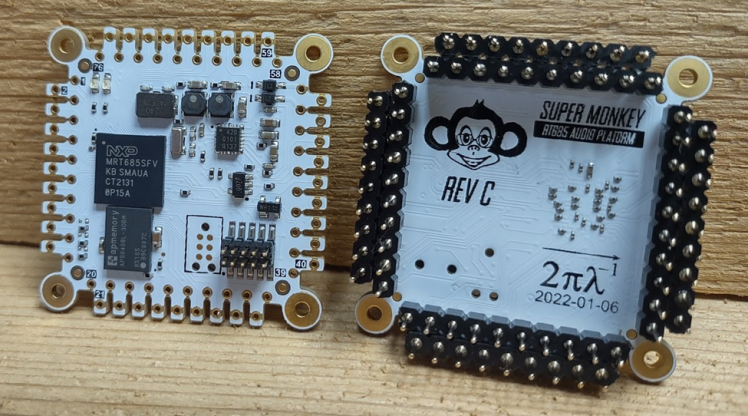 The RT685 SuperMonkey “Rev C”
The design files are in github:
https://github.com/ehughes/rt_super
The additional horsepower will be for more than typical models and effects. The Wi-Fi connection provided by the nRF7002 will serve as a backbone for data that will be key to transforming experiences. Digital Amp models, effects, etc have been implemented and reimplemented to the nth degree. This will be something very different and I am not looking to model or recreate the products of the past.
A New Look and Feel
The design for the Kinetis Make it Challenge was never intended to be “road ready”, rather an interesting show piece. It was the catalyst to think about what could be. The starting point of the new design will be focused on physicality and a human’s connection to the instrument.
The Next Gen Design
A visceral truth that every guitarist knows personally is that you “feel” your instrument. Retaining the essence of the pickguard is essential. The Active Pickguard for the Make It Challenge implemented simple capacitive touch controls. Given the time constraint, the result was OK. But just OK….
Capacitive touch technology has moved lightyears beyond the tech of 2011. What if the *entire* pickguard was touch sensitive? What if the control surface was silky smooth glass? A Seamless transition of wood into glass. The surface responds where you want it. Instead of scratchy potentiometers in a fixed location, control can be anywhere you want it, how you want it. The technology to implement what I envision exists and we carry it in our pocket.
The physicality of the new design is the 1st step to some of the other transformation features. Guitars have always been a unique cultural icon. Guitarists have sought tones and experiences that are unique to them. Angus young’s Gibson SG, Eddie Van Halen’s “Franken Strat”, Stevie Ray Vaughn’s “Number One”. This is so much ingrained how guitarists think that ecreations command a high price tag.
Imagine an instrument that you pull off the rack that becomes yours. Digital technology and mass manufacturing process has made reproducibility easy. Serial number 1000 is exactly the same as serial number 100000. But that really isn’t what the customers want. They want an instrument that is *theirs*. Something no one else has.
That is the essence of where I want to go. Not towards better tone controls and effects, but producing instruments at a scale that are always unique to the person playing it.
The Ensoniq ZR-76 IdeaPad and How the nRF7002 Fits In
Achieving this vision will come in several steps. To understand the 1st building block the nRF7002 will be a part of, we need to take a step back in time to 1996.
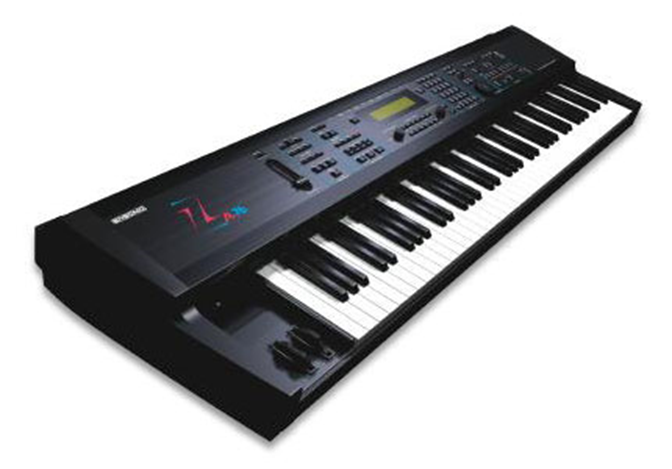
The EnsoniqZR-76 Performance Synthesizer and Workstation
Before the guitar, the synthesizer was my 1st love. There was an aesthetic to the gear of the late 80’s and 90’s. Sleek brushed aluminum, a plethora of encoder knobs and large arrays of buttons.
You weren’t just a musician, but the operator of a sleek F-14 Tomcat supersonic fighter Jet.
If you were lucky enough to come up in the era of arcades and got strapped inside a Sega Afterburner machine, you understand know feeling.
Ensoniq’s manufactured some of the most ubiquitous gear in the 80’s and 90’s. The ASR-10 Sampler which was used by several #1 artists. Many of Ensoniq’s features were leading edge. The ZR-76 was the last in the lineage of this class of device and incorporated a unique feature: the “Idea Pad”.
By the mid/late 90’s memory was getting cheaper and so were higher end 32-bit MCUs based upon the Motorola 68000 architecture. The ZR-76 incorporated enough memory to track everything you do. Any riff, lick, or cool technique would be in a buffer to be easily recalled. This may not sound particularly useful, but as a musician there are many times when I played something really cool but could not reproduce. The Idea Pad allowed you to not be concerned if the “record” button was on. You could play freely without ever thinking about it.
There was an added psychological benefit as well. The added stress of “recording” changes how you play. The best music is serendipity. You cannot force it happen; you just have to be ready when it does.
Into the Guitar
The ZR-76 memory buffer was small. You could get about 30 minutes before the circular buffer wrapped. The only storage option was a 3.5” floppy disk.

The 3.5” 1.44MB Floppy Disk
What was stored was effectively metadata. The MIDI command codes , timing information and your current “patch”. For the guitar, data exists as real-time time series data. It is a lot more raw data…. and it is effectively “analog”.
What I want to do is capture everything.

What I want is the ability to capture everything a musician does on their instrument. Everything that that has ever come output out of the pickups. Every setting, patch, adjustment and tweak. Storage technology has moved on. Not only with local storage, but cloud storage. What I am proposing is not a better looper pedal. Although, this design will certainly have ample RAM (16MB) for that function. There are several technology pieces at our disposal to implement this. Recording buffers can be extended via SD Card. This finite storage is the starting point but can get us to everything recorded in a day or two. The next piece is the connectivity.
Cloud storage is nearly free. This is the 1st of three transformational pieces enabled by the nRF7002. There will be enough local storage to queue up all of the real time data. The nRF7002 can offload queued up data into a backend when the guitar is “hanging on the rack”. If you are thinking ahead, you may ask “What will we do with all that data?”. The good news is that there is technology for that as well. The many hours of the raw data will need sorted, filter and categorized. We have the ability to do that at scale.
Lastly, there is much to be learned about the contents of the data to feed back into the guitar. To truly turn it into *your* instrument. Almost like your own Iron Man suit.
But that will be a story for another time….
There is historical precedent for meticulous “note taking” of *everything*. One of my favorite composers, J.S. Bach, produced so much raw work that it had to be captured with the Bach-Werke-Verzeichnis (BWV) system. As of today, there are 1,126 BWV numbers assigned to his compositions. It is also understood that this is the known work, with the possibility of more lost to time. The BWV system represents a significant effort. Technology now exists to scale the concept to anyone and any instrument. J.S. Bach was certainly unique. However, there is great material being produced daily by unknown individuals that will be lost to time.
I experience this issue often. I play a riff that I can’t seem to recreate. Like a meme it might resurface in a future jam session, but I can’t count on my memory or ability to always be “hooked up” to a recorder.
Taking the 1st Steps – Choosing the nRF7002
This concept requires several pieces before becoming a complete implementation. The first step is an important one; build the infrastructure to capture the data. When the nRF7002 was announced, I quickly realized it was the perfect companion for the i.MX RT685 SOC I was using.
There were four attractive aspects of the nRF7002:
- A “ Zephyr 1st” approach software integration
- A Quad-SPI interface hardware interface
- Good balance of the power consumption and performance
- Simplicity of board level design
Translating an idea into reality is a blocker for many. Everyone on the planet has good ideas. There is no shortage of them. Getting an idea instantiated to discover its true value is what separates those who talk about things versus those who do things. It is of upmost importance to remove the barriers at this early stage.
For me, the Zephyr piece is absolutely huge. My prior experience with the nRF9160 and the nRF52840 informed of why Zephyr is important. In this webinar, I talk about some of the “why”:
https://www.zephyrproject.org/why-you-should-care-about-zephyr-rtos/
A well tested network stack is critical for rapid prototypes. Furthermore, the end game is to connect to backend cloud services. Whether it be connecting to an S3 Bucket, doing a simple HTTPS Post, or connecting to an IOT service such as Golioth, there are a lot of details dealing with complex security stacks to ensure reliable operation. Zephyr does this out of the box. Once you are “plugged in”, you gain the all the benefits of 1000’s hours of testing and development. Both Nordic and NXP are fully committed to the platform, making the it an easy choice when I think about connectivity.
As with any software technolgy, there is ramp up time. I wrote some deep dive articles on going from “zero to Zephyr”. This one details building a board from scratch around the i.MX RT685 and getting Zephyr to boot:
https://zephyrproject.org/the-road-to-using-the-i-mx-rt685-crossover-mcu-with-zephyr-rtos/
Likewise, I did this piece to show how to get the high-level benefits of Zephyr while still being able to get “to the metal” to optimize performance and power on the Nordic nRF9160:
https://www.zephyrproject.org/getting-the-best-of-all-worlds-with-zephyr-rtos/
The next important feature of the NRF7002 is the Quad-SPI (QSPI) interface. QSPI represents a good balance of interface speed and wiring simplicity. There are existing modules and chipsets that use a 4-bit SDIO interface. However, these tend to be used more often for Linux based systems. I already have the SDIO interface on the RT685 committed to the SD card for storage.
The NXP i.MX RT family of parts contain a peripheral call “FlexSPI”. The FlexSPI interface is primarily used for attaching execute in place (XIP) flash devices over a 1-bit, 4-bit or Octal “SPI” bus. FlexSPI can also be used PSRAM memories. The SuperMonkey module used in the next active pickguard will have 16MB of PSRAM (Octal Interface) over one of the FlexSPI channel. You can read more about FlexSPI here:
FlexSPI is highly adaptable and can be configured to talk to the nRF7002. The nRF7002 can also be used with a regular SPI interface. This is 1st baby step I took on the path to getting things working with the i.MX RT685 and what I will detail in this article. Nordic has traditional made board level design easy. I wrote about this for the nRF9160 platform here:
https://resources.altium.com/p/using-altium-designer-cellular-industrial-iot
All the Nordic develop kits have freely available design files, so it is straightforward to move from concept prototype to the 1st PCB iteration.
Baby Steps with the nRF7002
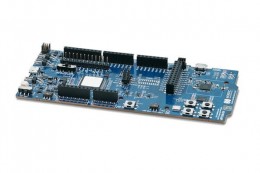
I have been doing “full stack” embedded systems for nearly 25 years. This line of work has humbled me on numerous occasions. Even though a technical endpoint may be sophisticated, my general approach is always the same. Start with the simplest steps possible and always start with the existing tools and examples. I have tried numerous times to circumvent this and have failed on almost every occasion! It doesn’t matter of your experience level. Baby steps 1st, starting with blinking the LED. For the nRF7002, I started with nRF7002-DK. This platform uses the nRF5340 as the host microcontroller.
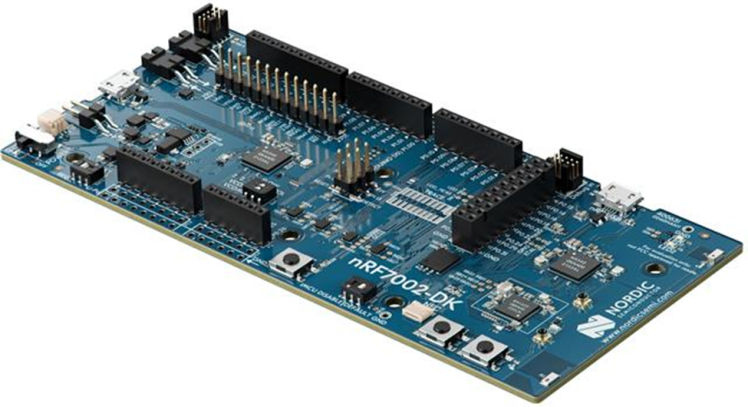
The nRF7002-DK
I wrote about the experience here in the context of using the nRF7002 with the Golioth IOT platform:
https://blog.golioth.io/trying-out-golioth-with-the-nordic-nrf7002/
The 1st step was to see the nRF7002 operate in a controlled environment under idea” conditions. The 1st sample I used with the nRF7002-DK was the Wi-Fi Shell.
https://github.com/nrfconnect/sdk-nrf
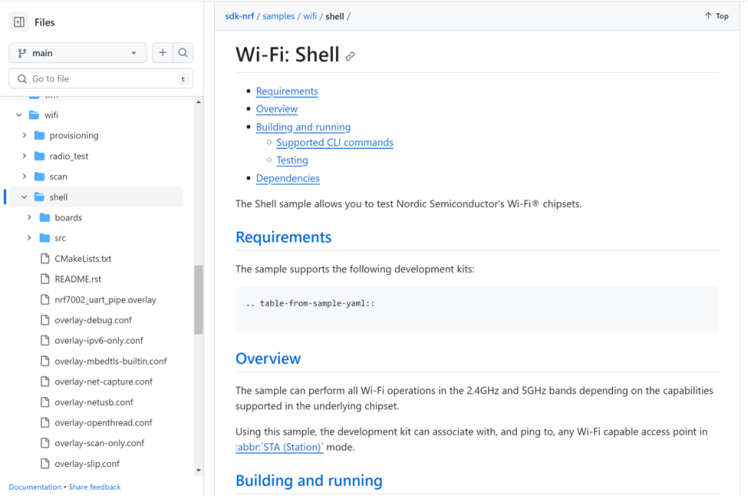
Wi-Fi Shell Sample in the nRF Connect SDK
The Wi-Fi shell is the best place to start with the nRF7002-DK. You get a fully functional command line interface to scan for networks, connect, perform basic network operations such as ping, DNS queries and even send TCP/UDP packets.

The Wi-Fi Shell Sample
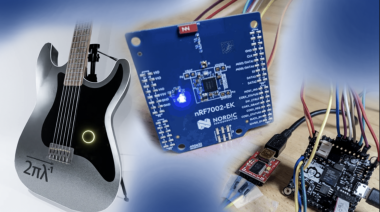
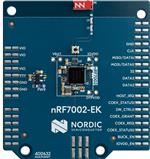
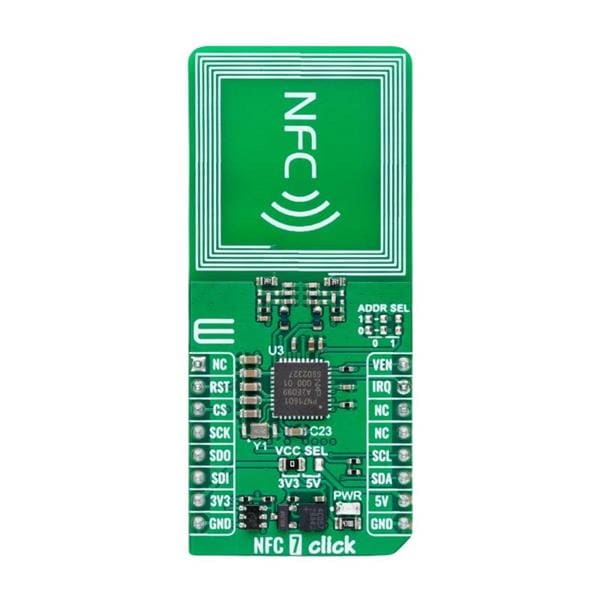
After seeing the Nordic designed hardware function with an example, the next step is to consider how to get the nRF7002 working with the i.MX RT685. Nordic recently released the nRF7002-EK. The nRF7002-EK is an nRF7002 Wi-Fi 6 Evaluation Kit with an Arduino shield form factor.
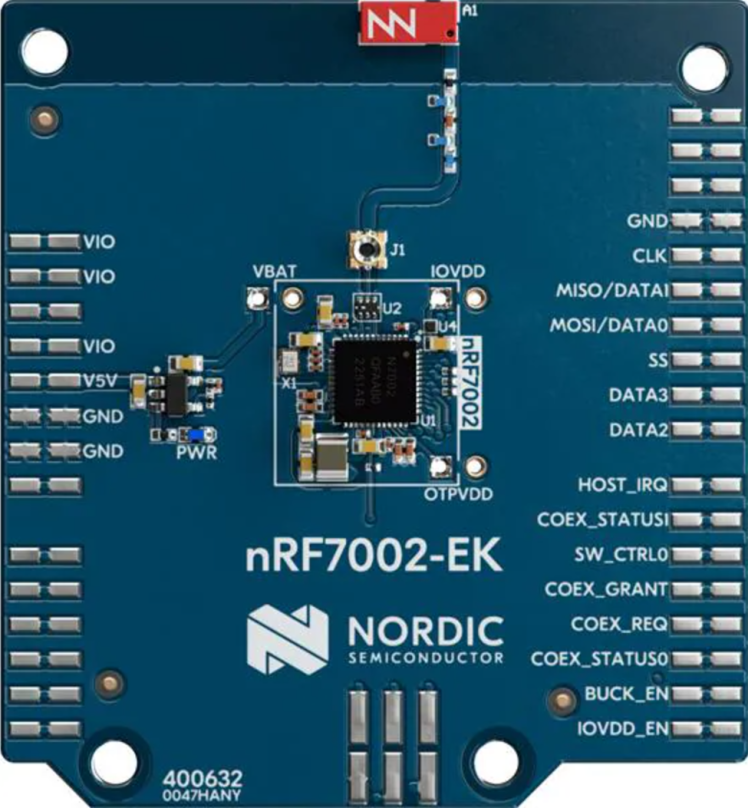
The Nordic nRF7002-EK
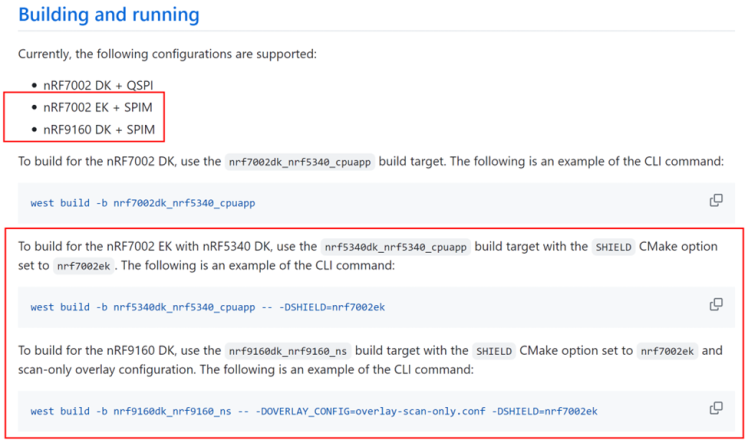
The 1st step with the nRF7002-EK
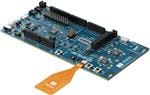
The nRF7002-EK is in an Arduino form factor shield to “plug” into a wide range of boards. Before going “all-in” on getting the nRF7002 to work with the i.MX RT685, I used another Nordic sample to understand how migrate. The readme.rst in the Wi-Fi shell sample details using the nRF7002-EK in 1-bit SPI mode. There are two examples connecting the nRF7002 to a host processor: the nRF5340 via the nRF5340-DK and the nRF9160 via the nRF9160-DK
nRF7002-EK SPI Examples
I verified correct operation with the nRF5340-DK and the nRF7002-EK. This was a critical step. It allowed me to examine the hardware configuration to get the SPI bus “talking”. The Zephyr driver mechanism uses devicetree files to specify SOCs, boards and shields. These devicetree files get transformed into a giant C header file at build time. Combined with standardized macros, your application code can reference peripherals hardware connections in a portable manner.
It is important to note that the Zephyr devicetree system borrows concepts from Linux but is different in one specific aspect. The Zephyr devicetree is static and is processed when you compile the code. The output is just a header file. However, There is nothing stopping from bypassing this mechanism and accessing hardware registers directly. The tradeoff is portability.
Using devicetree means that I can move code between different vendors and target hardware. Another important point is that the difference between the i.MX RT685 and the nRF5340 is smaller than one may think. These SoCs are produced from different vendors and have a differing peripheral set. However, both use an ARM Cortex M33 application core. Once you look at microcontrollers through the lens of *composition*, it is much easier to this about how to move between what appears to be radically different devices. Zephyr is built around this composition model. Moving from one platform to another is much simpler than you may think.
The nRF5340 sample is built with the “nrf7002ek” shield overlay. We can see what this overlay does by looking here:
https://github.dev/nrfconnect/sdk-nrf/blob/main/boards/shields/nrf7002ek/

The nRF7002-EK Shield Overlay
Notice that nRF700x node lives under a reference to the “arduino_spi” node alias. There are also references to GPIO pins with the “arduino_header” alias. The SPI interface code for the nRF7002 lives here:
https://github.com/nrfconnect/sdk-nrf/blob/main/drivers/wifi/nrf700x/src/qspi/src/
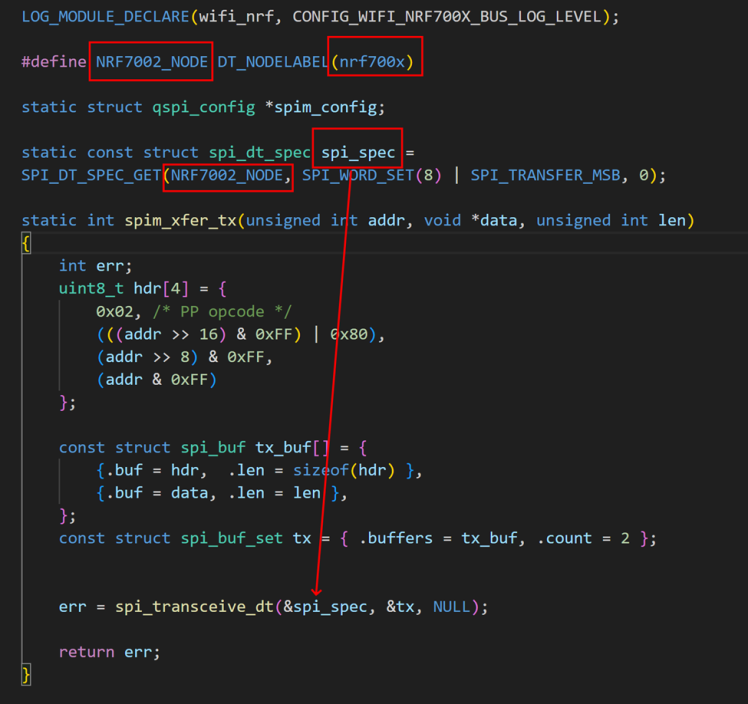
Devicetree Node Usage in the NRF7002 SPI Driver Code
The driver code uses the Zephyr devicetree macros to fetch a reference to a SPI device. It doesn’t actually care about the underlying hardware. This is the magic of the system.
We can track the arduino_spi alias to the board devicetree for the nRF5340-DK in the main zephyr repository:
https://github.com/zephyrproject-rtos/zephyr/blob/main/boards/arm/nrf5340dk_nrf5340/
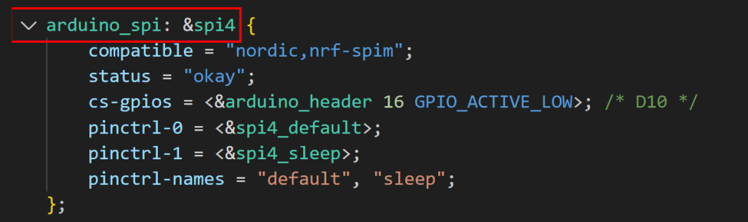
Tracking Down “arduino_spi” in the nRF5340 Board Devicetree File
You can see that arduino_spi aliases to spi4 in the nRF5340. This is where the “rubber meets the road”. Once again it is important to note that the nRF7002 driver doesn’t care about the underlying SPI port. It finds it through the devicetree mechanism.
Moving to the i.MX RT685
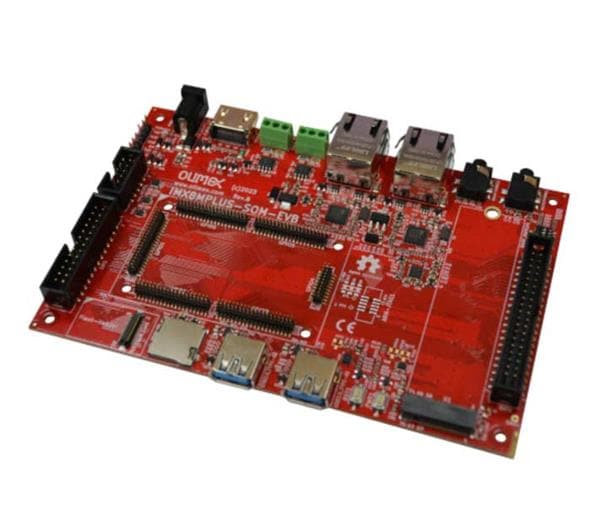
The next step is to consider how to migrate to the MIMXRT685. The starting point was the i.MX RT600 Audio Evaluation Kit (MIMXRT685-AUD-EVK).
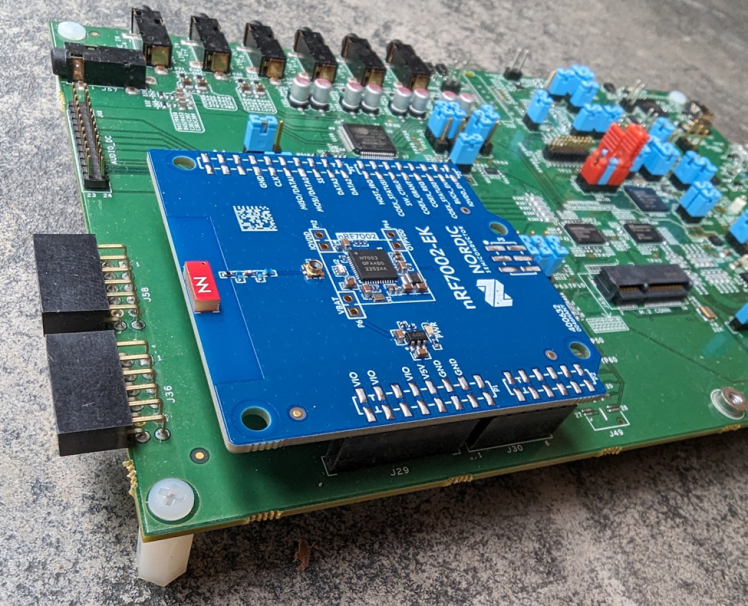
The nRF7002-EK connected to the MIMXRT685-AUD-EVK
The RT685 has Zephyr support with the mimxrt685_evk board. The best part is that the Zephyr devicetree mechanism allows users to “mutate” an existing board definition to make things work.
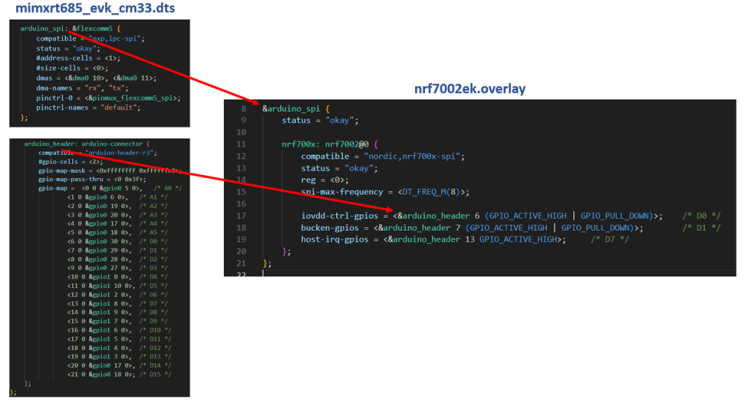
Observing the connections between the mimxrt685_evk and the nrf7002ek.overlay
The aliases for arduino_spi and arduino_header already exist in the mimxrt685_evk_cm33.dts file. This makes integration simple. The biggest consideration for porting the nRF7002-EK to a new board is where the nRF7002 pins for HOST_IRQ, BUCK_EN and IOVDD_EN are mapped. The nRF7002-EK places these IO on header pins that could be used for other functions on a host board. In particular, BUCK_EN and IOVDD_EN are on the pins for the standard Arduino UART. There can be conflicts with the circuits on your host hardware, so it is good to double check the schematics of the nRF7002-EK and the host board. The Wi-Fi shell sample shows an example of how this is handled.
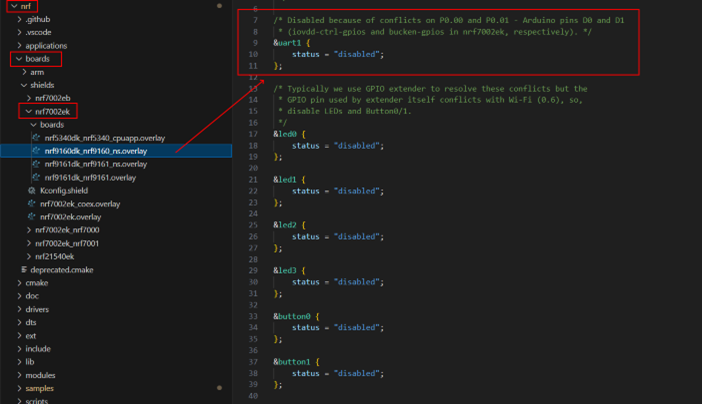
Handling potential IO conflicts
I used the instructions in the Wi-Fi shell sample for the nrf9160 as it was setup for “scan only”. This got me to the point where I could see things working at the hardware as it was the simplest use case. However, to get the full WiFi capabilities, there is one additional concern. The nRF7002 Wi-Fi subsystem has a dependency on an WPA supplicant module.
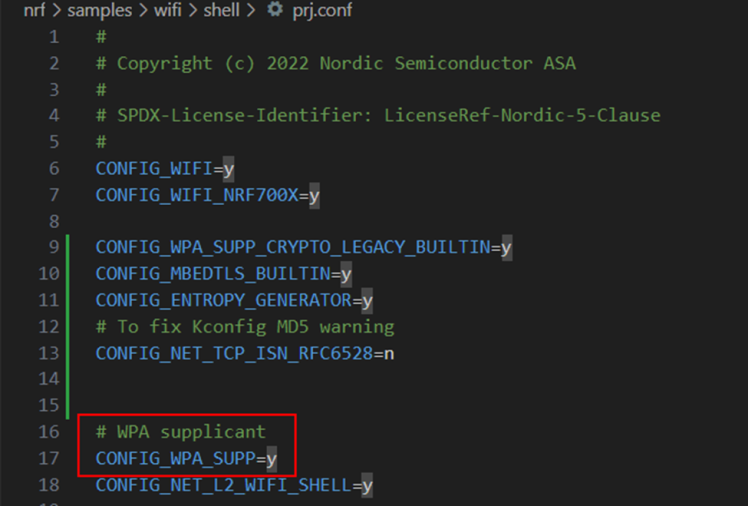
WPA Supplicant Dependency
This is required to connect to a network. The WPA Supplicant module has dependencies on specific to Nordic software modules for Nordic host processors. To use on a non-Nordic Host, there was a recent pull request for a mbedTLS configuration overlay.

A kconfig overlay for using WPA_SUPP with non-nRF host MCUs
Using this a guide, I could get everything to work. The end point wasn’t just the EVK, but to get things working on my SuperMonkey Hardware. I already had a custom board definition that was based upon the EVK. I detailed how to make a custom Zephyr board definition here. Nothing feels better than getting a build to work!
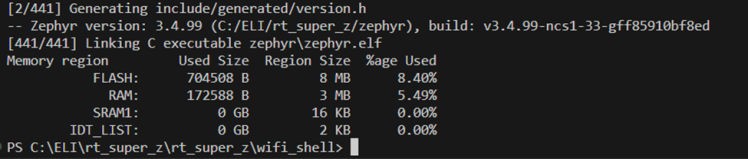

Build Success with a fully featured Wi-Fi Shell on the RT685 SuperMonkey
Using the baby steps, I could put it all together in short order. The end result was a working WiFi shell.
The working version can be found in the rt_super_z repo:
https://github.com/ehughes/rt_super_z/
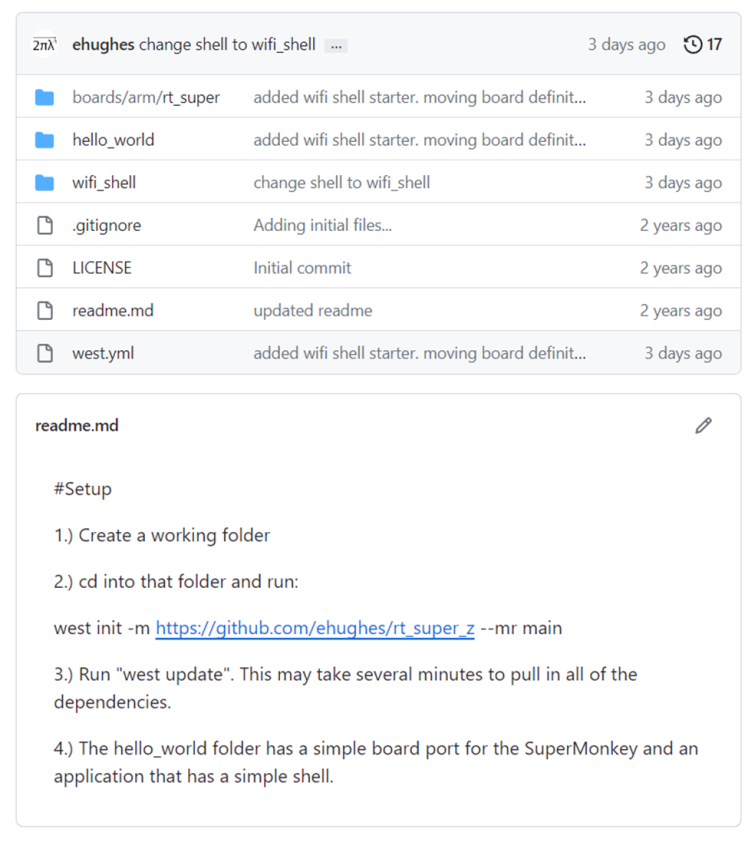 The rt_super_z repository
Now that we have the nRF7002 working in the basic SPI mode, development can proceed with higher network operations such as file transfers and device settings. To improve connection speed, we can also get the Quad-SPI mode working. That, however, will be for another article.
Wrapping Up
I hope this article was helpful in introducing the nRF7002, the nRF7002-EK and how you can adapt it to your own projects. As you saw in this example, you can completely change the underlying platform with relatively little work. We “crossed over” between a the NXP i.MX RT685 Audio SoC and the Nordic nRF7002 Wi-Fi Companion. The next version of the pickguard will keep progressing and there is *a lot* more of the story to tell. This is only the beginning. There are other cool interfaces that will be added as BLE-MIDI
If you are new to Zephyr, I highly recommend starting with the Nordic DevAcademy:
https://academy.nordicsemi.com/courses/nrf-connect-sdk-fundamentals/
The Nordic DevAcademy well take you through getting started with Zephyr and all of the basics. The Zephyr ecosystem can be daunting at first, but the investment will pay huge dividends in terms of application portability, code reuse and rapid prototyping. The Nordic Connect SDK with any of the nRF DK hardware will get you going very fast!
Cheers!
Code
Credits
Related products


Leave your feedback...