

Smart Mirror (with Optional Alexa)
Made by benrules2 / Home Automation / Notifications / Productivity / Voice / Weather
About the project
A low cost and easy to build smart mirror with off the shelf parts.
Project info
Difficulty: Moderate
Platforms: Amazon Alexa, Raspberry Pi
Estimated time: 1 day
License: GNU General Public License, version 3 or later (GPL3+)
Items used in this project
Hardware components


View all
Software apps and online services

Story
This Smart Mirror build is aimed at being low cost, and made from readily available parts.
It all relies on the use of a regular picture frame, and mirrored window film to turn the glass into a two way mirror. Then you enclose a monitor in a wooden frame, and attach the monitor to your mirror. Finally, you get the software running on a raspberry pi, and put it behind the monitor.
This project also includes a bonus Alexa installation. Your smart mirror will be great without this, but it's nice to have a voice assistant in your mirror to ask tough questions or control home automation.
Demo and built walkthroughLets get started.
Step 1: Creating the Two Way Mirror
The two way mirror is the most essential part of this build. To create this component, you just apply Gila Mirrored Window Film to any piece of glass or acrylic. This works equally well for glass and acrylic, and only takes about 15 minutes.
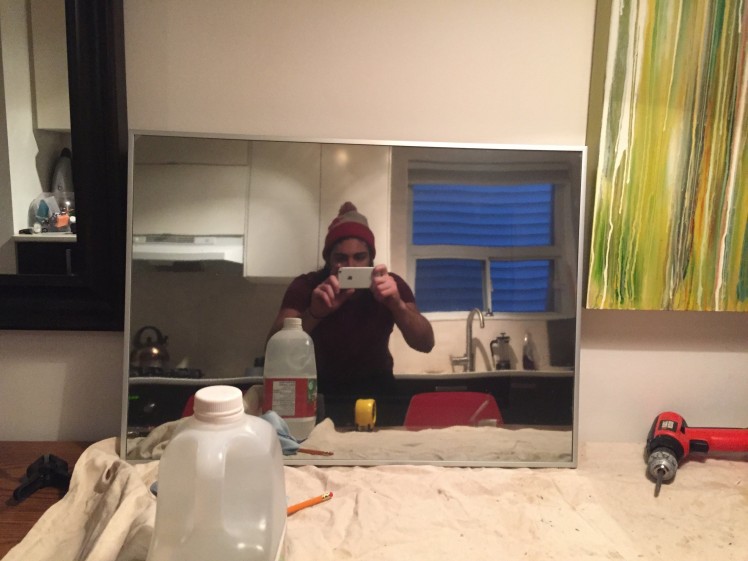 IKEA STROMBY frame with Gila Mirrored Window Film
Applying the film:
- Fill the squirt bottle with water and add about 0.5 tablespoons of dish soap. Basically just one squirt.
- Cut off a piece of reflective film about 1 inch larger than your surface in all directions.
- Clean your surface, and then spray generously with dish soap mixture.
- Put scotch tape on both corners of the film, and pull it apart to remove the plastic protective liner. Peel the liner, spraying dish soap mixture between protective liner and the film sheet.
- With the film sheet generously coated in soap mixture, lay it flat on your surface.
- Squeegee down the middle, and then from the middle out to the sides. Keep spraying and smoothing until all the air bubbles are gone.
- Use scissors or the exacto knife to trim excess materials from edge.
You're done! Let it sit for a while before moving, as it hasn't really stuck in place until all the soap mixture dries.
Step 2: Building the Wood Monitor Enclosure
The goal here is to get 4 pieces of wood around your monitor.
Start by removing the monitors bezel by removing screws and jabbing a knife or paint scraper in the seam of the monitor. If there are loose monitor controls, cover the exposed backside of the circuit board with electrical tape, and tape it to the back of your monitor.
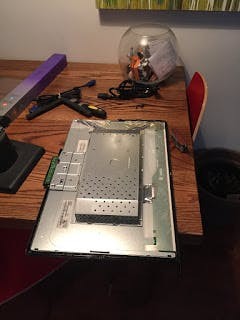 Monitor with bezel removed
Now it's time to build the frame. Use your most basic woodworking skills to size the wood frame, and then use the 90 angle brackets to attached the inner corners. Then screw 4 small screws in the front and back corners to hold the monitor in place.
 Monitor with wooden enclosure. Actually looks pretty cool on its own.
Note, I painted the frame black shortly after this for aesthetic purposes.
Step 3: Sticking it all Together
We have our ikea frame mirror, and a wooden monitor enclosure, and we need to stick them together.
I did this by cutting a hole with in the rigid frame backing of my Ikea frame, and gorilla glued some angle brackets to the backing to attach to the outside of the frame.
 Monitor enclosure sitting in ikea frame hole with angle brackets ready to be glued.
The hole in the frame backing was done using multiple passes of an exacto knife. Then I lay the monitor flat over the hole, centered everything, and used the all surface gorilla glue to fasten 4 angle brackets around each edge.
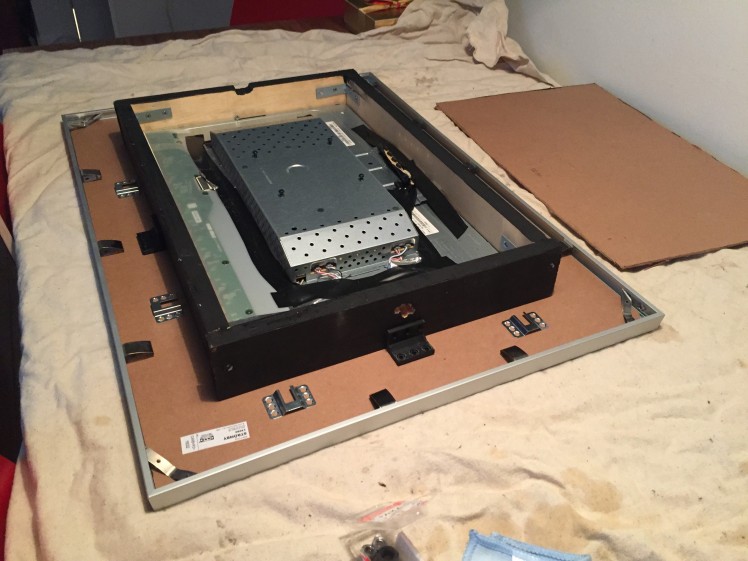
Once the glue has set, you simply screw the bracket into the monitor frame and visualize how you can arrange your electronics behind the mirror. It's up to you how to arrange your components. I punched some holes in the frame to run wires for my speaker and mic using a drill, and another trough for the power cable using a hand saw. My pi case is just wedged in place. I should probably glue that or something...
 My electronics in place behind the monitor.
Step 4: Setting up your Raspberry Pi
So you've built your hardware! That's awesome, now it's time to get the raspberry pi running the MagicMirror and Alexa software. Of course the first step is just getting an operating system. I strongly recommend raspbian jessie, which already has a great install guide. Once the Pi starts up, run the following in terminal to get the software up to date:
sudo apt-get update
sudo apt-get upgrade
You should also follow these steps to enable VNC Viewer, a remote desktop tool that allows to you access your RPi desktop from any computer on the same network. This lets you work remotely once you've finished the initial setup, without plugging in a keyboard and mouse.
Installing MagicMirror
With the basic setup done, we will now install the core application called MagicMirror. There is a guide on the website to install MagicMirror, but it didn't entirely work for me.
First I had to update NodeJs and electron by running the following commands:
curl -sL https://deb.nodesource.com/setup_4.x — Node.js v4 LTS "Argon" | sudo bash -
sudo apt-get install nodejs sudo
npm install electron
Then I downloaded and installed magic mirror using:
curl -sL https://raw.githubusercontent.com/MichMich/MagicMirror/master/installers/raspberry.sh | bash
If these ran successfully, you can just navigate to the MagicMirror directory, and run npm start
This should show the default mirror dashboard which you will immediately want to customize. To edit this, navigate to the MagicMirror/config/config.js file and add custom location, calenders, moldules, etc.
There are also some additional configuration details regarding screen orientation, screensaver settings, and wifi.
BONUS: Installing Alexa
If you've already got a computer on your wall, you may as well add some voice interaction. This can be done by installing and running Alexa on your raspberry pi as well. Instructions for this can be found previous post.
Alexa and MagicMirror will then run simultaneously on the same raspberry pi (at about 25 - 50% CPU).
Congratulations, now you've got a smart mirror, and maybe a personal assistant! Have fun never looking at your smart phone again. If you'd like to add some custom behaviour to Alexa, checkout this post on how to do it.
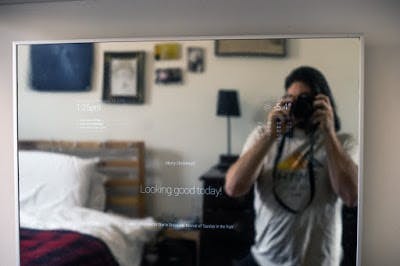 Smart mirror in its natural habitat
CAD, enclosures and custom parts
Credits
benrules2
I like to make projects that are beginner to intermediate in difficulty, with the hope of encouraging new makers to try something out for the first time. There are lots of opportunity for pretty exciting outcomes with only one or two days work. I have a mixed background of physics and computer science as well, so I like to work in a little science to my projects when I can.


Leave your feedback...