

Retro Arcade: Get Your Game On With Pocketbeagle

Made by Arakiel / Displays / Games & Gaming / Retro Tech
About the project
Tutorial on creating a retro style arcade using BeagleBone's new PocketBeagle
Project info
Difficulty: Difficult
Platforms: Adafruit, BeagleBoard
Estimated time: 1 day
License: GNU General Public License, version 3 or later (GPL3+)
Items used in this project
Hardware components

View all
Hand tools and fabrication machines
Story
For many of us, the thought of old-style arcade machines brings back favorite childhood memories: Quarters lined up on the machine, the friendly competition with friends to beat the current high score, and your initials recorded for everyone else to see. Still, this can be somewhat generational as even now you can still find arcades scattered here and there, taking cards instead of quarters and having a slew of new and modern games tempting you to play them.
In recent years, companies have revitalized some of the old games and consoles, modernizing, minimizing, and loading the updated devices with a multitude of games. Alongside this resurgence, the TV and movie industries have also tried to play to this with several shows and movies enticing generations both old and young.
Of course, as with many things, the maker/tinkerer/engineer loves to see if they can do it and if they can do it better. With the countless number of development platforms on the market and the constant release of newer and updated versions, Makers have been providing retro gaming systems and resources for these for quite some time. Here is our take on a retro-style arcade game emulator using Beagleboard’s PocketBeagle.
Project Materials and Resources
We recommend gathering the following project materials before getting started:
- Bill of Materials
- Code and STL files
- Hardware
- Accounts and software
Project Bill of Materials (BOM)
Access the project's BOM on Mouser's website for these required components:
- 958-PKTBEAGLE-SC-569—BeagleBoard.org PocketBeagle
- 485-3015—Adafruit PCB Gamepad
- 485-1770—Adafruit 2.8” TFT LCD
- 611-PTS645SM43SMTR92—C&K 6mm Tactile Switches (quantity 10)
- 667-RP-SMLF16DA1—Panasonic microSD Card
- 485-805—Adafruit SPDT Slide Switch
- 485-2465—Adafruit USB PowerBoost Battery Recharge Board (optional)
- 485-328—Adafruit 2500mAh Lithium Ion Polymer Battery (optional)
- 855-M20-9771846—Harwin Pin Headers (optional)
- 470Ω resistors (quantity 2), not included in the BOM
Project Code and STL files
Hardware
- Soldering iron
- Jumper wire
- Solder
- Breadboard
- Digital multimeter (optional)
- Oscilloscope (optional)
- MikroElektronika Click Boards (optional)
Accounts and Software
- Debian Stretch IoT (provided by Beagleboard.org)
- Advance MAME (Multiple Arcade Machine Emulator)
- Terminal emulation software (such as Cloud 9, Tera Term, or Putty)
- Etcher image burner software
- Fritzing viewer
Project Technology Overview
The retro arcade emulator is an intermediate to advanced level project geared toward those who have a basic understanding of programming languages, familiarity with the Linux command line interface, and soldering and wiring skills. The instructions provided have been completed using Windows 10 64-bit; some instructions included with this project may vary slightly depending on OS used. We will be using several Linux commands, and we recommend researching commands that you are not familiar with.
For any commands that request the Debian password, the default password is temppwd.
For this project, we’ve used the following products and technologies, described in the following sections:
- Pocket Beagle
- Debian open source OS
- Terminal emulation
- MAME and MAME Advanced
- SPI TFT Display
Pocket Beagle
The PocketBeagle comes equipped with the new Octavo Systems OSD3358-SM. This chip, integrated with the Texas Instruments Sitara AM3358 processor, TPS65217C PMIC, TI TL5209 LDO, and up to 1GB of DDR3 memory, sits on a board the size of a key FOB (Figure 1). With a micro SD card (not included) and a copy of the Debian IoT image provided by BeagleBoard.org, you can be up and running within minutes. By default, the PocketBeagle provides access to SPI, I2C, 18 GPIOs, CAN, and PWM, providing plenty of features for any designer. The flexibility to increase the number of GPIOs makes this development platform very appealing. You will find that a number of device tree overlays already exist that allow for easy addition of MikroElektronika Click boards to add features like ethernet or RTC. You can find these using the optional link provided under Hardware.ki7.
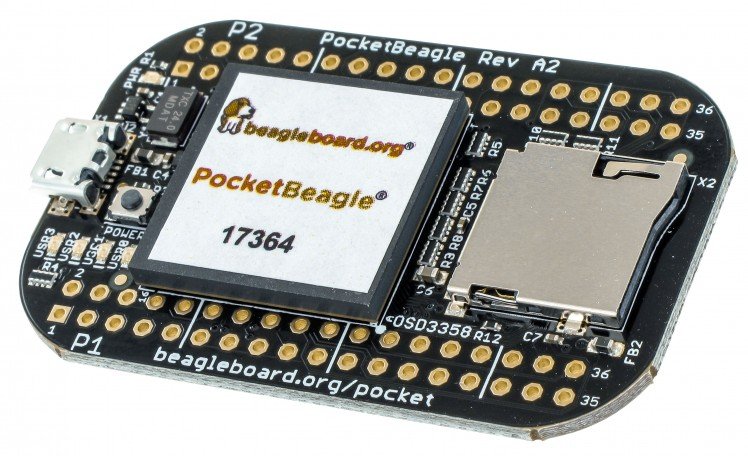
Figure 1: The PocketBeagle comes equipped with the new Octavo Systems OSD3358-SM.
Debian Open Source OS
Debian is a free to use, completely open source Unix-like OS provided by those participating in the Debian Project. There are a number of available builds for this OS depending on the platform you are using, ranging from a PC operating system to a non-graphical interface such as the one we are using in this project. Currently, Debian is the preferred firmware image used by Beagleboard.org for its products that have multiple variations. For this project, we use the non-graphical Stretch IoT version, although a graphical version has recently become available.
Terminal Emulation
Since the PocketBeagle and selected software option do not provide a direct human interface, terminal emulation will be necessary to communicate with your board. By default, the software image will provide you with the Cloud 9 option, which provides a terminal connection. However, if you should choose to use another terminal emulation tool, such as Tera Term or Putty, you can either SSH or connect via serial connection.
Game Console Emulator
For this project, we Multiple Arcade Machine Emulator (MAME), which is open source software used to emulate a wide variety of gaming consoles. Advance MAME is a port from the original MAME that allows output to more current display types such as TVs, PC monitors, and the TFT display used in this project. I do encourage anyone interested, to research more into the history of MAME and the Advance MAME port.
SPI TFT Display
And of course, what game would be complete without the display? The SPI TFT used for this project is Adafruit's part number 1770, which uses the ILI9341 LCD single chip driver supported by fbtft. The fbtft is a kernel module that acts as a medium between the ILI9341 driver and the framebuffer system. Currently, fbtft only supports a limited number of displays, which is important because these displays must have an RS/DC or Data Command pin for the display to function. You can find information regarding fbtft as well as displays commonly used and a breakdown of the command line interface on GitHub by simply searching online for fbtft.
Developing the Arcade
In the following sections, we walk you through the process of developing the arcade:
Install Debian
The PocketBeagle does not come with software installed and requires several items to get setup:
- A microSD card for your image
- Debian Stretch IoT (non-graphical) image from beagleboard.org
- Etcher software to burn the image (Figure 2).
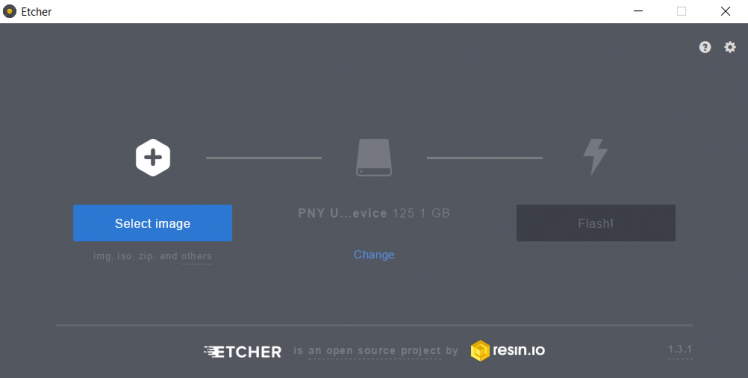
Figure 2: Etcher software.
To begin installing the Debian OS, verify that computer you’re using has a method for interfacing with the microSD card, such as an onboard slot or external card reader. These instructions are specific to Etcher and could vary depending on the software you opted to use:
Boot the PocketBeagle
Now that you’ve successfully burned the image to the microSD card, power up and boot the PocketBeagle to the newly-imaged Debian OS:
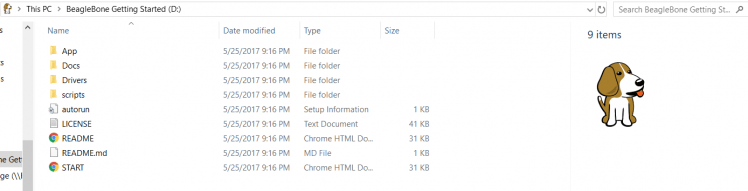
Figure 3: Open a new folder and click Start.
The resulting onscreen instructions are designed for BeagleBone Black but work for the PocketBeagle as well. If you have previously worked with a BeagleBone Black or PocketBeagle, then you have most likely already installed the USB drivers. If not, skip to Step 2 on the screen, “Enable a network connection,” then select the appropriate USB drivers for your system and install them.
Once completed, move on to “Browse your beagle” and click the http link, which will open new browser window (Figure 4). If everything is successful, the new window will have a green dialog box at the top indicating success (Figure 5).
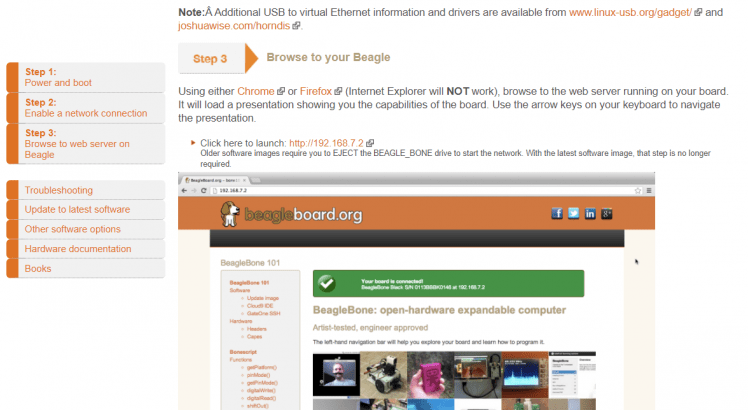
Figure 4: Browse to your Beagle.
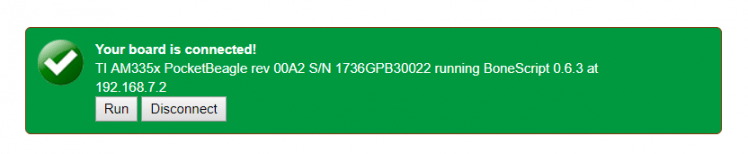
Figure 5: You're connected!
Select the Terminal Interface
You have a couple of options for the interface between the terminal and the PocketBeagle:
- Use the IP address shown to SSH into the PocketBeagle using an emulation program of your choosing.
- Use the Cloud9 IDE link. Cloud9 will not only provide a terminal window but also work as a programming interface for writing code in languages such as Python (Figure 6).

Figure 6: Cloud9 interface bash window.
Set Up Internet Access
The PocketBeagles doesn’t come equipped with an Ethernet port or Wi-Fi, so in this step, we’ll configure Internet access:
- If you’re already versed in sharing network connections, go ahead and configure Internet access.
- If you need help configuring Internet access, go to our Mouser Electronics Github page and use our Shared Network Access Guide.
Update the PocketBeagle
Following best practices, we now update and upgrade the Debian OS to ensure we’re working with the most recent version:
At the terminal window, you’ll see the debian@beaglebone:~$ prompt:
1. Type sudo apt-get update 2. Type sudo apt-get upgrade
Type y at any prompts that come up during the installation.
Modify the Hardware Configuration
The next task is to configure the system hardware for this project using the device tree overlay.
Tip: The device tree (DT) has an extensive history about the BeagleBone Black and now the PocketBeagle. If you would like to read more about this, one document I found cited in several places was Beaglebone and the 3.8 Kernel by Pantelis Antoniou.
Again here, if you’re experienced with modifying hardware configuration, you can do so on your own. Download or clone PB-beaglearcade.dtbo from the Mouser Electronics Github and save the file to debian@beaglebone:/lib/firmware$. Make sure that you enable the overlay in the uEnv.txt file in /boot/uEnv.txt.
Otherwise, use the Device Tree Overlay Creation Guide available in the Mouser Electronics Github to take you through the process. Here, you’ll copy or clone the text from the PB-beaglearcade.dts file on Mouser’s Github into your newly created .dts file.
Install and Configure Drivers
In this project, we use Advanced MAME to emulate the retro arcade games. The installation is pretty straightforward but time-consuming. To help you along with this, we’ve included a start-up guide on our Mouser Electronics Github page that you can follow to walk you through this process.
Once installed, you’ll then configure the PocketBeagle for use with this software. At the debian@beaglebone:~$ prompt:
If you don’t see any .rc files available (or if you prefer), you can also clone the file:
You can find ROMs in a variety of places, but as a starting point, you can explore the MAME site, which has a list of free-to-play ROMs available for anyone wanting to download and use them. The most important aspects are
- Ensuring that you store the ROM in the /.advance/rom folder and
- Ensuring the file has a .zip extension
The easiest way I’ve found for loading them is to store them in Dropbox, share them, and then use a command like wget to copy the ROM from the repository to the appropriate folder on your PocketBeagle.
Create Startup Services
Creating your own service routine is a great way to ensure that the program you’ve installed or written will run on power up. This is useful in case of power interruptions and in cases where you might not always want to manually launch the script.
Now the service will start each time the system powers up and run the script the service points, too.
Putting the Hardware Together
Now that we have the software in place, the startup services created, and have located and loaded the ROM’s we want to play, we need to look towards putting all the hardware together. In order to save everyone a long drawn out pin for pin description of every connection, we will provide fritzing diagrams of the TFT and PocketBeagle connection and a pinout of the Adafruit gamepad here (Figures 7 and 8) and on our Mouser Electronics Github page.
A couple of things to note:
- Include pullup resistors on two of the GPIOs. I was never able to determine why, but P2_02 and P2_06 will require a 470Ω pullup resistor, which is outlined in the Fritzing diagram.
- Ensure a ground is connected. All of the GPIO used for this project are active low, so on the gamepad, it will be important to ensure the ground is connected.
- Use a standard microUSB cable to a wall outlet or computer for power. If you’re looking for more portability, a LiPo batterywith a solution similar to this one by Adafruit using the PowerBoost 1000 would also work.
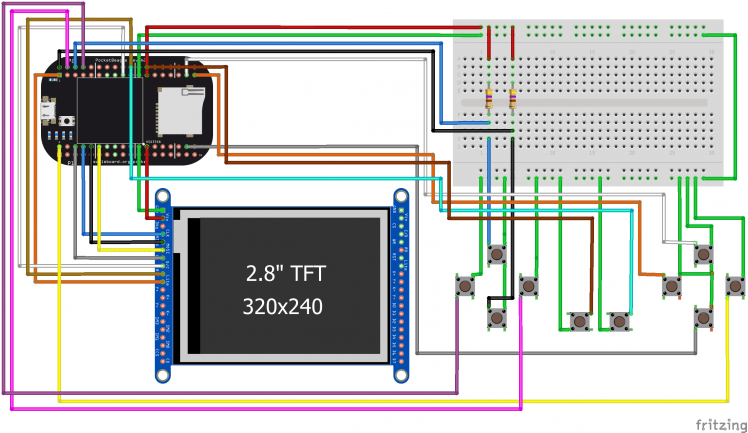
Figure 7: Fritzing diagram of the Pocket Arcade.
Figure 8: PiGRRL gamepad pinout.
Adding a Frame and Switch Covers
Now that we have the software installed, the hardware wired up, and a game playing on the screen, we need to look at presentation. Unlike some of the other hardware that might allow connection to a TV or PC display, the PocketBeagle works very well for a handheld platform. Since some of the parts used in this project were created by Adafruit, we looked to Adafruit for a solution. In the same project we linked to in the wiring section you can find the STL files they used to create the 3D printed case for that project.
Of course, this is not a Raspberry Pi, and the display is different, so we made some modifications of our own. On our Mouser Electronics Github page, you will find the modified STL files for printing out a snap-together version of the Adafruit PiGRRL 2 case along with the buttons (for the buttons, we recommend Ninja Flex filament), as shown in Figures 9 and 10. It does admittedly have a few bugs in the design, but we welcome anyone to use or modify the case.
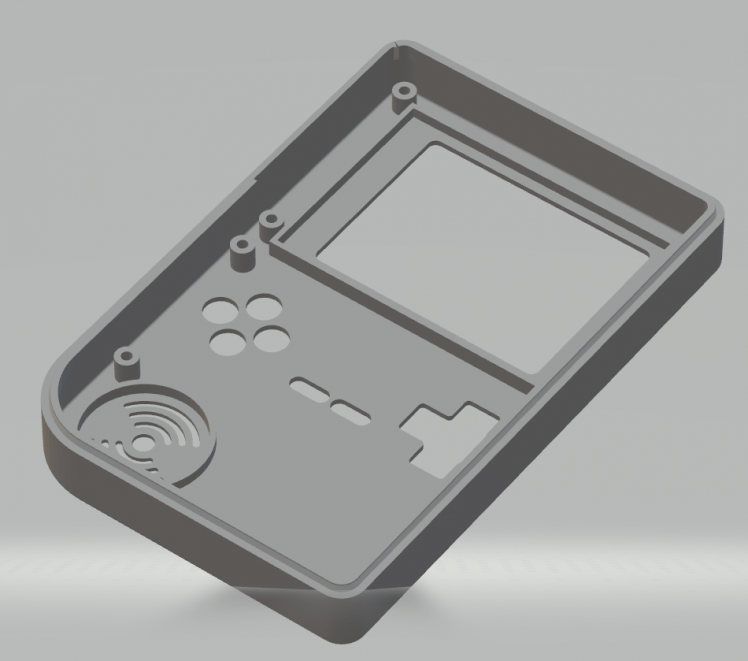
Figure 9: Front Case STL image.
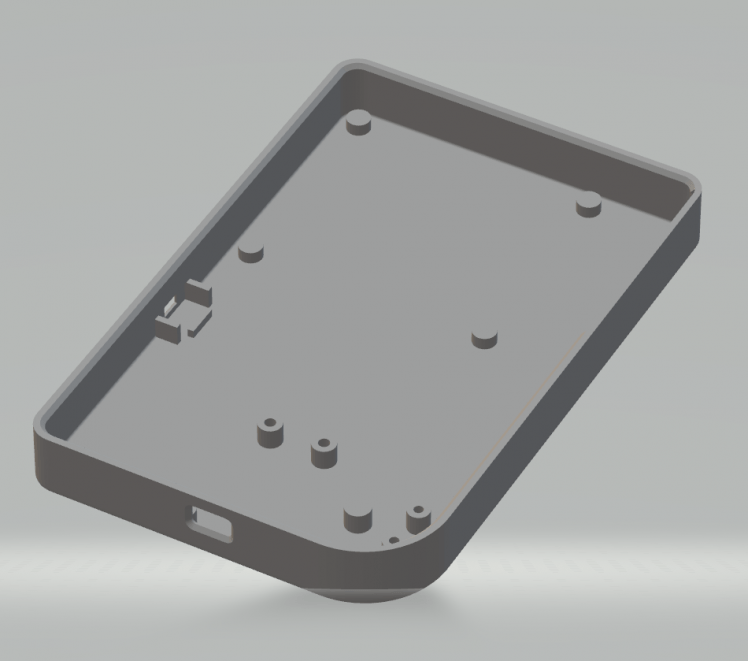
Figure 10: Back Case STL Image.
Conclusion
Figure 11 shows our completed project. Sometimes it’s not always about creating something new and exciting as technology continues to evolve around us. Sometimes it can simply be about bringing back memories of things earlier in our life that helped define us. For me, these experiences are what help shape my love of electronics and gaming, and something I love is being able to help provide possible inspiration to current and future engineers, makers, and tinkerers.

Figure 11: Our completed retro arcade game.
Code
Credits
Related products


Leave your feedback...