
Raspberry Pi Pico Sd Card Spi Storage Interface

Made by electroscope_archive / Communication / Environmental Sensing
About the project
Expand your Pico with removable FAT32 storage — log data, manage files, and interact via a Serial menu using SPI and a microSD module.
Project info
Items used in this project

Story
Adding the Raspberry Pi Pico sd card Module opens up powerful possibilities — from logging sensor data to saving settings or text files. This project walks you through building an SD card storage interface for the Pico using an inexpensive microSD card module and the SPI bus. You’ll end up with a fully interactive Serial menu that lets you create, edit, read, and delete files on the SD card.
Raspberry Pi Pico sd card Module

Raspberry Pi Pico sd card Module
🧰 Why This Project MattersThe Pico’s onboard storage is limited. By connecting a microSD card via SPI:
- You get gigabytes of removable storage for your projects.
- You learn how embedded systems manage FAT32 file systems.
- You unlock real-world use cases like data logging, configuration files, and persistent settings.
This setup works with any standard SD card module that includes a 3.3 V regulator and level shifting, ensuring safe operation with the Pico.
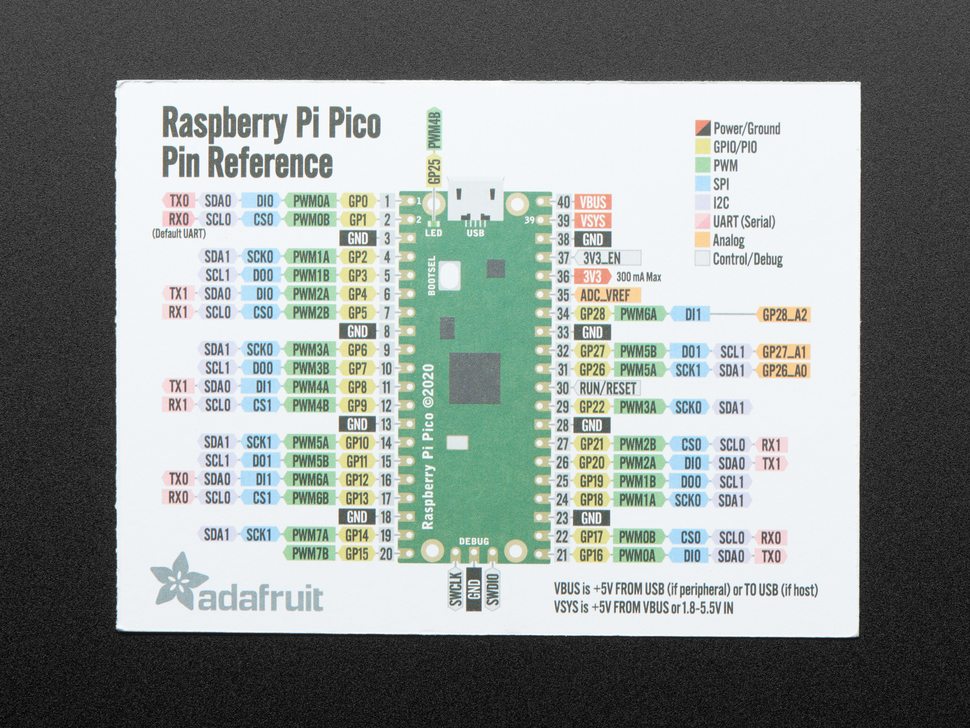
SD Card Module Pinout
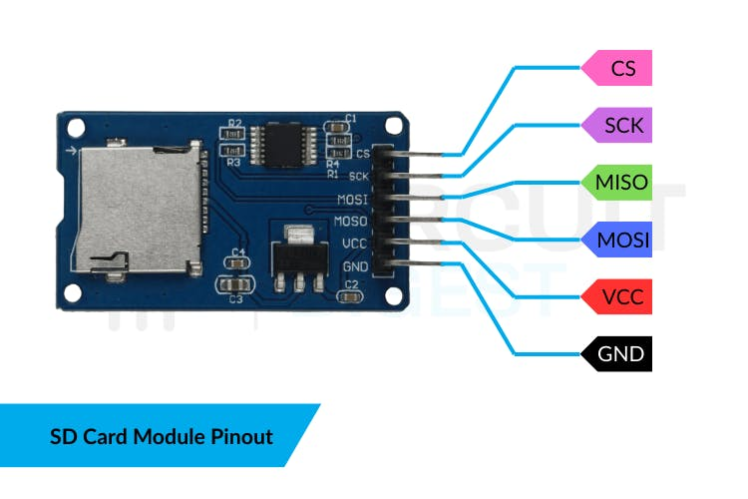
SD Card Module Pinout
🔌 Hardware RequirementsYou’ll need:
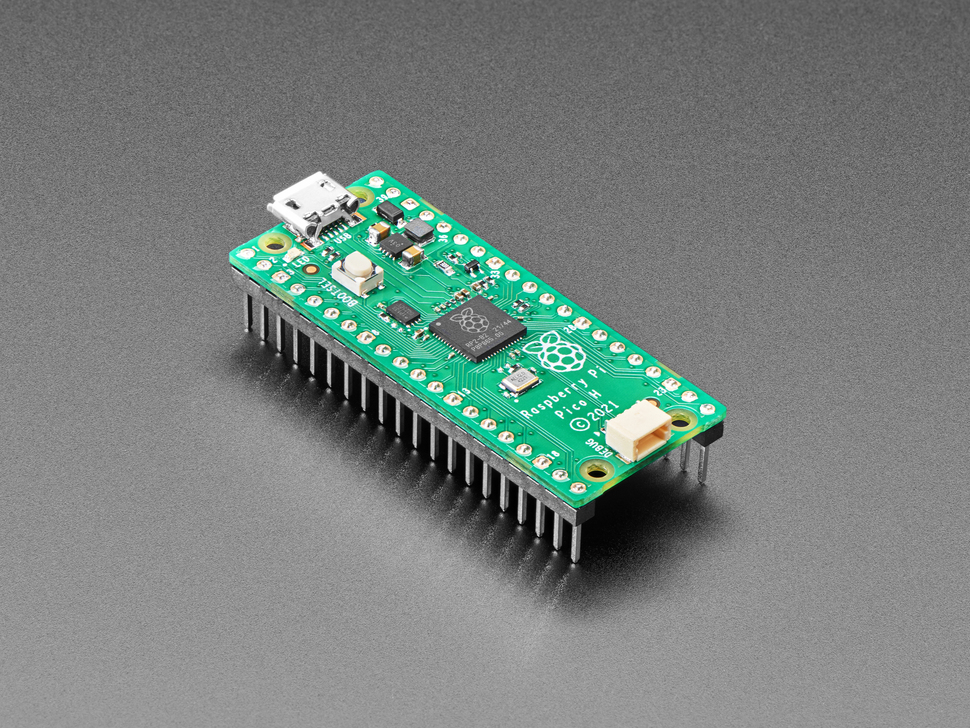
- Raspberry Pi Pico (RP2040 microcontroller)
- MicroSD card module (with 3.3 V support)
- MicroSD card (FAT32 formatted)
- Breadboard + jumper wires
- USB cable (for power and programming)
Wiring Diagram
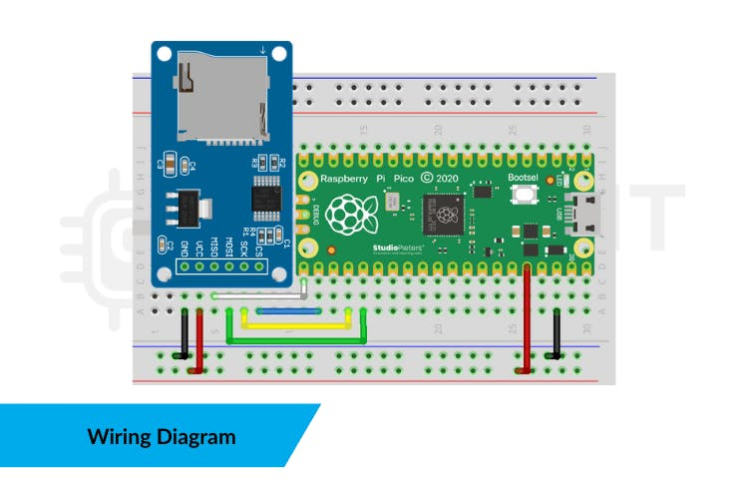
Wiring Diagram
📀 Preparing Your SD CardBefore using the card:
- Remove existing partitions.
- Create one primary partition.
- Format as FAT32 (use Rufus or GUIFormat if needed).Larger than 32 GB cards often default to exFAT and won’t work without reformatting.
⚠️ If the card isn’t FAT32, initialisation will fail, and the Pico will report SD init FAILED.
The provided Arduino sketch uses the standard SPI and SD libraries to:
- Initialise the SD card
- Create a file
- Write text
- Read from a file
- Delete a file
Here’s a high-level look at the core idea:
#include <SPI.h>
#include <SD.h>

const uint8_t CSPIN = 17;      // SD chip select
const char *FILENAME = "demo.txt";

void setup() {
  Serial.begin(115200);
  SD.begin(CSPIN, SPI);
  printMenu();
}
#include <SPI.h>
#include <SD.h>

const uint8_t CSPIN = 17;      // SD chip select
const char *FILENAME = "demo.txt";

void setup() {
  Serial.begin(115200);
  SD.begin(CSPIN, SPI);
  printMenu();
}
The loop waits for Serial input (1–4) and triggers the corresponding file operation.
👉 File operations include:
- Create & write default text
- Write custom text from Serial
- Read every character
- Delete the file
Once your Pico is wired and programmed:
- The Serial Monitor shows an easy menu.
- Choose an option by typing a number.
- The Pico performs the file action immediately.
- Results appear in real time.
This responsiveness makes it great for debugging and learning how file I/O works on a microcontroller
Schematics, diagrams and documents
Code
Credits
Related products


Leave your feedback...