

Pyramiduino

Made by baldengineer / Productivity / IoT
About the project
The only Arduino designed for healing (probably not). Okay, but it is designed for teaching.
Project info
Difficulty: Moderate
Estimated time: 4 hours
License: GNU General Public License, version 3 or later (GPL3+)
Items used in this project
Hardware components


Story
The AddOhms YouTube channel features this board in a three-part series. It shows how to design a DIY, or standalone, Arduino board. Learn how to draw the schematic, layout the PCB, and finally turn-on the finished board.
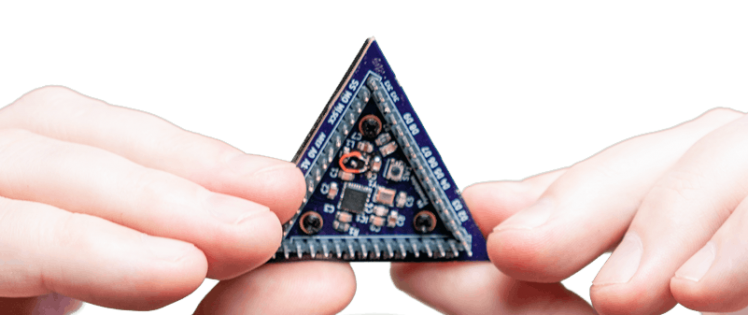
Originally, the board was a boring rectangle. Then I remembered an old trick to giving presentations: "Draw a triangle on the board." You'd be surprised how often it works. In this case, I made some cool boards and an entire video series out of the strange tip.
What problem does the Pyramiduino solve? Um. I'll get back to you on that.
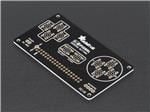
Hardware Description
Functionally, it is similar to a 328p-based Arduino Pro Mini. Except the Pryamiduino has a 16 MHz crystal. On the other hand, it is like an Uno/Nano without the USB chip and a 5 volt regulator.
The headers break out the same I/O pins as an Uno. The serial pins accept the common "FTDI board" form factor for easy UART access. There is no ICSP header, but all of the necessary signals are necessary for in-circuit programming.
The board only operates on 5 volts. There is an onboard 3.3 volt LDO. The design files included on this project are the "correct" files. Aka, they do not include the mistakes from the video series. Mistakes which were entirely there for educational video reasons.
Assembly
You will need to get the board manufactured. You can order the Pyramiduino PCB from OSHPark. Assembly is best done with a reflow oven or hot plate. The 328p used is a QFN (or MFN) package. It is very difficult to solder by hand, but not impossible.
Bootloader
As shown in the video, part 3, you need an AVR ISP to load the bootloader. If you don't have a standalone programmer, you can try using an Arduino as an ISP.
Test
As I show in the Turn-On video, it is critical to test VCC-GND and 3v3-GND to make sure there are no shorts.
Exercising
I created a simple program to toggle all of the I/O pins. Eventually I'll extend it to test the ADC (analog input) as well. (Or I'd be happy to take your pull-request that does exactly that! *hint* *hint*)
Videos
Here's the video series. They range from 10-15 minutes each. As usual, AddOhms videos are succinct. Um. There aren't a lot of. Uh. Filler. And uh, oh yeah, I forgot to mention kind of things. (None of that.)
Bonus, episode 3 explains how the "Arduino Auto-Reset Works."
Episode 1: Drawing the Schematic
AddOhms #23Episode 2: Laying out the PCB
AddOhms #24Episode 3: Turn-on, debug and bootloader burn
AddOhms #27Schematics, diagrams and documents
Code
Credits
baldengineer
Fan of making things blink, beep, and fly. Creator of AddOhms and writer at baldengineer.com.
Related products


Leave your feedback...