

Product Quality Analyzer Using Unit V2 & Blues Wireless

Made by pradeeplogu0 / Communication / Productivity / IoT
About the project
Will guide you to make a Cellular IoT based Product Quality Analyzer with M5Unit V2.
Project info
Difficulty: Moderate
Platforms: DFRobot, Jupyter, M5Stack, Node-RED, Blues Wireless
Estimated time: 1 hour
License: GNU Lesser General Public License version 3 or later (LGPL3+)
Items used in this project
Hardware components

Story
It is more difficult to maintain the same quality over quantity in production. Product quality is critical for any company that manufactures things. Manufacturers can ensure that their products fulfill customer expectations, decrease costs associated with recalls, and boost customer satisfaction by maintaining a high level of quality.
To maintain industrial product quality, manufacturers must consider a number of factors, including quality control, product design, and production processes.
Quality Control is a key element of industrial product quality. Quality control begins with setting standards for the product and then testing to ensure those standards are met. So, the final solution is testing the product at each stage of the production process, as well as after it is completed.
We can inspect the products manually, but since it is time-consuming, all the vendors want to introduce the products first. All about “TTM - Time To Market”.
In this project, we are going to see how to build a low-cost Industrial Product Quality Analyzer with cellular monitoring and control.
Hardware Requirements ⚙️:
Software ?️:
About the hardware modules ?:
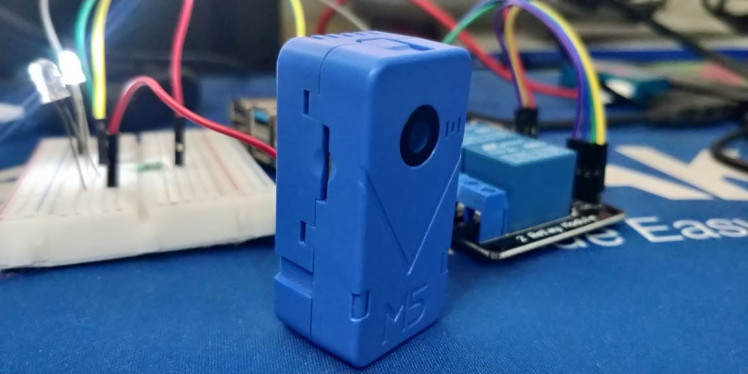
M5Stack's UnitV2is a small Linux computer which contains an AI recognition camera module. Also, it has an onboard microphone and Wi-Fi chip for better performance. We can use this for multiple applications. Even it comes with some preloaded models. It offers a convenient and efficient AI experience. So, you can directly start working out of the box.
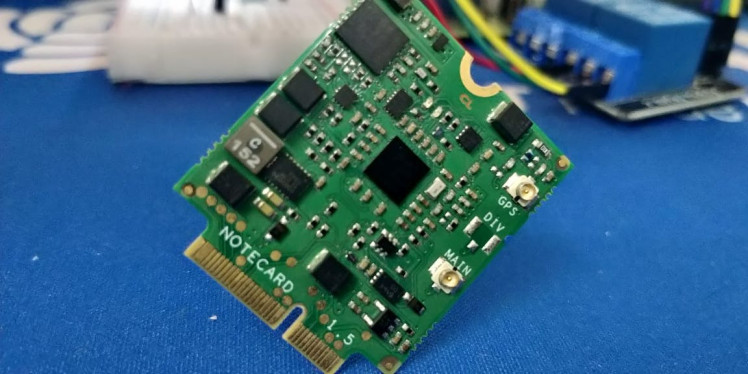
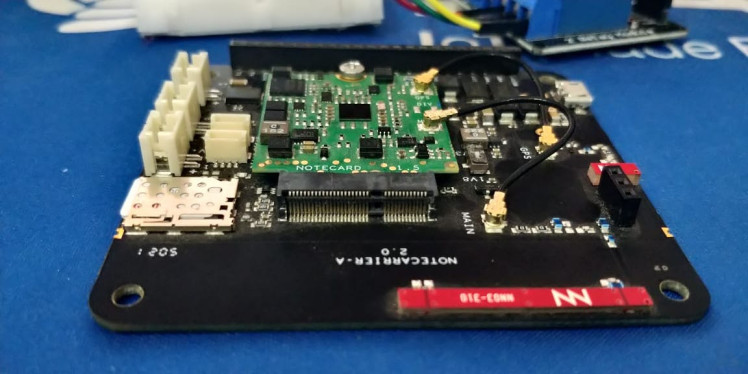
Blues Wireless Notecard is a smart IoT hardware which can be capable of transferring the sensor data to the cloud via private VPN tunnels with the help of the Cellular network. Notecard is an M.2 Key connector based module. So, we need to use some sort of controller board.
Blues Wireless Notecarrier is the controller board which will talk to the Notecard, and it will give the provisions for power supply and some other interfaces like UART, I2C.
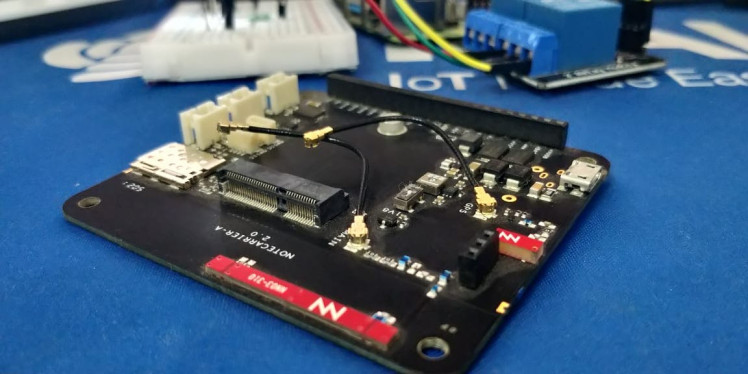
So, we are going to connect the Notecard with this.
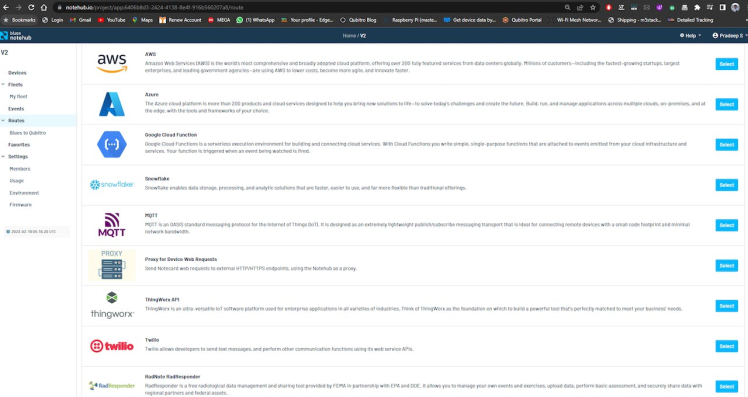
Blues Notehub is the VPN tunnel which gets the data directly from the cellular Notecard, and it will revert the data to other cloud routes like MQTT, Azure, AWS etc…

Watch this YouTube video to get to know more about Notehub.
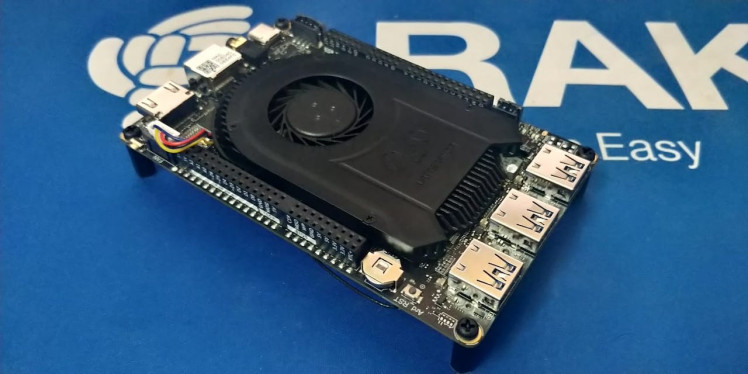
Lattepanda 3 Deltais a single board pocket-size computer, which has plenty of connectivity options and features. We are going to use this as our control system to control the instruments. This contains 8 GB of LPDDR4 RAM with Intel based processor. It also contains inbuilt eMMC storage and some expansion slots for the storage and 4G or 5G network. Also, it can work on both Windows and Linux platforms.As I previously mentioned, the Unit V2 contains some pre-installed models. We can directly use that models to classify many objects. Also, we can add our own models in it, by using M5Stack's Unit V Training.
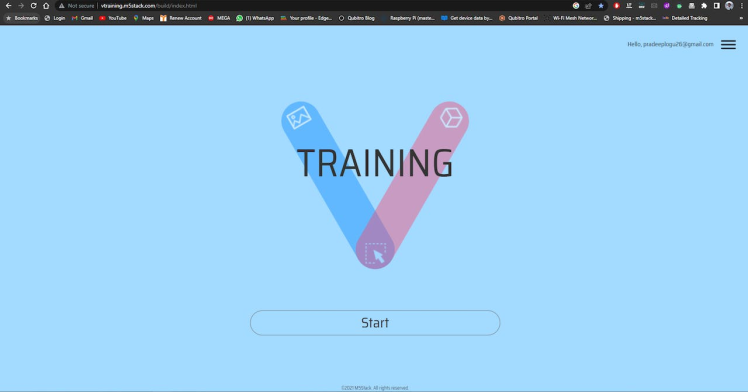
Step 1—Model Classifications ?:
As I previously mentioned, the Unit V2 contains some pre-installed models. We can directly use that models to classify many objects. Also, we can add our own models in it, by using M5Stack's Unit V Training.
Then upload the images, here is used to classify perfect and defected bottles (like-without caps, not well manufactured).Once finished the upload, then labeling them.
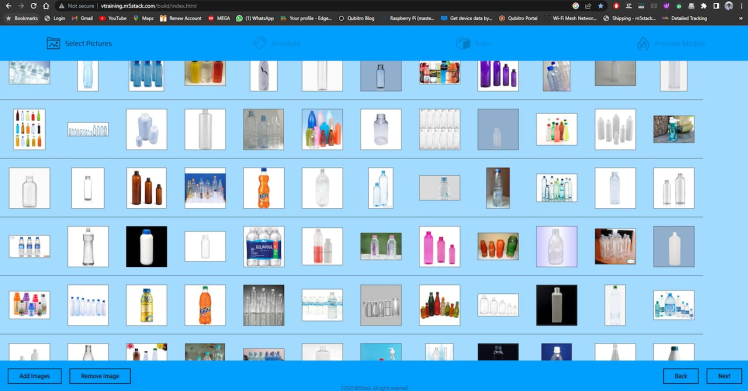
Once finish the upload, then labeling them.

Next, finish the model development by simply clicking next. Then just upload the model and test that.
Also for more use case models I have tried to classify some other product defects.
Next thing is, we have to interface the Blues Notecard with Unit V2.
Step 2—Hardware Connection ⛓️:
One of the best things is Unit V2 has an onboard UART interface. So, we can directly connect the Notecard with that.
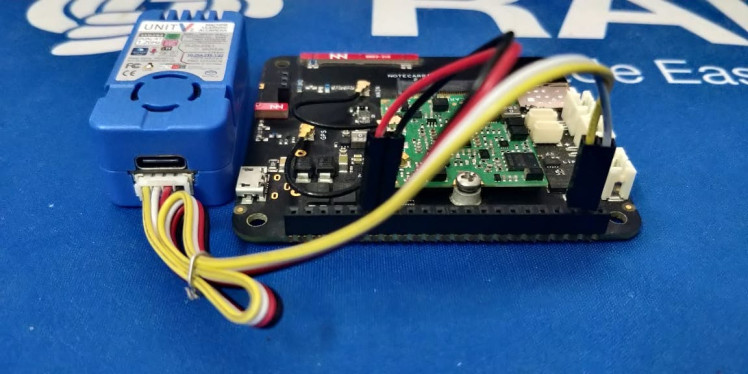
Notecard can be powered by Unit V2 via the Type C port. So, you don't need to add a power supply to it. So, all the data communication and the power input will be taken from the UART port itself. We can connect the Blues Notecard with Unit V2 via Python in the Jupyter notebook. Switch the Unit V2 to Jupyter mode and use this following script.
Step 3—Jupyter with Notecard ??:
We can connect the Blues Notecard with Unit V2 via Python in the Jupyter notebook. Switch the Unit V2 to Jupyter mode and use this following script.This below part of the code helps you to run your model via Jupyter notebook.
from json.decoder import JSONDecodeError
import subprocess
import json
import base64
import serial

uart_grove = serial.Serial('/dev/ttyS1', 9600, timeout=0.5)
reconizer = subprocess.Popen(['/home/m5stack/payload/bin/object_recognition', '/home/m5stack/payload/uploads/models/v2model_2d03a4c01727079a'], stdin=subprocess.PIPE, stdout=subprocess.PIPE, stderr=subprocess.PIPE)
reconizer.stdin.write("_{"stream":1}rn".encode('utf-8'))
reconizer.stdin.flush()

img = b''

while 1:
    doc = json.loads(reconizer.stdout.readline().decode('utf-8'))
    uart_grove.write(('{"req":"hub.set", "product":"com.gmail.pradeeplogu26:v2"}' + 'n').encode('utf-8'))

    if 'img' in doc:
        byte_data = base64.b64decode(doc["img"])
        img = bytes(byte_data)

    elif 'num' in doc:
        for obj in doc['obj']:
            Object =str(obj['type'])

            if Object=="Perfect":
                req={}
                req = {"req": "note.add"}
                req["sync"] = True
                req["body"] = {"Object": str(Object),"Alarm":True}
                json_data = json.dumps(req)
                print(json_data)
                uart_grove.write(str(json_data).encode('utf-8'))

            else:
                req={}
                req = {"req": "note.add"}
                req["sync"] = True
                req["body"] = {"Object": str(Object),"Alarm":False}
                json_data = json.dumps(req)
                print(json_data)
                uart_grove.write(str(json_data).encode('utf-8'))
This below part of the code help you to run your model via Jupyter notebook.
reconizer = subprocess.Popen(['/home/m5stack/payload/bin/object_recognition', '/home/m5stack/payload/uploads/models/v2model_2d03a4c01727079a'], stdin=subprocess.PIPE, stdout=subprocess.PIPE, stderr=subprocess.PIPE)In this code, change your model name as per yours. Next, you have to change the product ID in this code block.
uart_grove.write(('{"req":"hub.set", "product":"com.gmail.pradeeplogu26:v2"}' + 'n').encode('utf-8'))Go to the Notehub and create a new project.
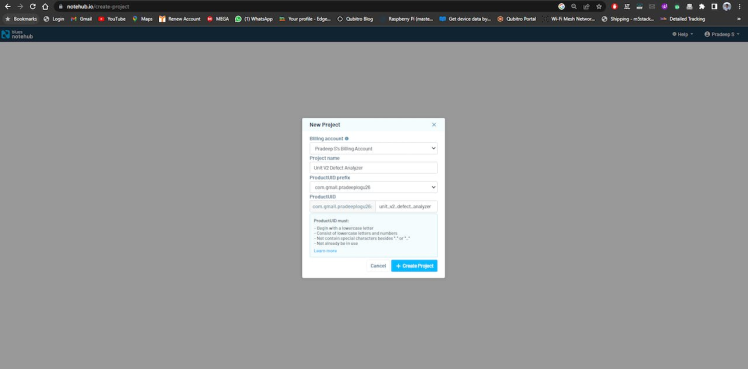
Note: You have to change the Product ID and the model name in the script.
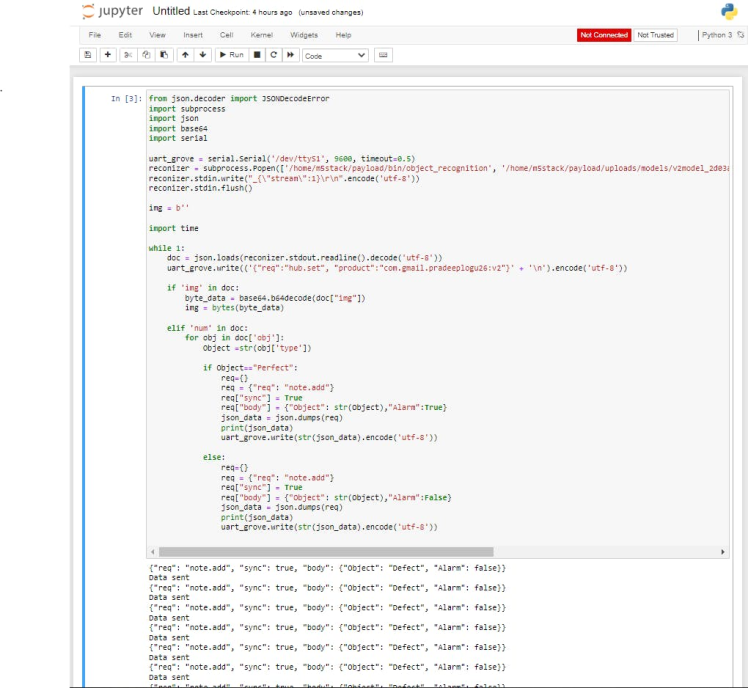
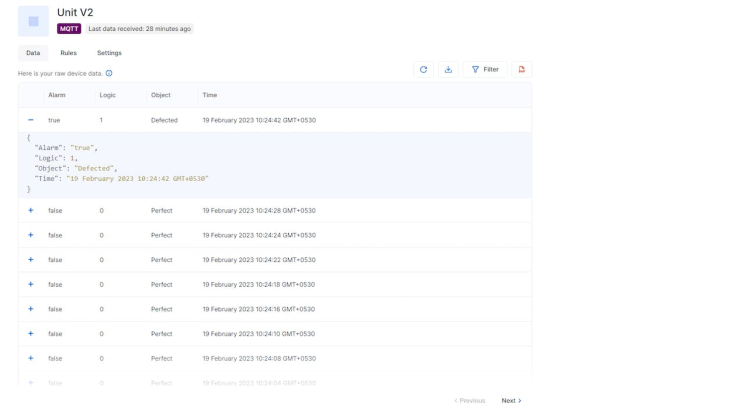
This script will send an Alarm if it detects the defected item. Open the Notehub and look for the incoming data.
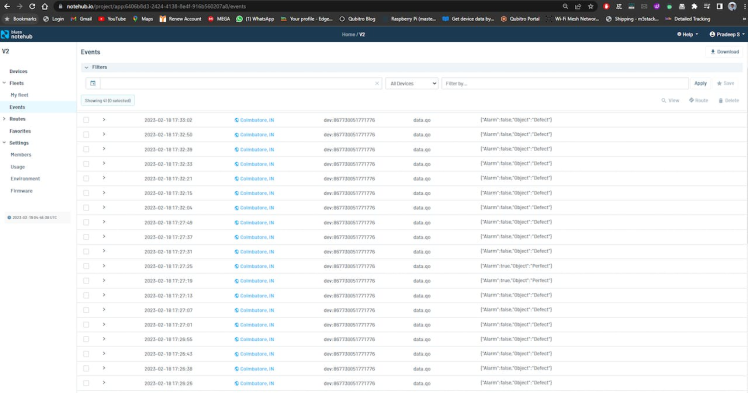
If you can see the data, everything is working well.
Step 4—Cloud Routing ☁️:
Now our model classification is in Blues Notehub, but we need to add some alert function and based on the model data we need to control the production line. No one wants to manufacture the defect items again and again.
So, If the defect item is classified in the production line. We have to control, stop and make an alert. To make the alert, we will first transfer the data to Qubitro and NodeRed.
First, let's connect Qubitro with Notehub. Go to the Qubitro portal and create a new MQTT based connection.
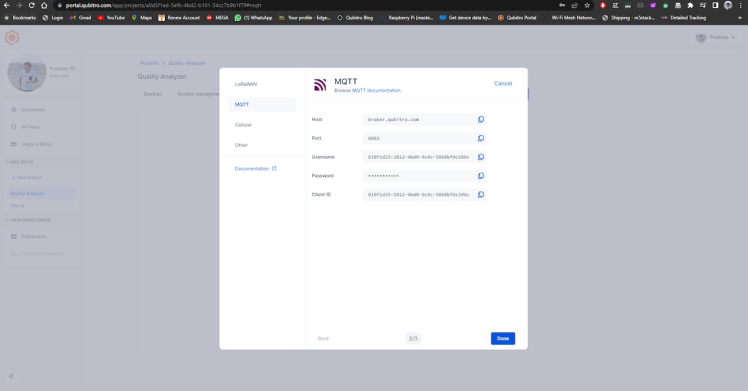
Then copy the credentials, next open the Notehub and navigate to the routes page.
Create a new MQTT route and insert your Qubitro credentials.
Note: In Qubitro, MQTT topic is MQTT username.
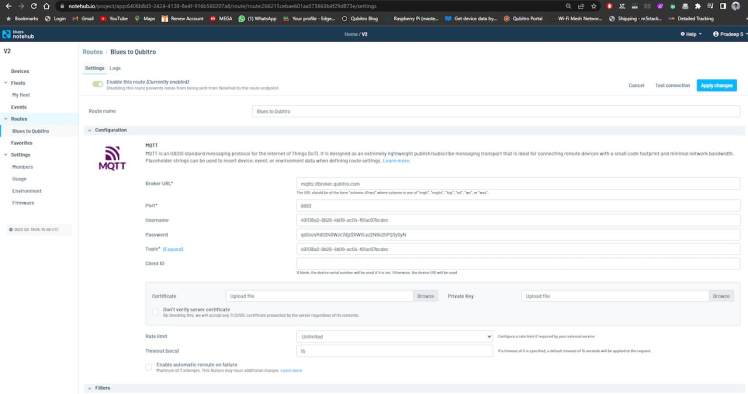
Next, set the data as body only.

Check back the Qubitro portal and look for the incoming data.
That's all about the data routing, next we have to add an alert and control system.
Step 5—Twilio Configuration ?:
Navigate to the rules page in the Qubitro Portal and create a new rule.
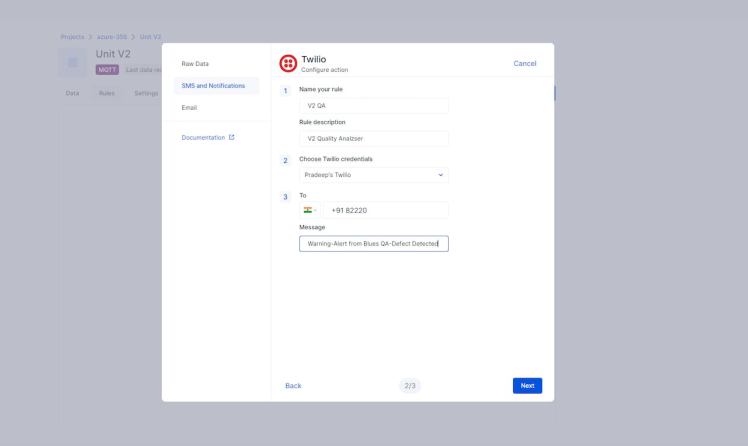
Once the rule logic is true, it will auto trigger the Twilio service. So, now we have finished the alert system. Next, will make a control system, which can trigger some relays based on the classification.
Step 6—Lattepanda 3 Delta Relay Integration ?:
Lattepanda is the one of the best SBC which can work on both Windows and Linux platforms. And it also has an onboard eMMC storage to load the OS. Similar to Raspberry Pi, it contains more GPIO which is from the inbuilt Arduino Leonardo chip. So, it's like an Arduino inside the Windows PC. Simply, you can program the SBC by the SBC alone. In this project, I'm going to use the Lattepanda 3 Delta as my control system to control the instruments from the V2's classification results.As I mentioned above, Lattepanda has an Arduino chip inside, so we are going to use that to control our external instruments. For this, I'm using the digital pin 12 & 13.
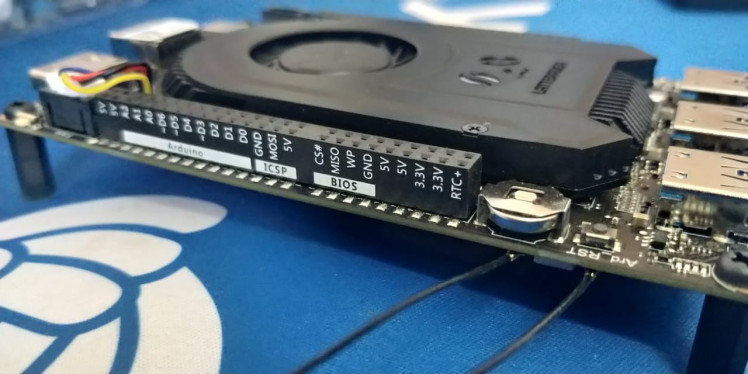
As I mentioned above, Lattepanda has an Arduino chip inside, so we are going to use that to control our external instruments. For this, I'm using the digital pin 12 &13.

Next, we have to program the Lattepanda Arduino chip to our needs, open the Arduino IDE in the Lattepanda and just enter the following code.
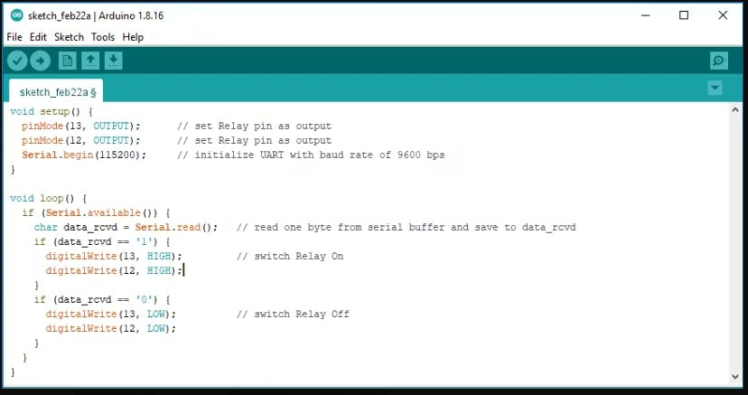
This will get data from the serial port and based on the incoming data it will control the relay modules. Then compile and upload the code to Lattepanda 3 Delta. Next, open the serial monitor and type “0” and “1” to control the relay module. Next, we can integrate the node red to control the relay modules via MQTT.
Step 6—Node Red Integration ?:
To build a control system, here I'm using the Lattepanda 3 Delta with Node Red. First install the Node Red in the Lattepanda using this following command.
npm install -g --unsafe-perm node-redMake sure that Node.js is already installed in your device.
Then use this command to start the node red service in the LP node-red.
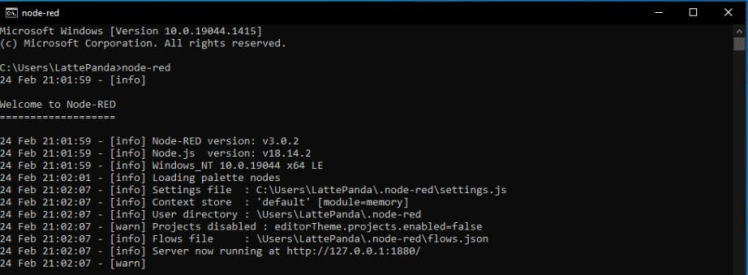
You will see the IP address, by using this only we can access the Node Red service. Open the IP address in the browser.

In this, I have added a simple MQTT publish section to test out the connection. For MQTT connection, use the same credentials as we previously created. The MQTT username and topics both are the same only.
Next, I have added some payload injection points to test the MQTT connection.
All the JSON files for the Node Red blocks are included in the github.
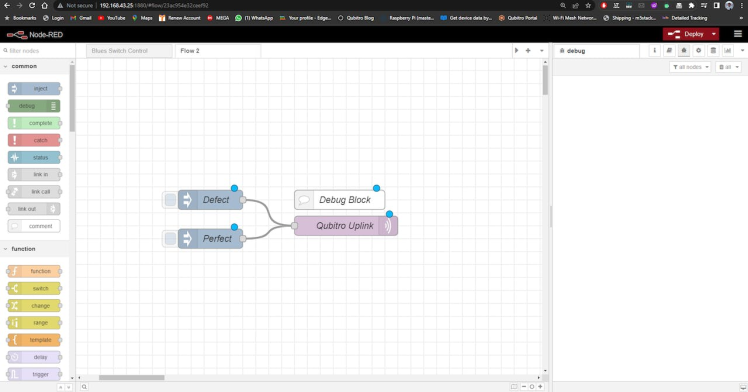
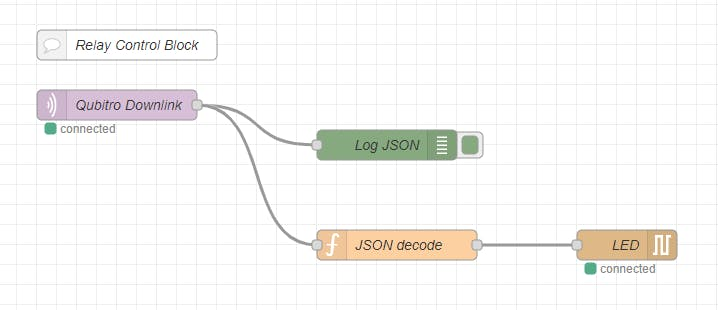
Here is the block which can get the data from the MQTT portal and based on the data.
{"Alarm":false,"Object":"Perfect","Log Level":0}And then the next block will convert the payload to trigger the GPIO.Next, we have to communicate with the serial port to control the relay, in order that here we can use the serial port node in node red, and configure it with the correct port number and the baud rate.
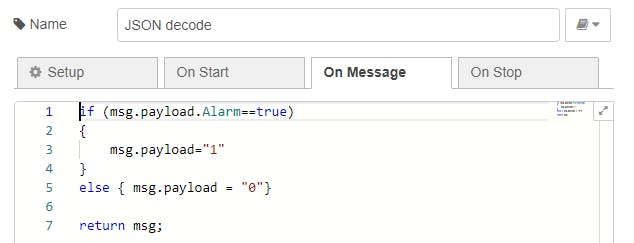
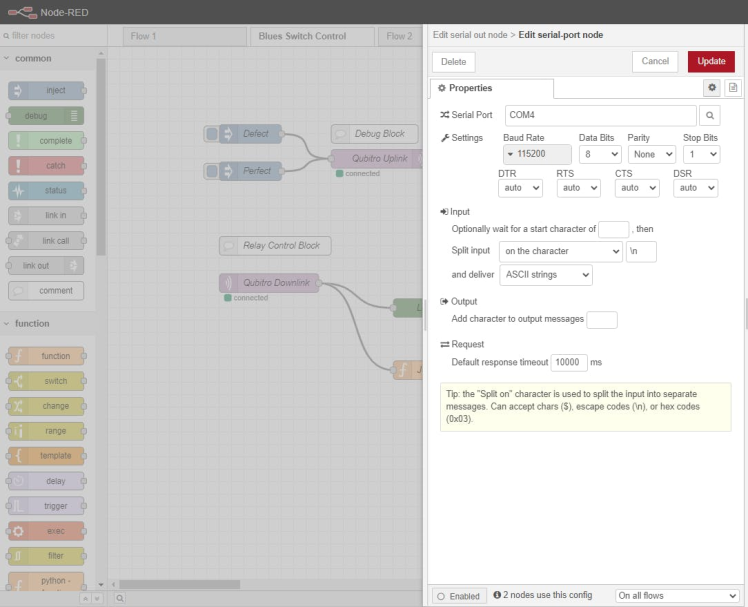
Next, we have to communicate with the serial port to control the relay, in order that here we can use the serial port node in node red, and configure with the correct port number and the baud rate.

Here is my serial port configuration.
Below is the complete block.
Below the simple debug test.

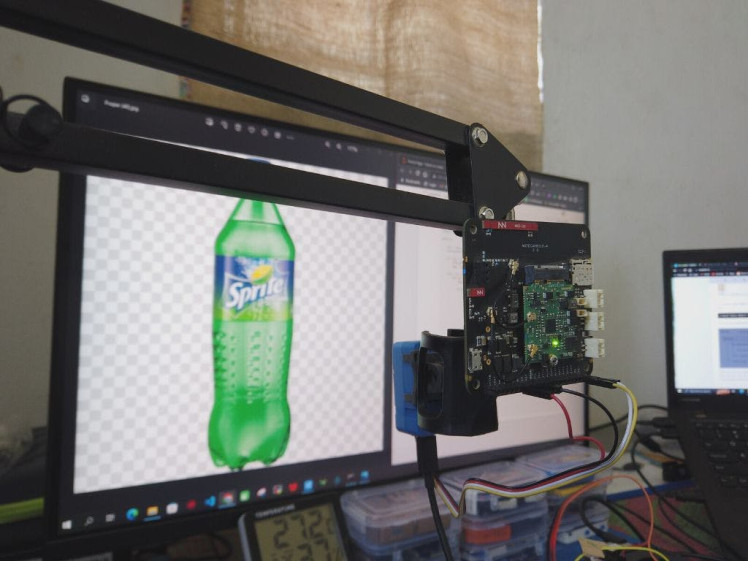
Step 7—Deployment ?:
Now all set, just connect the Unit V2 to the power supply, and just wait for the magic. Based on the model classification results, it will trigger the alarm and make the Lattepanda relay to turn on and off.

Conclusion ?:
In this project, we learned how to use cellular IoT and machine learning to create a low power quality analyzer. And I've only shown my approach with vision-based ML classifications for specific items and use cases, but it can be readily implemented in other industries or production units where quality is important. I hope you enjoy it. Thank you. I'll be back with another amazing project soon.
Code
Credits
Related products


Leave your feedback...