
Pinhole Camera Made With 3d Pen
Made by 3dsimo / 3D Printing / Art / Photos & Video / Retro Tech
About the project
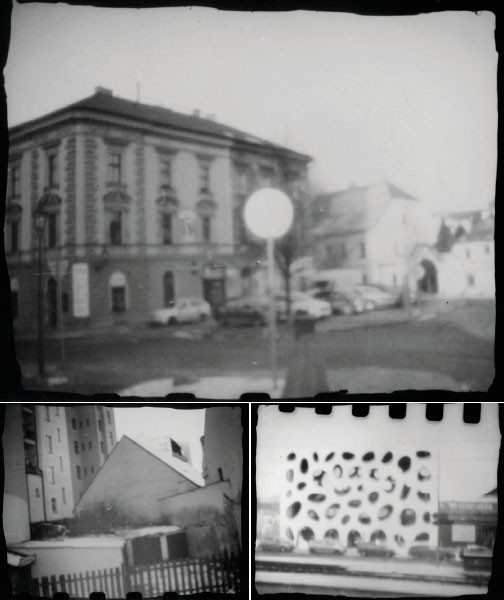
Pinhole camera is a simple device capable of capturing a picture without using lens. The most important aspects for the pinhole camera are making a light-tight space where you can load photosensitive material and creating a pinhole which should be as tiny and accurate possible.
Project info
Difficulty: Difficult
Estimated time: 1 day
License: GNU General Public License, version 3 or later (GPL3+)
Items used in this project

Story
Taking pictures is so common these days that we don’t even pay much attention to it. Everybody has a cellphone with a built-in camera and we can capture basically any moment we want with a simple tap on the screen. The devices are so smart that we don’t even have to worry about the light conditions or zooming so much — the cell does everything for us. Isn’t it like living a dream? Well, definitely not for professional photographers — not yet, leastways. But when it comes to people who just want to take a picture of anything they like in the easiest possible way, it’s perfect. There are even whole social networking sites based solely on sharing pictures.
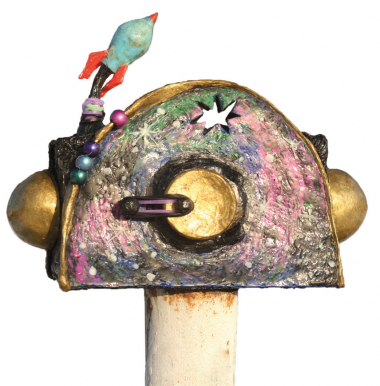
This particular type of camera is called pinhole camera and it is a simple device capable of capturing a picture without using an optical system (a lens). The most important aspects for the pinhole camera to work well are making a light-tight space where you can load photosensitive material (film) and creating a pinhole which should be as tiny and accurate (in terms of its roundness) as possible. The box side where the pinhole is should be very thin so that the light could get in the box at the right angle to make the picture as sharp as could be.
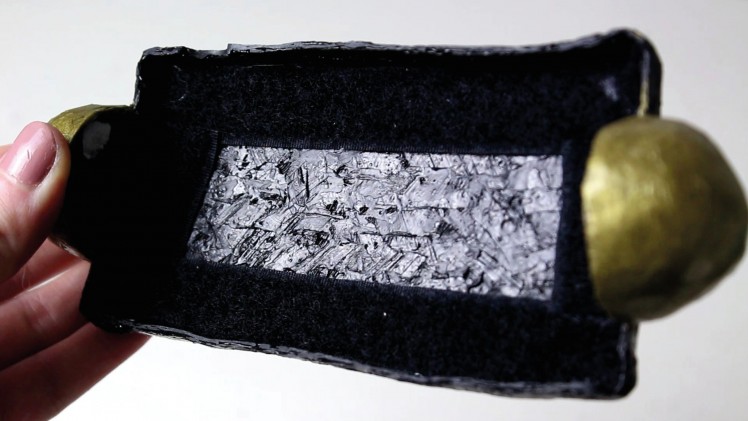
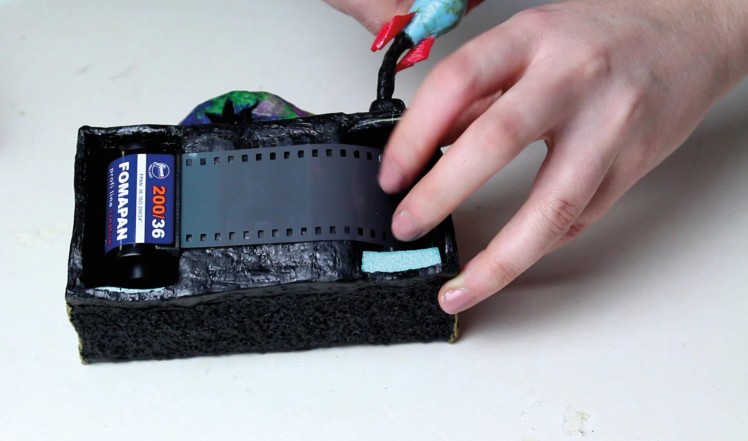
- First of all, let’s start with creating the box where you can load the film. There are two parts it consists of: a) main body, where the film will be loaded, with a small window for exposing pictures, the pinhole itself in the front side, and a hole for the part which will be rewinding the used film; b) back cover to close the box. As this box needs to protect a photosensitive material, it is best if you form each side from at least 3 layers and if you smoothen each of the sides using the 3DSimo BURNING ATTACHMENT (the knife-shaped extension seems to be the best option) from the outside as well as from the inside.
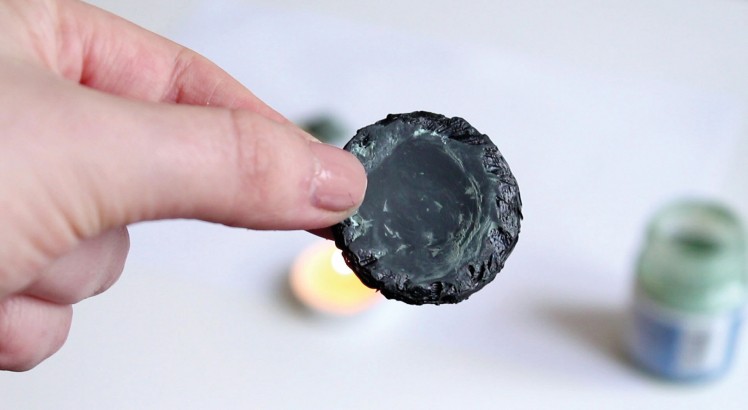
- A precise pinhole is one of the crucial steps on the way to creating this camera, which is why it is best to be done separately. For that reason, there is a large hole left in the front side of the box to which you will weld a separate disk with the most precise pinhole ever.
- The disk is easily made by stacking 3 layers of circles on top of each other, their smoothening with the BURNING ATTACHMENT with the knife-shaped extension and subsequent sanding. We even used a polishing paste to make sure the surface is as smooth and even as possible. The last step in making the disk is to heat a sharp needle on a flame and guide it perpendicularly to the disk (ideally towards the very center of it).
- Then you just need to weld the disk to the body of the pinhole camera.
- Even if the body itself is the best ever made, the whole project will be ruined unless you manage to make such a back cover that fits tightly to the box. So start with 3D drawing the back part in 3 layers and smoothening it with the BURNING ATTACHMENT in order to prevent the light from getting in. To achieve the best possible light-tightness, it is good to wrap the already made body in paper, lay the back cover on top of it and then 3D draw the edges in 3 layers again. Gluing velvet ribbon stripes or the softer side of Velcro to the back cover as sealing proves useful as well.
- The last thing to do to complete the box is the cylinder for rewinding the film, which will need to be sealed up (ideally with black Naugahyde or velvet).
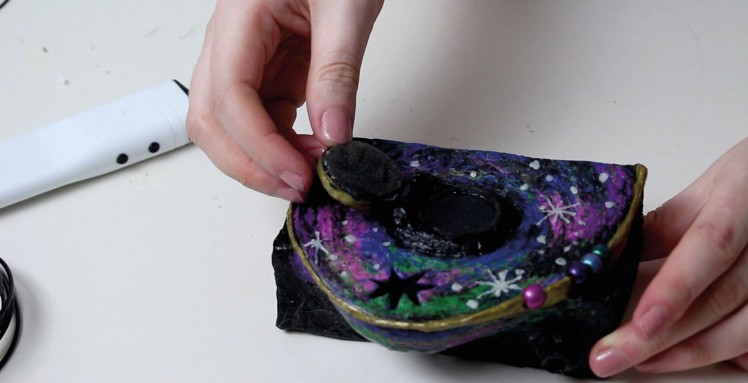
- You also need to make a cap which will serve as a shutter.
- For this particular case we chose the mechanism to be two small beads connected with a rubber band holding the cap closed. During exposure, you take the rubber band away and use the small bead to mechanically open the cap for a few seconds.
- As any other project in this book, any decorations and adornments you decide to supplement you pinhole camera with are up to your fantasy and taste.
- You will need to test the exposure times as they depend on the diameter of the pinhole and the film used. In our case the pinhole is about 0.5 mm in diameter and with black-and-white film with the speed of 200 ISO the exposure time is about 3 seconds.
Schematics, diagrams and documents
Credits
3dsimo
We are manufacturers of multi-functional tools for creators under the same brand. Our Company was established in 2014, it originates in Czech Republic, where both manufacturing and R&D are still located. We are only ones on the market with 3Dpen with switchable extensions and a smart device connection, which is our 3Dsimo mini. Kids 8+ can use 3DSimo Basic, it is very intuitive. It uses build-in battery, so user can draw up to 3 hours without any cables. The device is safe, and you cannot burn yourself with it. Our last products is 3Dsimo Kit, which is First building KIT of multi-material 3D pen that you can modify according to your wishes. It is an open source building kit based on Arduino Nano. You can find everything on our GitHub.
Related products


Leave your feedback...