

Musical Lights: Enhance Your Holidays With Raspberry Pi!

About the project
Create something new for the holidays or anytime with light strands, some music, and your own imagination. This project will provide instructions for building your own accent lights for your backyard, the holidays, or any time you want to express yourself.
Project info
Difficulty: Easy
Platforms: Raspberry Pi
Estimated time: 4 hours
License: GNU General Public License, version 3 or later (GPL3+)
Items used in this project
Hardware components


View all
Hand tools and fabrication machines
Story
In many homes across the world, the holidays provide an opportune time to express ourselves. My family will often tour other nearby neighborhoods just to see how creative others can be. One of the more amazing creations I've seen is holiday lights flashing in sync to music, with lights dancing in rhythm to a playlist. But it doesn't have to be just about the holidays; adding lighting features to your backyard can spruce up any get together, providing an amazing atmosphere for entertaining.
In this article, we will provide a list of suggested parts, instructions for software installation, and hopefully a desire to come up with a unique lighting creation for you, your family, and friends to enjoy any time of the year.
Project Materials and Resources
For this project, we've listed several parts in the bill of materials (BOM) that can certainly be substituted, such as the wires and terminals. The provided BOM is merely a suggestion of parts to use, but other methods are available for splicing and routing wires. Of course, many of these items might already be laying around your house; in that case, use what you have available. Also, mechanical relays or several prebuilt options available online may replace the suggested solid state relay.
Project BOM
- Raspberry Pi 3 Model B+
- 16 AWG red wire
- 16 AWG green wire
- 16 AWG black wire
- 16 AWG white wire
- 3 prong pigtail AC power cord, 16 AWG
- Duplex AC power outlet
- Crydom ED24D3 solid state relay
- 14AWG – 16AWG terminal splices
- 14AWG – 16 AWG crimp fork terminals
Hardware
- Wire strippers
- Flat-tip screwdriver
- Philips-head screwdriver
- Needle-nose pliers
- Male to female jumper wire
Accounts and Software
- Raspbian for Raspberry Pi
- LightShow Pi from lightshowpi.org
Project Technology Overview
Raspberry Pi 3 Model B+
Versatile and sporting a vast number of different features, the Raspberry Pi 3 Model B+ (Figure 1) is an outstanding development platform. Easy to set up with nothing more than a keyboard, mouse, and monitor, the Raspberry Pi 3 Model B+ is a fully equipped, single-board computer. The dual-band wireless local area network (LAN) and Bluetooth, 4-pole stereo audio, and full-size High Definition Multimedia Interface (HDMI) only scratch the surface of this Raspberry Pi's internal capabilities. Use either the suggested operating system (OS) from RaspberryPi.org or any of the third-party images to open the door for any number of possible projects.
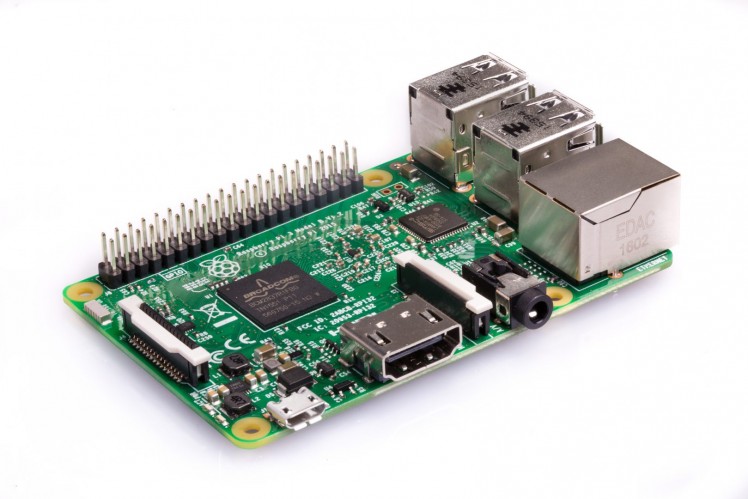
Figure 1: Raspberry Pi 3 Model B+
Solid-State Relay
Solid-state relays, much like mechanical relays, are designed to allow switching of either alternating current (AC) or direct current (DC) voltages to a load. With solid-state relays, you have minimal wear due to no moving parts as well as extremely fast switching speeds. However, one downside of solid-state relays is overload-damage susceptibility. For this lighting project, either relay type would work well if you are simply planning on turning them on and off, but for pulse width modulation (PWM) dim control, the high-speed switching capabilities of the solid state relay will be much more desirable.
Light Strands
When considering the types of relays you'll use—for the lights layout of whatever it is you choose to decorate—one thing you have to consider is the type of light strands you'll utilize. The two most prominent types available commercially are light-emitting diodes (LEDs) and incandescent lights. Each type has its pros and cons to consider before you purchase or configure your software, which we will discuss in more detail in the software section.
LED strands allow for PWM control and provide a much more energy efficient way to decorate. Due to the lower-power requirements, you can daisy chain more strands, permitting you to cover a larger area on the same channel. Unfortunately, most commercially available lights are what are called half wave rectified, which will cause your LED strands to light up in segments instead of in full strands when employing the PWM mode. You can add a bridge rectifierto modify the strands using online instructions, or another alternative is to look for industrial grade lights that are full wave rectified.
Incandescent strands do not have the same issue with rectification as LED strands have, and when used with a solid-state relay, they are still dimmable using PWM. The one largest drawback of incandescent strands is the power requirements. With incandescent lights, you may need to consider using a more industrial-grade solid-state relay for longer runs, making sure to not exceed the current limitation of the strands themselves. If you plan on using a combination of both on/off and PWM configurations, you may also consider a mix and match to help lower your energy costs.
The Setup (Hardware)
Let the hardware wiring begin! Please be aware that we will work with dangerous voltages in this project, so please make sure to take every precaution and always double-check your wiring before you apply any power.
Wiring the Raspberry Pi 3 Model B+
The code for this project utilizes the first eight general-purpose input/output (GPIO) pins to control the light strands in various ways. When wiring the Raspberry Pi 3 Model B+, you will use the GPIO 0 through GPIO 7 pins, which, depending on how you choose to design the lighting display, will allow you to control seven or more lighting strands. The output of each GPIO pin will serve as what is called the control voltage for the solid-state relay. This control voltage indicates when the relay should close, and once closed, when it should open back again. Depending on the type of device you are using, you will need to wire each individual GPIO to its own relay, as well as jumper a ground line from each relay back to the Raspberry Pi (Figure 2). Take note that the GPIO pins in this project are configured based on the software included in the install package, which does not match the official Pi GPIO list (Figure 3).

Figure 2: Sample DC Solid State Relay Diagram
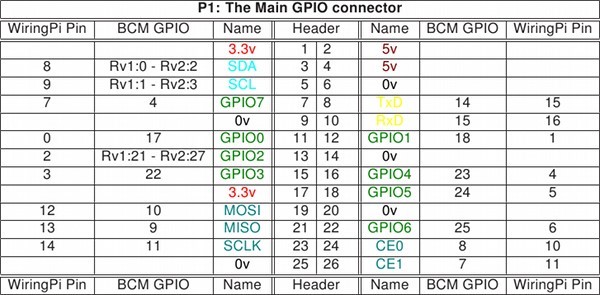
Figure 3: GPIO Configuration for LightShow Pi
Wiring the Outlets
We won't give any specific configurations to wire the AC power outlet, considering you may decide to wire multiple outlets to a single output from the solid state relay. Nonetheless, you should know that each AC power outlet will have three connections: Hot, neutral, and ground. The hot and neutral connections are on either side with the ground typically located by a single screw on the top or bottom of the outlet. On both the hot and neutral sides, you can see a small tab connecting the screws for both outlets. Breaking the tab on the hot side will separate these outlets, enabling you to control each outlet individually if you so choose.
Wiring the AC side of the relay is very simple. Begin by jumping the hot wire from the AC pigtail to one connector on each of the load sides of the relay. You can jump wires using items such as wire nuts or the terminal splices provided in the BOM. From the other side of the relay, you will run an individual wire to the hot screw on each AC power outlet you wish to control. Remember, if you break the tab on the hot side, you can control each outlet on the duplex AC-power outlet separately, and each outlet will require its own input from the relay. You might decide to leave the AC side of the relay intact, running only one wire to either of the two hot screws if you plan to control two strings of lights from one GPIO output pin.
To wire the rest of the AC power outlet, begin by jumping wires from the neutral wire on the pigtail to one of the two screws on the neutral side of the outlet. Repeat this step with the ground wire, from the pigtail to the AC outlet. For safety, I highly recommend purchasing a dual gang or larger outlet box and wall plate cover from your local hardware store. This will help to ensure that the wires remain inaccessible when performing live.
The Setup (Software)
Configuring the Raspberry Pi
To start the Raspberry Pi configuration, you will need to download, install, and update the appropriate OS. The Raspberry Pi doesn't have enough onboard storage for the OS, which is why the microSD card will supplement as additional storage.
Loading Raspbian to the Raspberry Pi
To avoid a download, install, or load of any additional software, we will use a drag and drop method for the Raspbian installation.
- With whatever computer you have available, navigate to the download page using this link: NOOBS download site
- Select the Download ZIP for the "NOOBS" (not NOOBS LITE) and download the file to your system.
- Locate the downloaded file within your Downloads folder, select the file, right click, and select Extract All.
- Insert a formatted microSD into your computer, using an appropriate reader and adapter if necessary. Make sure to identify the drive letter assigned to the new device.
- Select and drag all the files from the newly created/extracted folder and drop them onto the formatted microSD card. The drive letter (created when you insert the microSD card) can help you identify the microSD card location.
- Once this process is complete, safely remove the microSD card from your computer and insert the card into the appropriate slot on the bottom of the Raspberry Pi 3 Model B+.
- Connect your mouse, keyboard, and monitor to the Raspberry Pi by using the Universal Serial Bus (USB) and HDMI connections available on the board (Figure 4).
- Employing a USB power adapter and Micro USB cable, plug the Micro USB cable into the Micro USB connector (labeled "Power In") on the Raspberry Pi 3 Model B+ (Figure 4). The unit should immediately begin to boot, and it will prompt you to select an OS.
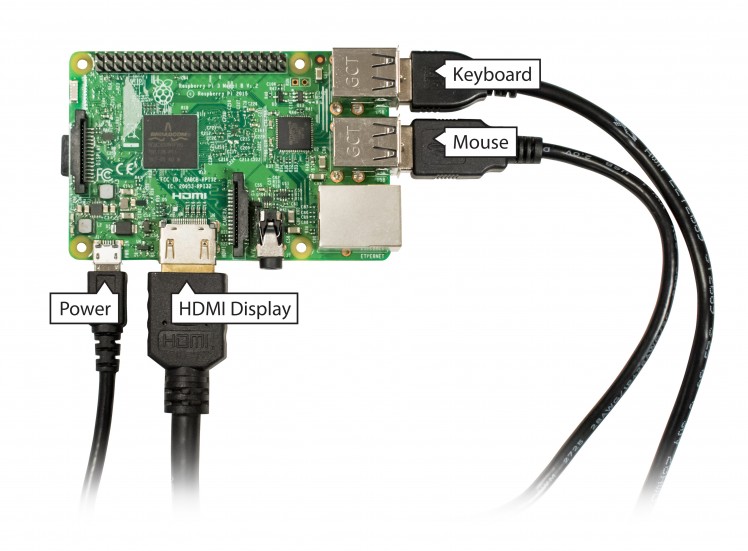
Figure 4: External Connections and Power
- Using the mouse, select Raspbian (Recommended). This software will take several minutes to complete the installation.
- Once complete, the Raspberry Pi 3 Model B+ should boot in the desktop environment (Figure 5).
(*Recommendation: Use a 32GB or smaller microSD card in this project, considering larger devices will be formatted in the Extended File Allocation Table (exFAT), which is not compatible with NOOBS.)
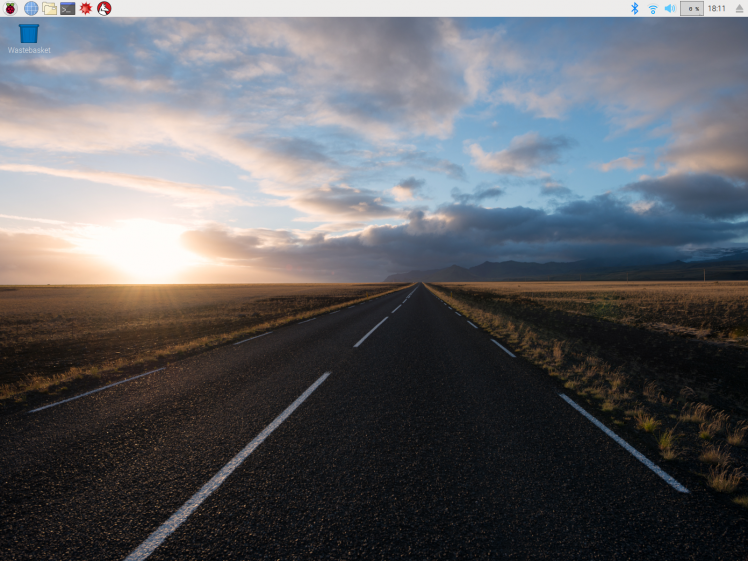
Figure 5: Desktop Environment
Dancing Lights
Installing the lighting-control software by lightshowpi.org is simple, requiring only a few steps that are listed as follows:
sudo apt-get update to download any available software updates.sudo apt-get upgrade to install all available upgrades. This process ensures you have the latest and greatest version installed.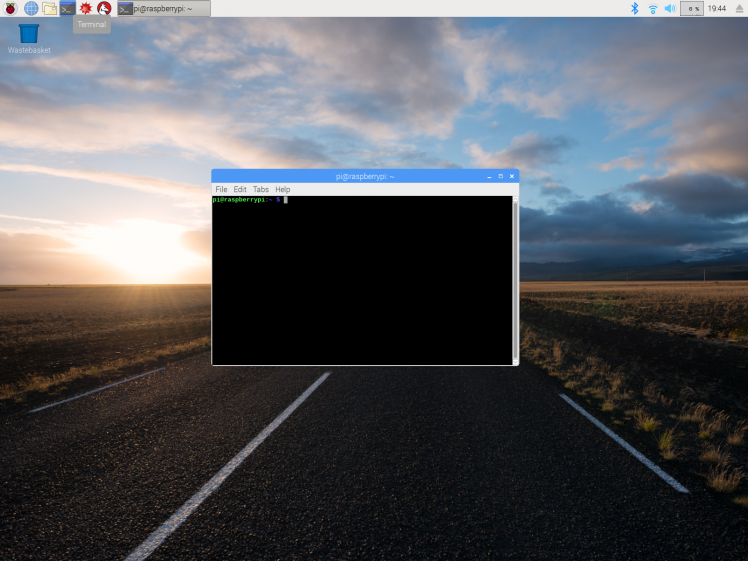
Figure 6: Terminal Window Inside Desktop Environment
sudo apt-get install git to install the "git" app. This step is necessary to download the LightShow Pi software, but you can skip this step if you've already installed this software.git clone https://togiles@bitbucket.org/togiles/lightshowpi.git to download the LightShow Pi software. This download will automatically create a new folder called "lightshowpi."cd ~/lightshowpi to change to the new folder, and then type git fetch && git checkout stable immediately thereafter.sudo ./install.sh to install the LightShow Pi software.sudo reboot command to reboot the system.To run a quick test of each channel, you can plug something like a nightlight into each outlet, and then type sudo python py/hardware_controller.py --state=flash into the terminal window from the LightShow Pi directory. This command will flash each channel individually.
Before we play our music playlist, we need to discuss the defaults.cfg file located in the lightshowpi/config folder. This file points to the music playlist file location, sets the mode to either on/off or PWM for each channel, sets the PWM range, and so much more. Due to the overwhelming number of options available, we will only make changes to a few. I strongly suggest that you take the time to carefully read through the file as well as remember any changes you make in case you need to revert to the original list.
We are nearly ready for the lights to go on and let the show begin, but first, follow these final steps to cross the finish line:
sudo nano defaults.cfg in the terminal window from the lightshowpi/config"pin_modes = onoff" in that list.This configuration line allows you to set each channel's specific mode. If the line is left as is, all eight channels will only turn on and off. If you want to set all eight channels to PWM, you can simply type pin_modes = pwm to change the line. If you want specific control, you can adjust each channel on its own, ensuring you have eight options listed (e.g., "pin_modes = onoff,onoff,onoff,pwm,pwm,pwm,onoff,onoff").
"pwm_range = 100" in the list.This range sets the timing for your PWM and requires some trial and error to get the look you desire. For myself, I've found that setting it to "pwm_range = 167" works well.
These configuration lines determine the minimum and maximum frequency of scanned sounds and will set the range automatically for each channel, unless each channel is mapped using the custom mapping option. I've found that "min_frequency = 50" and "max_frequency = 9000" works well.
"playlist_path = $SYNCHRONIZED_LIGHTS_HOME/music/sample/.playlist" to the directory where you decide to store your music files. This last configuration line is what points to your music playlist on line 241. This step is important; what are dancing lights if you don't have music?sudo nano .playlist to create a playlist, and then use the "My Cool Song<tab>/home/pi/lightshowpi/music/cool_song.mp3" format to add a line for each song you wish to play. This step allows you to restructure the directory to match your chosen folder location.Finally, once you've added some songs, created a playlist, and plugged in speakers into the Raspberry Pi and lights into your outlet, you are ready to play. To play your list in a nonstop loop, simply type start_music_and_lights for a continual show. To stop the loop, type stop_music_and_lights in the lightshowpi folder.
Let the Show Begin
To decorate your home for the holidays, or to simply add some lighting features to your yard, you can execute this project as an easy and inexpensive alternative to the purchase of commercially available decorative lighting options. With the numerous configuration options and the ability to swap out different strands of lights on a whim, the only thing you need to add to this project is a little of your own flair to awe your neighbors with your amazing display. If you've built something like this before or followed our project guide, drop us a line and maybe even share a short video on Facebook, Twitter, LinkedIn, Instagram, or Google+ to show us what you've made. Happy holidays!
Credits
Related products


Leave your feedback...