
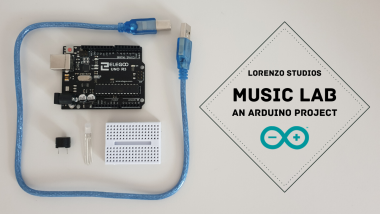
Music Lab, An Arduino Project

Made by LorenzoStudios / Music
About the project
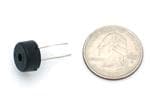
What is "Arduino Music Lab"? It is a project based on an Arduino microcontroller and a buzzer (a little acoustic signaler that can make sounds) which is able to play some traits of famous songs!
Project info
Difficulty: Easy
Platforms: Arduino
Estimated time: 1 hour
License: GNU General Public License, version 3 or later (GPL3+)
Items used in this project
Hardware components


Software apps and online services
Story
During the quarantine, I tried to create a project which combine Arduino to one of my biggest passions: the musical world.
From this idea, I made the music lab with an Arduino microcontroller and a buzzer (a little acoustic signaler) which is able to play some traits of very famous songs!
As you can see in the project's video, the music lab is based on the buzzer reproduction of a single instrument at a time, which synchronized with a video-editing software to the other instruments, can reproduce the original song, as much as possible similiar to the original.
How can you create this? This is really simple!
[Suggestions and Comments]
- More tracks in a MIDI file equals to a better audio/video final result.
- Not every track can be played by Arduino: the buzzer may not be able to reproduce all the original notes from some generated codes.
- Arduino Uno boards can't use more than a buzzer at a time.
- You can also implement others devices, including an LCD display or an IR sensor with its remote in order to make this project even more interesting!
- I used Wondershare Filmora 9 as a video-editing software but you can use whatever video-editing program you want.
- You can use LEDs (like in the video) in order to facilitate the video-sync process.
- Buzzer works only on analogic pins (A0-A5) and PVM pins [~] (3/5/6/9/10/11/13).
[Code]
- The first thing to do is to get some MIDI files (.mid extension) from the Internet (If you don't know what MIDI files are, they're not audio files - like mp3, flac or wav files. This kind of file saves all the information about the notes, instruments, effects just like in a text file!).
- Then, you need to open https://www.extramaster.net/tools/midiToArduino/ and import your previously-downloaded midi file.

- Select the track (instrument) you want to play.

- Scroll down and adjust the Midi Speed Factor to 1.0x.

- Scroll down and click "Convert Midi To Arduino".

- Select all and copy the generated code (Ctrl + A -> Ctrl + C).
- Open the Arduino IDE and create an empty new file.
- Paste the selected code in the Arduino IDE.
- Save the file and upload it (Ctrll + U) to your Arduino Board (after you connected it to your PC).
[Circuit]
- Connect the Arduino board to your PC.
- Insert the buzzer in the breadboard.
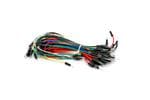
- Connect (as the diagrams) one of the buzzer terminals to a GND pin of the Arduino board with a male-to-male jumper.
- Connect the other terminal to the indicated pin in the Arduino code (the default pin is the eleventh, but you can change it by changing in the IDE change the number of int tonePin = 11 with another analogic/PWM pin number).
[Video]
- Record (with a camera or a smartphone) the execution of one MIDI track at a time (see 'suggestion/comments 1').
- Open a video-editing software (I used Wondershare Filmora) and import in a new project all the recorded videos.
- Syncronize all the video tracks, add titles and export the final video!
Schematics, diagrams and documents
Code
Credits
Related products


Leave your feedback...