
Items used in this project
Hardware components


Story
Constitution
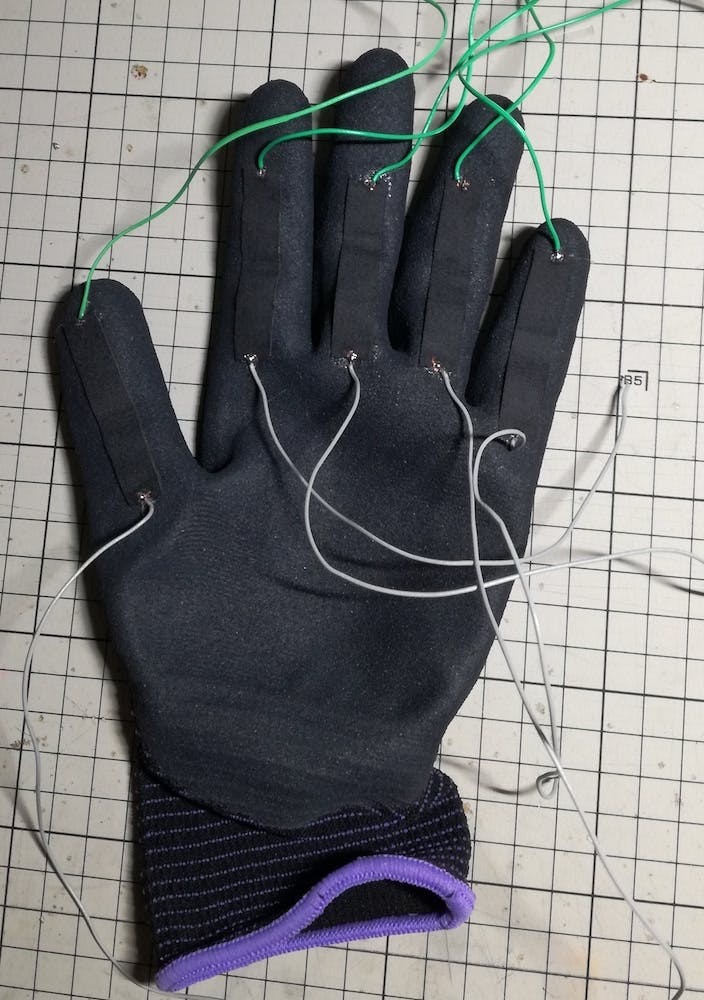
Detects the movement of the finger with a pressure sensitive conductive cloth, transmits the signal by BLE, and reproduces the voice corresponding to the motion of the finger on the PC.
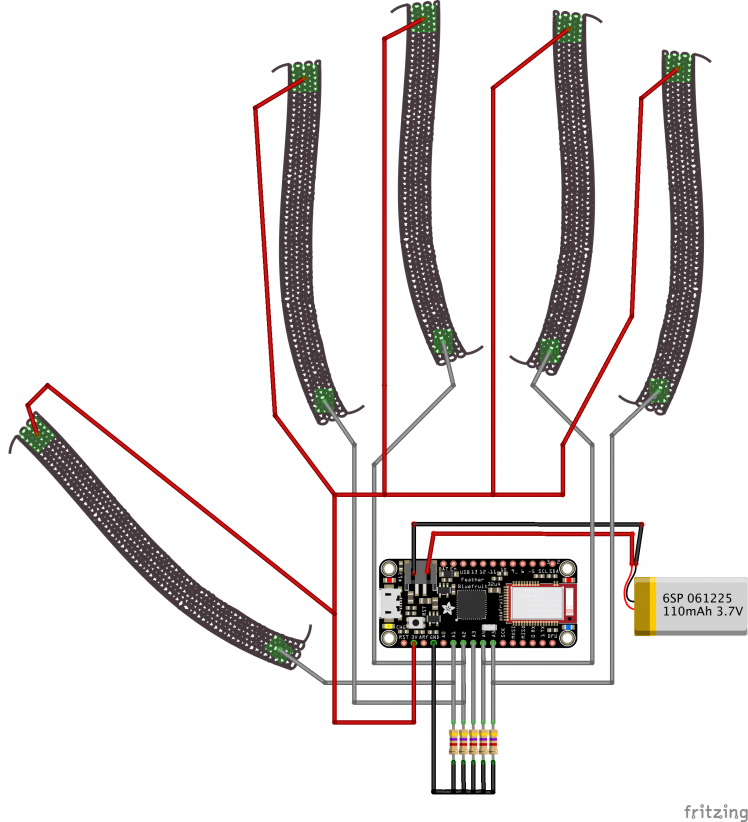
Overall Block Diagram Motion sensing glove DigiTe schematic
Glove Making
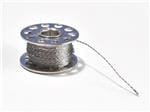
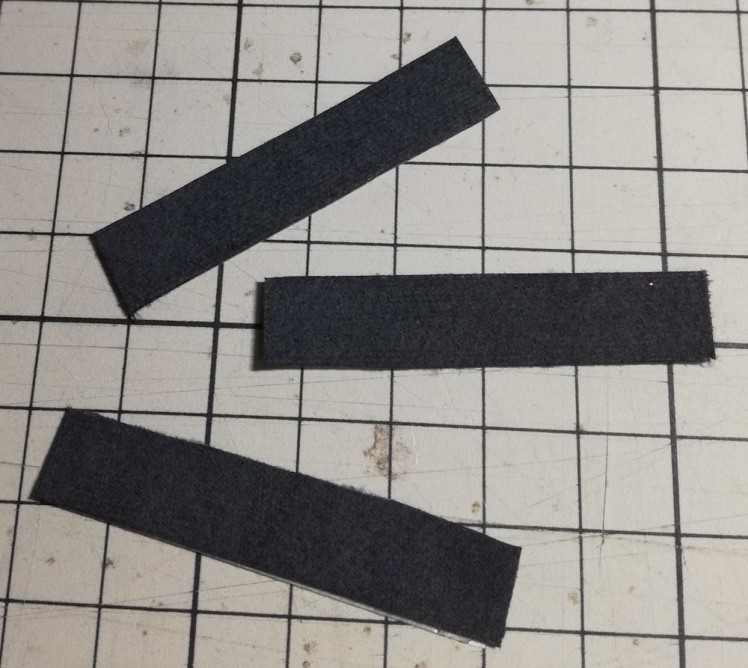
Cut the pressure sensitive conductive cloth to about 1 cm × 5 cm, sew it with conductive thread at both ends for wiring soldering, and paste it on the finger of the glove with double sided tape.
; ; 1 / 3
1 / 3
When you bend your finger, the resistance decreases at both ends of the pressure sensitive conductive cloth due to the pressure.
Paste the remaining fingers as well. Also paste the breadboard on the gloves and wire the parts with the BLE equipped microcomputer Feather 32u4.
; ; 1 / 2
1 / 2
Arduino Code
Install the BLE library for Feather 32u4.
https://github.com/adafruit/Adafruit_BluefruitLE_nRF 51
I programed with reference to this library code example bleuart_datamode.ino.
#include <Arduino.h>
#include <SPI.h>
#include "Adafruit_BLE.h"
#include "Adafruit_BluefruitLE_SPI.h"
#include "Adafruit_BluefruitLE_UART.h"
#include "BluefruitConfig.h"
#if SOFTWARE_SERIAL_AVAILABLE
 #include <SoftwareSerial.h>
#endif
#define FACTORYRESET_ENABLE         1
#define MINIMUM_FIRMWARE_VERSION    "0.6.6"
#define MODE_LED_BEHAVIOUR          "MODE"
const int analogInPin[5] = {A1, A2, A3, A4, A5};
int sensorValueIni[5] = {0,};
int sensorValue[5] = {0,};
float Div[5] = {0,};
int cnt[5] = {0,};
int sum = 0;
int sumOld = 0;
/* ...hardware SPI, using SCK/MOSI/MISO hardware SPI pins and then user selected CS/IRQ/RST */
Adafruit_BluefruitLE_SPI ble(BLUEFRUIT_SPI_CS, BLUEFRUIT_SPI_IRQ, BLUEFRUIT_SPI_RST);
// A small helper
void error(const __FlashStringHelper*err) {
 Serial.println(err);
 while (1);
}
void setup(void)
{
 Serial.begin(115200);
 for(int j = 0; j < 5000; j++){
   for(int i = 0; i < 5; i++){
     sensorValueIni[i] = analogRead(analogInPin[i]);
   }
 }
 if ( !ble.begin(VERBOSE_MODE) )
 {
   error(F("Couldn't find Bluefruit, make sure it's in CoMmanD mode & check wiring?"));
 }
 Serial.println( F("OK!") );
 if ( FACTORYRESET_ENABLE )
 {
   /* Perform a factory reset to make sure everything is in a known state */
   Serial.println(F("Performing a factory reset: "));
   if ( ! ble.factoryReset() ){
     error(F("Couldn't factory reset"));
   }
 }
 /* Disable command echo from Bluefruit */
 ble.echo(false);
 Serial.println("Requesting Bluefruit info:");
 /* Print Bluefruit information */
 ble.info();
 Serial.println(F("Please use Adafruit Bluefruit LE app to connect in UART mode"));
 Serial.println(F("Then Enter characters to send to Bluefruit"));
 Serial.println();
 ble.verbose(false);  // debug info is a little annoying after this point!
 /* Wait for connection */
 while (! ble.isConnected()) {
     delay(500);
 }
 Serial.println(F("******************************"));
 // LED Activity command is only supported from 0.6.6
 if ( ble.isVersionAtLeast(MINIMUM_FIRMWARE_VERSION) )
 {
   // Change Mode LED Activity
   Serial.println(F("Change LED activity to " MODE_LED_BEHAVIOUR));
   ble.sendCommandCheckOK("AT+HWModeLED=" MODE_LED_BEHAVIOUR);
 }
 // Set module to DATA mode
 Serial.println( F("Switching to DATA mode!") );
 ble.setMode(BLUEFRUIT_MODE_DATA);
 Serial.println(F("******************************"));
}
void loop(void)
{
 // read the analog in value:
 for(int j = 0; j < 10; j++){
   for(int i = 0; i < 5; i++){
     sensorValue[i] = analogRead(analogInPin[i]);
     Div[i] =  Div[i] + (float)sensorValue[i]/(float)sensorValueIni[i];
   }
 }
 for(int i = 0; i < 5; i++){
   Div[i] = Div[i]/10.0;
   Serial.print(Div[i]);
   Serial.print("t");
   if(Div[i] < 1.3){
     cnt[i] = 1;
   }else{
     cnt[i] = 0;
   }
 }
 Serial.println("");
 sum = 0;
 for(int i = 0; i < 5; i++){
   sum = sum + cnt[i];
 }
 Serial.println(sum);
 //Send input data to host via Bluefruit
 if(sum != sumOld){
   ble.print(sum);
   sumOld = sum;
 }
 delay(500);
}
When the microcomputer is started up, measure the initial resistance of the pressure sensitive conductive cloth of each finger (the fingers are in an extended state) and when bent, the bent fingers are detected when the resistance decreases by 30%.When the movement of the finger changes, calculate the number of extended fingers and transmit BLE.
Node-RED Setting
I used Node-RED to receive the BLE signal from the globe on the PC and output the sound.
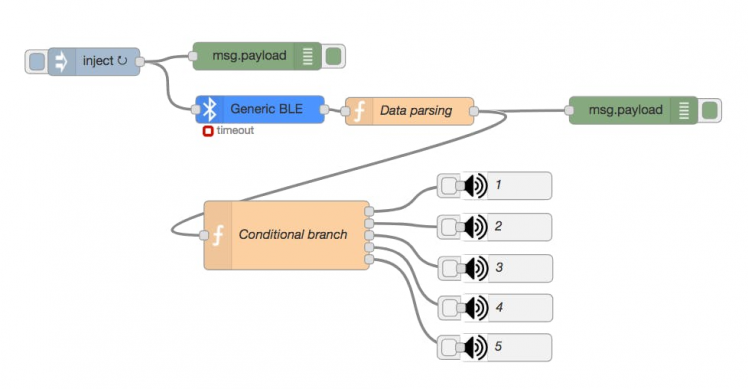
The following nodes are installed and used.
- BLE sending nodenode-red-contrib-generic-ble
- Audio nodenode-red-contrib-audio
The setting of each node will be explained in order from the left.
Inject Node
It is a node for starting the next BLE input node.

Enter the following as payload as JSON.
{
   "notify": true,
   "period": 60000
}
By activating this node, you can receive the BLE signal from the globe for 60 seconds. I want to receive it all the time, so I set it up in 1 minute.
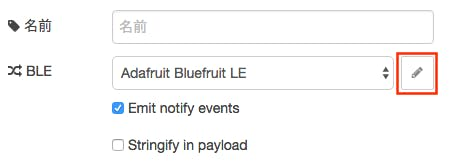
BLE Input Node
It is a node for receiving BLE data. With the glove activated, double-click it and click the following edit button.
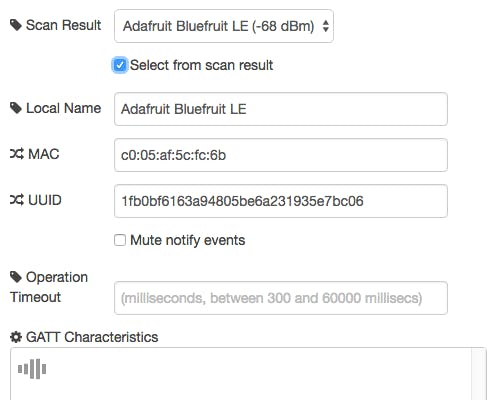
Check "Select from scan result" below, select "Adafruit Bluefruit LE" in Scan Result and click "Update".
When deploying in this state and activating the Inject node, we continue to receive the BLE signal from the glove.
Function Node - Data Parse
Type in the following and parse the number of fingers from the BLE signal.
var msg = { payload: Number(msg.payload.characteristics["6e400003b5a3f393e0a9e50e24dcca9e"]) };
return msg;
Function Node - Conditional Branch
Enter as follows and branch the output according to the number of fingers (1 to 5).
if (msg.payload == 1) {
  return [ msg, null, null, null, null ];
}else if (msg.payload == 2) {
  return [ null, msg, null, null, null ];
}else if (msg.payload == 3) {
  return [ null, null, msg, null, null ];
}else if (msg.payload == 4) {
  return [ null, null, null, msg, null ];
}else if (msg.payload == 5) {
  return [ null, null, null, null, msg ];
}
Audio Node
Specify each mp3 data to be played by passing. In this case, I play "One" when the BLE data (number of fingers) is 1, "two" when it is 2....
Operation
Credits

Related products


Leave your feedback...