
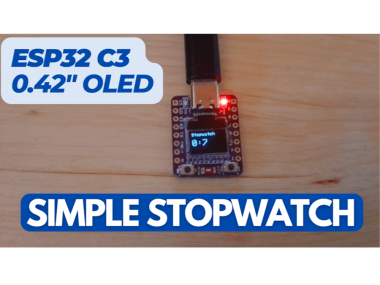
Make Esp32-c3 0.42″ Oled Stopwatch – Visual Programming

Made by Ron / Clocks / Displays / Lights / Notifications
About the project
In this Visual Programming Visuino tutorial, we’ll use the ESP32-C3 development board with its built-in OLED display to create a stopwatch.
Project info
Difficulty: Easy
Platforms: Adafruit, Arduino, Visuino
Estimated time: 1 hour
License: GNU General Public License, version 3 or later (GPL3+)
Items used in this project

Story
In this Visual Programming Visuino tutorial, we’ll use the ESP32-C3 development board with its built-in 0.42″ OLED display to create a compact and accurate digital stopwatch.
This project demonstrates how to build a fully functional stopwatch using only the ESP32-C3 board, making it ideal for learning timing concepts, quick prototypes, and compact embedded projects.
Note: No external display modules or timing components are required — the OLED is already built into the ESP32-C3 board.
🎬 Watch the Video!
Step 1: What You Will Need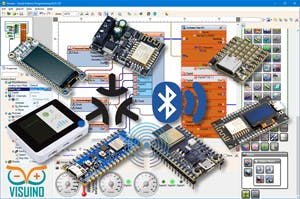
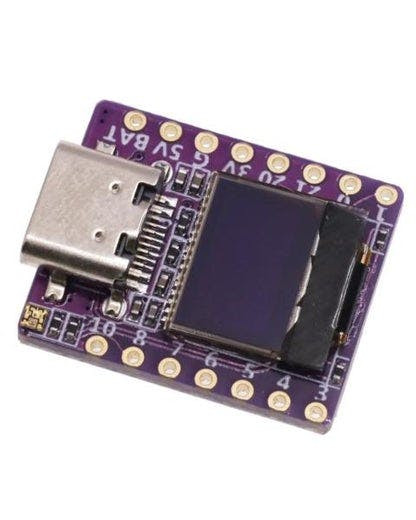
- ESP32 C3 OLED
- Visuino program: Download Visuino
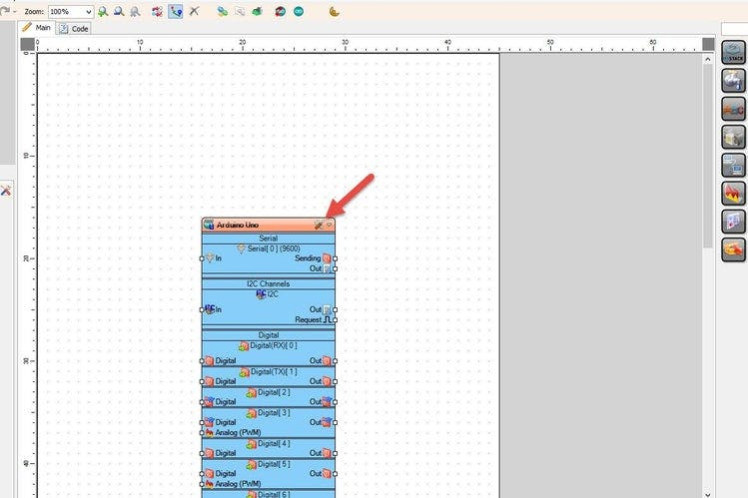
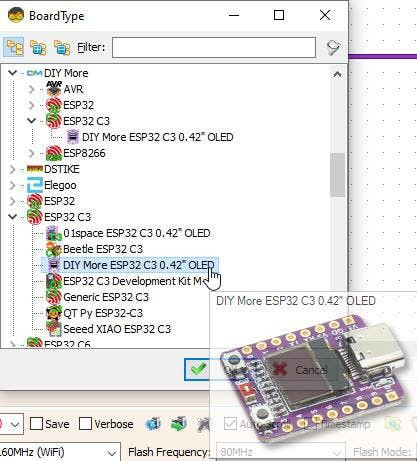
Start Visuino as shown in the first picture Click on the "Tools" button on the Arduino component (Picture 1) in Visuino When the dialog appears, select "DIY More ESP32 C3 0.42" OLED" as shown on Picture 2
Note: there are a few different ESP32 C3 OLED boards to choose, make sure that you select the one that fits your board
Step 3: In Visuino Add Components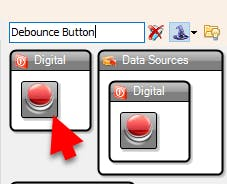
- Add "Debounce Button" component
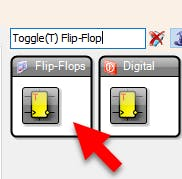
- Add "Toggle(T) Flip-Flop" component
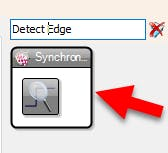
- Add "Detect Edge" component
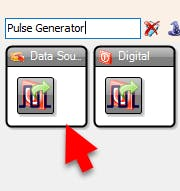
- Add "Pulse Generator" component
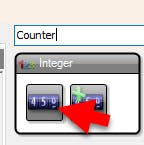
- Add 2X "Counter" component
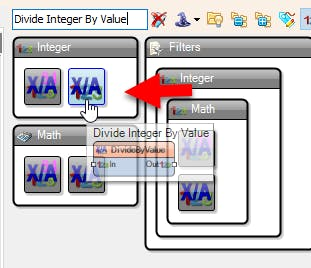
- Add "Divide Integer By Value" component
- Add "Formatted Text" component
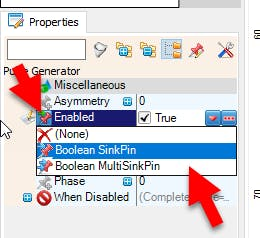
- Select "PulseGenerator1" and in the properties window select "Enabled" and click on the pin icon and select "Boolean SinkPin"
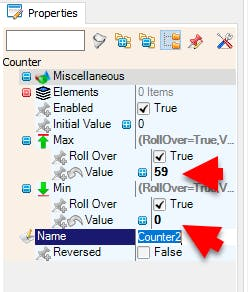
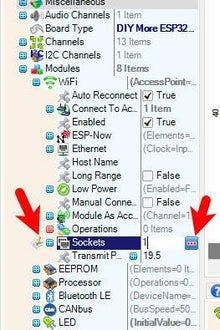
- Select "Counter2" and in the properties window set "Max" > "Value" to 59 and "Min">"Value" to 0
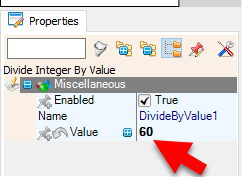
- Select "DivideByValue1" and in the properties window set "Value" to 60
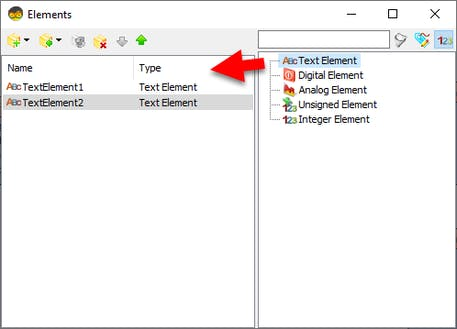
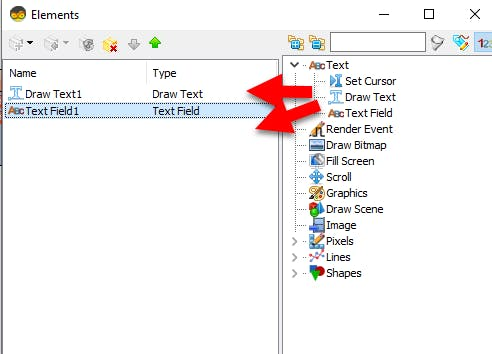
- Double click on "FormattedText1" and in the "Elements" window drag 2X "Text Field" to the left side
- Close the "Elements" window
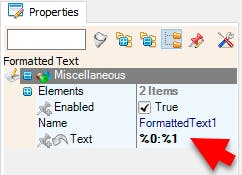
- Select "FormattedText1" and in the properties window set "Text" to %0:%1
Select DIY More ESP32 C3 0.42" OLED and in the editor Modules>Display>Elements, click on [...] button, so that "Elements" window will open.
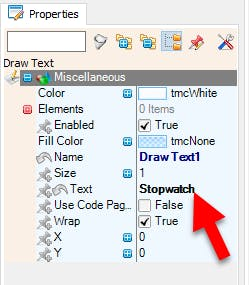
- "In the Elements Dialog drag "Draw Text" from the right side to the left and in the properties window set "Text" to Stopwatch
- In the Elements Dialog drag 2X "Text Field" from the right side to the left
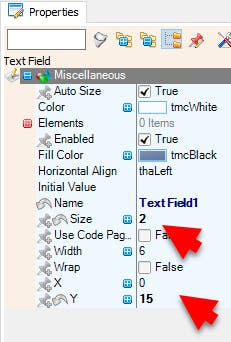
- Select "Text Field2" and in the properties window set "Y" to 15, and "Size" to 2
Close the Elements Dialog
Step 5: In Visuino Connect Components
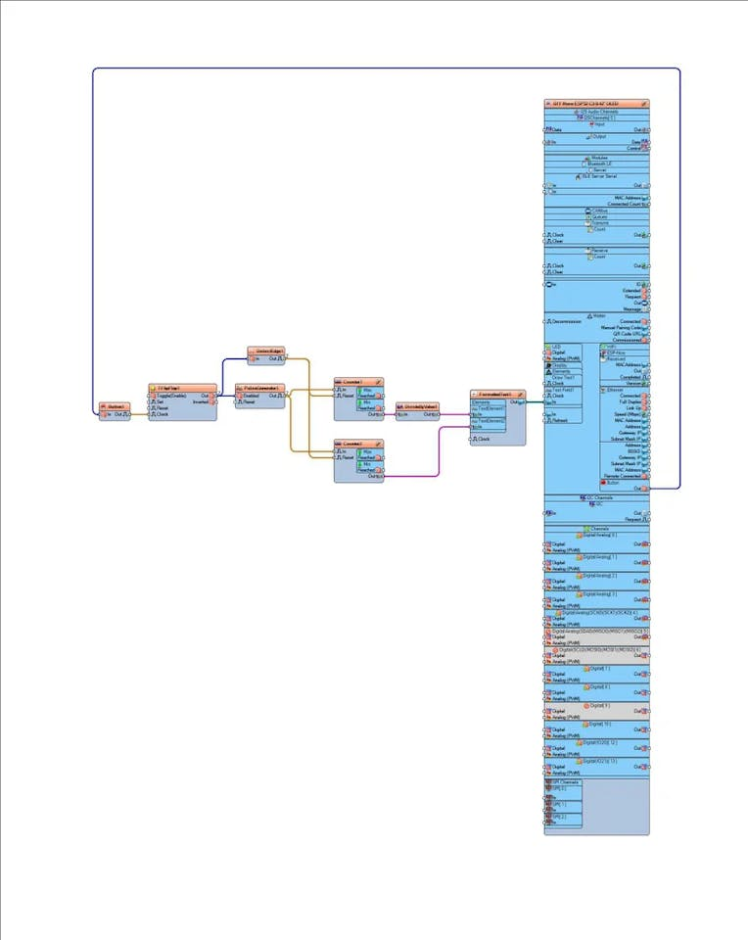
- Connect "Arduino" > "Modules" > "Button" pin [Out] to "Button1" pin [In]
- Connect "Button1" pin [Out] to "TFlipFlop1" pin [Clock]
- Connect "TFlipFlop1" pin [Out] to "DetectEdge1" pin [In]
- Connect "TFlipFlop1" pin [Out] to "PulseGenerator1" pin [Enabled]
- Connect "DetectEdge1" pin [Out] to "Counter1" pin [Reset]
- Connect "DetectEdge1" pin [Out] to "Counter2" pin [Reset]
- Connect "PulseGenerator1" pin [Out] to "Counter1" pin [In]
- Connect "PulseGenerator1" pin [Out] to "Counter2" pin [In]
- Connect "Counter1" pin [Out] to "DivideByValue1" pin [In]
- Connect "DivideByValue1" pin [Out] to "FormattedText1" > "TextElement1" pin [In]
- Connect "Counter2" pin [Out] to "FormattedText1" > "TextElement2" pin [In]
- Connect "FormattedText1" pin [Out] to "Arduino" > "Modules" > "Display" > "Text Field1" pin [In]
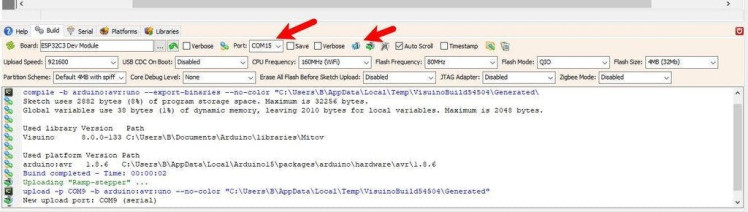
In Visuino, at the bottom click on the "Build" Tab, make sure the correct port is selected, then click on the "Compile/Build and Upload" button.
Step 7: PlayCongratulations! You have completed your Internet Time project with Visuino. Also attached is the Visuino project, that I created for this Tutorial. You can download and open it in Visuino: https://www.visuino.eu
Schematics, diagrams and documents
Code
Credits
Related products


Leave your feedback...