
Lora Cellular Gateway Based Farming With Blues

About the project
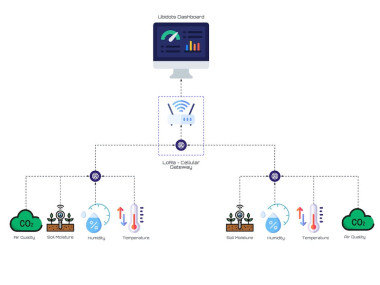
LoRa Cellular Gateway-based farms, integrated with Blues technology, deliver real-time insights on soil conditions and crop health.
Project info
Difficulty: Difficult
Platforms: Seeed Studio, Ubidots, Blues Wireless
Estimated time: 3 days
License: Apache License 2.0 (Apache-2.0)
Items used in this project
Hardware components

View all
Story
Agriculture, fundamental to human civilization, has long supported societies. As we grapple with challenges like a growing global population, shifting climate patterns, and the imperative for sustainable resource management, the importance of agriculture has only intensified. With a projected world population of 9.7 billion by 2050, demanding a 70% increase in food production, there is a need to depart from traditional farming methods characterized by generalized approaches and uniform practices.
Precision farming, also known as precision agriculture or precision ag, presents an innovative farming approach. It employs information technology, data analysis, and advanced equipment to optimize various aspects of agricultural production, aiming to enhance efficiency, increase productivity, and foster sustainability.
In response to these challenges, a groundbreaking project has been initiated, seamlessly aligning with the evolving landscape of precision farming. This transformative initiative involves the integration of a LoRa Cellular Gateway made with the Blues IoT Kit. As a pivotal component of this innovative system, sensor-equipped nodes are strategically deployed across different sections of a farm. These nodes wirelessly transmit crucial data to a centralized gateway, which, in turn, forwards the collected information to the cloud for comprehensive analysis.
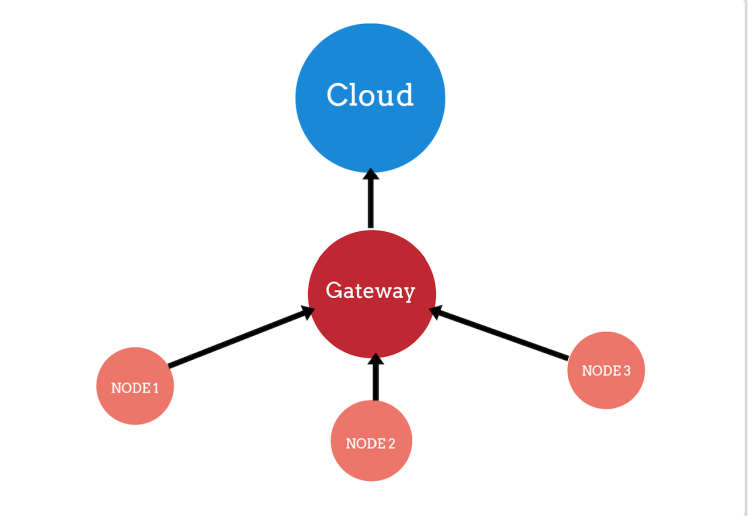
Data FlowThe below diagram depicts the basic flow of data between the Nodes and the Cloud.
Effective communication is a crucial component within this setup, facilitating the seamless transmission of data from farms to the cloud. While common communication protocols like 3G/4G GSM, Wi-Fi, Zigbee, and Bluetooth are often utilized in similar scenarios, cellular connectivity stands out as the sole reliable option in our context. However, deploying cellular connectivity to each node can become cost-prohibitive.
In this context, LoRaWAN presents as an ideal communication mode, capable of transmitting data over several kilometres with minimal energy consumption. Nevertheless, a challenge arises with the multitude of nodes, each necessitating a distinct LoRa module. While LoRaWAN gateways could potentially address this, they might not be the most cost-effective solution.
To overcome this challenge, we propose employing a LoRa cellular gateway that utilizes LoRa point-to-point (P2P) communication.
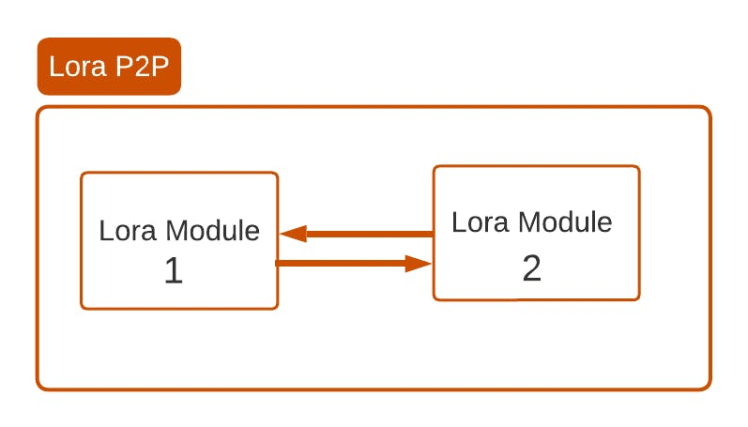
This approach introduces a cost-effective alternative, allowing us to leverage the benefits of LoRa's long-range capabilities. The gateway incorporates a LoRa module paired with cellular connectivity, enabling the connection of multiple LoRa nodes without additional complications.By integrating both the LoRa module and cellular option, the gateway becomes a centralized hub capable of efficiently collecting data from various LoRa nodes dispersed across the farm.
The illustration depicts the data flow dynamics between the node and the cloud via the gateway.

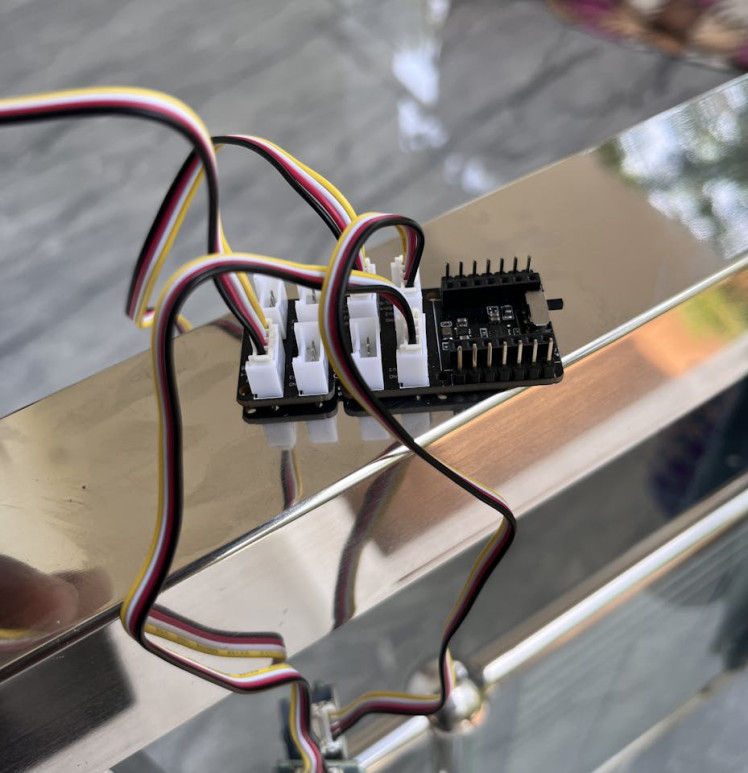
The key components of the Lora-Cellular Gateway are
- Blues Notecard with carrier
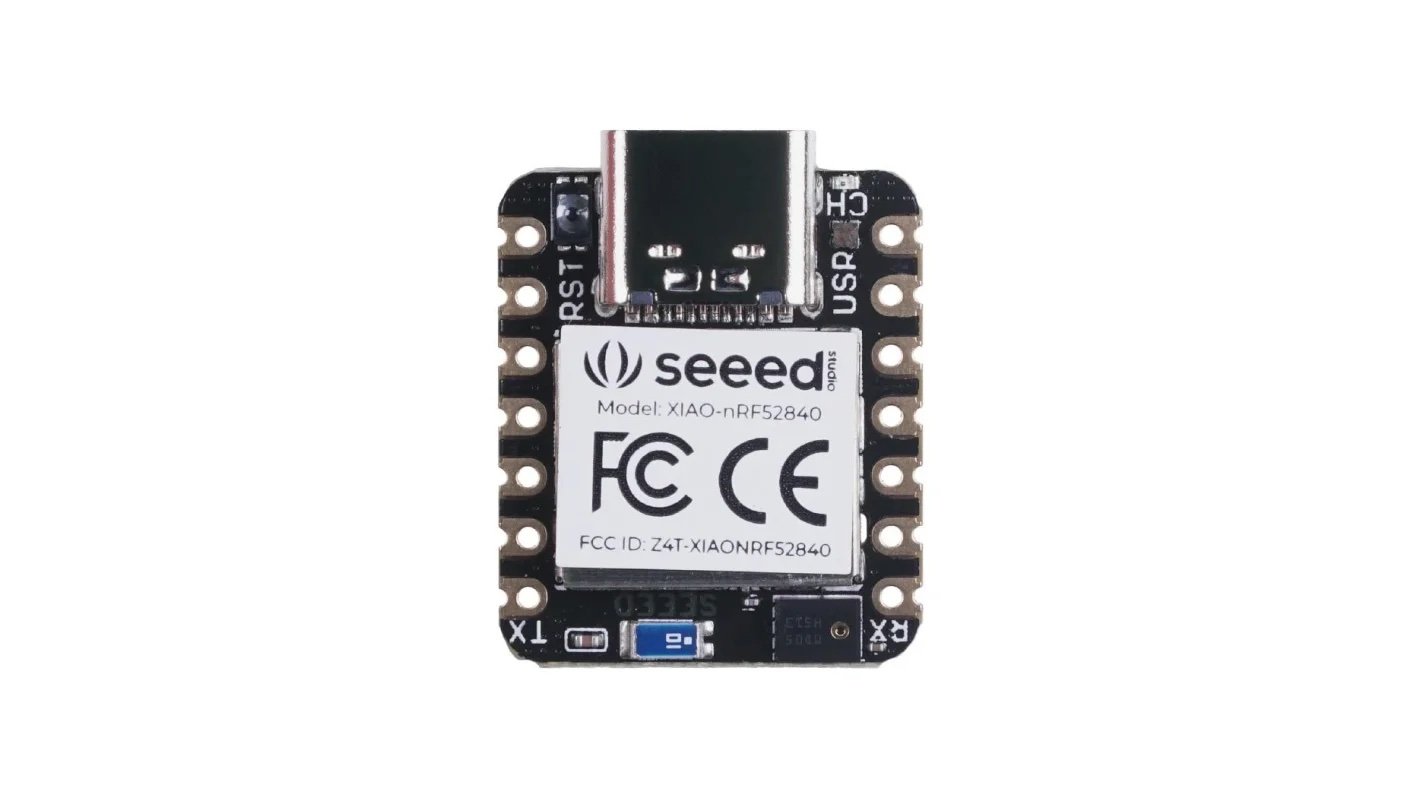
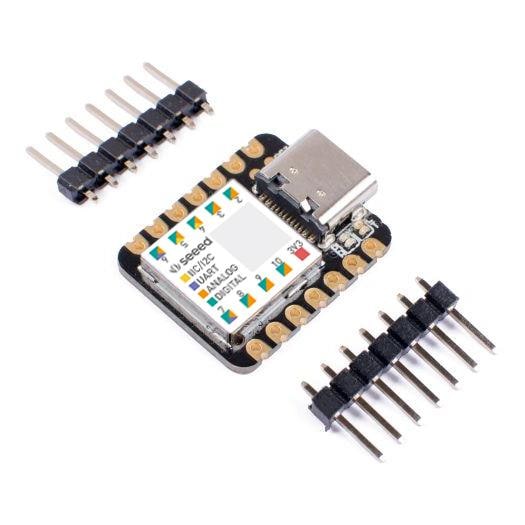
- XIAO ESP32 C3
- Lora E5 Module
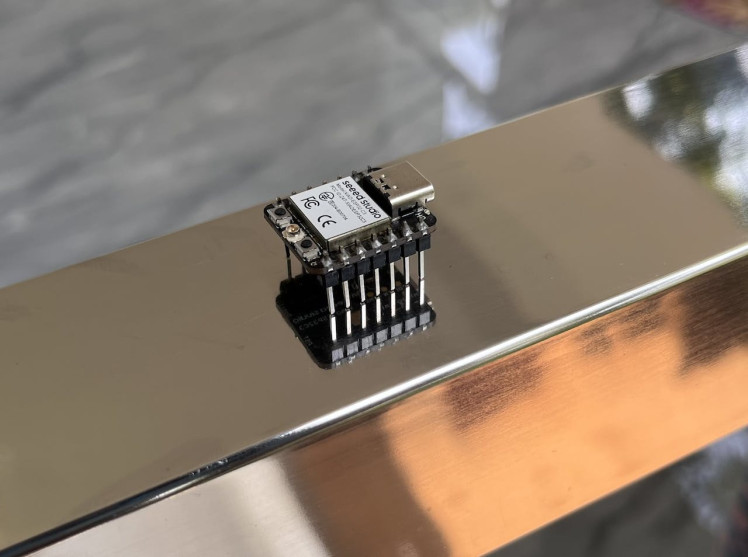
Blues Notecardwith carrier
Notecard plugged into the Notecarrrier(Front View)
")
")
Nano SIM inserted for additional carrier activity (Back view)
The Notecard is a tiny cellular communication module that allows devices to send and receive data over cellular networks. It is simple to set up, uses low power, and is affordable. The Notecard sends or receives the data using the Note, a JSON object.
Notecard cellular global version is used here to send the data from the device. To extend the functionality of the Notecard, the Notecarrier Piis used. It's the only Notecarrier I have. It is designed for drop-in development with a Raspberry Pi or compatible Single Board Computer.
You can use any other Notecarrier which you have that is compatible with the Notecard.
The Notecarrier Pi follows the standard 40-pin Raspberry Pi Model B+ layout.
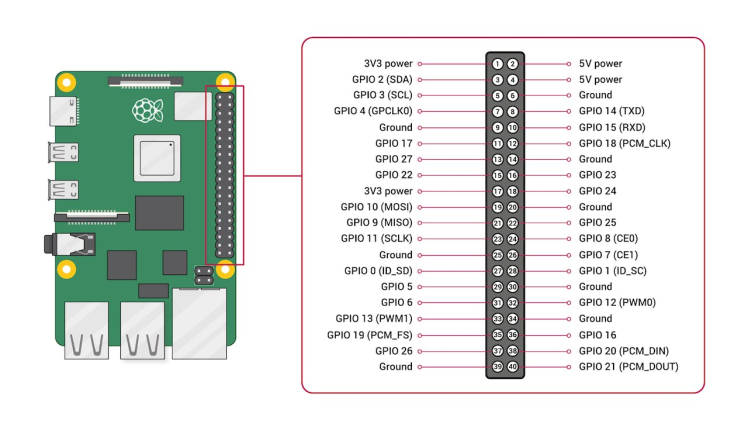
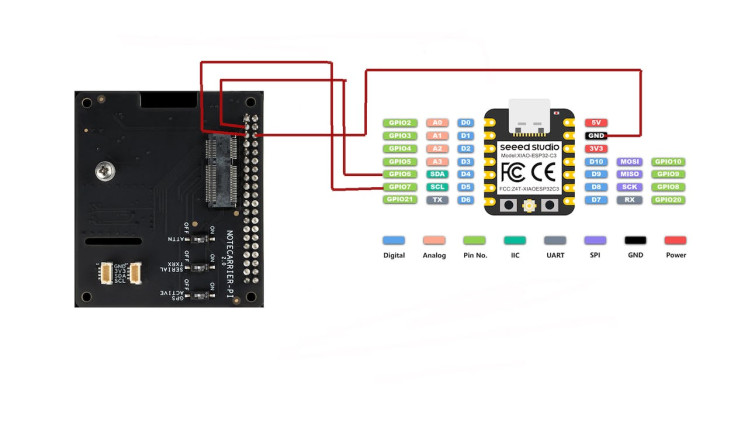
By following the layout, the I2C pins(GPIO2 &GPIO 3)in the Notecarrier are used for communicating with the Microcontroller to send the data by employing a common ground connection.
Before getting started make sure your Notecard is working properly and communicating with the Notehub. This is the guide from the Blues for the quick start.
XIAO ESP32 C3
The XIAO ESP32-C3 development board provides an excellent combination of processing power, memory, and connectivity options, making it a suitable choice for building the gateway in this project. Its capabilities enable efficient data handling, communication management, and real-time monitoring, contributing to the successful implementation of the project's goals. The rich development ecosystem of the XIAO ESP32-C3 further enhances the ease of development and customization for this application.
I2C communication test
First, we need to test the communication between the Notecard and the XIAO ESP32 with the I2C, so you need to hook up the connection like this.
This is the piece of code you should need to use for that.
#include <Notecard.h>
#define productUID "Put Your Product ID"
Notecard notecard;
void setup()
{
Serial.begin(115200);
Serial.print("Smart Farm With LoRa Cellular Gatewayrn");
notecard.setDebugOutputStream(Serial);
notecard.begin();
J *restore = notecard.newRequest("card.restore");
JAddBoolToObject(restore, "delete", true);
notecard.sendRequest(restore);
delay(10000);
J *req = notecard.newRequest("hub.set");
JAddStringToObject(req, "product", productUID);
JAddStringToObject(req, "mode", "continuous");
JAddBoolToObject(req, "sync", true);
JAddNumberToObject(req, "inbound", 1);
JAddNumberToObject(req, "outbound", 1);
notecard.sendRequestWithRetry(req, 5);
delay(20000);
}
void loop()
{
// Nothing
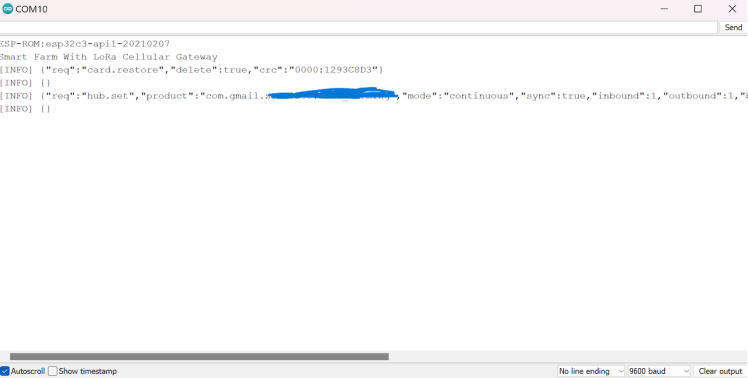
}If everything is correct, the serial monitor output will be like this.
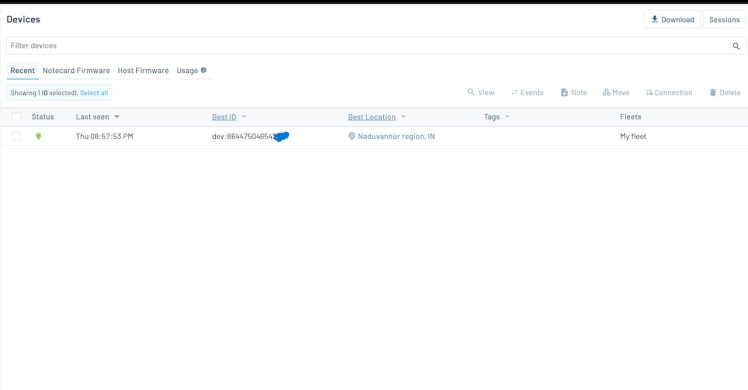
The device will also be shown online on Notehub.io.
LoRa E5 Module
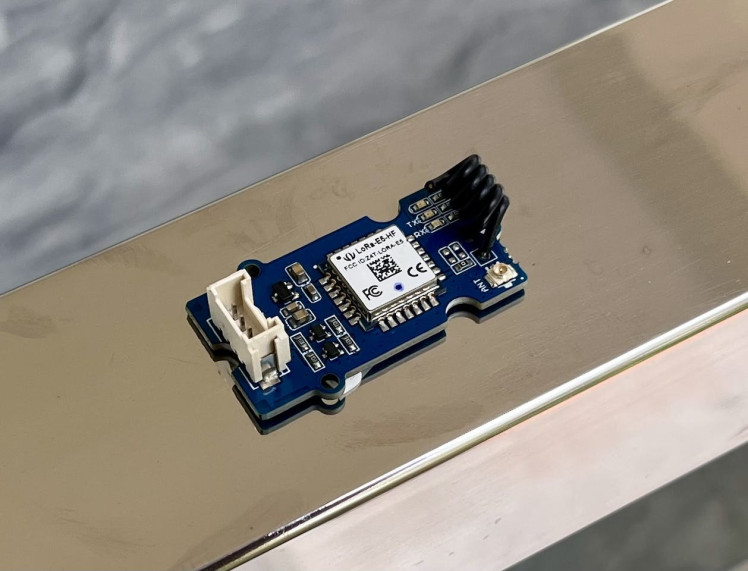
The Grove-Wio-E5 is a high-performance wireless radio module that supports LoRaWAN protocol and is incredibly easy to use. At its core is the Wio-E5 LoRaWAN STM32WLE5JC module, which integrates the ARM Cortex M4 ultra-low-power MCU core and Wio SX126x. This module can be easily interfaced with a microcontroller with AT commands through UART communication.
If you need more about Lora module E5 have a look here.
LoRa Module test
We need to also check the proper working of the Lora Module. For doing that follow the below connection.
The connection will go towards the LORa E5 Module

The connection will go towards the LORa E5 Module
This is the piece of code you should need to use for testing the module.
#include <HardwareSerial.h>
HardwareSerial MySerial0(0);

void setup()
{
  Serial.begin(115200);
  while (!Serial);
  MySerial0.begin(9600, SERIAL_8N1, -1, -1);
}

void loop()
{
  // Check if a command is available from the Serial Monitor
  if (Serial.available())
  {
    // Read the command from Serial
    String command = Serial.readStringUntil('n');

    // Send the command to MySerial0
    MySerial0.println(command);

    // Wait for a response
    delay(500);  // Adjust the delay as needed

    // Read and print the response from MySerial0 to Serial
    while (MySerial0.available())
    {
      char c = MySerial0.read();
      Serial.print(c);
    }

    // Print a new line to separate responses
    Serial.println();
  }

  delay(100);  // Adjust the delay as needed
}
So when we enter the command AT to the serial monitor, the output should be OK like below. Please make sure your baud rate is set to 9600.
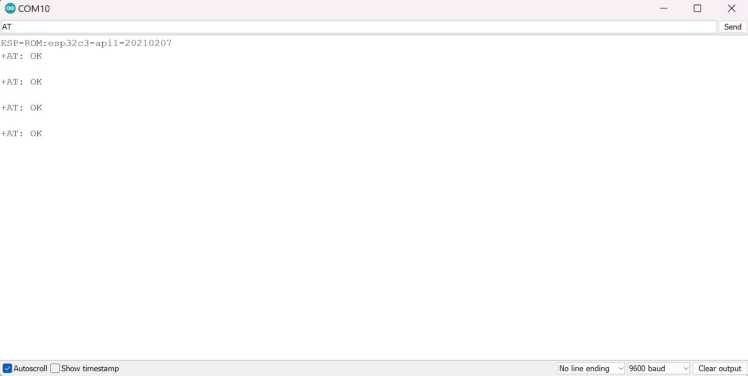
You can find the entire AT commands for this module in this pdf.

Starting page of the PDF
That's all about the components and testing, so we are now trying to make an enclosure for this device.
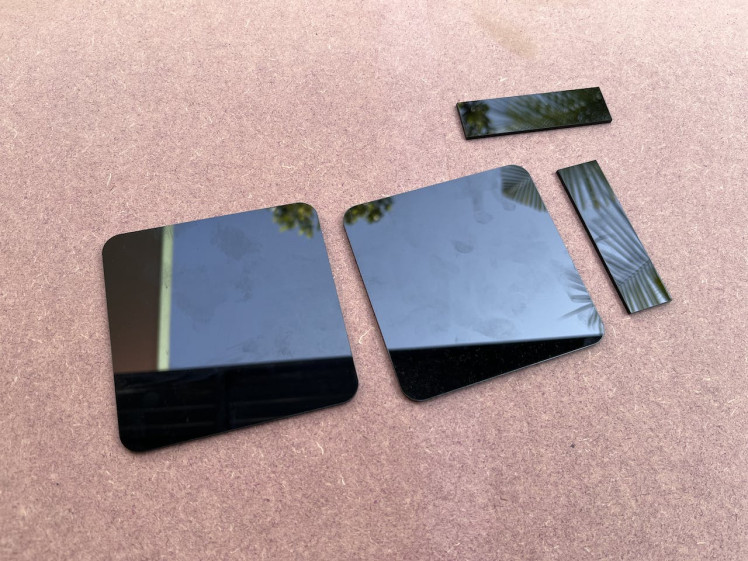
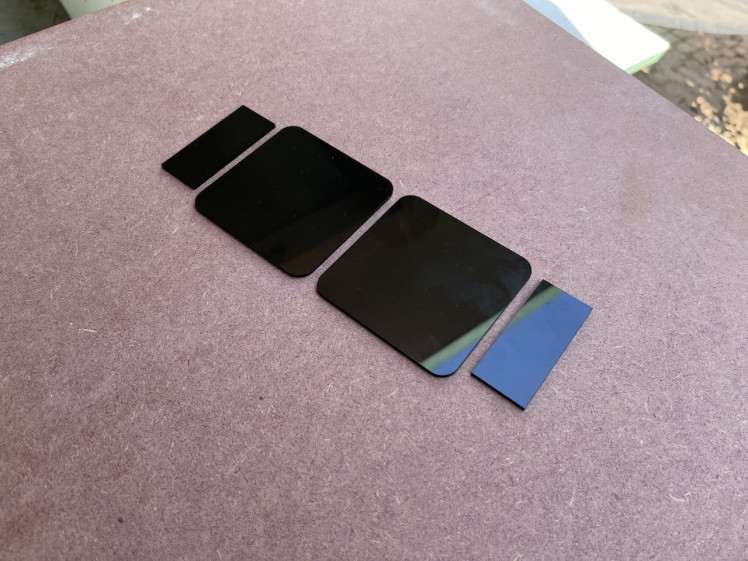
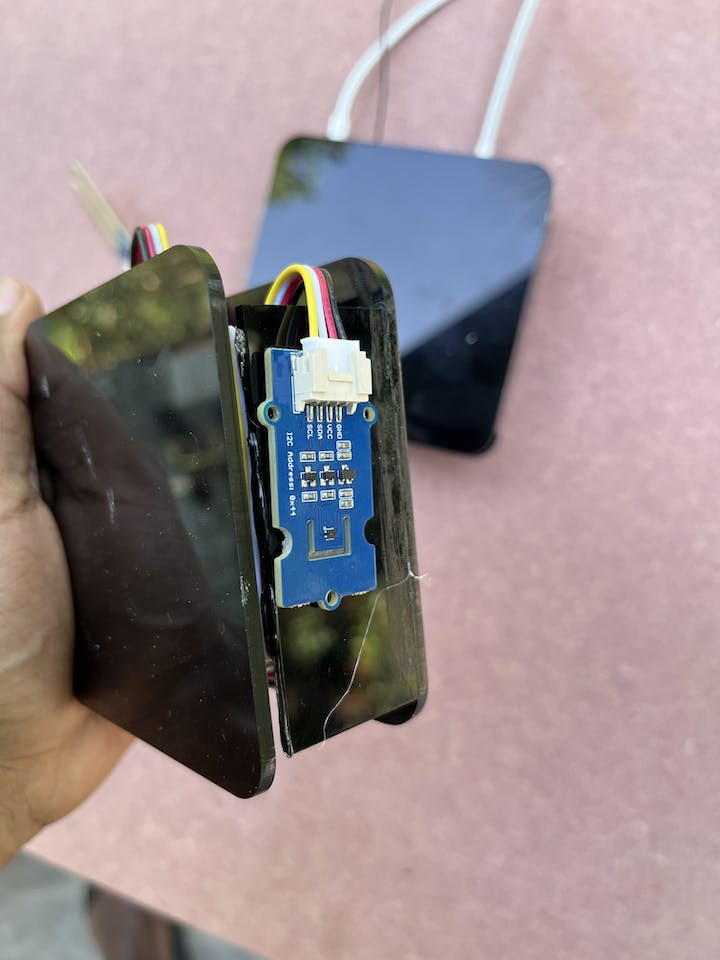
The Enclosure for the device is made up of a 3mm black acrylic sheet.
The components are attached by a female header by removing the male portions.
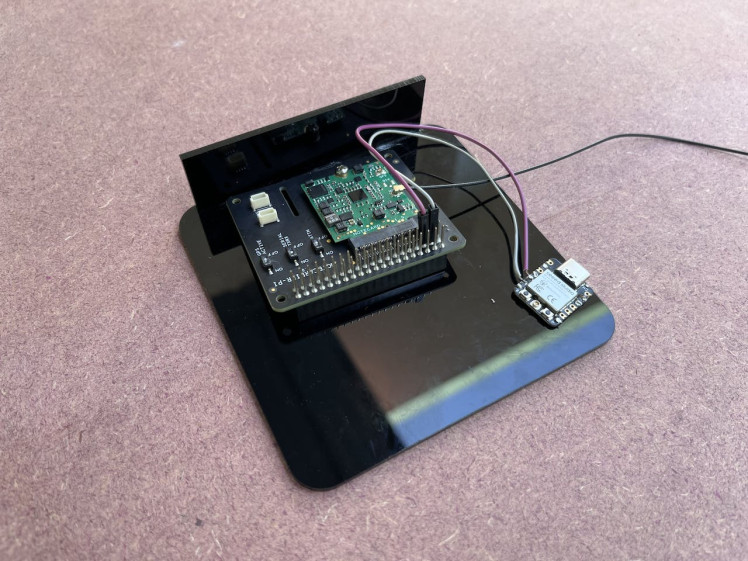
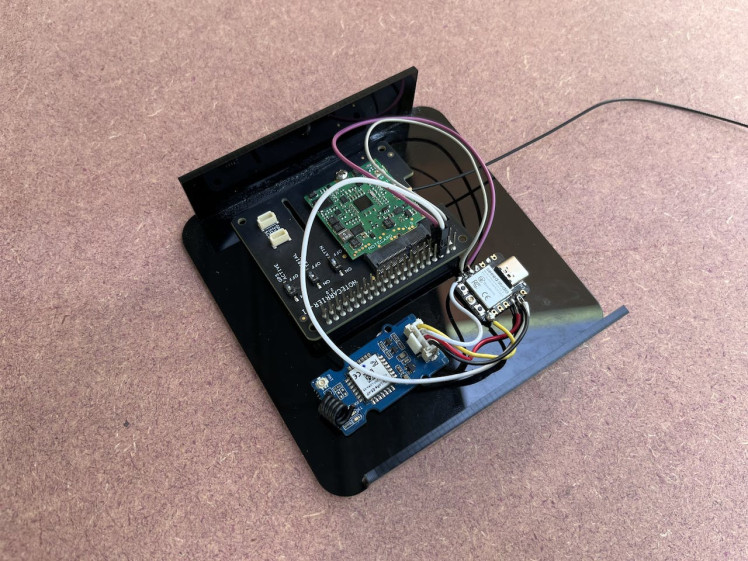
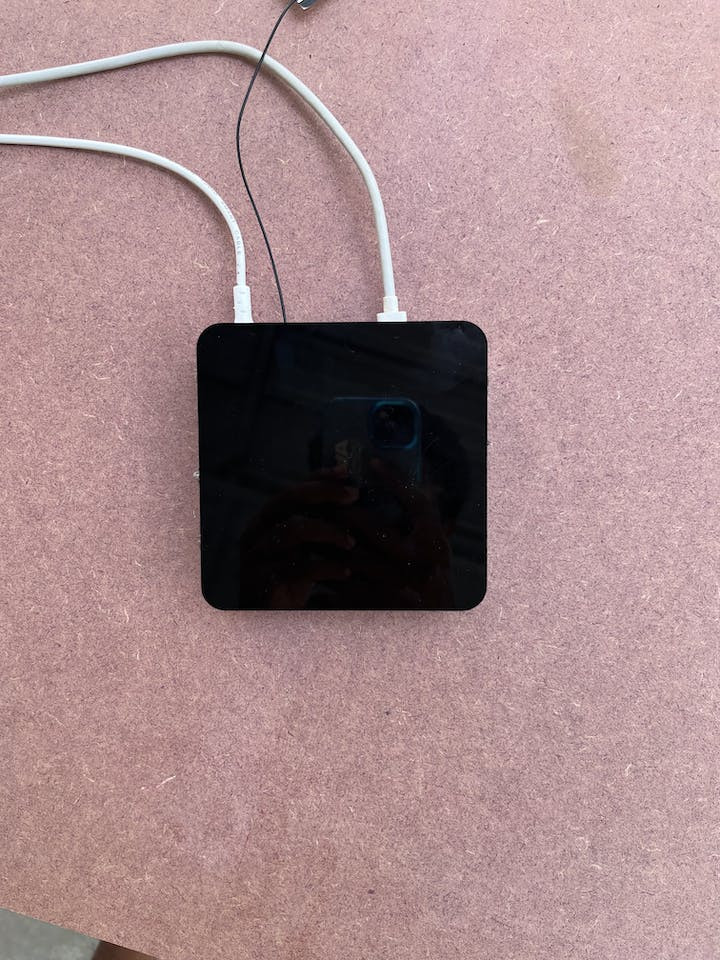
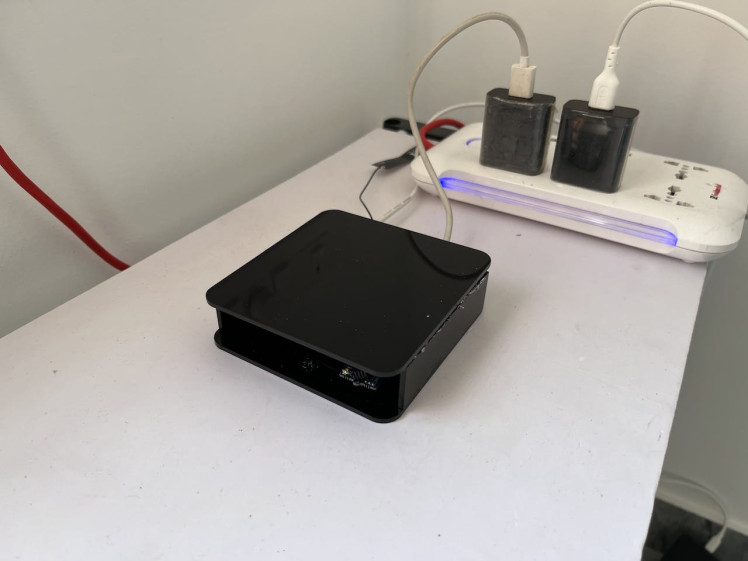
Here is the final veriosn of the Lora Cellular Gateway.
The Notecarrier and the Seed is powered seperately to avoid the problems of shared power supply.
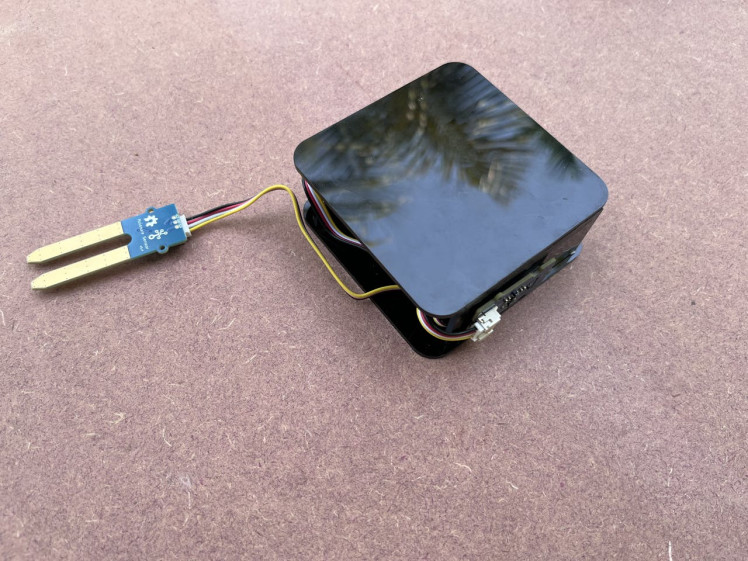
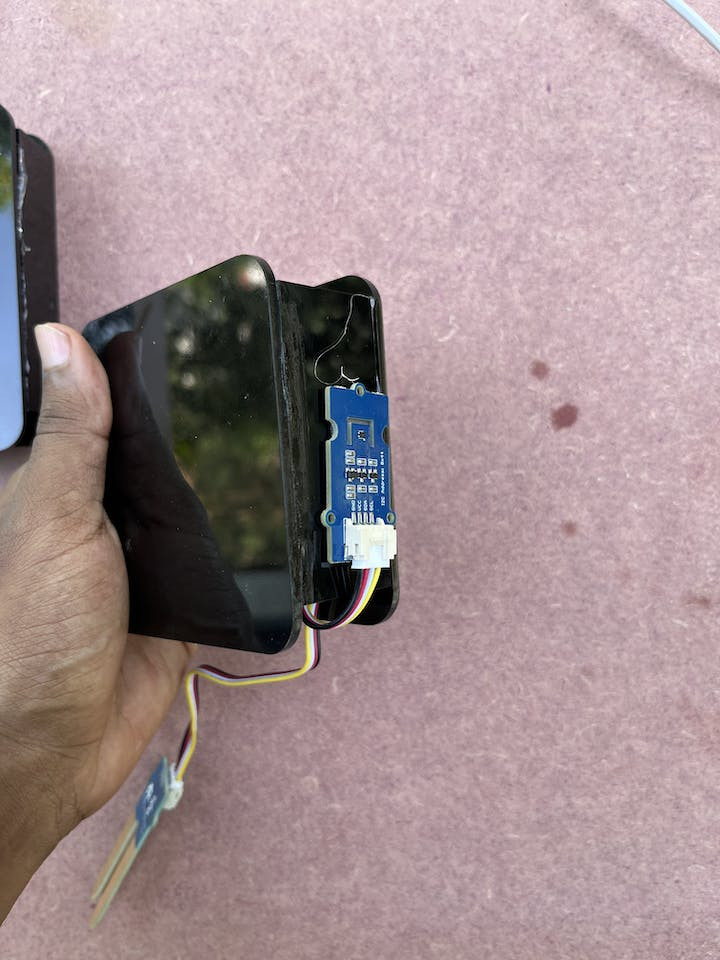
NodeThe Node is also powered by the XIAO ESP32 C3 and it consists of mainly three sensors.
1) Sensirion Humidity and Temperature Sensor 40(SHT40): It is used here for measuring the temperature and humidity of the environment. Key advantages of the SHT40 sensor include High accuracy, Wide Measurement Range, Low Power Consumption and Fast response time. It uses I2C protocol for communicating with the ESP32C3.
2) Moisture sensor: This Moisture Sensor can be used for detecting the moisture of soil. This sensor outputs analog value and can fed directly to the ESP.

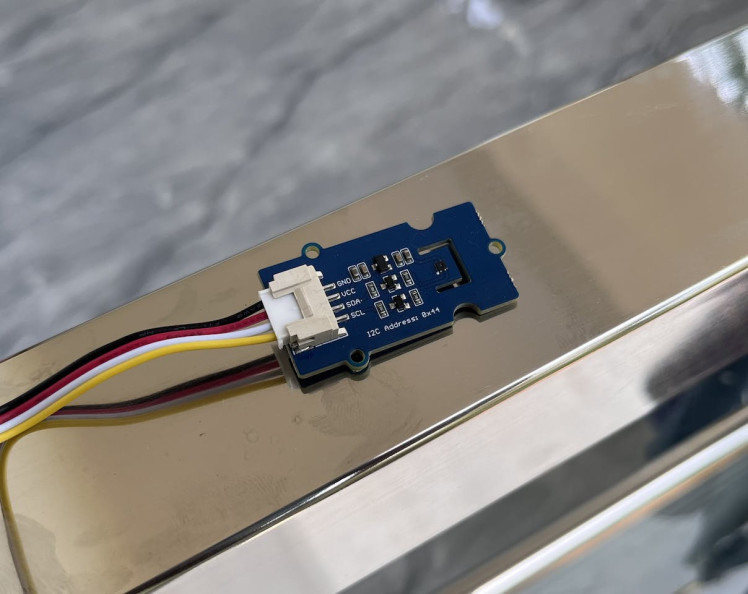
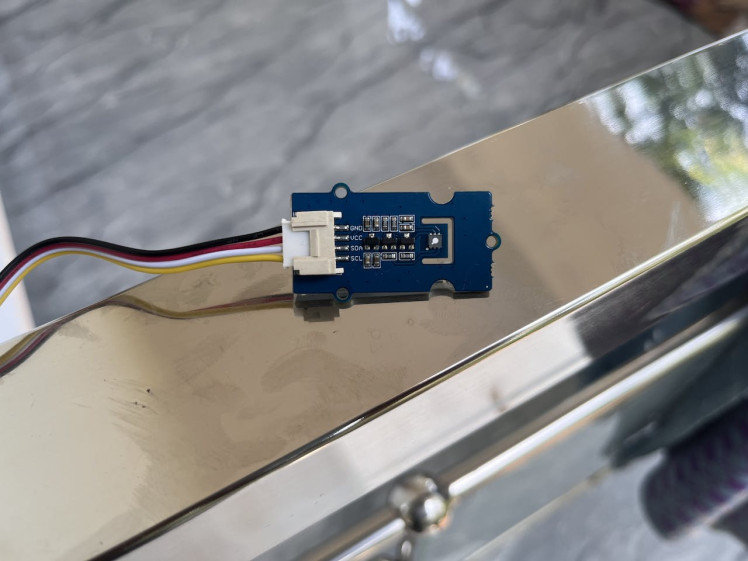
3)Grove VOC and eCO2 Gas Sensor (SGP30) : This module is based on SGP30, they provide TVOC(Total Volatile Organic Compounds) and CO2eq output for this module. Here we only concerned about the CO2 levels in the farm field.
All these are groove sensors, so they can be easily plugged into the XIAO's Expansion shield by means of groove connectors.
Expansion Shield

Expansion Shield
On the Node side also we used the Lora-E5 module. With the on-board battery management chip and battery bonding pad, we could easily power the Seeed XIAO with 3.7V lithium battery and recharge it. So here we used a 2000 mah battery for powering the node. If you are going to implement it in farm consider using a solar panel as a source for charging the battery.
2000 mah battery

2000 mah battery
The Node enlcosure is also made up of the black Acrylic sheets.
Secured all necessary components

Secured all necessary components
Here is the final version of the Node. The SGP30 Sensor is connected to a one side and the SHT40 is connected to the another side of the Node.
1 / 2
Here is an another Node.
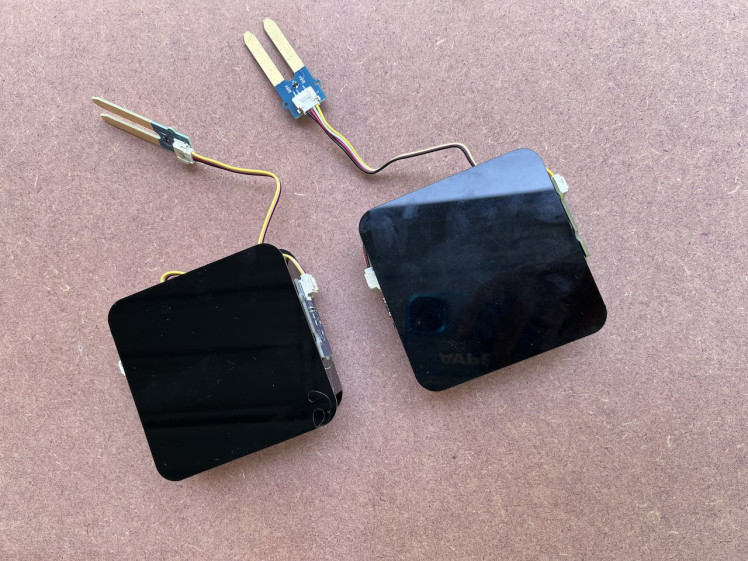
Two Nodes and the Gateway.

Two Nodes and the Gateway.
Data Visualisation With UbidotsUbidots is a comprehensive IoT (Internet of Things) platform designed to simplify the process of collecting, analyzing, and visualizing data from connected devices. The platform empowers everyone to monitor and manage real-time data streams, enabling them to make informed decisions and optimise operations.
Ubidots offers a user-friendly interface that allows users to seamlessly connect various sensors, devices, and equipment to the cloud. Through customizable dashboards, users can create visually engaging displays that showcase real-time data, trends, and insights. This enables them to gain a deeper understanding of their operations, identify patterns, and respond to changing conditions promptly.
The platform's capabilities extend beyond data visualization. Ubidots enable users to set up alerts and notifications based on specific thresholds, ensuring that they are promptly informed of critical events or deviations.
In this project, the Ubidots platform plays a crucial role in visualizing and interpreting the data collected from various nodes. Ubidots offers robust support for MQTT, HTTP, and TCP protocols, making it exceptionally well-suited for the requirements of this project.
This guide provides a structured pathway to familiarize yourself with the Ubidots platform. But, I have briefly outlined the steps that you can follow to connect your device to the platform and set up your dashboard
- Create A New Device
Upon registering an account on the Ubidots platform, users are directed to a page enabling the creation of a new device. While multiple preset devices are available, I opted for a blank template.
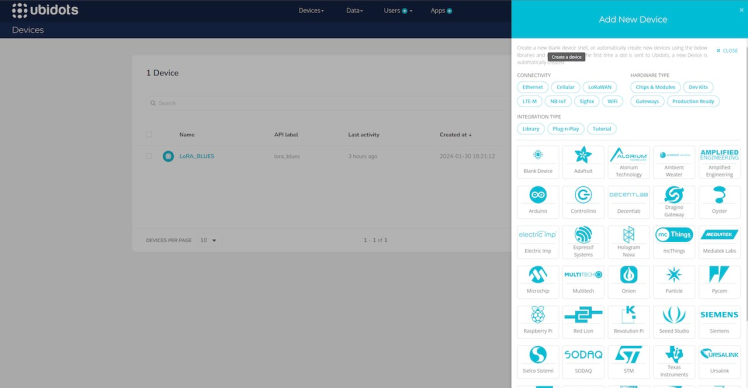
Subsequently, assign a distinct name to your device, which will be used to communicate with the device in upcoming steps.
- Create Variables
Variables created for the Node

Variables created for the Node
Ubidots variables represent dynamic data points within the Ubidots IoT platform. These variables encapsulate diverse sets of information such as sensor readings, measurements, or any data that changes over time. Each variable is associated with a specific device and holds real-time or historical data, which can be graphed, analyzed, and visualized to glean insights.
To create variables, navigate to the Devices section and choose the desired device. From there you can add variables that can hold data.
- Create Dashboard
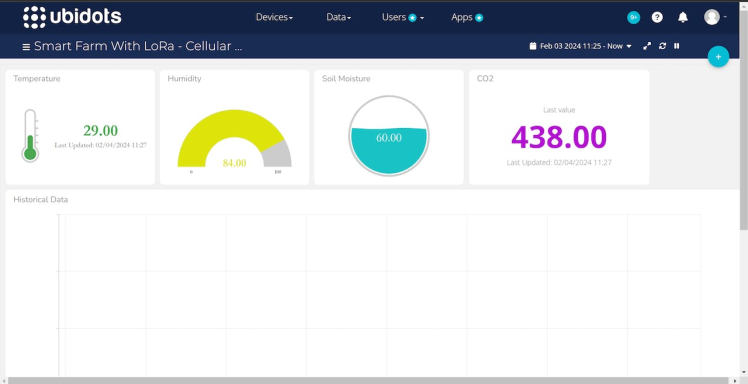
Here is my dashboard created

Here is my dashboard created
The next step involves crafting the dashboard. To initiate the dashboard creation process, navigate to the Data and subsequently access the Dashboard tab.
In the widgets panel you see an extensive array of widgets awaiting your selection, opt for the ones that align with your specific requirements.
We can send data to the Ubidots via HTTP POST requests by formatting data in JSON or URL parameters. Alternatively, Ubidots supports MQTT for lightweight communication. This project utilizing the HTTP POST.
NotehubNotehub is an integral component of this project, and its significance amplifies when coupled with Notecard. Notecard is just one piece of the puzzle, and its capabilities reach their zenith when complemented by Notehub. As a cloud platform, Notehub plays a pivotal role in managing and interpreting the data emanating from the Notecard.
Here we will create a route in Notehub for sending the data to the cloud. For sending the data we need to use this URL.
https://industrial.api.ubidots.com/api/v1.6/devices/<device_label>/The device_label can is the name of the device you given on the Ubidots.
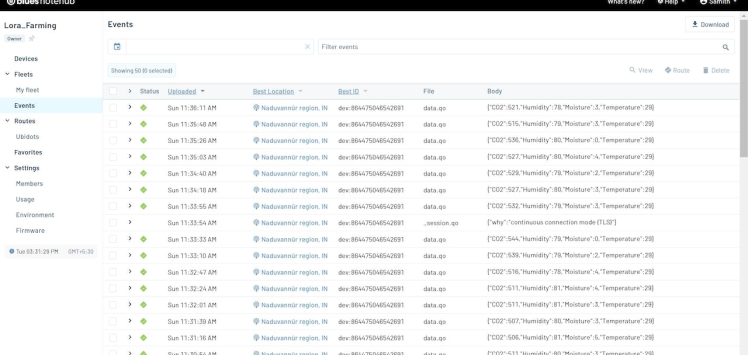
This is the Route created on the Notehub to send data.

This is the Route created on the Notehub to send data.
The format of the Route should be like this. The X-Auth-Token can be found on the Devices tab.
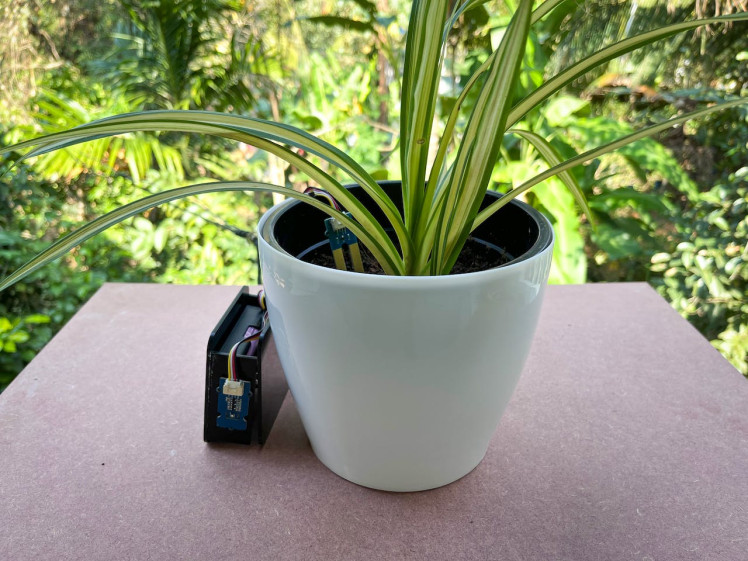
Real World TestingI don't have access to the farms, So I decided to test it on my plants. I placed a fully charged Node on a plant.
Then I powered the Gateway.
After some time we have successfully received the data in the Notehub.
Hooray! We also received the data of this particular node in our dashboard.
Schematics, diagrams and documents
Code
Credits
Related products


Leave your feedback...