

Jarvisify Your Alexa

Made by padmalaya_rawal / 3D Printing / Artificial intelligence / Communication / Voice
About the project
We all need Hey, JARVIS rather than Alexa. Isn't it?
Project info
Items used in this project
Hardware components

Story
We all Love Iron Man's JARVIS and might have sometimes tried to build one by ourselves. How do I know? because I also tried that too?. Building a JARVIS is more like a Software project and I love more hardware than software when I noticed that I already own an Amazon Alexa, I just needed to change its name. After spending weeks, I found that the name could not be changed. So, I thought why not add external hardware that can take a custom command and speak out Alexa at a very low level to activate it!
And that's exactly what I did. See it in action here before you make it:
Now convinced, let's begin:
STEP 1: Arduino Libraries
To make the project work, you need two libraries one for the "Offline Voice Recognition module" and the other for "DF Player mini". I am unable to upload the zip file of libraries here but you can download the same from here: https://electroboffin.com/curiosity-sparks/jarvisify-your-alexa/
STEP 2: Audio File
You will need an audio file that you will save to the Micro SD Card that will go to DF Player mini. In my case, I have changed the name of my Amazon Echo Dot to "Echo" rather than the default "Alexa" which can also be done by going to the Amazon Alexa mobile app. If you have also changed the name to "Echo" like I did. Otherwise, you can either record an mp3 with your voice saying the wake word (Alexa, Echo, Hey Google, Hey Siri, etc...) or use any online text-to-speech convertor website to achieve the same results.
Make sure to change the name of the audio file to "01.mp3", only then it will work. Please note that if you are thinking of changing the name in the code as per the audio file name, it won't work, DF Player Mini only supports the numerical file names.
You can download the audio file here(same as above): https://electroboffin.com/curiosity-sparks/jarvisify-your-alexa/
STEP 3: Add Custom Wake word
Once you are done uploading the code, now you have to add your custom wake-up word to the DF Robot's Offline Voice Recognition module by following the below steps:
- Initiate the voice assistant by employing the default wake-up word which is "Hey, robot"
- Utter "Learning wake word"
- Speak the designated wake-up word to be acquired: "Hey, JARVIS"
- The module will indicate by saying "Learning successful, please say it again!"
- Speak the designated wake-up word to be acquired again which is "Hey, JARVIS"
- The module will again indicate by saying "Learning successful, please say it again!"
- Speak the designated wake-up word to be acquired again which is "Hey, JARVIS"
- The module will indicate by saying "OK, Learning completed"
STEP 4: Upload the code
Once you are done with the above steps, the last step in the electronics is to upload the code to your development board which you can do very easily using Arduino IDE. Please make sure to add the library before you proceed with uploading the code, if you don't know how to do that, follow the below steps. If you already know, move on to the next step.
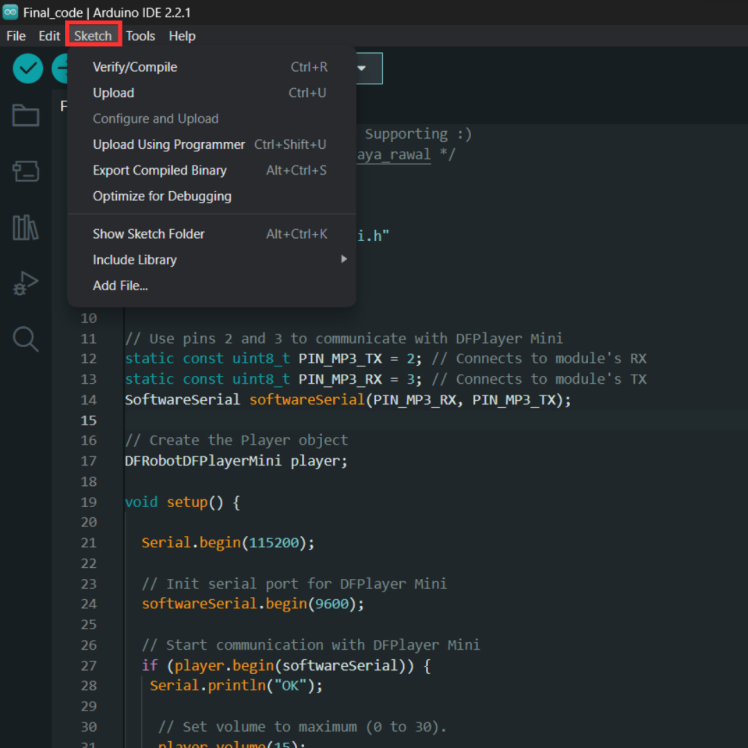
Steps for importing library:
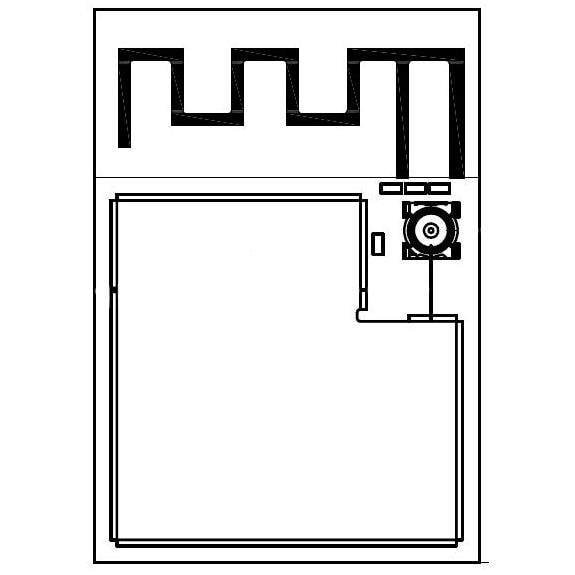
- Open Arduino IDE and navigate to Sketch in the top bar as shown in the image below
- Click on "Add Zip library"
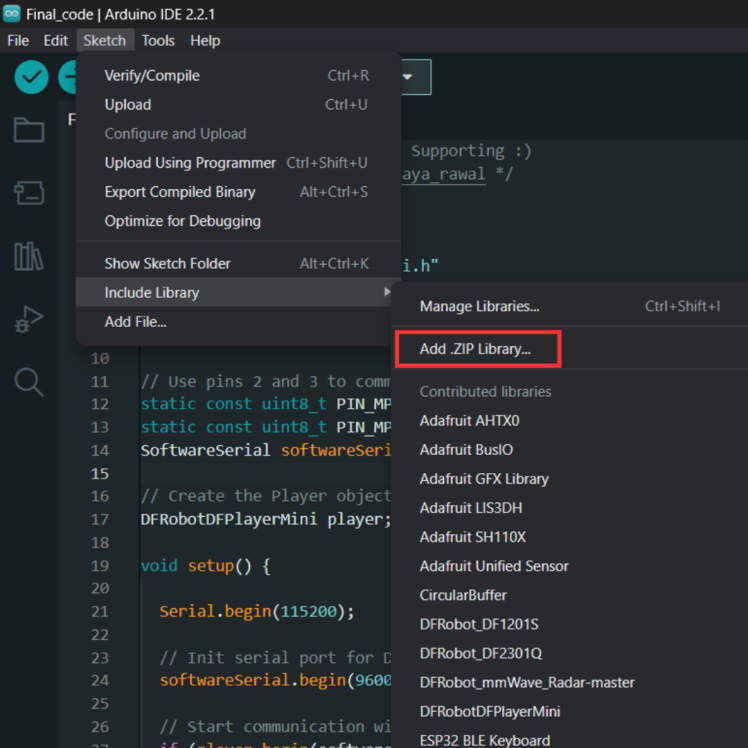
- The Zip file I provided has two libraries, unzip the given zip file and zip them individually and add one by one by following the above steps.
STEP 5: CAD Model
Now you might have already downloaded the given stl file for 3D printing, but if you wish to make one on your own, you might need the 3D models of the components, grab them from here:
STEP 6: Slicing
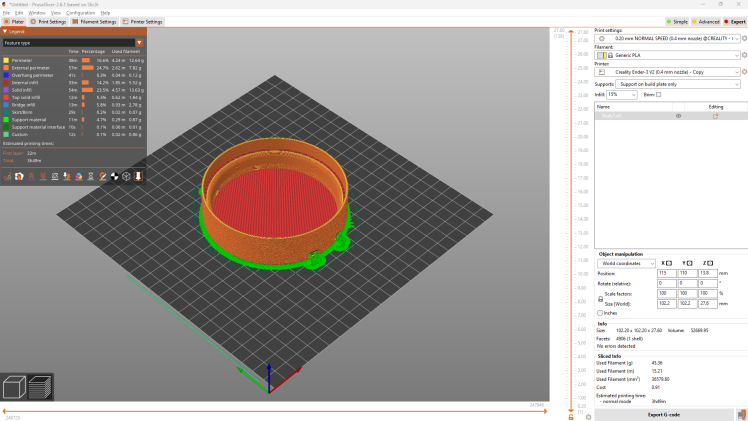
Download the STL file and by using any of your favorite Slicing software, slice it. I have used Prusa Slicer and the following are the details that you are looking for
STEP 7: Time for 3D printing
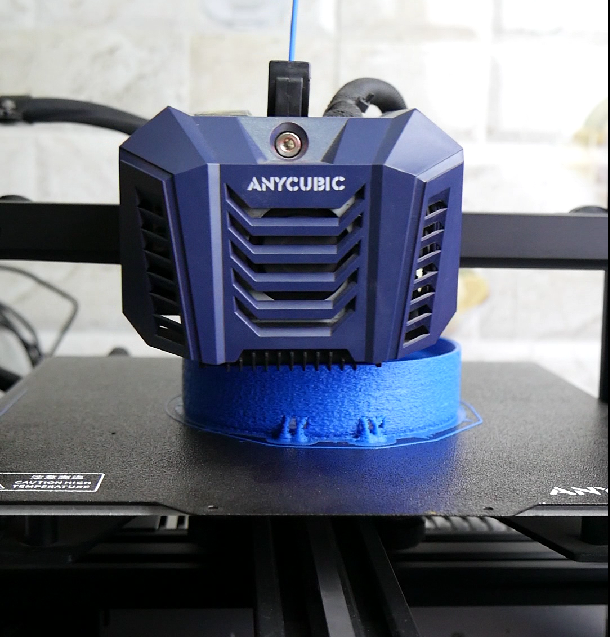
3D Print the slice model and here are the details that you might need:
STEP 8: Assembling

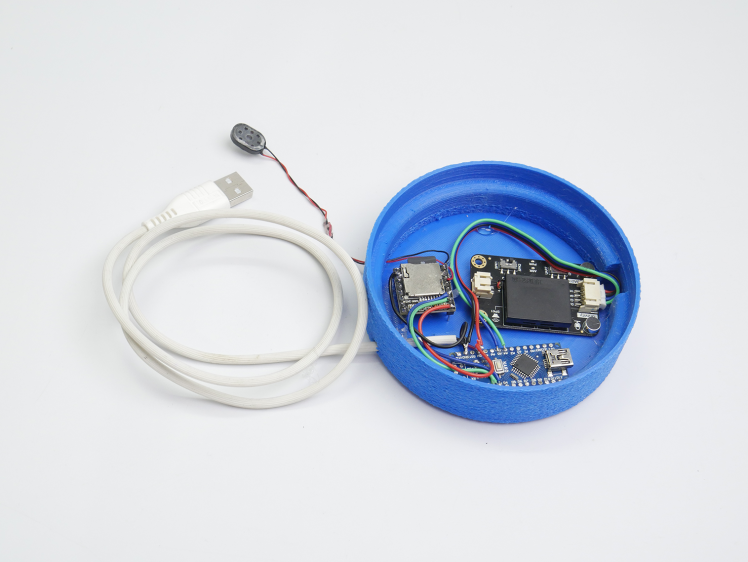
The assembly is very straightforward, just follow the circuit diagram and you are good to go. The only thing you have to keep in mind is to connect the Power cable and the speaker at the end by inserting their wires from the circular holes provided. Rectangular holes are for the microphones of the Offline Voice recognition module. There is a slot provided inside on the back of the rectangular holes section and that's for the Gravity connector.
Place your Alexa Echo Dot Gen 3 on the top and stick the speaker on one of the 4 microphones of the Echo Dot as shown above.
STEP 9: Have fun with your own "JARVIS"
You are good to go to do wonders with your JARVISified Alexa!!
Happy Tinkering?


Leave your feedback...