
Instructable Ghost Zoetrope

Made by electrouser778 / Art / Holidays
About the project
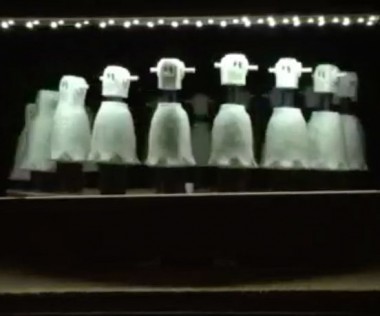
The Instructable Robot, dressed as a ghost, almost loses his head for Halloween!In real life, you don't see the black bars (they are the result of filming a strobe light). This is the same mechanism as "https://www.electromaker.io/project/view/zoetrope", using a different animation.
Items used in this project
Hardware components


Story
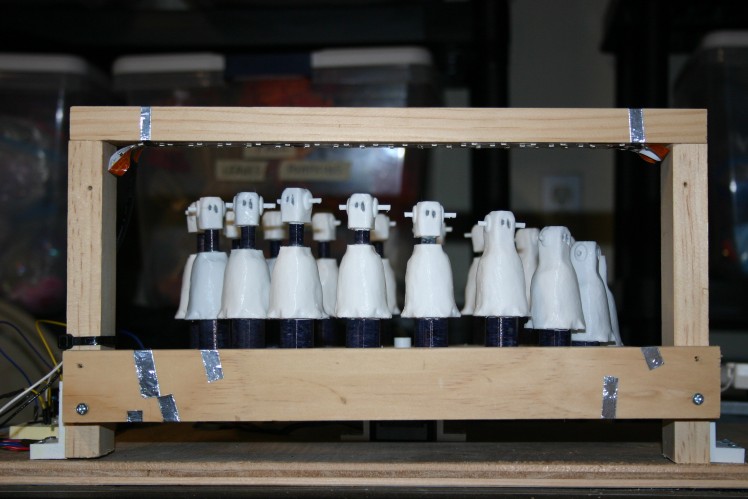
Step 1: What it Looks like in operation:
(1) Arduino Uno
(1) Arduino Motor Shield
(1) 12 volt 3 amp dc power supply
(1) String of led tape lights (use as needed, you'll probably have many left over)
(1) FQP30n06l n-channel qfet mosfet transistor
(1) 330 ohm resistor
(1) 12K ohm resistor
(1) 1n4004 diode
Miscellaneous 3mm screws, wood screws, 1/4" plywood, 1/2" plywood (base) and 1" x 2" wood (to mount the led lights)
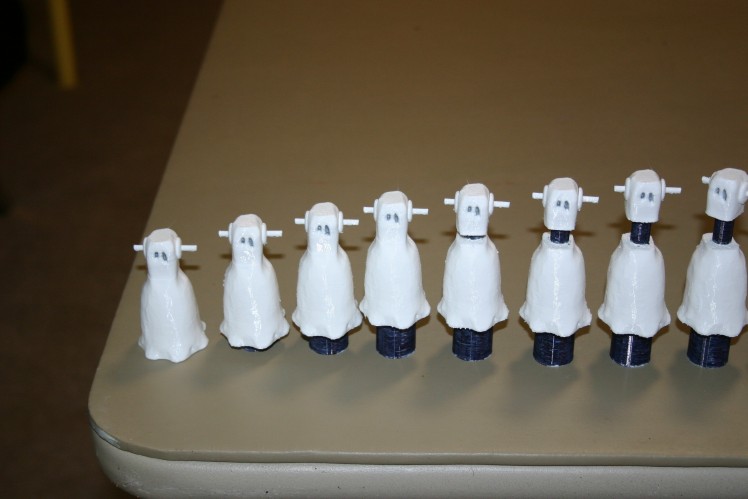
Step 2: 3d Printed Ghosts
Go here to find the 3d print files and Arduino sketch.
The ghosts aren't difficult to print--I used white PLA, supports and 10% fill. They require about one hour per ghost, so we're talking about roughly 20 hours of print time.
Print two each of:
ghostb
ghostc
ghostd
ghoste
ghostf
ghostg
Print one each of the other ghosts.
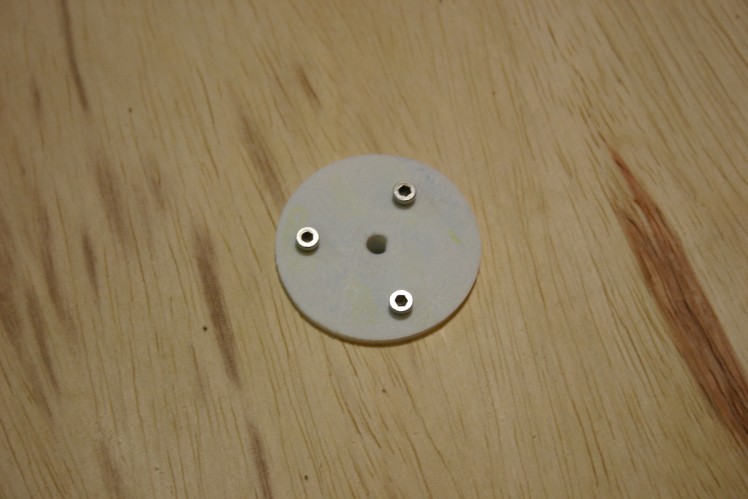
The hub should be printed at 96% size and at least 30% fill.
Step 3:
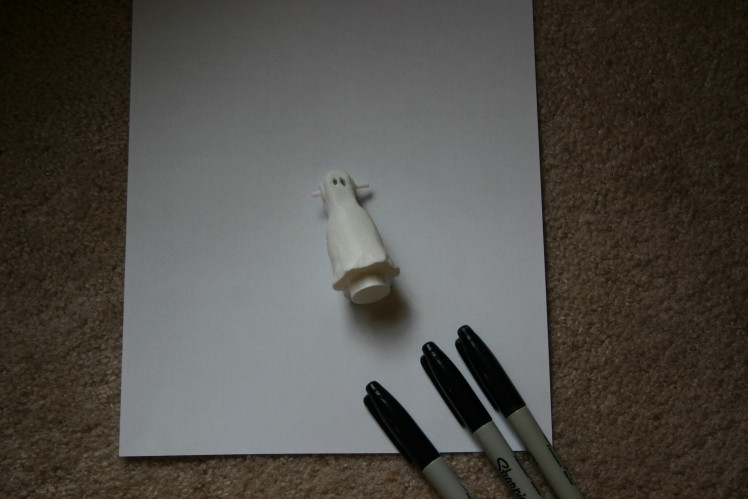
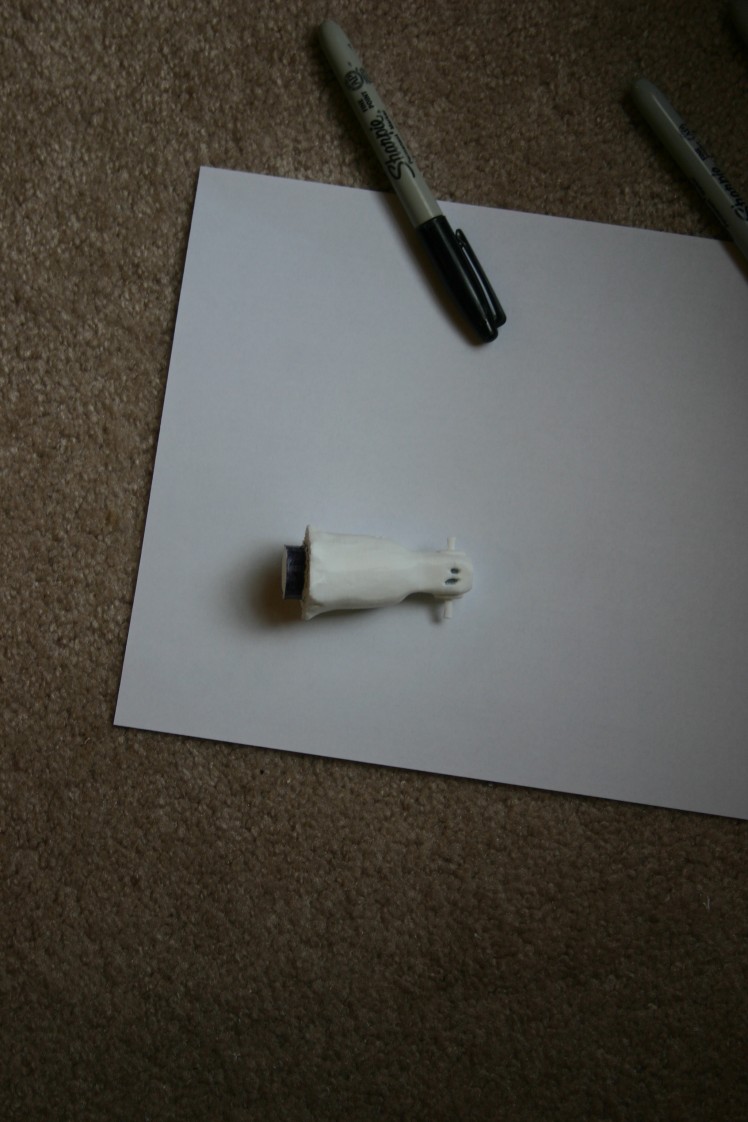
The eyeballs and circular risers need to be colored black, so I used markers to accomplish this.
Step 4: How It Works
This is a type of zoetrope using 3d objects and a flashing strobe (leds). This is set up to have 20 "frames" per revolution and the led light string flashes on briefly whenever a new object is in the proper position.
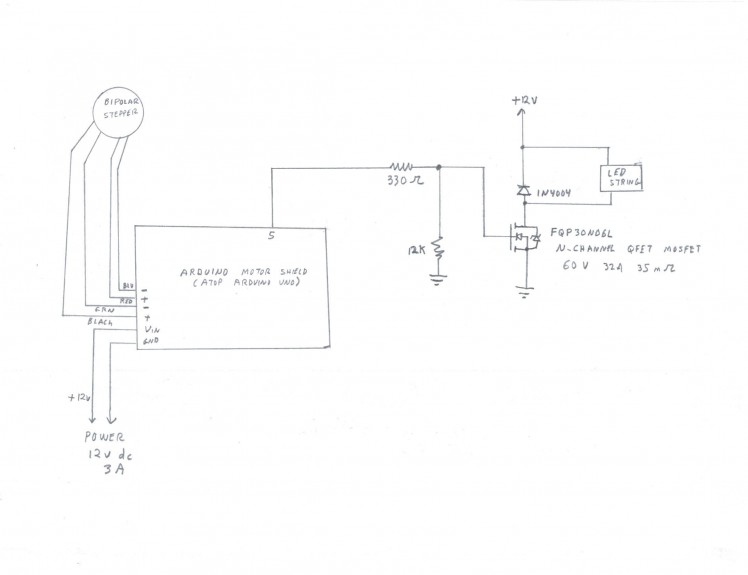
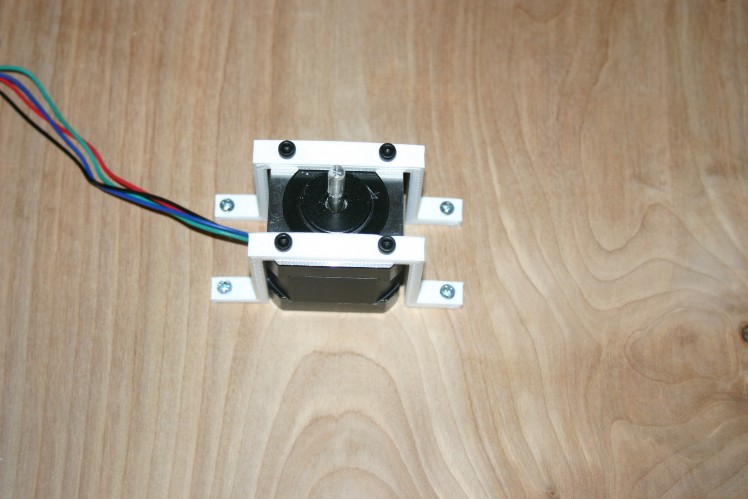
The bipolar stepper motor is easily controlled using the Arduino motor shield (sketch in step #2). The bipolar stepper motor takes two hundred 1.8 degree steps per revolution. Every ten steps (18 degrees), the led string is pulsed on, then off.
The stepper motor is secured to the plywood base using 3mm screws (into the motor) and wood screws (into the plywood base).
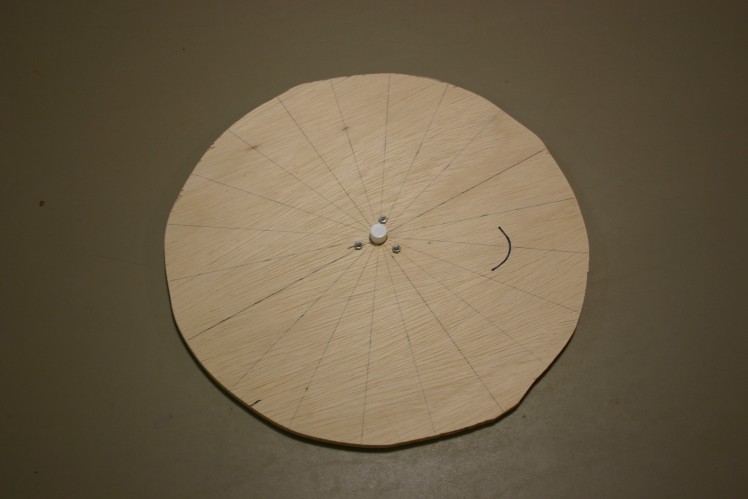
The 12 inch diameter (1/4 inch thick plywood) wheel is marked in 18 degree increments so that we know where to place each ghost. The motor hub (3d printed) is fastened to the plywood using 3mm screws and nuts. The motor hub and plywood turntable slide over the stepper motor shaft.
The system needs to operate in a reasonably dark environment. If there is too much light on the zoetrope then your eyes will see a "blur" as the pieces whiz around. In my setup, the ghosts are slightly above eye level, thus the "black neck" seems to disappear and the head appears to "float." If you are planning to look down on the zoetrope (like on a table), then the plywood turntable needs to be painted black.
Step 5:
We start with the ghost in the lowest position, then he rises. After he reaches a certain height, the head rises.
Step 6:
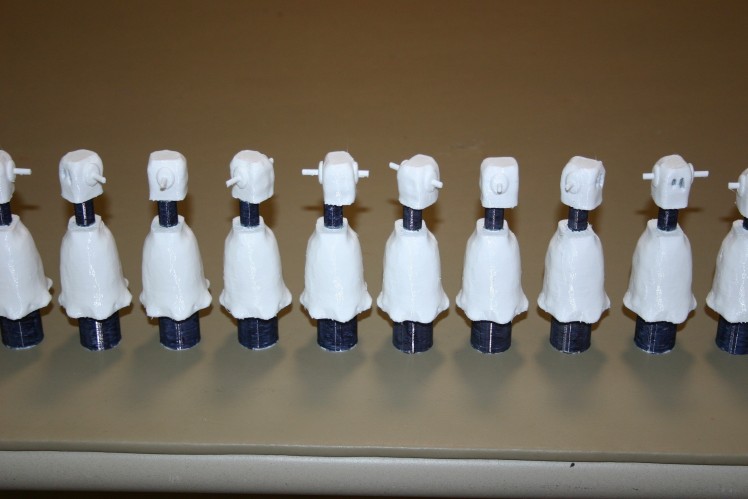
In 45 degree steps, the head rotates.
Step 7:
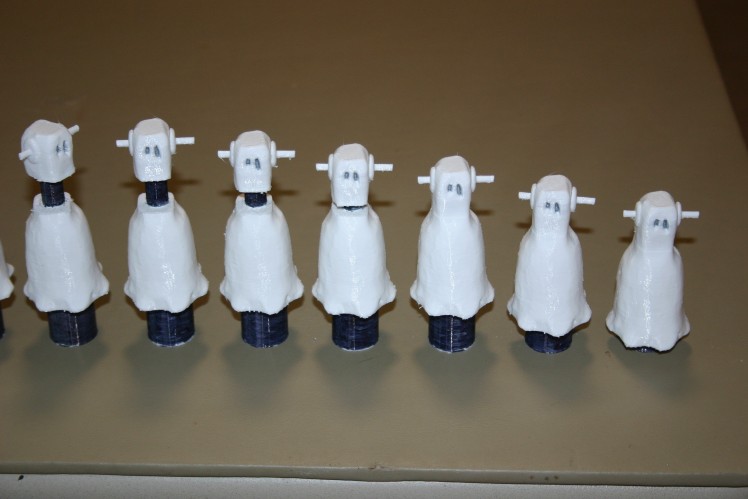
Now the head goes down, then the ghost goes down until it is back in the starting position.
Step 8:
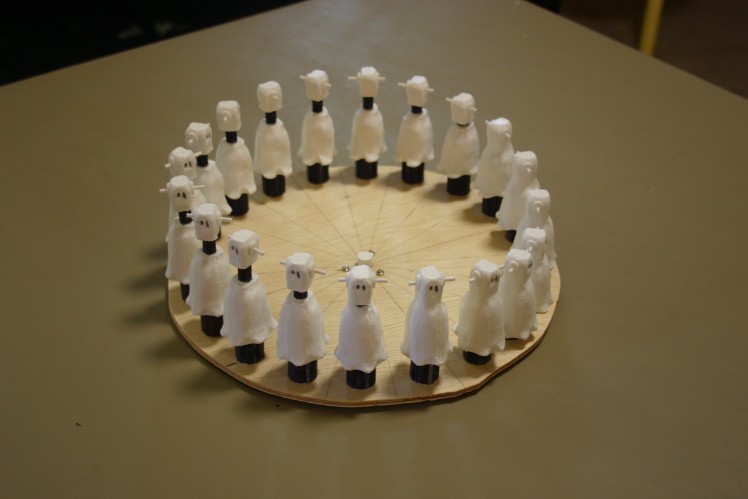
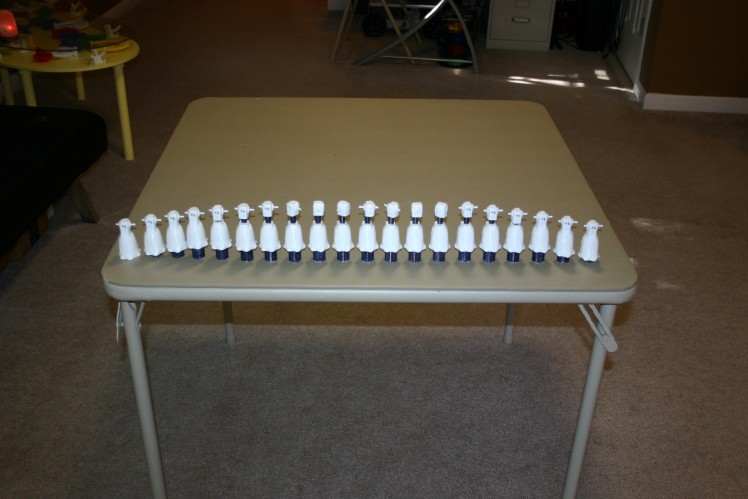
The ghosts are placed on the turntable in the proper sequence. I used aluminum duct tape (folded into a circle, sticky side out) to hold the ghosts in place.
Step 9:
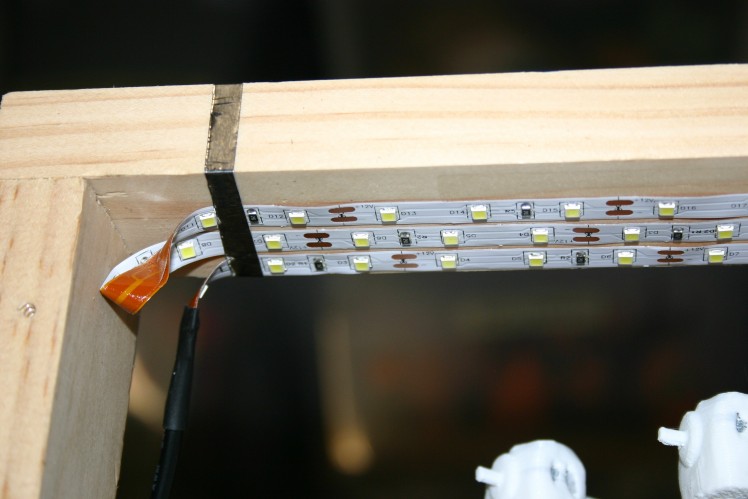
The led light string is placed above the ghosts.
Step 10:
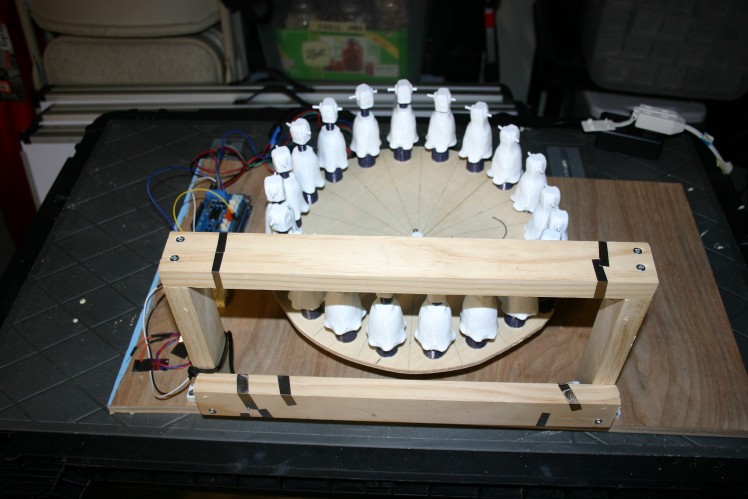
This is what the finished device looks like. I placed a second bar of lights in a position to illuminate the ghosts--but that provided too much illumination and made the black painted areas more visible.
Step 11:
You can make the turntable larger (whatever size the stepper motor can handle) and you can change the configuration/quantity of led lights.
My ghost was modeled in polymer clay by my wife, Annelle, and scanned using a MakerBot Digitizer (scanner). The ghost was adjusted for size and movement using Tinkercad.
Schematics, diagrams and documents
Code
Credits
Related products


Leave your feedback...