

Hexabitz Piano Controllable From Raspberry Pi And Python Gui

Made by Aula_Jazmati / Displays / Kids & Family / Music / Wearables / IoT
About the project
This project uses Hexabitz modules to play the music notes. It’s definitely an effective way to learn about modules, Python GUI & music ?
Project info
Difficulty: Moderate
Platforms: Amazon Web Services, DFRobot, Raspberry Pi, STMicroelectronics
Estimated time: 1 hour
License: MIT license (MIT)
Items used in this project
Hardware components

Story
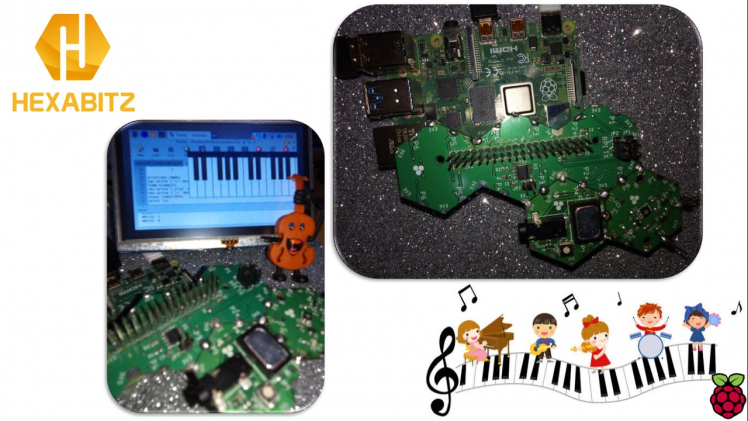
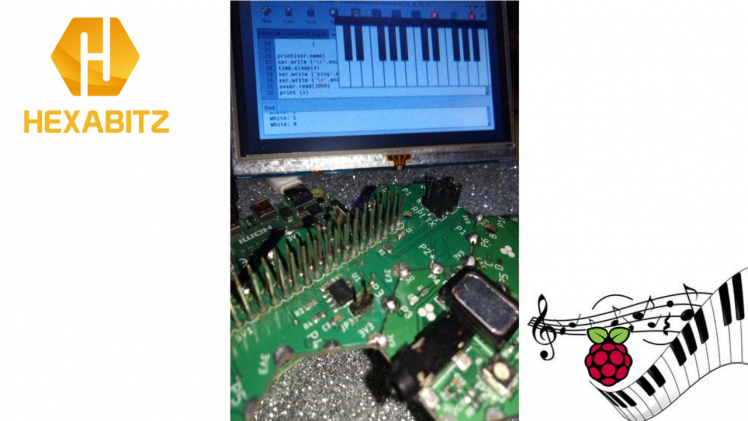
- Make your own piano with Hexabitz modules and Raspberry Pi.
- This project uses Hexabitz Modules to play the music notes. It’s definitely an effective way to learn about modules, Python GUI & Music.
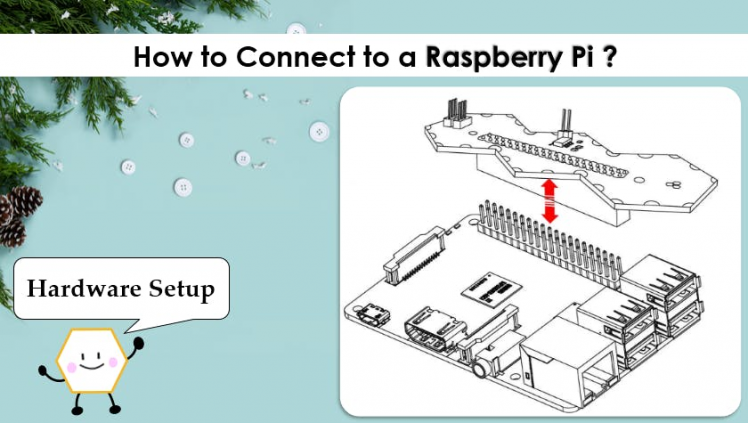
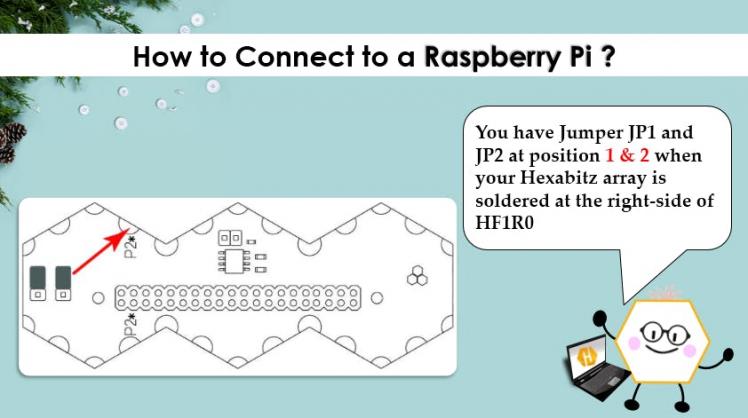
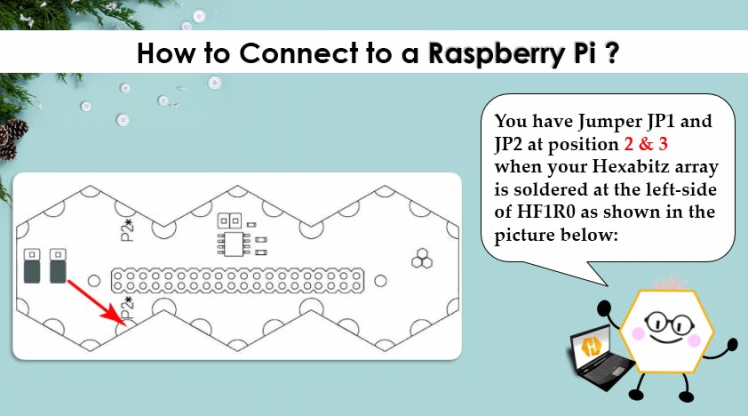
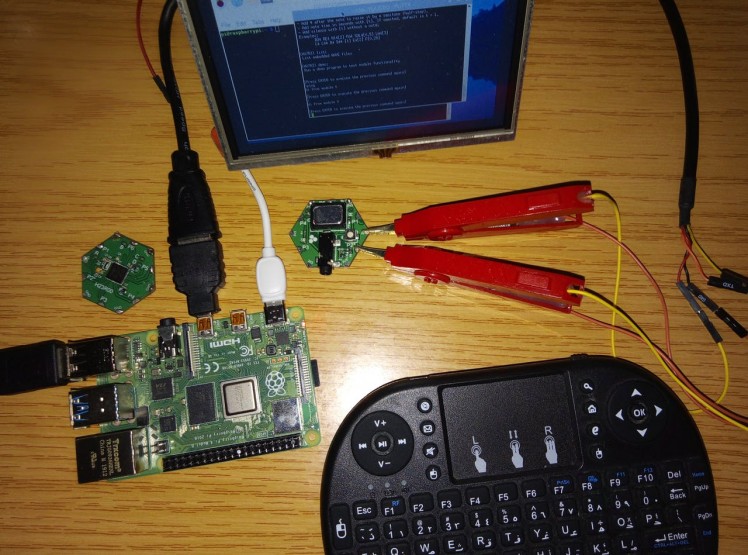
- Connect the modules to HF1R0 module.
- Make sure to connect your Hexabitz array at the right spot or left spot. In this project, I have Jumper JP1 and JP2 at position 3 & 4 and my Hexabitz array is soldered as shown in the picture below:
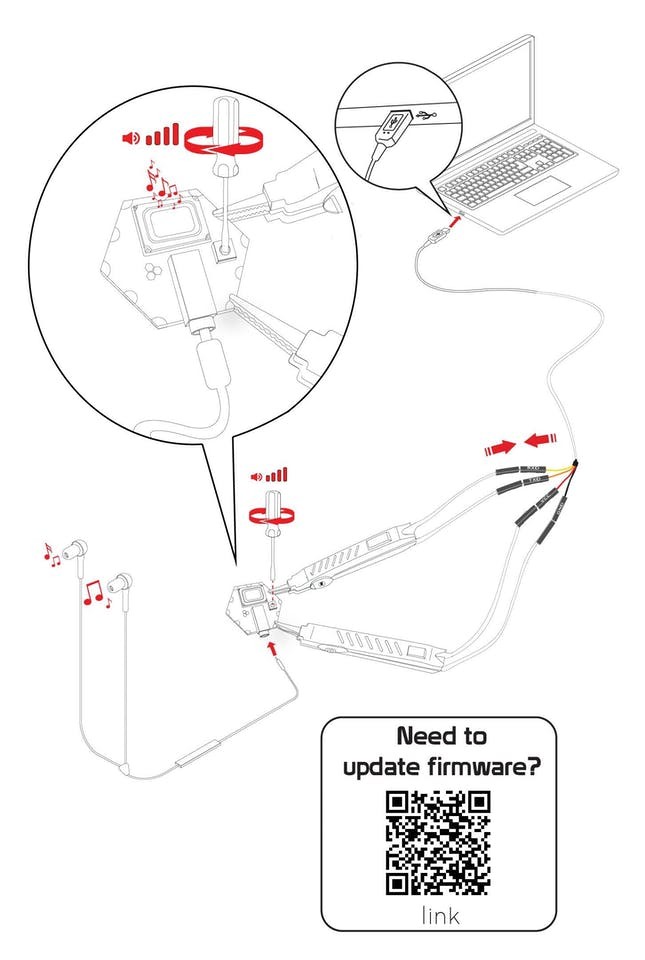
- Be sure to download the firmware on the module before soldering.
https://hexabitz.com/docs/how-to/update-module-firmware/
- Installing Pi operating system -Raspbian Buster with desktop and recommended software-image and Writing an image to the SD card
https://www.raspberrypi.org/documentation/installation/installing-images/README.md
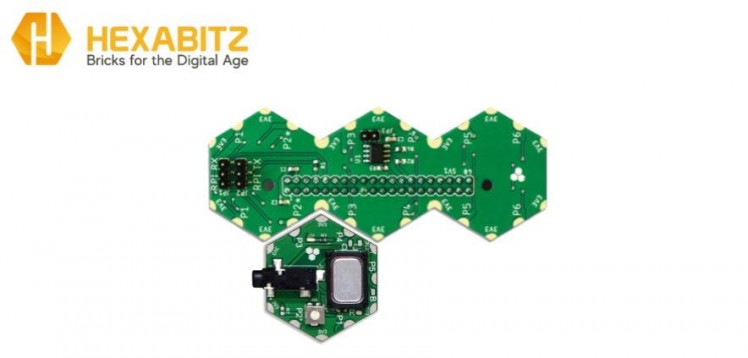
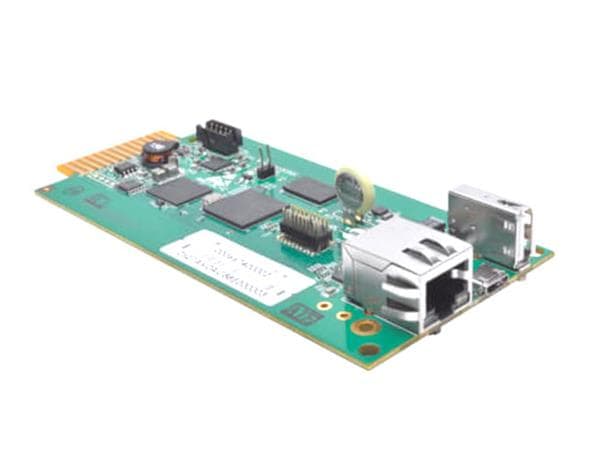
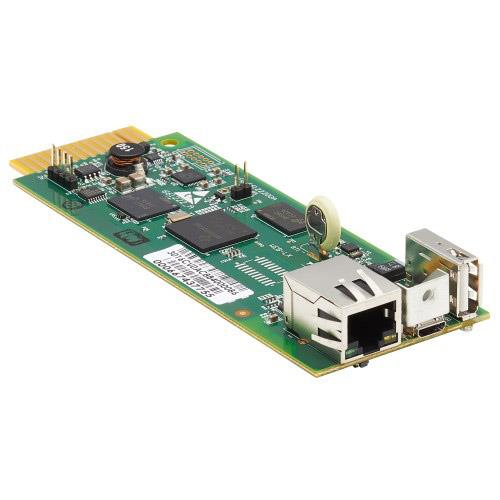
🎹 Raspberry Pi interface module(HF1R0x):Hexabitz HF1R0x module enables you to seamlessly interface your modules to a Raspberry Pi 3B/3B+/4B single-board computer.
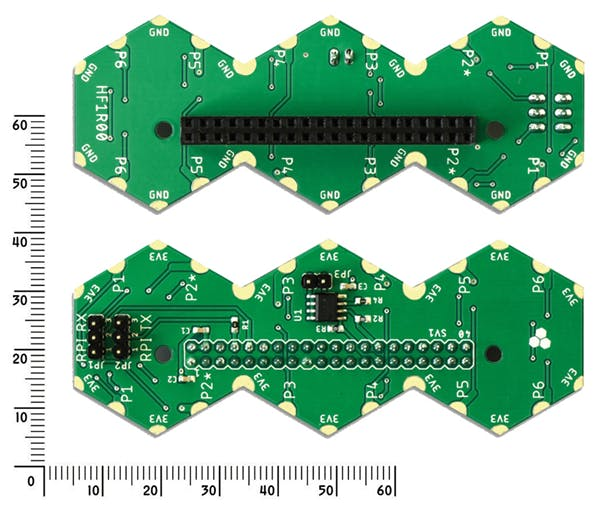

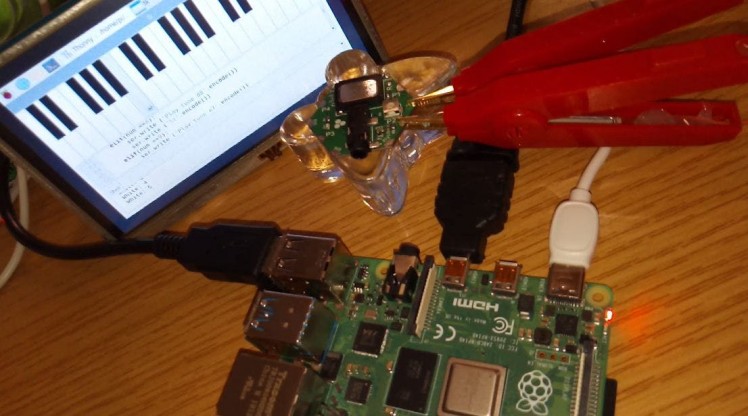
H07R3x is an audio amplifier and speaker module based on ST TS4990 1.2W audio amplifier and STM32F0 MCU.

This module features an on-board 8-ohm rectangular CUI speaker and a headphone output jack.
Use this module to play sounds and tunes stored in the MCU embedded Flash or streamed from an external hardware/another module via array ports.

1 / 3

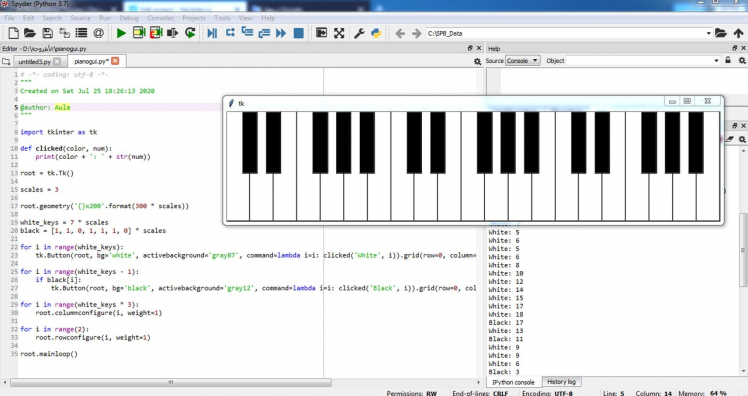
Tkinter is the standard GUI library for Python. Python when combined with Tkinter provides a fast and easy way to create GUI applications.
Tkinter provides a powerful object-oriented interface to the Tk GUI toolkit.
Creating a GUI application using Tkinter is an easy task.
All you need to do is perform the following steps :
- Import the Tkinter module.
- Create the GUI application main window.
- Add one or more of the above-mentioned widgets to the GUI application.
- Enter the main event loop to take action against each event triggered by the user.

You can start Python3 from the command line (with python3) then
import tkinterIf you get an error message then exit out of Python3 and call
sudo apt-get install python3-tkto install it.
🎹 Python pyserialThis module encapsulates the access for the serial port. It provides backends for Python running on Windows, OSX, Linux, BSD (possibly any POSIX compliant system) and IronPython. The module named “serial” automatically selects the appropriate backend.

Depending on the version of python, there are several commands to install the package pyserial.
sudo apt-get install python-serial python3-serial🎹 Note1:
There are several ways to determine the USB port to which the device is connected. The fastest is to connect the unit to the USB port then to immediately run the command dmesg -s 1024.
You’ll get directly the tty port on which it is connected.
🎹 Python code to read the serial port:
This section of code primarily instantiates the serial class, setting it up with all the various bits of information that it needs to make the connection with.
port – This defines the serial port that the object should try and do read and writes over.
baudrate – This is the rate at which information is transferred over a communication channel.
parity – Sets whether we should be doing parity checking, this is for ensuring accurate data transmission between nodes during communication.
stopbits – This is the pattern of bits to expect which indicates the end of a character or the data transmission.
bytesize – This is the number of data bits.
timeout – This is the amount of time that serial commands should wait for before timing out.
import serial
ser = serial.Serial(
               port='/dev/ttyUSB0',
               baudrate = 921600,
               parity=serial.PARITY_NONE,
               stopbits=serial.STOPBITS_ONE,
               bytesize=serial.EIGHTBITS,
               timeout=1
           )

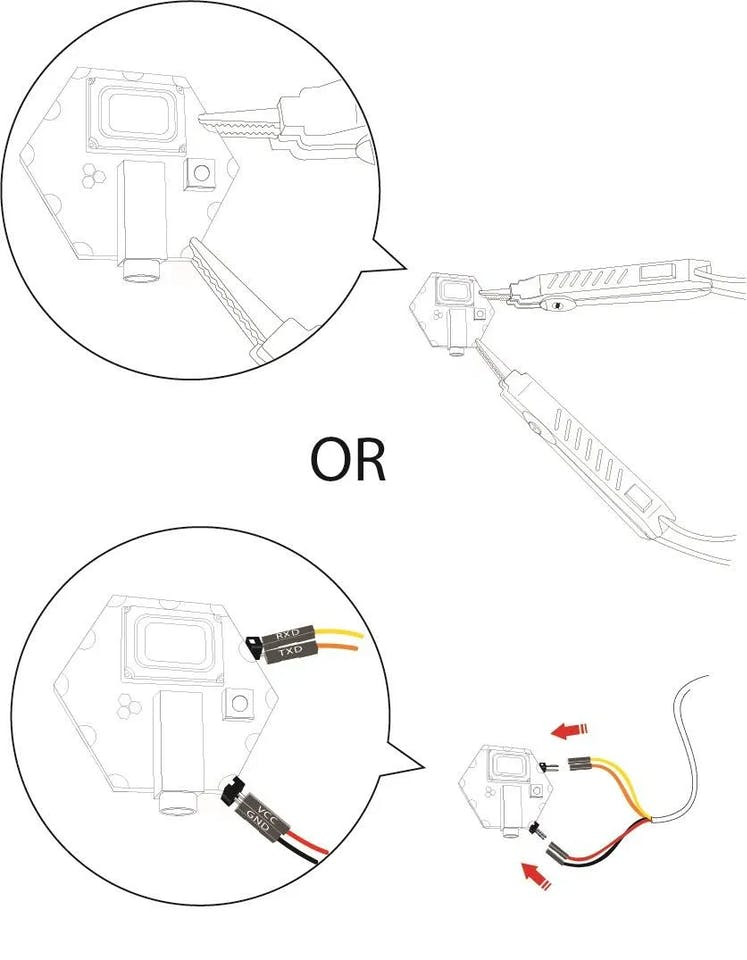
If you use standard FTDI USB-UART 3.3V cable for power and communication, connect the colored cable wires as follows:
- Red (VCC) to 3.3V (top power pad, i.e., corner edge pad).
- Black (GND) to GND (bottom power pad, i.e., corner edge pad).
- Yellow (RXD) to MCU TXD (top communication pad, i.e., side edge pad).
- Orange (TXD) to MCU RXD (bottom communication pad, i.e., side edge pad).
🎹 Note2:
Why does piano have black and white keys? The white keys represent the musical tones and the black keys represent the half step intervals between those musical tones. The colored keys help pianists decipher between the natural pitches and semitone pitches.
🎹 Note3:
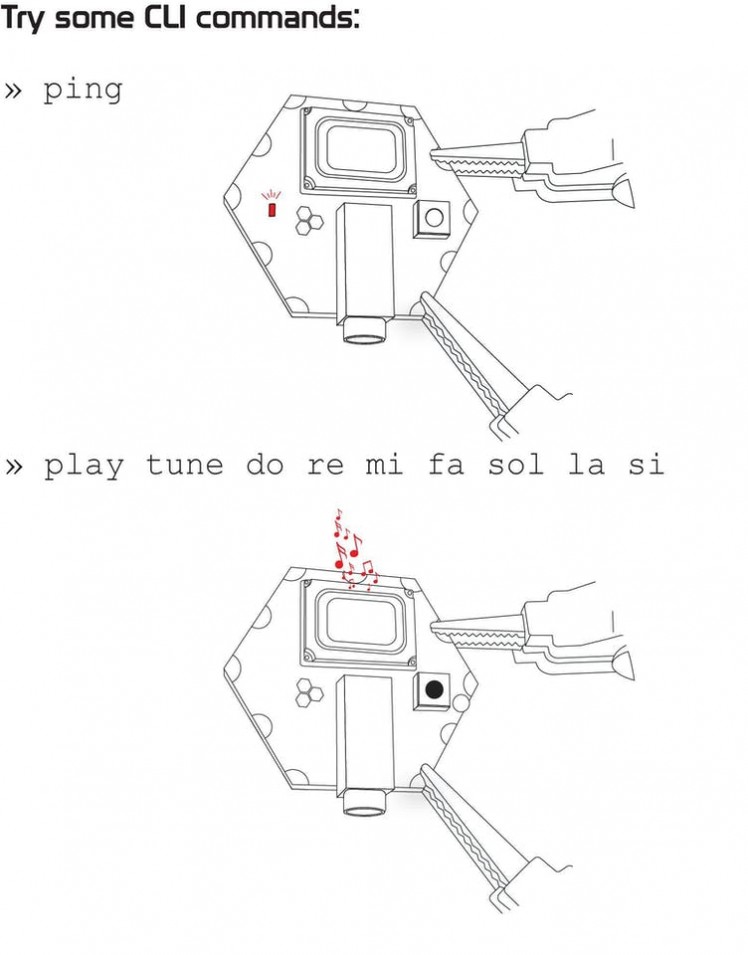
You can complete the code to play all the piano keys with the notes you want or according to the standard tables 🎶🎵

Schematics, diagrams and documents
Code
Credits
Related products


Leave your feedback...