

Getting Started With The Thingy:91 Prototyping Platform

Made by ElectromakerIan / Sensors / Wearables / IoT
About the project
The Thingy:91 is a pretty mighty IoT prototyping platform in a small form factor. Join me for a quick start guide using the provided demo application firmware!
Project info
Difficulty: Easy
Platforms: Nordic Semiconductor
Estimated time: 1 hour
License: GNU General Public License, version 3 or later (GPL3+)
Items used in this project

Story
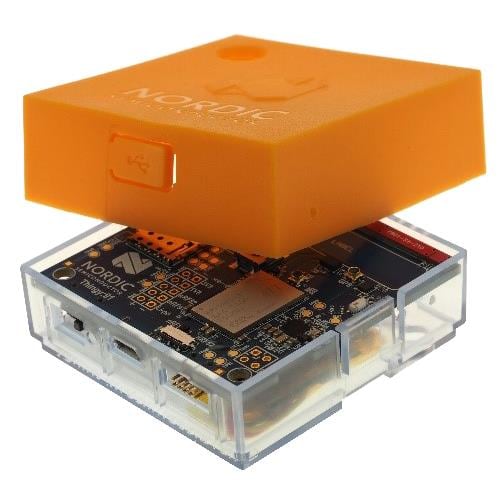
The Thingy:91 from Nordic Semiconductor fits a huge amount of cellular IoT goodness into a small box. This tutorial outlines the steps I took after receiving mine to get it up and running, and connected to the nRF Cloud service. It covers everything from how to register the included sim card, to getting the necessary image to flash the device, and ends by taking a look at what the nRF Cloud can show you.
Preparing the SIM card
To begin with, take the included iBASIS sim out, scratch off the strip covering the PIN and PUK, and note them down along with the long number printed on the SIM card itself.
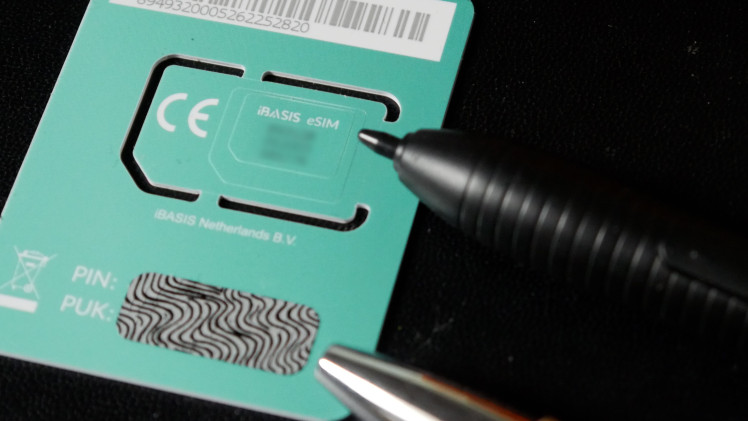
Save these in a separate text document, and enter the SIM into the SIM card slot of the Thingy:91. Now, you can put the Thingy:91 aside for a moment and concentrate on getting the software set up.
Getting the Software
We'll be using the nRF Connect app to get the software we need for the next steps. Head to the nRF Connect download page, and install the latest version. After installation, open the nRF Connect app

We'll need the Programmer app to update the firmware of the Thingy:91. Click install, and open the software. This software can be used to update the application firmware, but also the firmware provided for the nRF9160 SiP modem, both of which we'll update now.
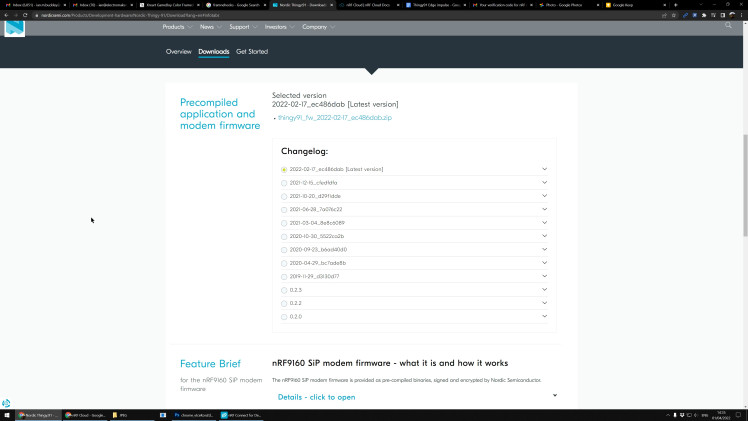
Head to the Thingy:91 downloads page, and get the latest firmware package zip file.
Once the download is finished, unzip the file, and open the Programmer app from the nRF Connect launch app.
Flashing the Firmware
Make sure that Enable MCUboot is selected in the left side panel - this allows the Thingy:91 to be programmed via USB. Plug the Thingy:91 into your computer's USB port, but don't turn it on just yet!
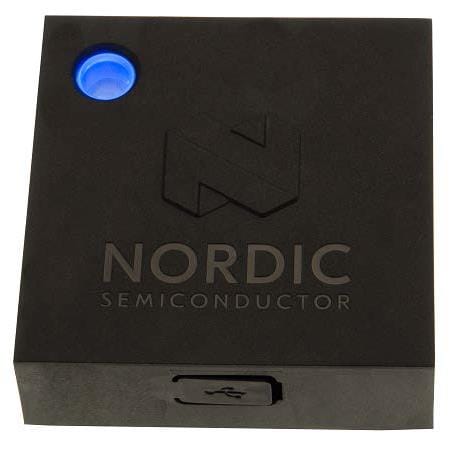
The Thingy:91 needs to be put into serial recovery mode before flashing. This is achieved by holding the switch (SW3) in the center down while turning the device on.
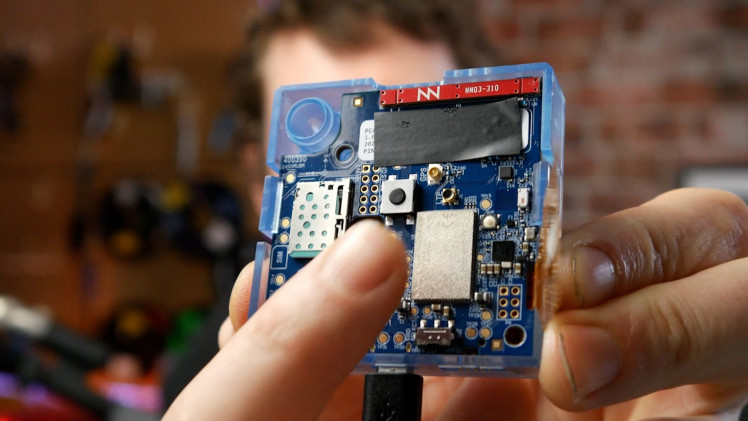
Note: You need to hold the larger button (SW3) in the middle while turning on, rather than the smaller button to the right of it (SW4 - that's for flashing the secondary nRF52840, we'll cover that another day).
Now, use the drop-down menu in the top left of the programmer to select your Thingy:91. We'll start with the modem firmware. Click Add File > Browse and find the unzipped firmware you downloaded previously. You are looking for a file called mfw_nrf9160_1.3.1.zip - though note that the numbers in yours might be different depending on which version of the firmware you download.
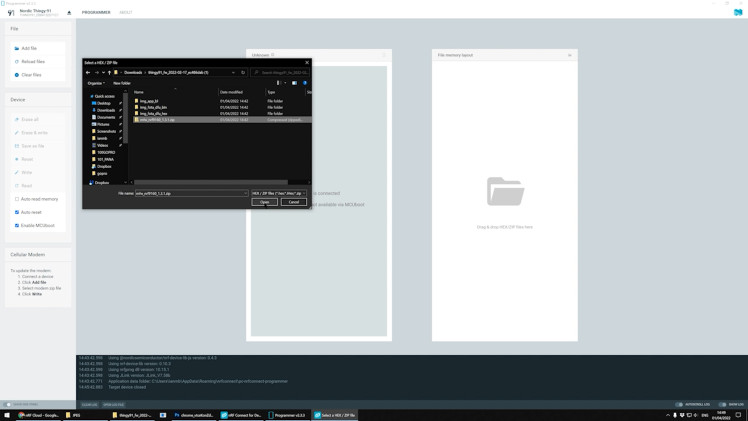
Then, click write. You'll be given a dialog box asking you to confirm. Once successful, go back to Add File > Browse, this time opening the img_fota_dfu_hex directory. The file you'll choose varies depending on if you are using an LTE-M or NB-IoT SIM card.
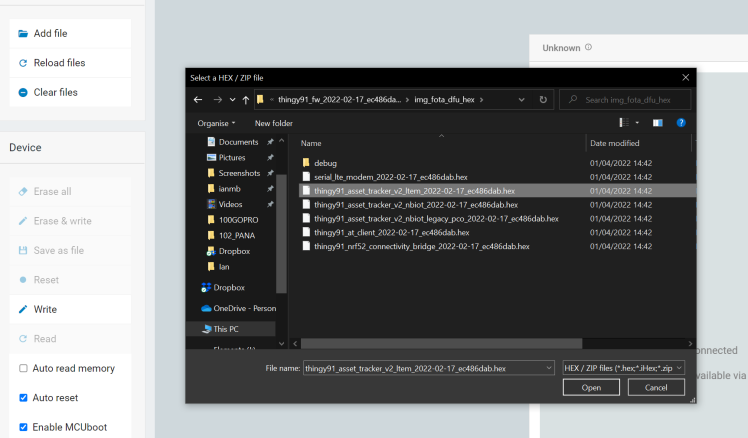
In this case, I'm using LTE-M so I'm going to select thingy91_asset_tracker_v2_ltem_2022-02-17_ec486dab.hex, a pre-compiled and built asset tracking application provided by Nordic. Select write, and the program will be uploaded to the Thingy:91
Note: Both write attempts failed the first time for me, I had to try turning the thingy off, turning it back on again in serial recovery mode (holding SW3 while powering on), and re-trying the write to get it to work. Be patient!
Now that the modem firmware is updated, and we have the example program loaded, we are ready to connect to nRF Cloud!
Connecting to the Cloud
To begin, head to the nRF Cloud website and create an account. Once logged in, click the large plus sign in the top left, and select LTE Device. You'll be prompted to activate your SIM card at this stage - use the details noted down earlier.
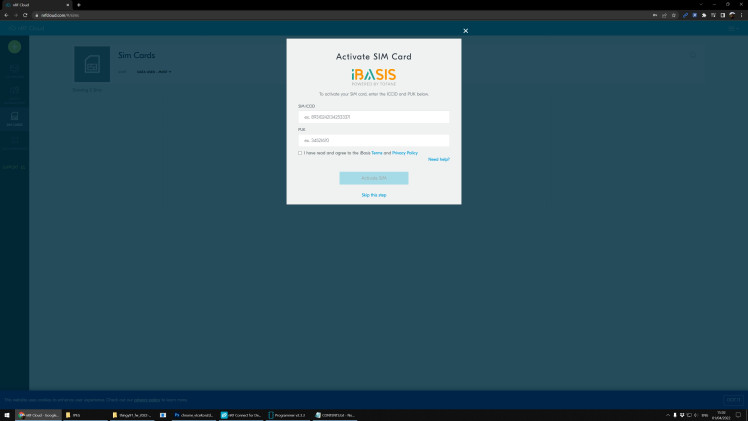
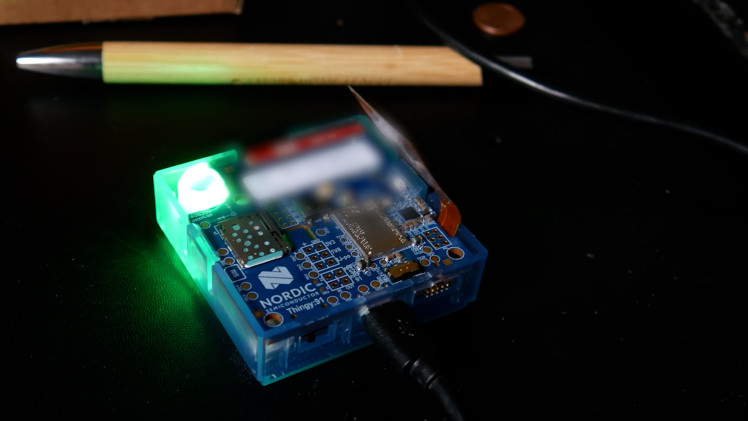
Note that the three 6-digit numbers will need to be combined into one 18-digit number in the SIM ICCID field. Before moving on, turn the Thingy:91 off and on again, this time not holding the button in the middle (SW3). Wait until the LED on your Thingy:91 is double pulsing in white - signifying that it's connected to the nRF Cloud. This can take a few minutes, so be patient! If your Thingy:91 is pulsing a different color, you can look at the Operating States page of the documentation to see what might be going on.
Now, return to the Add LTE Device dialog box, and enter the 15-digit Device ID and Pin. These are printed on a sticker on the Thingy:91 PCB. After entering this code, you should be connected to the nRF Cloud and after a few moments, you'll see the data streaming from the Thingy:91!
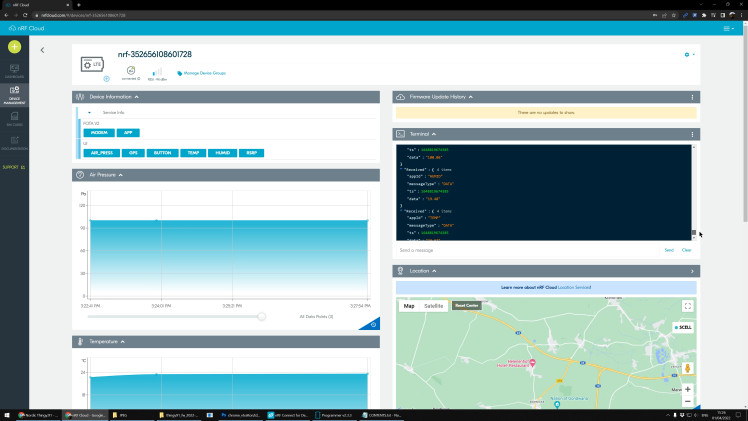
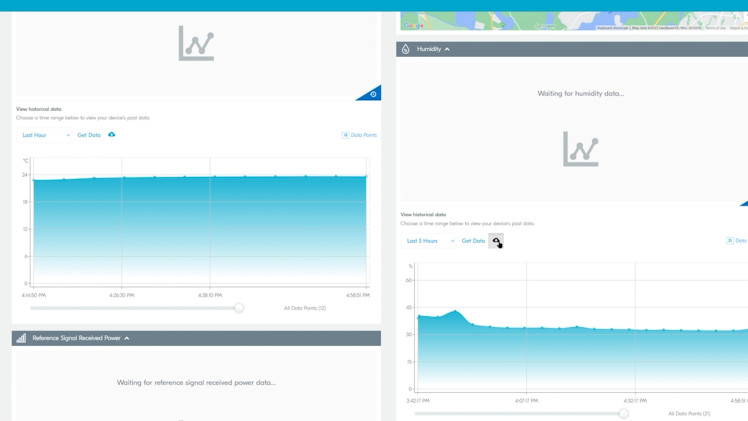
Now you can see what data is streaming from the Thingy:91 in real-time. As long as the battery is charged, it'll send this data when turned on provided it has cellular coverage.
We'll take a deeper look at all the different sensors onboard another day, but just as a quick bonus tip before we finish, you can select data from distinct time periods, and download it as .CSV files if you want to start working with it straight away.
So that's it! The very basic quickstart for the Thingy:91. This is my experience just getting the Thingy to talk to me, but we haven't even started developing for it yet - this tutorial is pre-Hello World! All of that is to come in the future, however, and I hope today's tutorial was handy for anyone hoping to get started with the Thingy:91!
Credits
ElectromakerIan
I'm the Electromaker Show person who usually enthusiastically talks about things on the internet.
Related products


Leave your feedback...