
Getting Started With Arduino

Made by yeshvanth-m / IoT
About the project
This project is meant for beginners with no knowledge about Hardware
Project info
Difficulty: Easy
Platforms: Arduino
Estimated time: 1 hour
License: GNU General Public License, version 3 or later (GPL3+)
Items used in this project

Story
The Arduino project was started at the Interaction Design Institute Ivrea (IDII) in Ivrea, Italy.At that time, the students used a BASIC Stamp microcontroller at a cost of $50, a considerable expense for many students. In 2003 Hernando Barragán created the development platform Wiring as a Master's thesis project at IDII, under the supervision of Massimo Banzi and Casey Reas. Casey Reas is known for co-creating, with Ben Fry, the Processing development platform. The project goal was to create simple, low-cost tools for creating digital projects by non-engineers. The Wiring platform consisted of a printed circuit board (PCB) with an ATmega168 microcontroller, an IDE based on Processing and library functions to easily program the microcontroller.In 2005, Massimo Banzi, with David Mellis, another IDII student, and David Cuartielles, extended Wiring by adding support for the cheaper ATmega8 microcontroller. The new project, forked from Wiring, was called Arduino.
Source: Wikipedia.org
What is a Microcontroller?A microcontroller is a compact integrated circuit designed to govern a specific operation in an embedded system. A typical microcontroller includes a processor, memory and input/output (I/O) peripherals on a single chip.
Source: internetofthingsagenda.techtarget.com
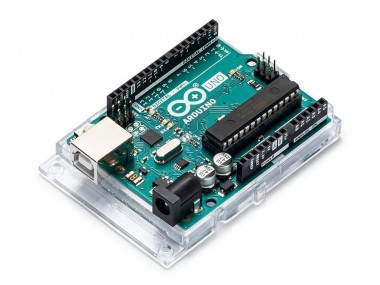
Arduino as a Microcontroller board:
https://3.bp.blogspot.com/

https://3.bp.blogspot.com/
The heart of the Arduino boards is an MCU (Microcontroller Unit) which does all the processing. The Arduino Uno board can be powered either by an external power supply from 7 - 12V DC or by using the USB - A cable itself (5V).
An MCU has to be programmed in order to do a specific task. This can be done using the Arduino IDE, Online web-editor or other IDEs but this project restricts to the usage of the Arduino IDE.
Let's get started: Step 1: Download the Arduino IDEThe latest version of the IDE can be downloaded from the official website.
Link: https://www.arduino.cc/en/main/software
arduino.cc

arduino.cc
Step 2: Connect the USB cable to the Arduino
Source: getready.io

Source: getready.io
Step 3: Verify if the device is detected or notOpen device manager in your PC and expand the ports, you should see that the Arduino Uno is detected, if not you need to install the required drivers.
The Device is detected

The Device is detected
Note: Most of the Arduino boards come with a sketch already programmed in them to blink the built-in LED (for testing purposes). Therefore you should see the amber-coloured LED blinking once you connect the board to the PC.
Step 4: Write your first sketch- Open the Arduino IDE
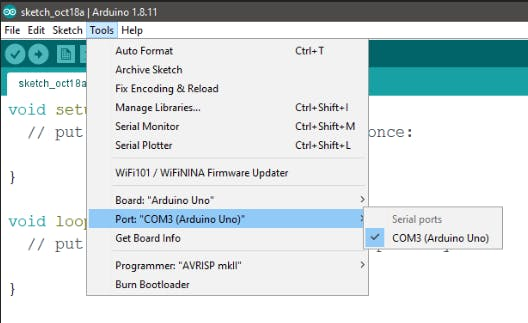
- Open the Tools menu from the Menu bar
- Select "Arduino Uno" for the board and select the assigned COM port
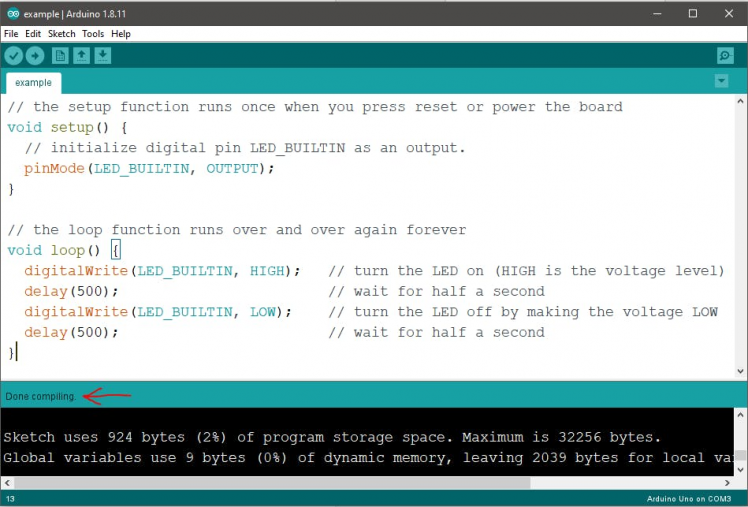
- Enter the code given below into the editor
// the setup function runs once when you press reset or power the boardvoid setup() { // initialize digital pin LED_BUILTIN as an output. pinMode(LED_BUILTIN, OUTPUT);}// the loop function runs over and over again forevervoid loop() { digitalWrite(LED_BUILTIN, HIGH); // turn the LED on (HIGH is the voltage level) delay(500); // wait for half a second digitalWrite(LED_BUILTIN, LOW); // turn the LED off by making the voltage LOW delay(500); // wait for half a second}Hit the tick button (compile) in the top-left corner of the IDE, You should see that the code is compiled successfully without any errors,
Hit the right arrow button (upload) next to the upload button. Now while the code uploads, you should see the LED's next to Tx and Rx blinking indicating data transfer between the board and the computer.
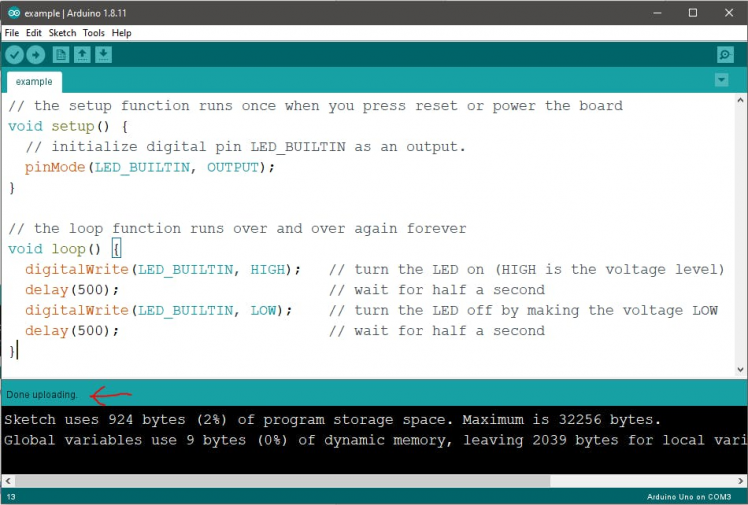
You have successfully uploaded your first sketch into the Arduino Uno!
If the LED was already blinking once you connected the board to your computer, you should notice that now the LED blinks faster as we've reduced the delay time by 500ms.
Stay tuned for more projects on Arduino!
Feel free to comment if you have any doubts/queries!
Code
Credits
Related products


Leave your feedback...