
Your Own Spacemouse! - Rp2040 Microcontroller

Made by Danivbel / 3D Printing / Displays / Productivity
About the project
You can make your own spacemouse using a RP2040 microcontroller, just follow the steps and your spacemouse will have a pan function, a zoom function, undo-, redo buttons, an lcd screen showing how fast the panning and the zooming goes and a knob to control that speed.
Project info
Difficulty: Moderate
Platforms: Adafruit, Autodesk, Raspberry Pi, CircuitPython, Pimoroni
Estimated time: 5 days
License: GNU General Public License, version 3 or later (GPL3+)
Items used in this project
Hardware components


View all
Software apps and online services
Hand tools and fabrication machines
View all
Story
Overview
The goal of this project is to create a spacemouse with a RP2040 microcontroller running circuitpython. A spacemouse is a tool usually used by cad-modellers to control their programs. A spacemouse is pretty expensive, so my idea was to make one myself.
In this project, I'm going to show you how I made my own spacemouse and how you can make one too.
How does it work
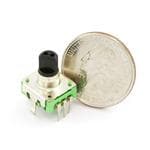
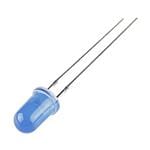
The official spacemouse is spring-loaded and uses IR-leds to know its position. This is a pretty complex system and I didn't have the tools to make it this way, so I did it in a way that was way easier by putting a rotary encoder on top of a joystick.
Coming up with ideas
I first had to think of what I wanted to put on my spacemouse, i also had to program the spacemouse which was pretty hard, because I didn't have any experience with coding when I started.

(picture of a prototype on a breadboard)
Tutorial
I'm now going to show you how you can make one yourself
Step 1: Installing circuitpython on the microcontroller
The first thing you have to do when you get the RP2040 microcontroller is install the software:
- Find your board on this site and download the UF2 file.
- Connect your board to your computer while holding the boot/bootsel button.
- Drag and drop the UF2 file onto your board (should appear between your drives) .

- The board should disconnect and reconnect with circuitpython.
Step 2: Adding libraries to the board
Before we start coding we need the right libraries, download the bundle for version 7.x from this website and unzip it.
Now open the file and add the following libraries to your board:
- adafruit_bitmap_font
- adafruit_bus_device
- adafruit_character_lcd
- adafruit_display_text
- adafruit_hid
- adafruit_mcp230xx
- adafruit_framebuf
- adafruit_ssd1306
You also need to download this font and put it on your board, you could also use another font as long as it is 5 by 8 pixels and named font5x8.bin.
Step 3: Connect everything and test it to see if it works.
Before building the actual spacemouse, it's smart to test everything, so plug everything into your board like in this diagram:
 If you have another board/prefer other pins you can change it in the code.
note: before changing the pins the screen uses, you should look what pins support the screen, because not every pin supports sda and scl output.
Now run the code from my github on your board to see if it works.
When everything works you can name the code code.py so it runs on startup.
Step 4: Designing and 3d-printing
Now that we know everything works, we can start making the design of the spacemouse, which I have included in the attachments, I recommend that you don't just print everything without looking if all the parts fit. I couldn't find all the parts I used, so I put some slightly different parts in the parts list.
I made the design in Fusion 360 because I think this is one of the easiest programs to learn cad-modeling.
When I was done with the design, I 3D-printed everything on my anycubic-i3 mega.
Step 5: Assembling and painting the 3d-printed parts
When you're finished 3D-printing, you can start assembling. I sanded the pieces so they would fit tightly together and glued them together with superglue afterwards.

As you can see, I still had a pretty big gap in the middle, I used some putty and sanded it to make the spacemouse smoother.
When everything was glued together and felt smooth, I began spraying the parts with primer to make sure the paint would stay on the parts, and when that dried, I painted the parts with spray paint.


I painted the base with a special rubber black to make it less slippery and feel better to lay your hand on.
Step 6: Adding the electronics
The next thing I did was adding the electronics, connect and solder everything to each other and glue it in place in the spacemouse with hot glue.
You can find where to place what part in the 3D-file.
Tip: when everything is connected, plug it in to your PC to see if it still works. You really don't want to scrape off all the glue because you didn't solder something correctly!

Step 7: Closing the spacemouse
So, your spacemouse may look done from above, but when you look at the bottom, you still see all the ugly electronics glued in place. We're going to do something about that!
How to add foam:
Lay your spacemouse on a piece of foam, and trace a line around the spacemouse with a pencil. Now take some contact glue and apply even coats of the glue on both the foam and the spacemouse.


Let it dry for a few minutes until you can touch the glue without it sticking to your hand. Now you have to be really precise, when the parts touch, they're stuck, and you won't be able to tear them apart, so make sure the glue on the mouse and the foam line up perfectly and push the mouse onto the foam.
Now you can cut the foam around the spacemouse and enjoy it!
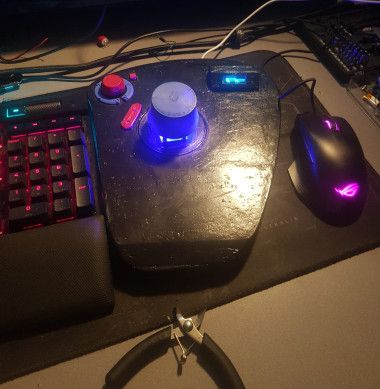
Final product:
This is how the spacemouse finally looks:


Final thoughts
I think this project is a really fun project if you want to get into electronics and programming, I learned a lot from it and gained a lot of experience, I'm really glad I made it because I did not only learn a lot from this, this is also a really handy tool which I can use when designing 3D-objects.
You can find all the links and files with frequent updates on my github.
Schematics, diagrams and documents
CAD, enclosures and custom parts
Code
Credits
Related products


Leave your feedback...