
Esp32 Web Server: Controlling Led Lights

Made by Makerfabs01 / IoT
About the project
This is a tutorial to show how to get started with ESP32, we will build a simple ESP32 web server, to control LED lights by web page.
Project info
Difficulty: Easy
Platforms: Arduino
Estimated time: 2 hours
License: GNU General Public License, version 3 or later (GPL3+)
Story
1. Project Purpose
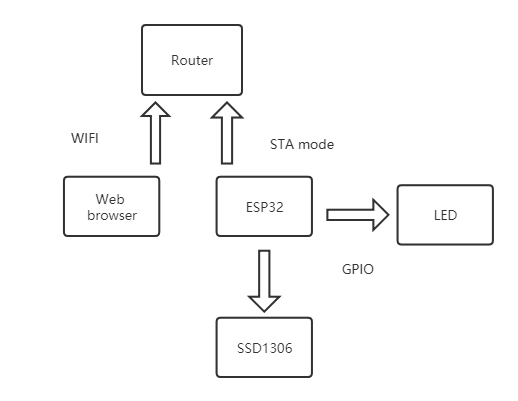
Under the same local area network, different devices can achieve simple communication through the HTTP protocol. The following article introduces a project, that ESP32 realizes remote control by web browser, to control local LED On/Off, by building web server. The status of the LED is displayed on the OLED (Driver: SSD1306).
The web server built by ESP32 plays the following roles:
- Enter the IP address of the ESP32 in the browser to access the ESP32 web server;
- Click the button on the web browser to change the On/Off of the LED light;
- The web server controls the two LEDs by GPIO26 and GPIO27 connected to the ESP32;
2. Project Materials
2.1 MakePython ESP32
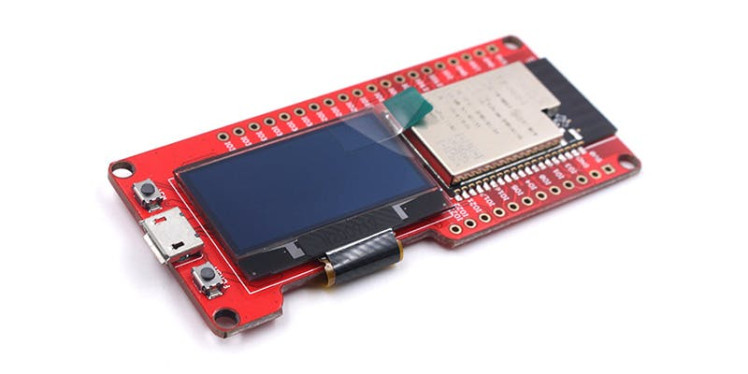
It is a classic ESP32 circuit board from Makerfabs. The CPU is two low-power Xtensa® 32-bit LX6 and ESP32-D0WDQ6. The processor clock frequency can reach 80MHz to 240MHz, which can realize high-speed operation. In addition, the module integrates a 1.3 inch SSD1306 IIC OLED screen, supports Wi-Fi protocols: 802.11b/g/n (802.11n to 150Mbps), A-MPDU, and A-MSDU aggregation, and Bluetooth protocol v4.2 BR/EDR and BLE specifications, you can get it from this link: MakePython ESP32.
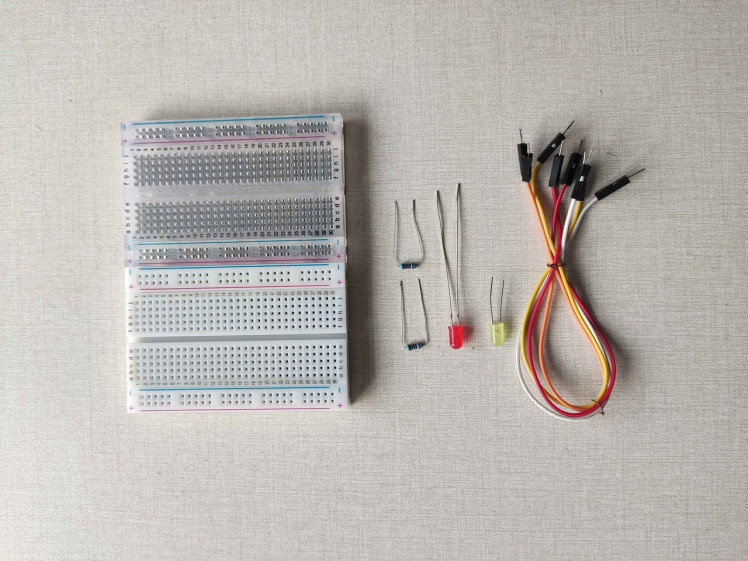
2.2 Other Components
- 2x LEDs
- 2x breadboard
- 2x 330 ohm resistors
- Several male-to-male jumpers
3. Project Preparation
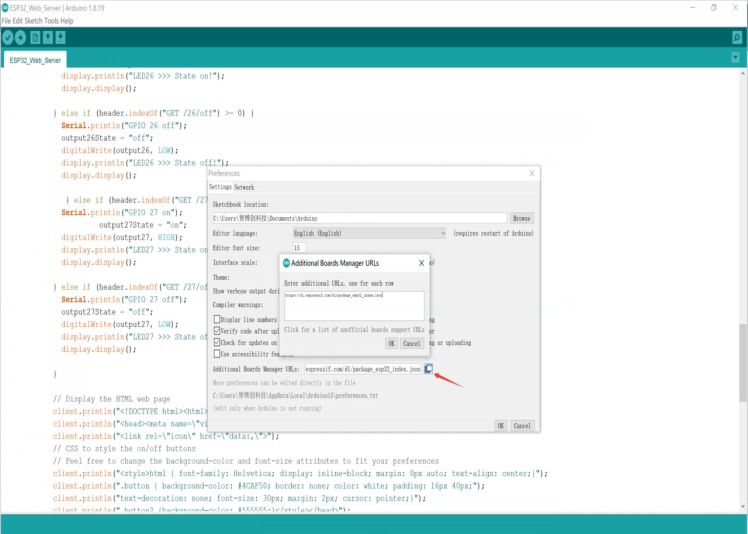
The programming environment of this project is Arduino IDE (version 1.8.19). In addition, you need to download the ESP32 development board in Arduino and install the WIFI, Adafruit_SSD1306, and Adafruit_GFX libraries.
3.1 Download ESP32 Development Board
Open the Arduino IDE (version 1.8.19) page and select Preferences.

Select Tools > Development Board Manager to enter the Development Board Manager page.
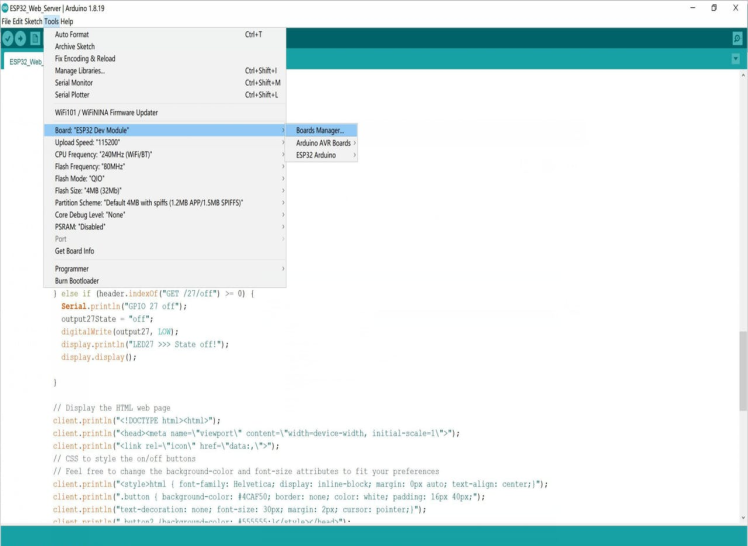
Search for ESP32, select the appropriate version, this article uses (version 1.0.6), click Install, and wait for the completion.

3.2 Install library files
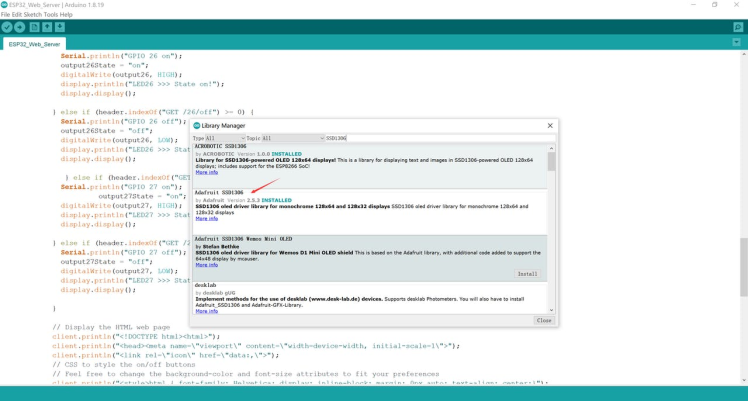
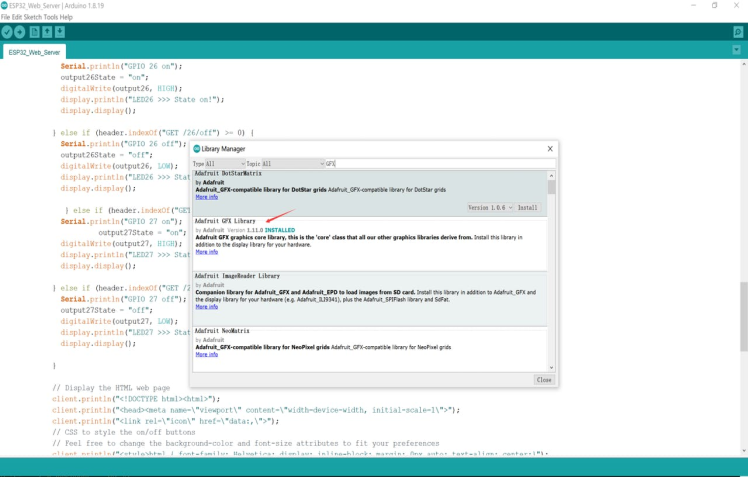
In the menu bar select Project > Load Libraries > Manage Libraries.
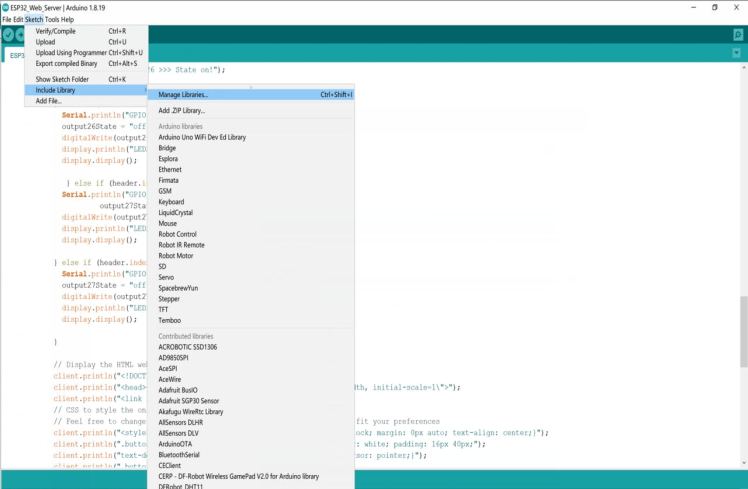
Search for Adafruit_SSD1306 and Adafruit_GFX, and select the corresponding files to install.
The same for the WIFI library.
4. Project Principle
4.1 The principle of ESP32 building a web server
After the ESP32 is connected to the wireless LAN through STA mode, ESP32 can obtain a local IP address. After opening the web server, Press the button of the webpage to send a different GET request, and the ESP32 Web server will respond after receiving the request by passing Html Strings to the client, these Html Strings will build the web page and present it to the client (browser).
* Note that the ESP32 and the PC need to be in the same WIFI LAN.
4.2 OLED display LED status
ESP32 communicates with SSD1306 OLED through IIC protocol, which realizes master-slave communication with SSD1306 OLED, so as to display LED status through the screen.
5. Hardware Connection
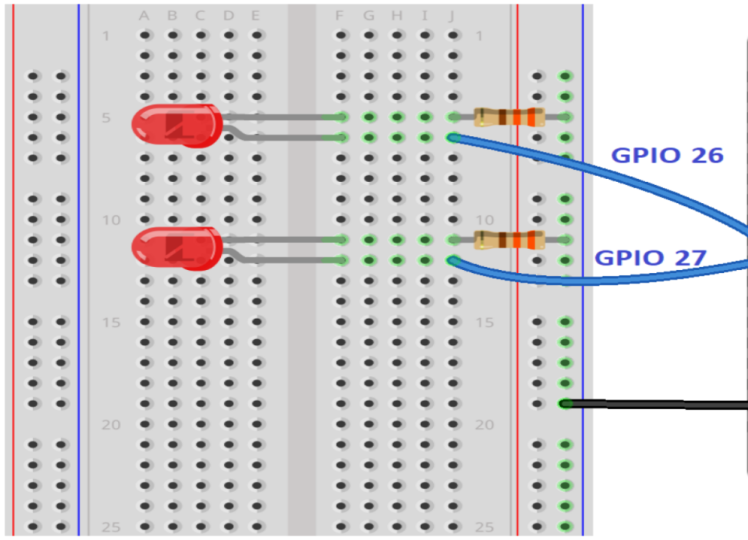
1) GPIO26 and GPIO27 are connected to the positive pole of the LED, and connected to the GND after passing through the 330Ω resistor.
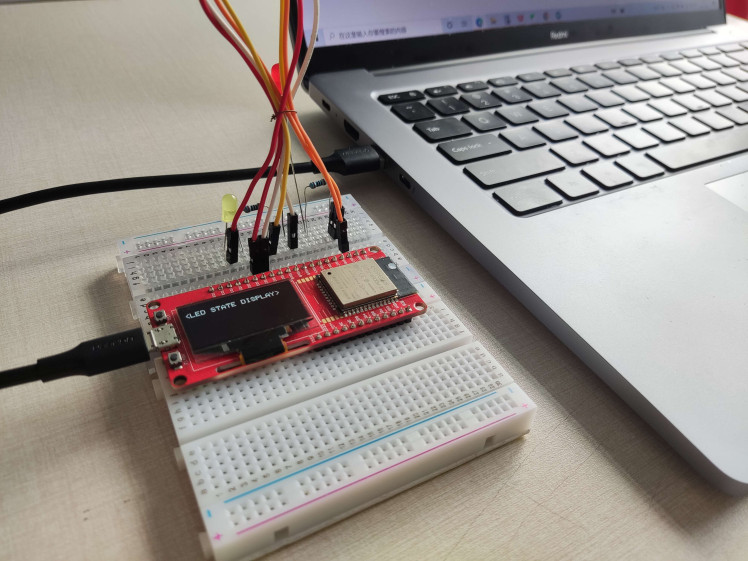
2) ESP32 are connected to computer by USB cable.
The LED lights and ESP32 wiring pins refer to below.
LED --> MakePython ESP32
LED26+ --> GPIO26
LED27+ --> GPIO27
LED26-, LED27- --> GND
6. Software Workflow and Project Code
The workflow of the software is shown in the figure below.

Download the original picture in full size here: ESP32 Web Server Software Workflow
Download the project code: ESP32 Web Server
Note:
- You need to change the SSID and password according to the WIFI you are connecting to.
- Modify your own GPIO according to the GPIO actually connected to it.
- SSID1306 OLED screen default SDA is GPIO4, SCL is GPIO5.
7. Software Upload Steps
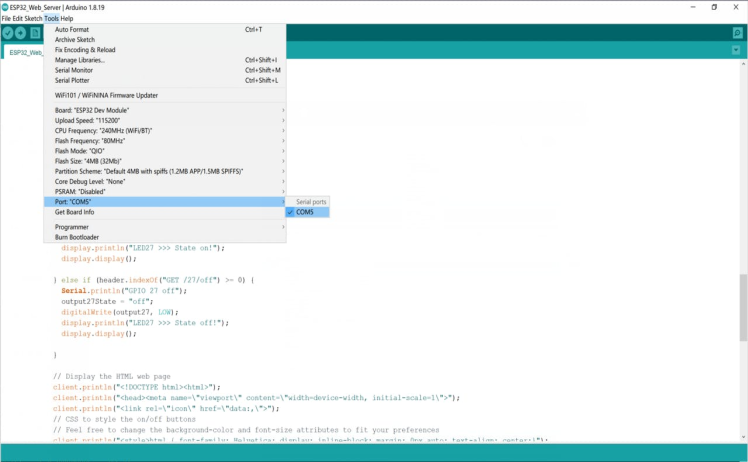
7.1 Choose the appropriate port for ESP32
In the Arduino IDE, select your board (ESP32 Dev Modul board) in Tools > Boards, and select the appropriate COM port > COM5 in Tools.

7.2 Click the upload button and wait for the code upload complete message


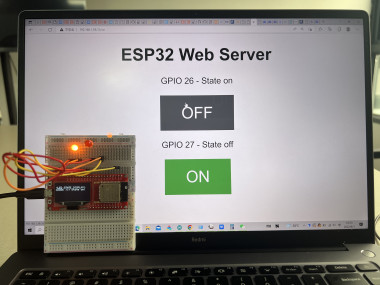
8. Project Testing and Results
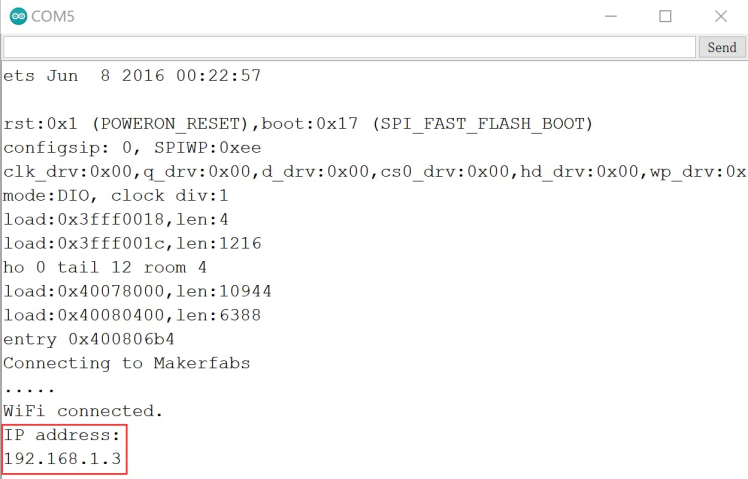
8.1 Record the ESP32 IP address
After uploading the code, select the baud rate of 115200, open the serial monitor, and press the reset button of ESP32.ESP32 will be connected to WIFI, and record the local IP address of ESP32 192.168.1.3
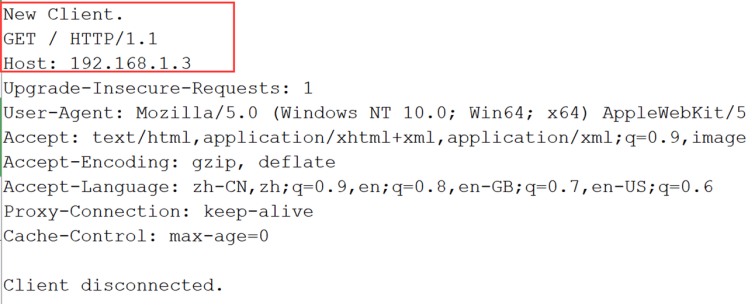
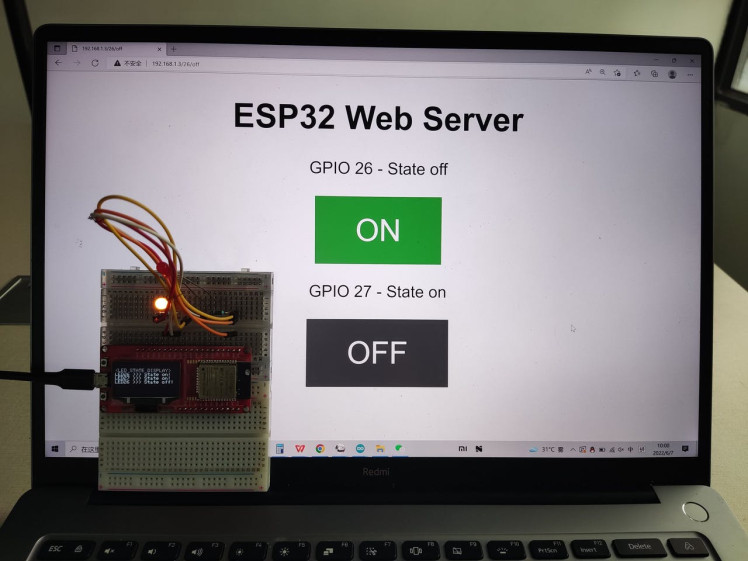
8.2 Accessing the web server
Please open a browser and visit 192.168.1.3. Check the serial monitor, you can see that the ESP32 receives HTTP access requests from the browser.

8.3 Testing the web server
Test whether the web server is working normally, turn on and off the buttons corresponding to GPIO26 and GPIO27, observe the LED lights, and observe whether the SSD1306 OLED will display the status of the corresponding LED lights.
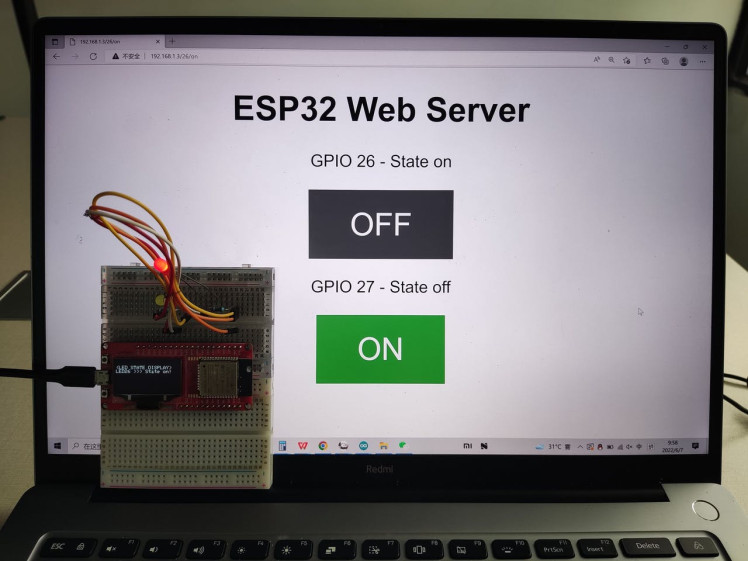
When you click the button to turn GPIO26 On, the LED26 light is on, and OLED display LED26>>> State on!
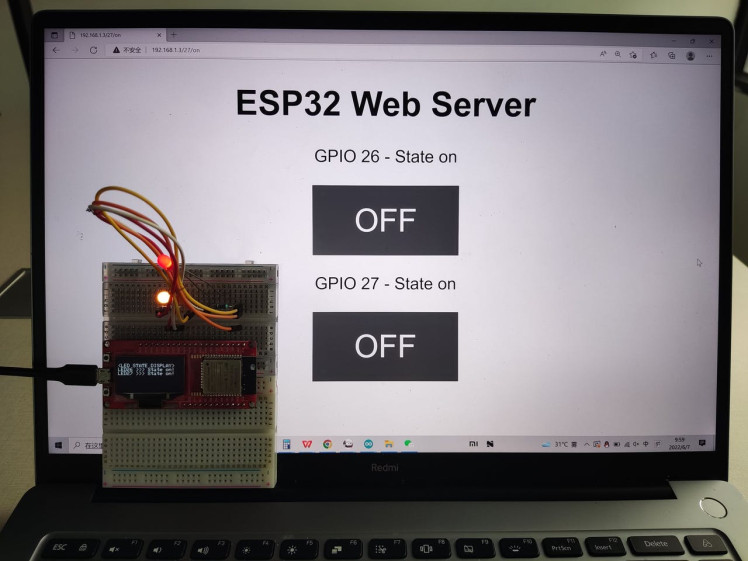
When you click the button to turn GPIO27 On, the LED27 light is on, and OLED display LED27>>> State on!
When you click the button to turn GPIO26 Off, the LED26 light is off, and OLED display LED26>>> State off!
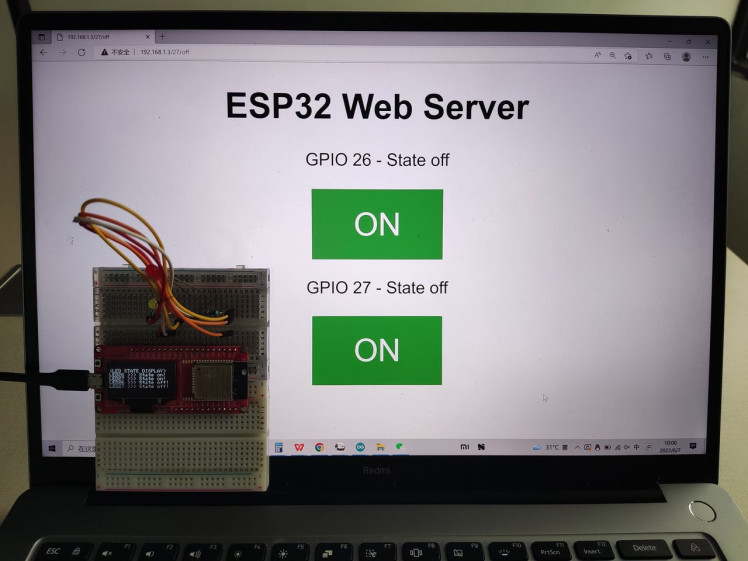
When you click the button to turn GPIO27 Off, the LED27 light is off, and OLED display LED27>>> State off!
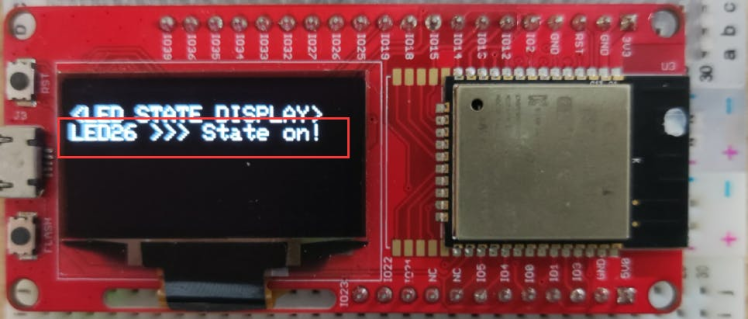
● After testing, the OLED will update the status of the corresponding LED after the switch button was pressed last time.
When you click the button to turn GPIO26 On, the ESP32 receives a request for the /26/on URL, when the ESP32 receives that request, it turns on the connection to GPIO26 and updates its state on the web page, for the SSD1306, The status of the LED will be displayed on the OLED, as shown in the red box in the screenshot below, and the same for GPIO27.

Code
Credits
Makerfabs01
Makerfabs, Turnkey PCB Assemblies | Small Batch PCBA Prototyping | IoT Hardware Engineering.
Related products


Leave your feedback...