
Draw On Ili9341 Tft Touchscreen Display Shield With Pen

About the project
Program an Arduino UNO with Visuino to draw on ILI9341 TFT touchscreen display shield with pen - quick and easy!
Project info
Difficulty: Easy
Estimated time: 1 hour
License: GNU General Public License, version 3 or later (GPL3+)
Items used in this project

Software apps and online services
Story
ILI9341 based TFT Touchscreen Display Shields are very popular low cost Display Shields for Arduino.
I already made couple of Visuino TFT Display tutorials showing you how you can animate Bitmap, and how you can display GPS coordinates on the Shield, but I have not shown you how to use the Touchscreen functionality.
In this tutorial I will show you how easy it is to program Arduino UNO with Visuino to be able to use Stylus Touchscreen Pen or Finger Touch to draw and scribble on the screen.
Step 1: Components- One Arduino Uno compatible board (It may work with Mega too, but I have not tested the shield with it yet)
- Optionally you can use a Stylus Touchscreen Pen to draw on the screen instead of using finger
1 / 3
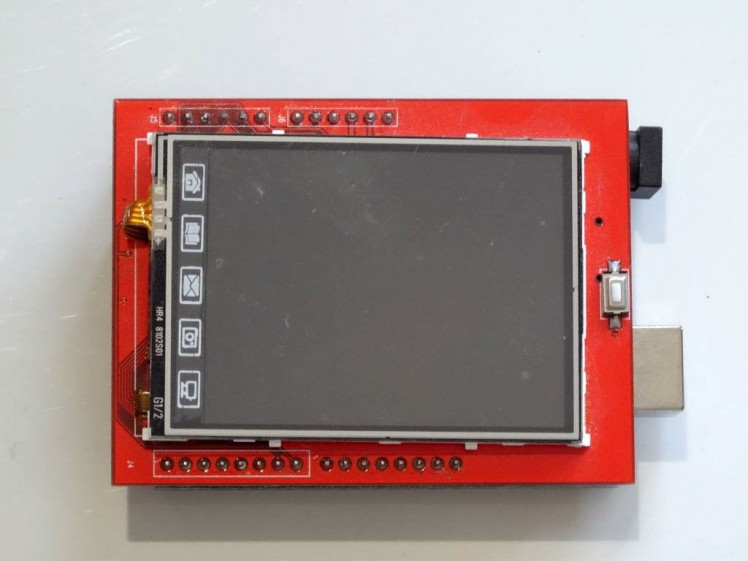
Plug the TFT Shield on top of the Arduino Uno as shown on the pictures, and on the Video
Step 3: Start Visuino and Add TFT Display Shield
1 / 3
To start programming the Arduino, you will need to have the Arduino IDE installed from here: http://www.arduino.cc/.
Make sure that you install 1.6.7 or higher, otherwise this tutorial will not work!
The Visuino: https://www.visuino.com also needs to be installed.
- Start Visuino as shown in the first picture
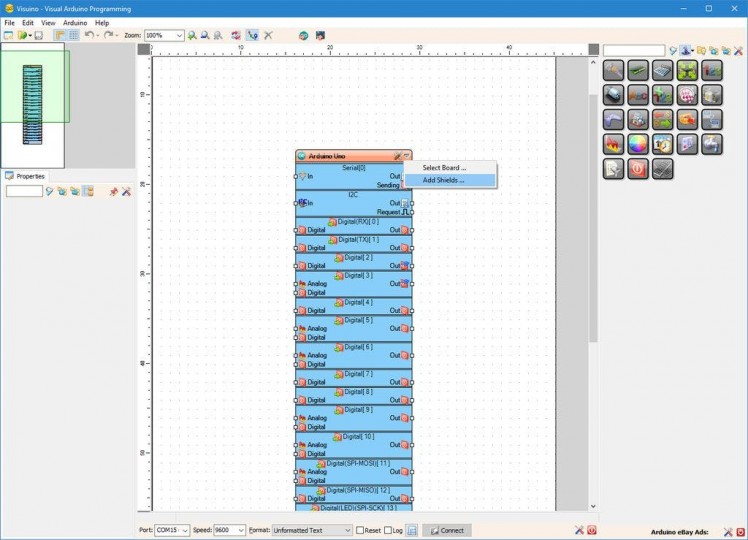
- Click on the "Arrow Down" button of the Arduino component to open the Drop Down Menu (Picture 1)
- From the Menu select "Add Shields..." (Picture 1)
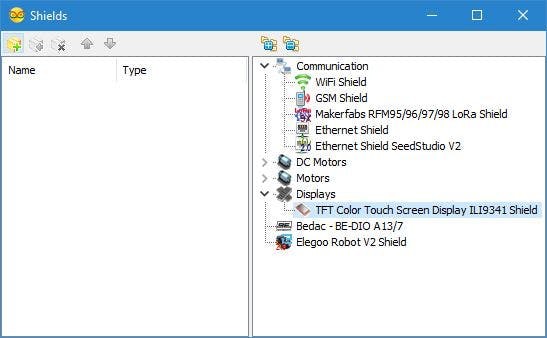
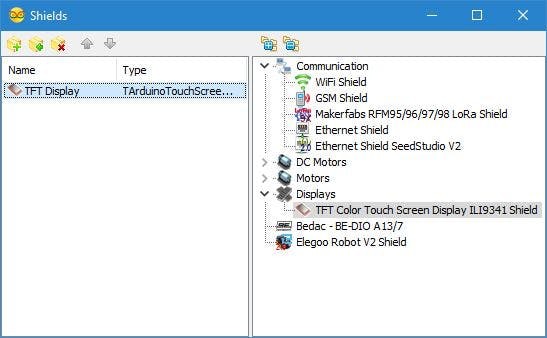
- In the "Shields" dialog expand the "Displays" category, and select the "TFT Color Touch Screen Display ILI9341 Shield" (Picture 2), then click on the "" button to add it (Picture 3)
- Close the Shields Editor
1 / 4
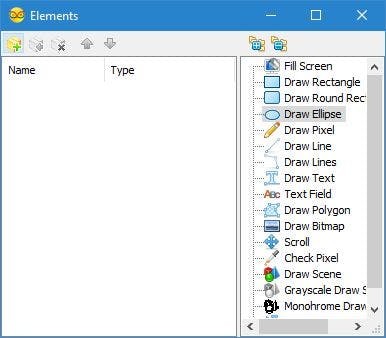

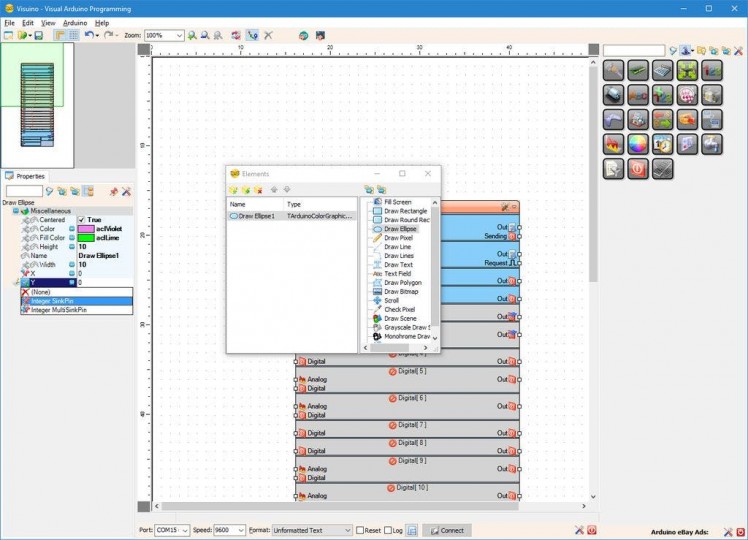
Next we need to add Graphics Draw Ellipse element to render a Small Circle at the location where the screen is touched.
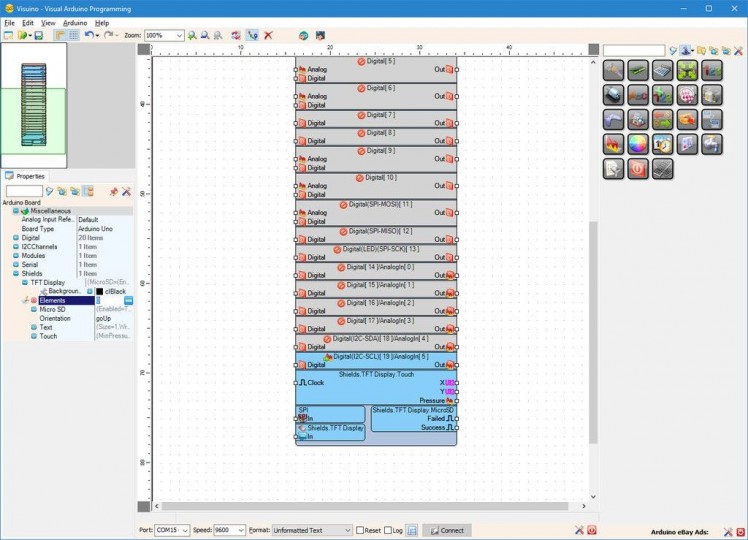
- In the Properties expand the "Shields" property, then the "TFT Display" Sub property (Picture 1)
- In the Properties, click on the "..." button next to the value of the "Elements" property of the "TFT Display" Element (Picture 1)
- In the Elements editor select “Draw Ellipse”, and then click on the "" button (Picture 2) to add one (Picture 3)
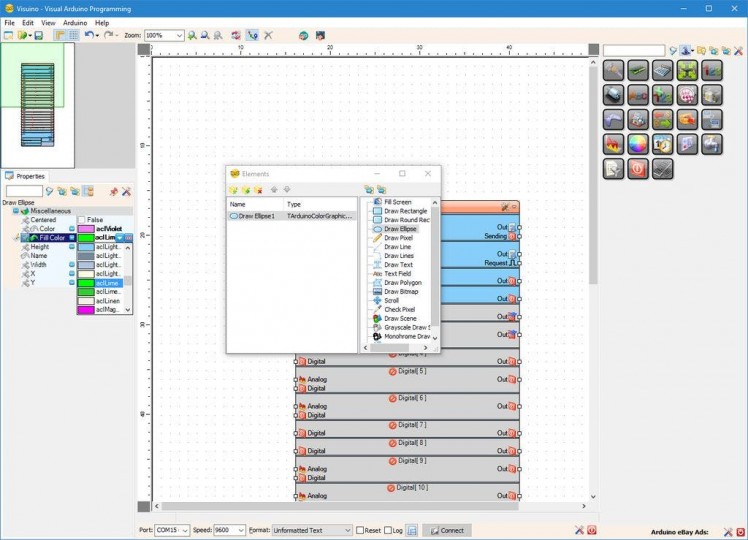
- In the Properties set the value of the "Color" property of the "Draw Ellipse1" element to "aclViolet" (Picture 3)
- In the Properties set the value of the "Fill Color" property of the "Draw Ellipse1" element to "aclLime" (Picture 4)
1 / 3
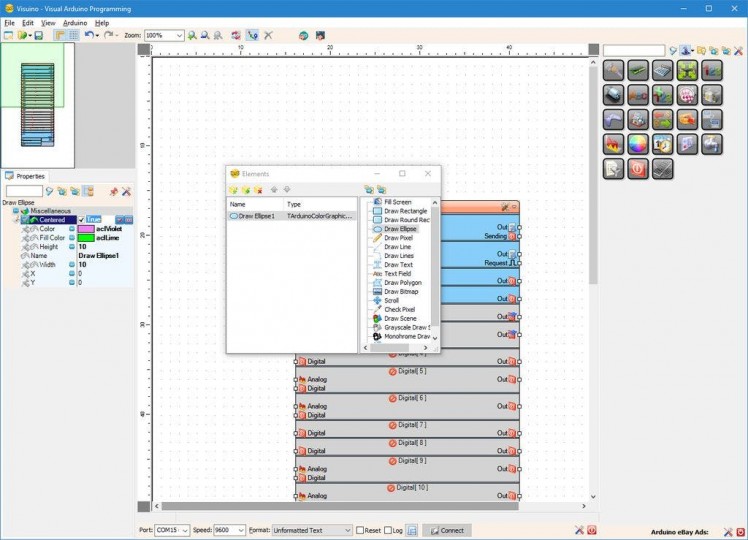
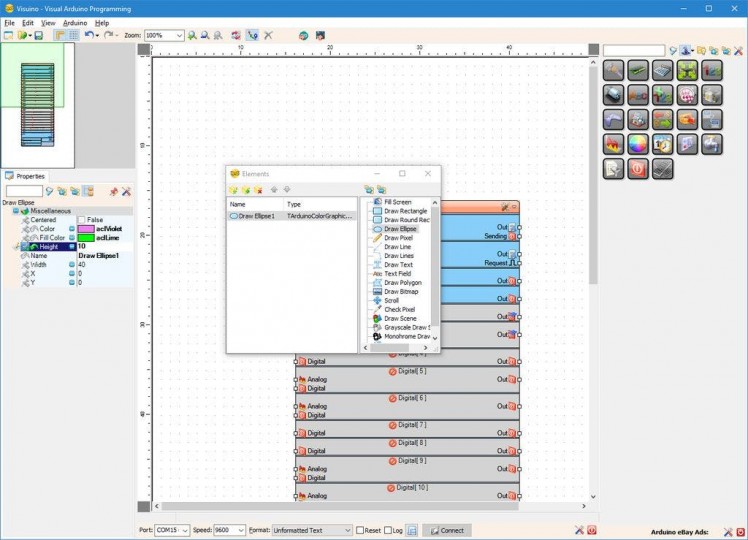

To make the Ellipse appear as Circle, we need to specify the Width, and Height. We also want the coordinates of the Ellipse to be of the center, not the Top Left corner.
- In the Properties set the value of the "Centered" property of the "Draw Ellipse1" element to "True" (Picture 1)
- In the Properties set the value of the "Height" property of the "Draw Ellipse1" element to "10" (Picture 2)
- In the Properties set the value of the "Width" property of the "Draw Ellipse1" element to "10" (Picture 3)
1 / 5

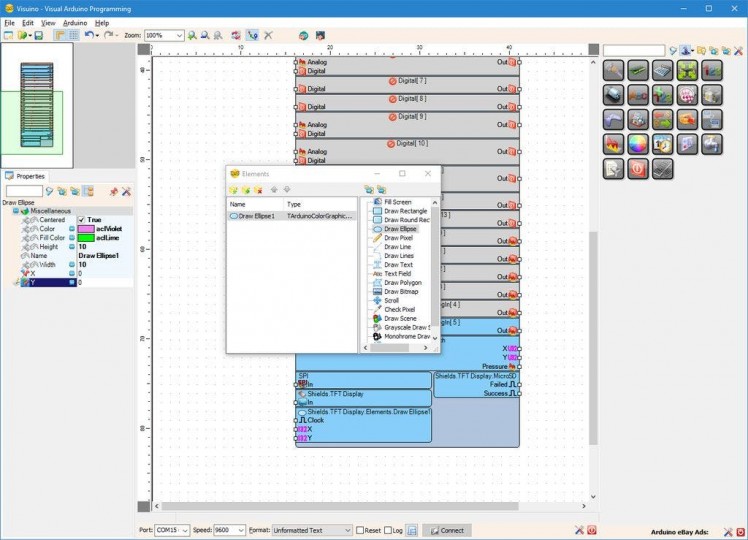
To draw the circle at specific location, we need to control its X and Y position. For this we will add pins for the X and Y properties, and connect them to the the X, and Y Touch position of the Shield:
- In the Properties click on the "Pin" button at front of the "X" property of the "Draw Ellipse1" element (Picture 1), and select "Integer SinkPin"
- In the Properties click on the "Pin" button at front of the "Y" property of the "Draw Ellipse1" element (Picture 2), and select "Integer SinkPin"
- Picture 3 shows the newly added pins
- Close the Elements Dialog
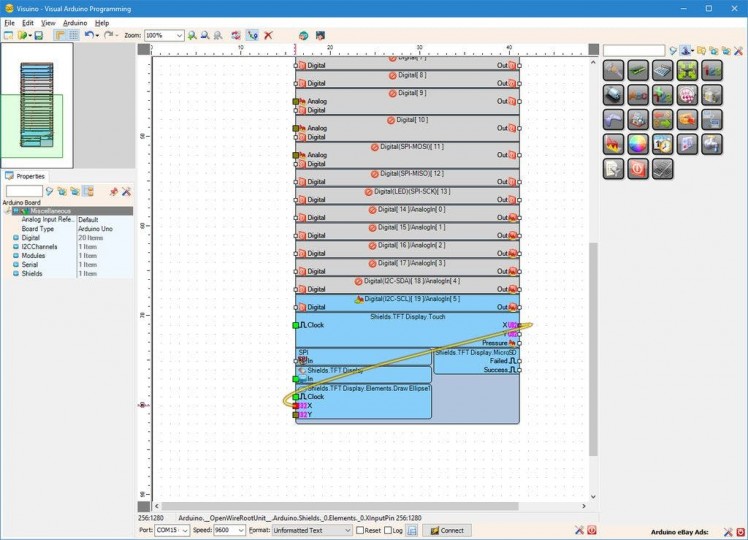
- Connect the "X" Output Pin of the "Shields.TFT Display.Touch" element of the Arduino component to the "X" Input Pin of the "Shields.TFT Display.Elements.Draw Ellipse1" element of the Arduino component (Picture 4)
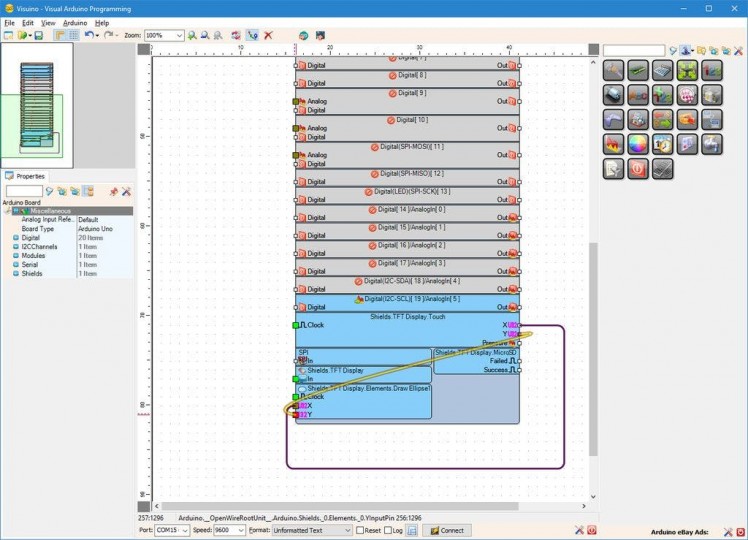
- Connect the "Y" Output Pin of the "Shields.TFT Display.Touch" element of the Arduino component to the "Y" Input Pin of the "Shields.TFT Display.Elements.Draw Ellipse1" element of the Arduino component (Picture 5)
1 / 4

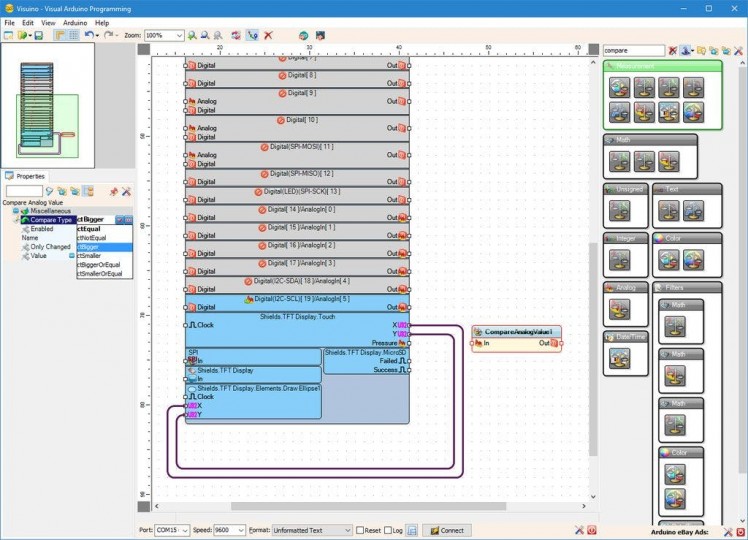
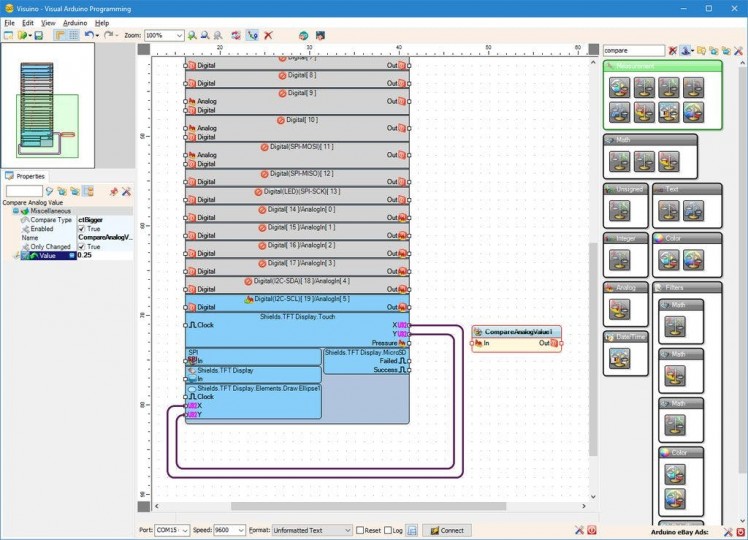

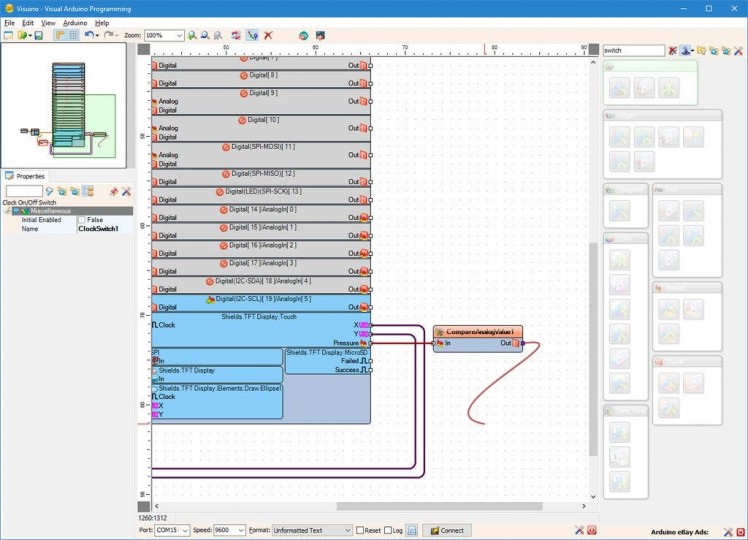
The touchscreen has a pin indicating how hard the screen is pressed. To detect when the pen touches the screen, we can use "Compare Analog Value" component, and specify the level:
- Type "compare" in the Filter box of the Component Toolbox, then select the "Compare Analog Value" component (Picture 1), and drop it in the design area (Picture 2)
- In the Properties set the value of the "Compare Type" property of the CompareAnalogValue1 component to "ctBigger" (Picture 2)
- In the Properties set the value of the "Value" property of the CompareAnalogValue1 component to "0.25" (Picture 3) - You can experiment with other values to adjust the touch sensitivity
- Connect the "Pressure" Output Pin of the "Shields.TFT Display.Touch" element of the Arduino component to the "In" Input Pin of the CompareAnalogValue1 component (Picture 4)
1 / 5
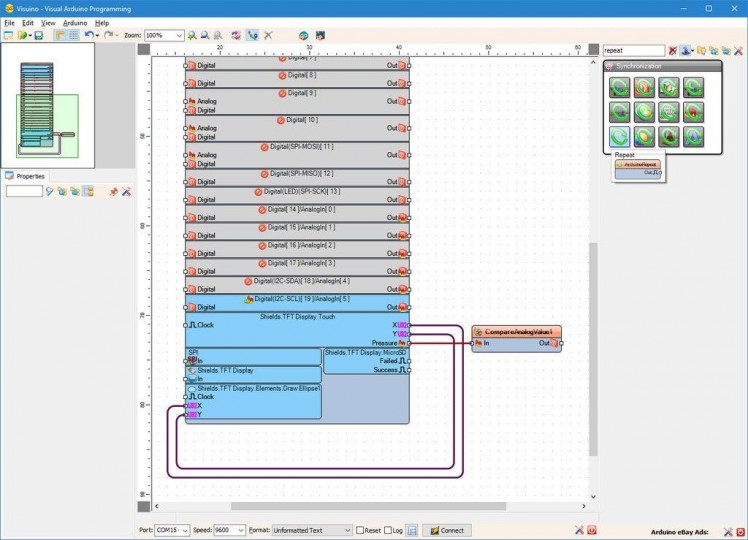

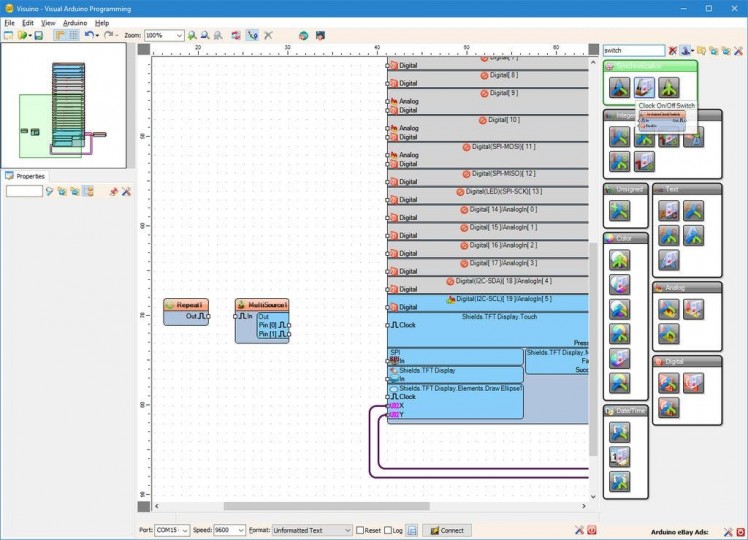


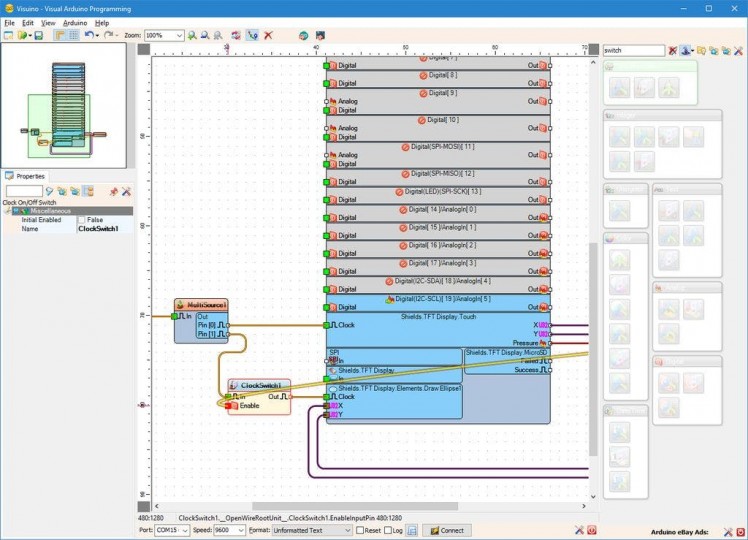
To draw the circle exactly at the touch location, we need to specify the X, and Y first, and then force the circle to be drawn. To repeatedly generate the clock for this operation, we can use the Repeat component. It will generate Clock as fast as the Arduino can execute the main loop. Since we want the test for touch to happen before the drawing of the circle, we will use "Clock Multi Source" component. For each clock on its input, the component will generate clocks on its outputs exactly in the order of the outputs, making sure the events will happen in exact sequence. To Enable and Disable the drawing of the Circle, we will use "Clock On/Off Switch" component:
- Type "repeat" in the Filter box of the Component Toolbox, then select the "Repeat" component (Picture 1), and drop it in the design area (Picture 2)
- Type "multi" in the Filter box of the Component Toolbox, then select the "Clock Multi Source" component (Picture 2), and drop it in the design area (Picture 3)
- Type "switch" in the Filter box of the Component Toolbox, then select the "Clock On/Off Switch" component (Picture 3), and drop it in the design area (Picture 4)
- Connect the "Out" Output Pin of the Repeat1 component to the "In" Input Pin of the MultiSource1 component (Picture 4)
- Connect the "Pin[ 0 ]" Output Pin of the "Out" Pins of the MultiSource1 component to the "Clock" Input Pin of the "Shields.TFT Display.Touch" element of the Arduino component (Picture 5)
1 / 4

To Enable Disable the "Clock On/Off Switch" component, when the pen is touched or lifted, we need to connect the switch to the "Compare Analog Value" component:
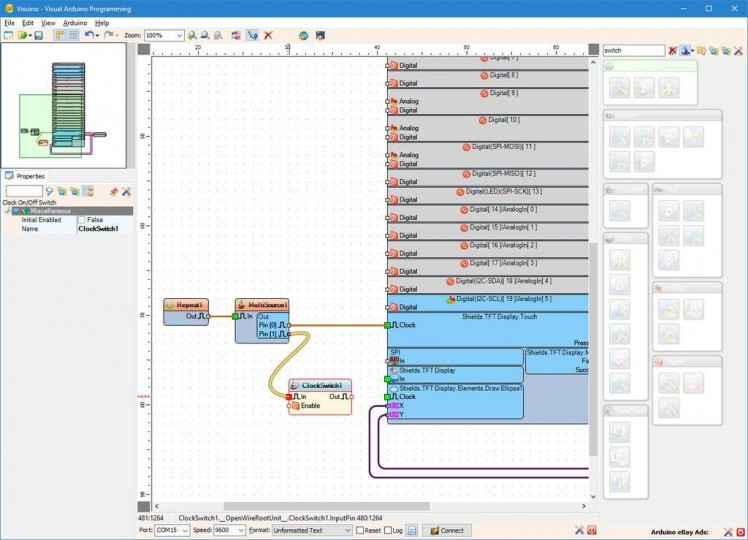
- Connect the "Pin[ 1 ]" Output Pin of the "Out" Pins of the MultiSource1 component to the "In" Input Pin of the ClockSwitch1 component (Picture 1)
- Connect the "Out" Output Pin of the ClockSwitch1 component to the "Clock" Input Pin of the "Shields.TFT Display.Elements.Draw Ellipse1" element of the Arduino component (Picture 2)
- Connect the "Out" Output Pin of the CompareAnalogValue1 component (Picture 3) to the "Enable" Input Pin of the ClockSwitch1 component (Picture 4)
1 / 2
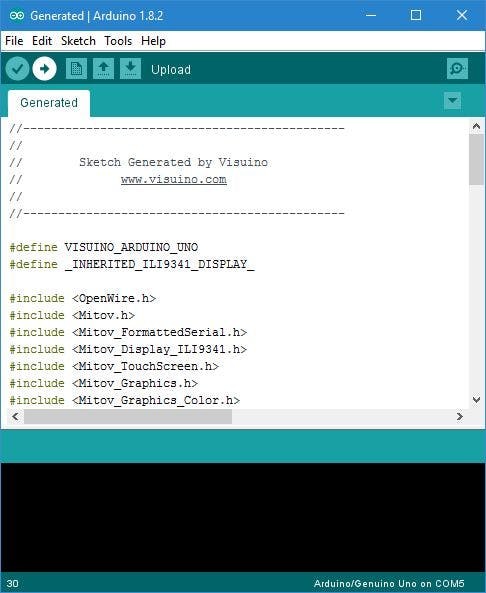
- In Visuino, Press F9 or click on the button shown on Picture 1 to generate the Arduino code, and open the Arduino IDE
- In the Arduino IDE, click on the Upload button, to compile and upload the code (Picture 2)
1 / 2

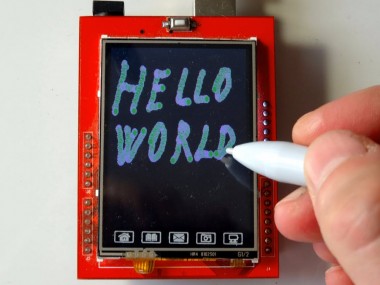
Congratulations! You have completed the project.
Pictures 2 and the Video show the connected and powered up project. You can Scribble and Draw on the ILI9341 based TFT Touchscreen Display Shield with a Touchscreen Stylus Pen or a Finger as seen on the Video.
To clear the display, you can press the Reset button.
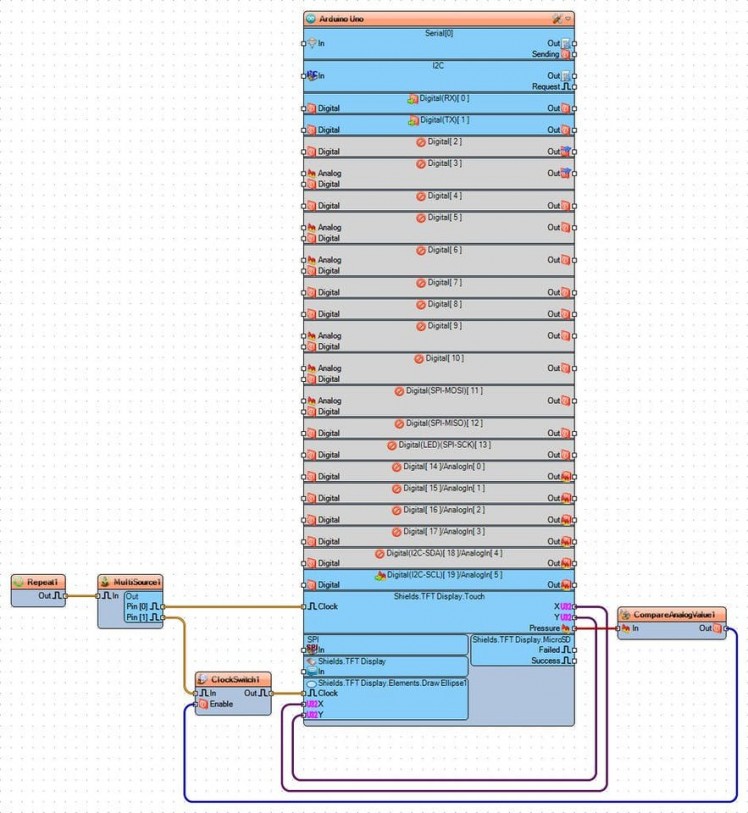
On Picture 1 you can see the complete Visuino diagram.Also attached is the Visuino project, that I created for this Tutorial. You can download and open it in Visuino: https://www.visuino.com
Credits
Related products


Leave your feedback...