
Diy Nozzle Camera

Made by Mellow_Labs / 3D Printing / Lights / Photos & Video
About the project
Adding a note to camera to your three D printer is affordable easy and satisfying to watch.
Project info
Difficulty: Easy
Platforms: Prusa
Estimated time: 2 hours
License: Creative Commons Attribution CC BY version 4.0 or later (CC BY 4+)
Story
Ever wanted a clear, close-up view of your 3D printer’s nozzle in action? Adding a dedicated nozzle camera is a great way to monitor prints, troubleshoot issues, and capture compelling footage. In this article, I’ll show you step by step how I added a nozzle camera to my Prusa Mini—and how you can do the same!
Why Add a Nozzle Camera?
Seeing exactly what's happening at your 3D printer’s nozzle lets you:
- Troubleshoot errors quickly.
- Capture better footage for your social media or tutorials.
- Monitor prints in real time to reduce failures.
I initially tested a super-cheap endoscope camera (around 480p), but soon upgraded to a 720p HD endoscope for sharper visuals. If you’re all about content creation, that little bump in resolution makes a big difference.
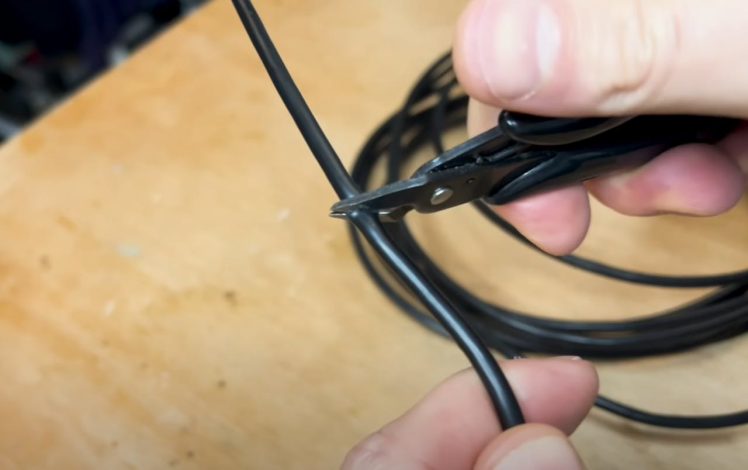
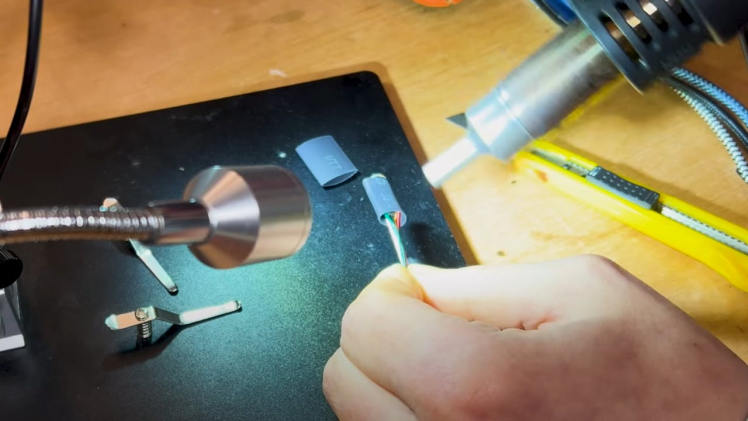
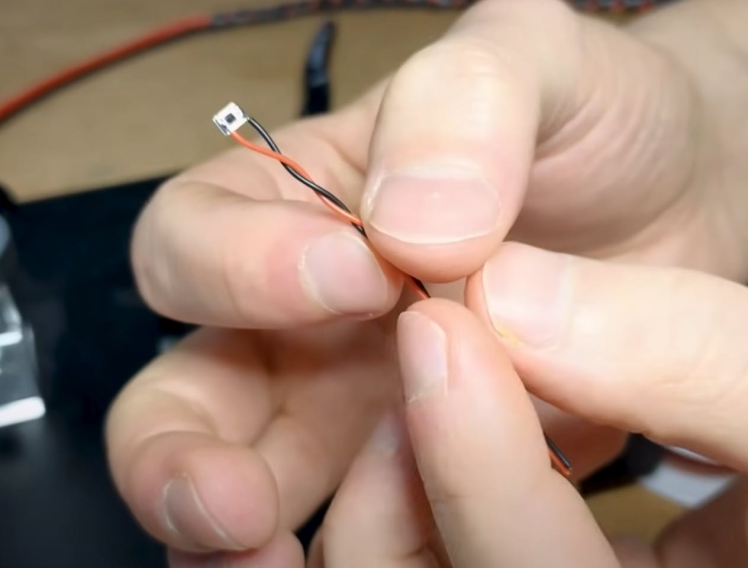
Leave yourself about 15–30 cm (or about the length of a hot dog) of wiring from the camera module before snipping. This extra length ensures you have enough slack for positioning and soldering later.
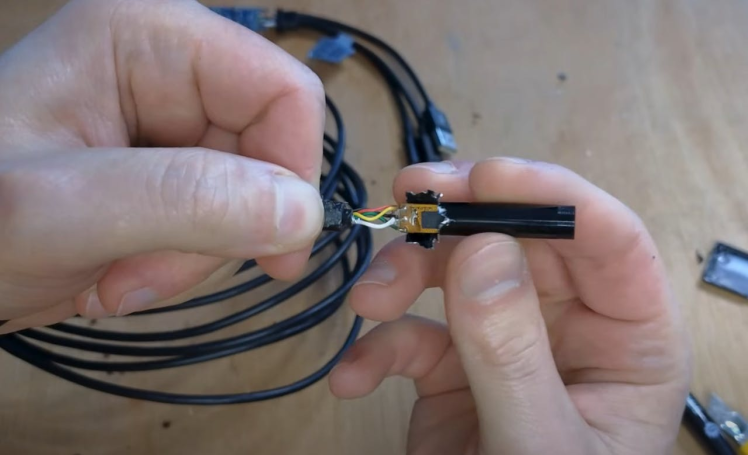
Carefully peel away or heat the back plastic cap and slide out the circuit board. Go slow and be mindful of delicate circuitry—avoid using excessive force.
Use heat shrink tubing to insulate the camera board. If you only have oversized tubing, you can gently stretch it over a pair of pliers before heating to fit. Then apply heat to shrink it snugly around the camera module.
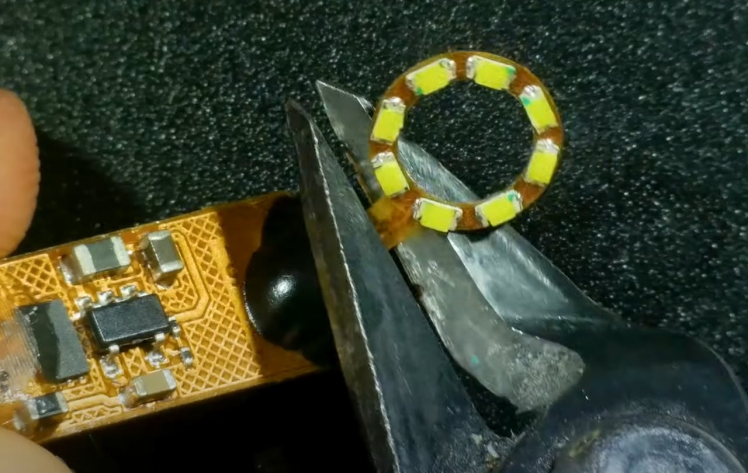
The tiny LEDs on the original endoscope aren’t bright enough and often cause lens flare. Peel or cut off the small LED ring. We’ll add better lighting in the next steps.
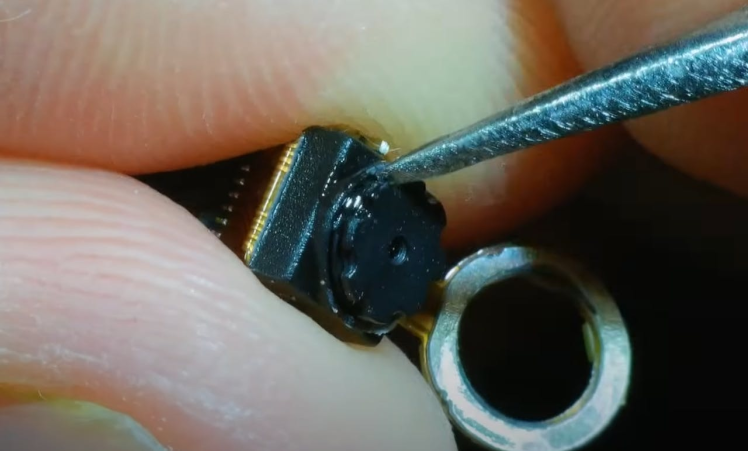
Most endoscope lenses unscrew for focus. If yours is glued, carefully pick off the glue and gently twist until it’s free. HD modules often have no glue, making life easier.
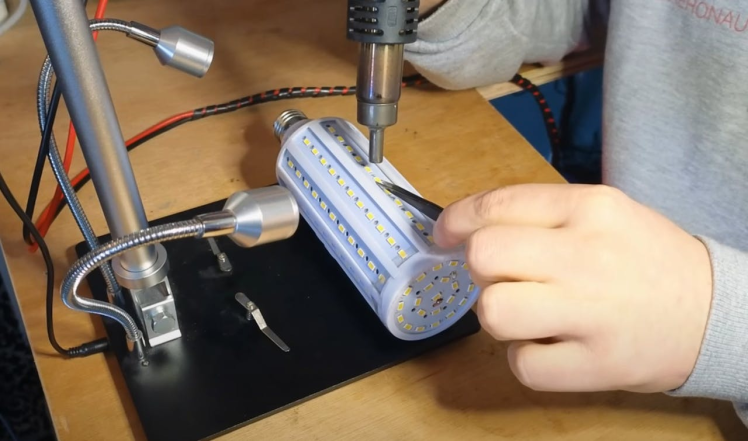
I harvested mine from a spare LED bulb by heating the board with hot air until the solder melted. You only need two, but grab extras in case you lose or damage any during soldering.
Attach a pair of wires (one positive, one negative) to each LED. Keep them free for now; we’ll integrate them later.
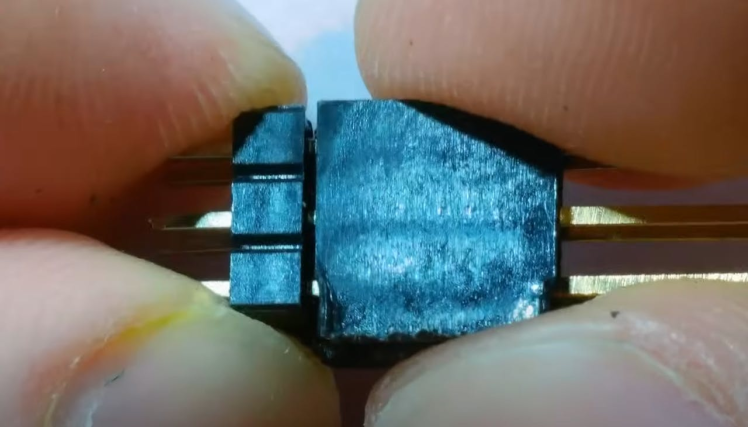
You’ll need a 5-wire connection back to your USB endoscope cable. I made a 2×3 connector (6 pins total) so one pin can serve as a safety measure—removed and glued in place to prevent misalignment when plugging and unplugging.
I went through endless prototypes, but you can skip that hassle by using my final design. The CAD files are available on my Patreon. You can either purchase the files or become a patron for full access. Mellow_labs Patreon
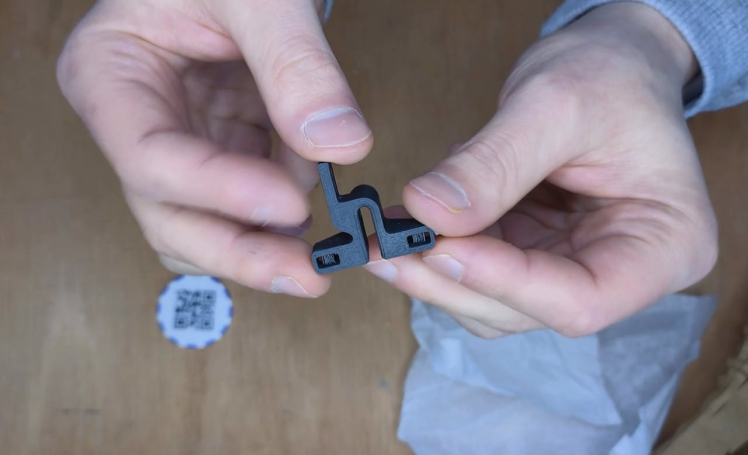
Filament choice matters! Print your camera mount in a material with a higher heat resistance than your typical filament. If you mostly print in PLA, consider using PETG or ASA for the mount so it won’t warp from the nozzle’s heat.
Final AssemblyFeed in the LEDsThe mount has holes to route your LED wires through. If your LEDs differ in size, you can edit the parametric CAD design to fit them.
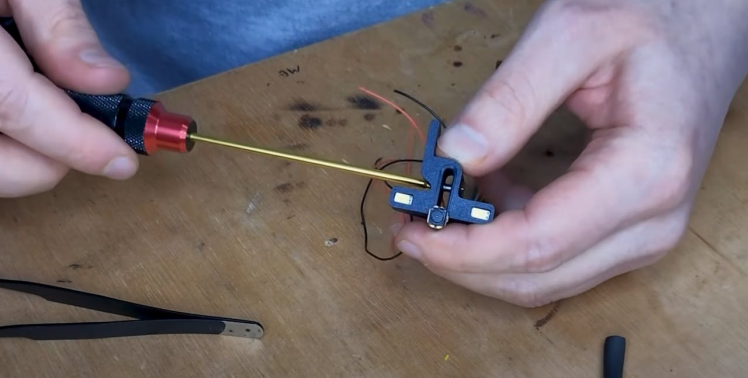
Secure the CameraInsert an M3 nut and screw into the mount’s clamping area, place the camera module, then tighten to hold it firmly in place.
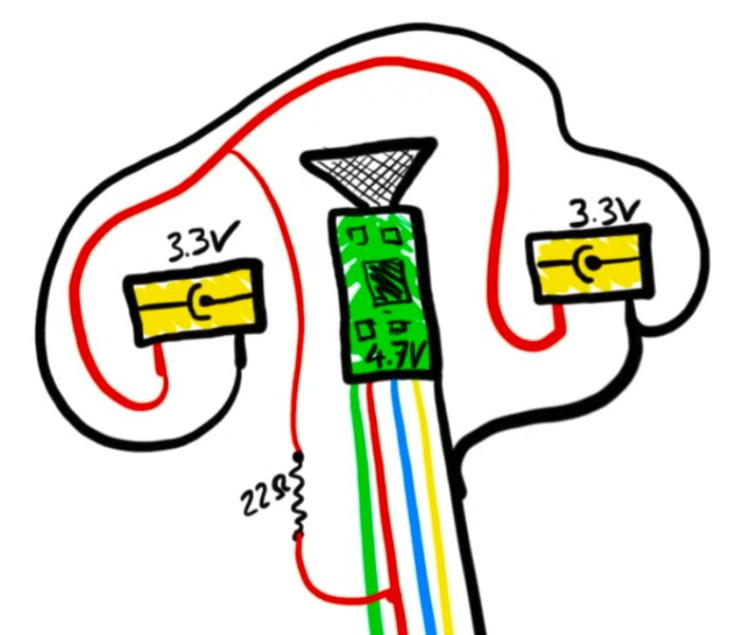
Wire EverythingSolder the two LEDs in parallel: red to red, black to black.Add an appropriate resistor (e.g., 22 Ω) to drop the camera’s supply voltage down to what your LEDs require (often around 3.3 V for each LED).Splice these LED wires into the power leads for the camera module.Use heat shrink tubing for insulation and strain relief. A piece of single-core wire can help keep everything neat.
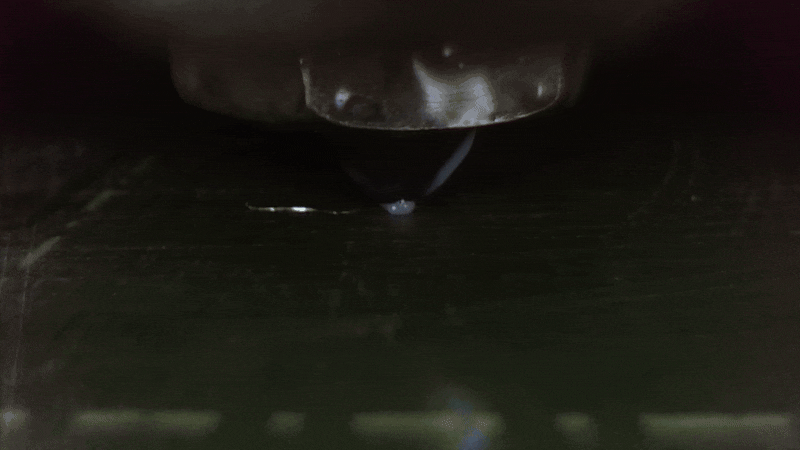
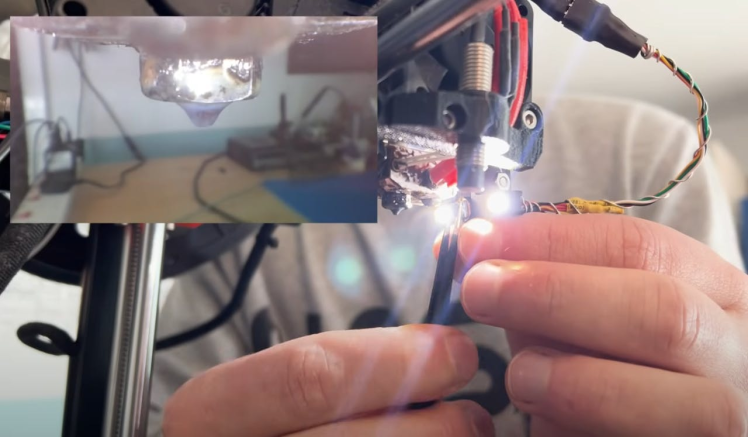
Install on Your PrinterThe Prusa Mini has a handy threaded hole above the hot end. Use an M3 screw to secure the mount there. Adjust the camera angle so it’s close to the nozzle but not touching the bed or prints. In my case, I heated the mount slightly so I could give it a twist for the perfect alignment.
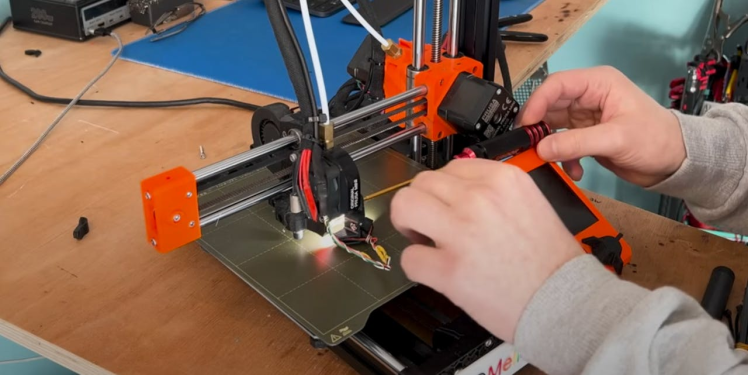
Focus the LensUse small pliers to twist the lens until your nozzle is in crisp focus. This may take a bit of trial and error.
And that’s it! You’ve got your very own nozzle cam setup for the Prusa Mini (or adapt it for your printer of choice). If you want more details—or to see me do all this in real time watch full video
Credits
Leave your feedback...