
Diy Arduino Tic Toc Toe Game

Made by mukesh-sankhla / 3D Printing / Artificial intelligence / Games & Gaming / Kids & Family / Retro Tech
About the project
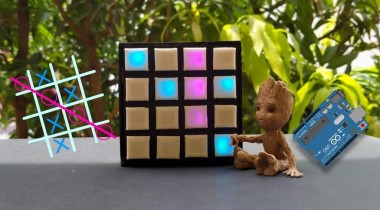
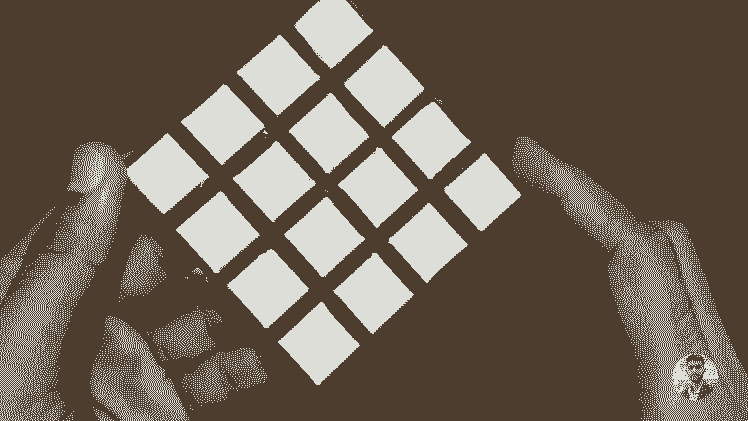
Two player 4 by 4 Tic Tac Toe Game using Arduino Uno.
Items used in this project
Hardware components


Story
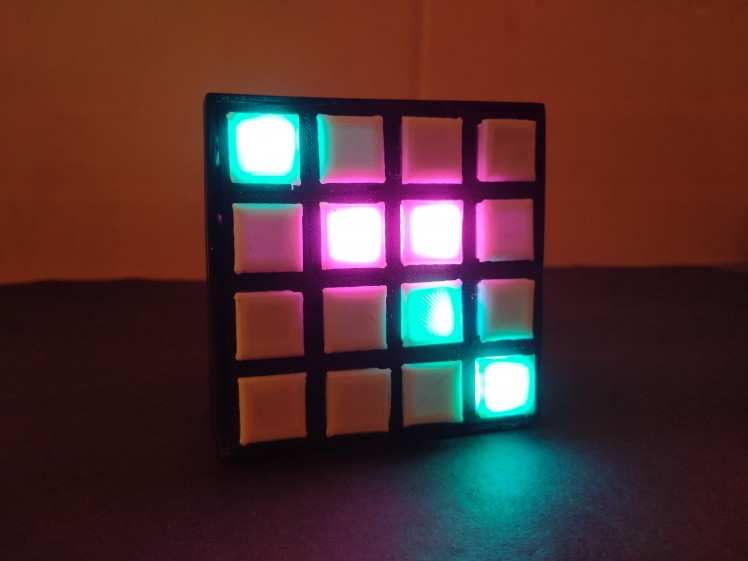
Tic Tac Toe game is a two player classic game. It becomes fun when you play it with your kids,family and friends. Here I have shown how to make a Tic Tac Toe game using a Arduino Uno,Push buttons and Pixel LEDs. This Arduino based 4 by 4 Tic Tac Toe is same as the classic Tic Tac Toe,only the difference is X and O's are represented in two different colors.This game has a program written in it which can decide who is winner or the game is draw.
Details
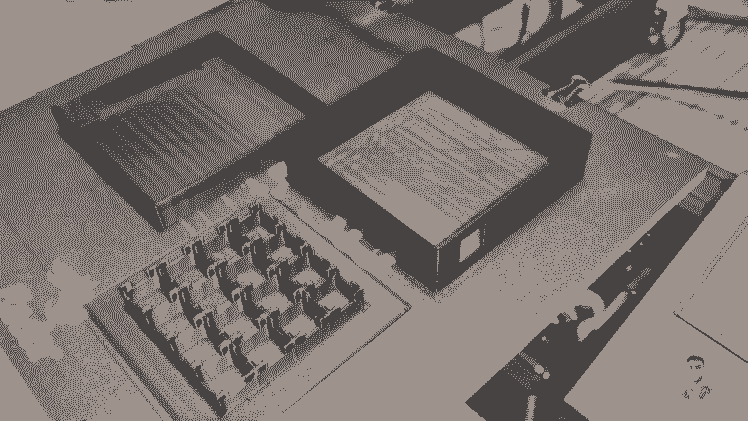
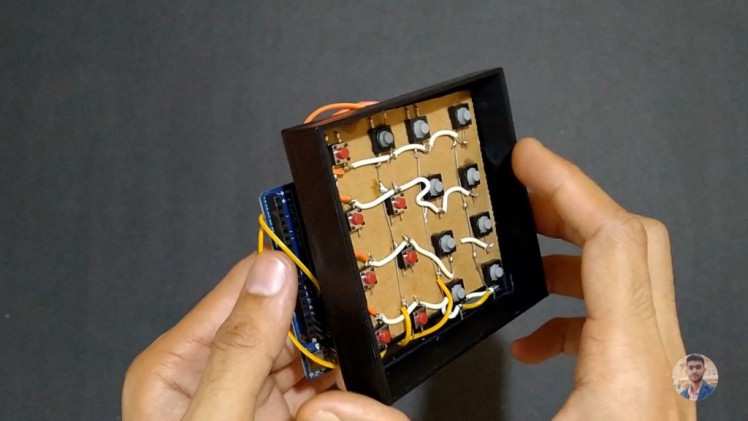
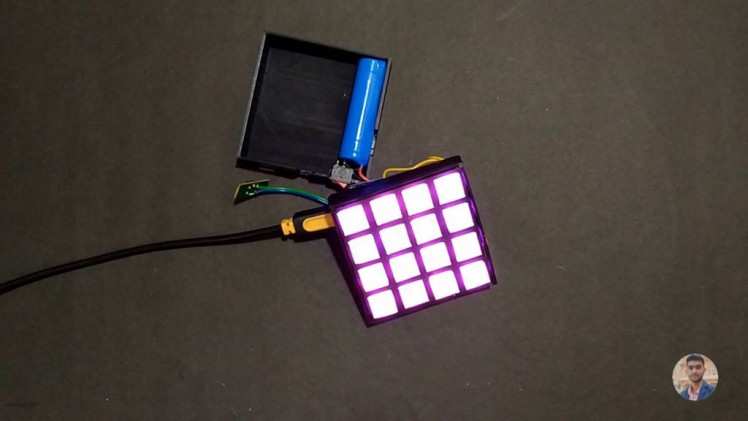
The Tic Tac Toe is made using a Arduino Uno,Push Buttons and Pixel LEds(WS2812B).This project is basically a 4 by 4 RGB Matrix with each pixel having a push button in it. If a pixel is been pushed then it should light with its set color. This game is set with two colors Sky Blue color representing Player 1 and Pink color representing Player 2. The program written for this game can decide the win or draw. If a player wins then all the LEDs should animate with that player color. If game is draw then all the LEDs should animate with Red color. After completion of one game,the game should be restarted to do that we have a reset button connected to Arduino.
Instructions:
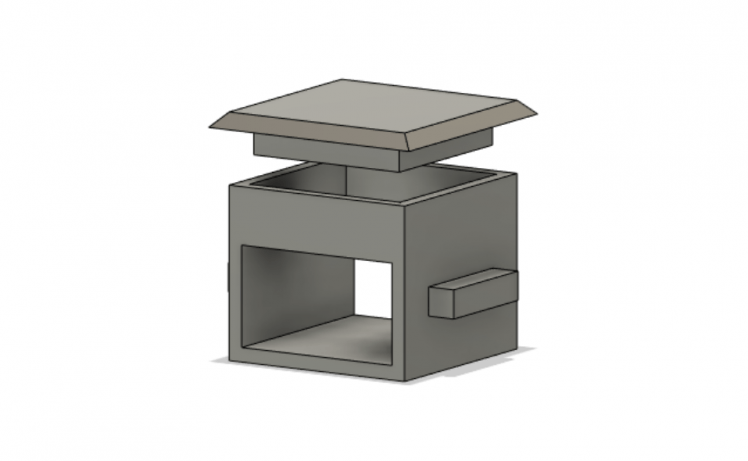
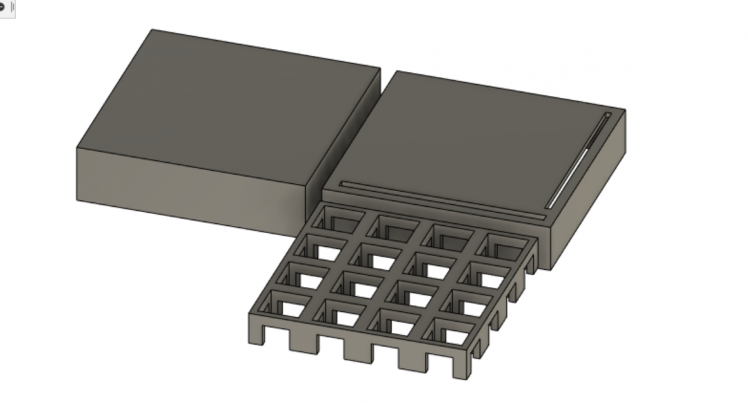
3D Printing:
- 3D print all the parts provided.
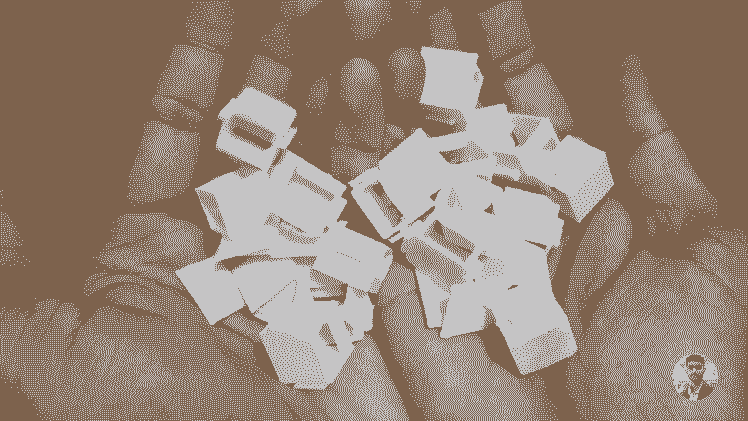
- 3D Print 16 small button in white PLA and remaining parts can be 3D printed in any color you want.
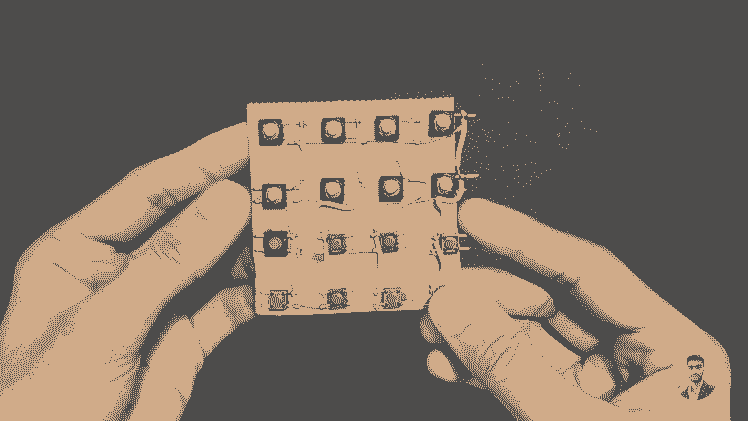
- After printing all the parts install all the 16 white buttons in the array using some fast glue.

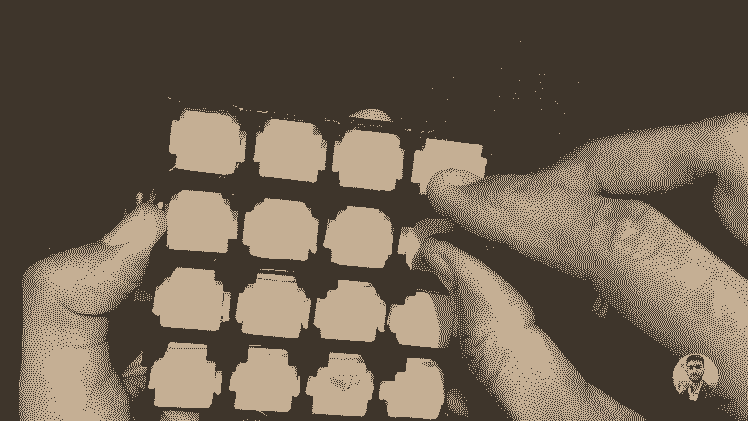
Making Push Buttons KeyPad :
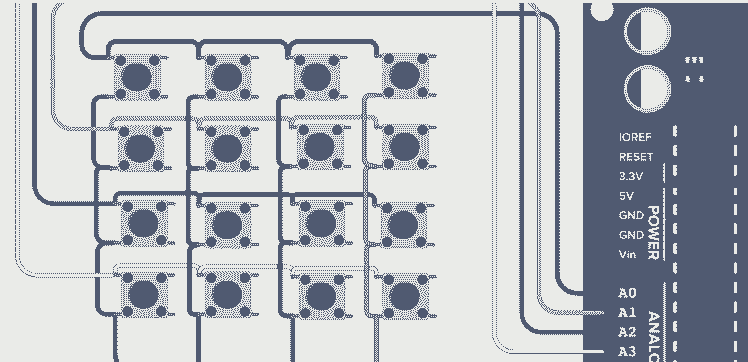
- Take a piece of cardboard,mark the positions with respect to 3D printed array on the cardboard.
- Glue all the 16 push buttons on the cardboard on the marked positions.
- Make all the connections by soldering the buttons with the help of some wires.
Circuit Connection:
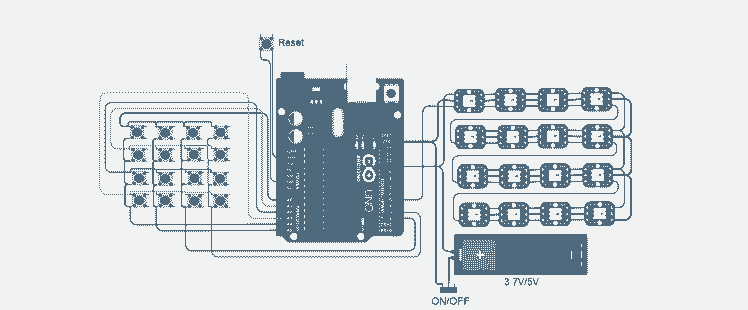
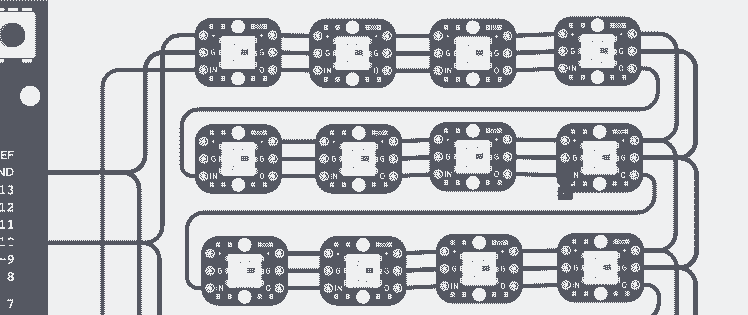
- Connect the push buttons keypad to Arduino Uno as shown in circuit diagram.(R1~A0,R2~A1,R3~A2,R4~A3,C1~A4,C2~A5,C3~Pin 2,C4~Pin 3).
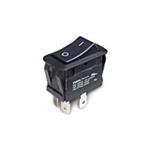
- Also take a extra push button(Reset Button) and connect to Arduino.(Reset,GND).
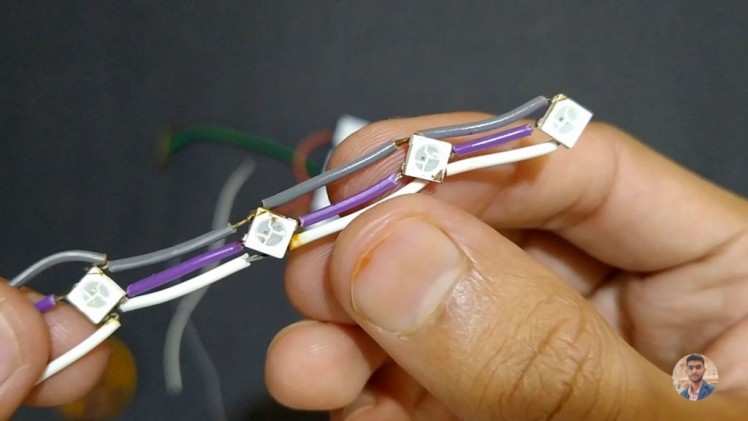
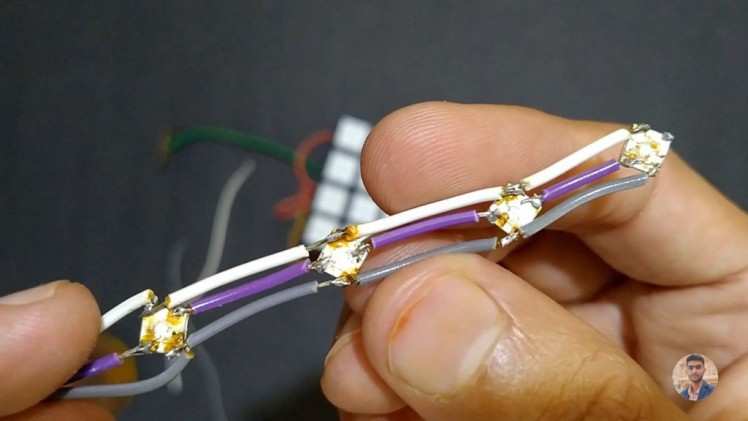
- Connect all the pixel LEDs.(-Ve/GND~GND,+Ve/5V~5V,Data In~Pin 5).
- I have used WS2812b LEDs,You can use the led strips which may be more convenient to use.
- Connect 3.7V/5V Batter with a ON/OFF Switch.
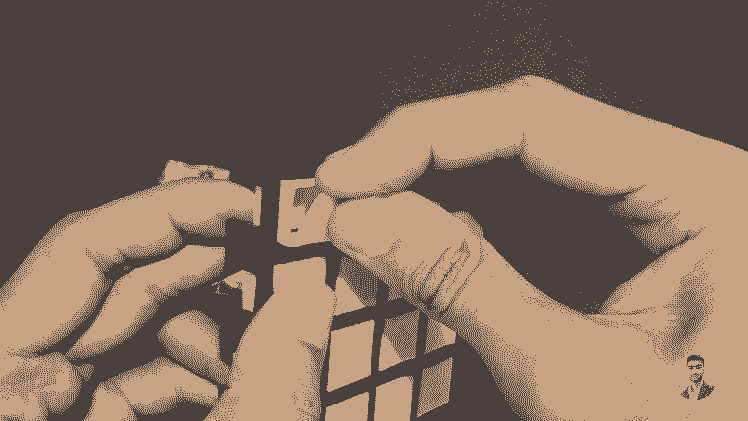
- Insert All the LEDs in each white 3D printed Buttons,one LED per each button.

Code:
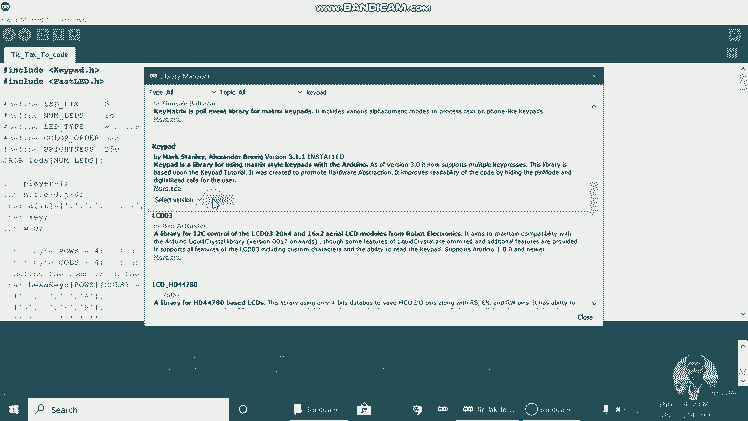
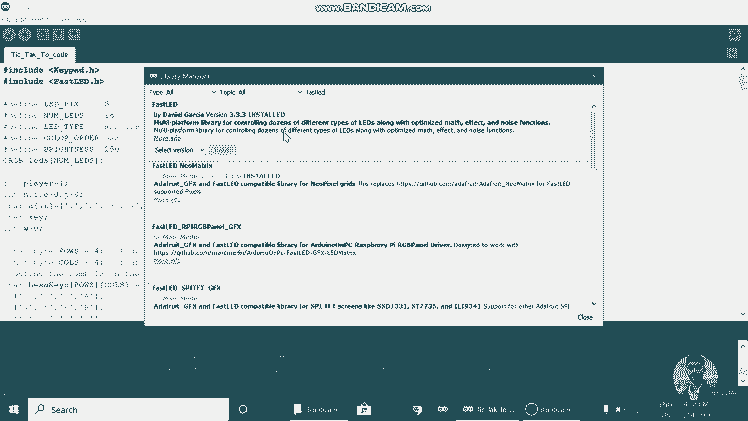
- Open the code in Arduino IDE.
- Install the KeyPad library and FastLED library into the Arduino IDE.
- Connect Arduino Uno to your PC.
- Select Board Type and Port.
- Upload the code.
Rules to Play:
- Sky Blue represents Player 1.
- Pink represents Player 2.
- Players should not push the button which is already been pushed.
- If any player wins the matrix will animate with his color.
- If Game is draw then matrix will animate with red color.


CAD, enclosures and custom parts
Code
Credits
mukesh-sankhla
Tech Educator | Content Creator | Developer | Maker - Simplifying technology through hands-on learning. Creating high-quality tutorials, projects, and insights on electronics, IoT, robotics, CAD, 3D printing, and software development at Empowering students, professionals, and makers with practical, accessible, and inspiring content.
Related products


Leave your feedback...