
Christmas Chocolate Vending Machine
Made by Mouser Electronics / Holidays / Kids & Family / Robotics
About the project
Christmas is around the corner! In this project we will create a fun christmas chocolate vending machine.
Project info
Difficulty: Easy
Platforms: Arduino
Estimated time: 5 hours
License: GNU General Public License, version 3 or later (GPL3+)
Items used in this project
Hardware components


Story
One of my favorite childhood cartoons in the Christmas season was 'The Secret World of Santa Claus'. Last week, while scrolling through the channels on my TV, I saw this cartoon, and it inspired me to bring the toys machine into reality. But instead of toys, it will be a chocolate vending machine. With the Christmas holidays are approaching, this would be a great project to do, which will also add a twisted touch to your usual Christmas decoration.
Let's get started!
Step 1: Vending machine housing assembly
Let's start with building the vending machine.
You'll need:
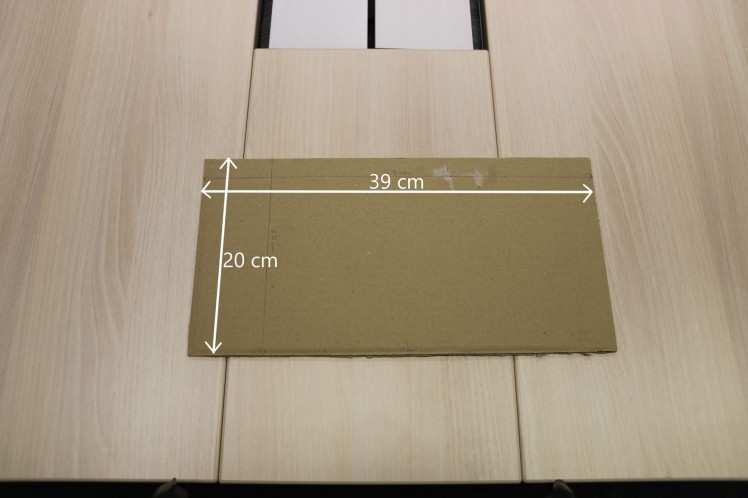
- Two 39cm x 39cm cardboard pieces will be used as the vending machine's front and backside.

- Three pieces of a 20cm x 39cm cardboard will be used as the bottom and the two others as the sidewalls of the vending machine.
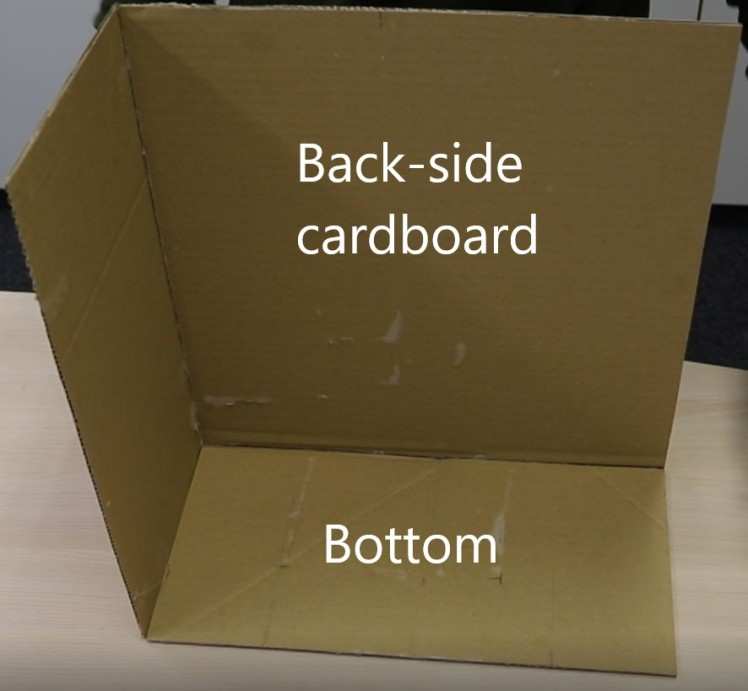
- Stick one of the 39cm x 39cm to two of the 20cm x 39cm. The rest will be glued later so that we can mount everything else inside the machine first.
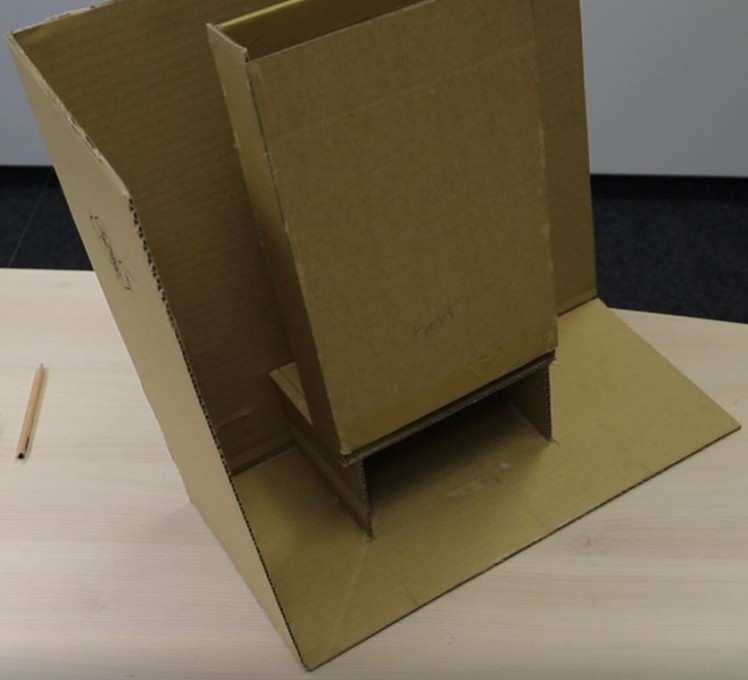
Step 2: Chocolate bars holder box
First, we'll build the base of the chocolate box holder. The box will be placed on top of it to be on the same level as the opening door of the vending machine.
You'll need:
- One piece of an 18cm x 12cm cardboard

- Two pieces of a 12cm x 8cm cardboard
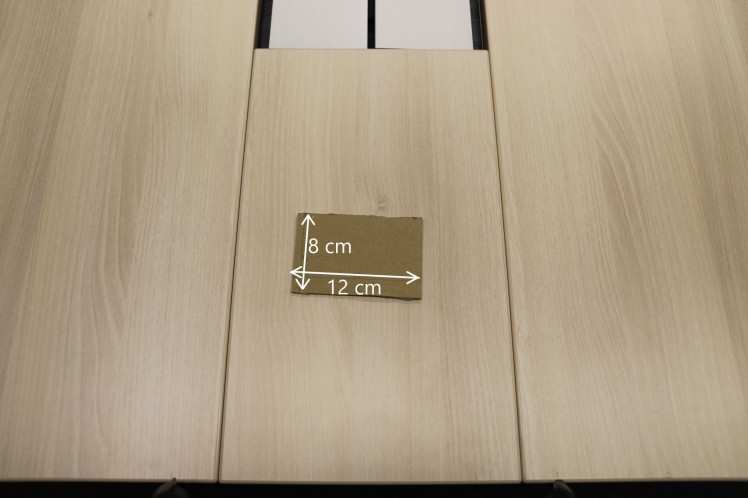
- Glue these inside the vending machine. It should be placed in the middle of the vending machine and glued to the back and bottom cardboard. (see figure below)
The chocolate box will be assembled, where the chocolate bars will be stacked up: The cardboard measurements used in this part are adjusted according to the size of the chocolate bar used here. The chocolate bar used here is 18cm long and 4cm wide.
- Two pieces of an 18cm x 30cm cardboard
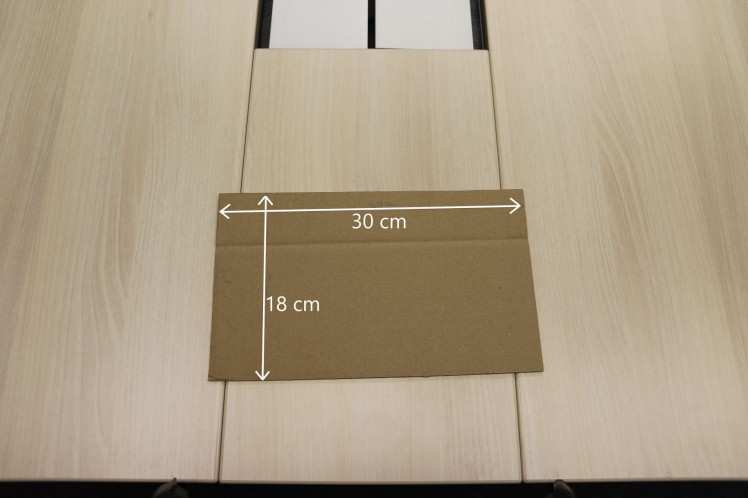
- Two pieces of a 4cm x 30cm cardboard
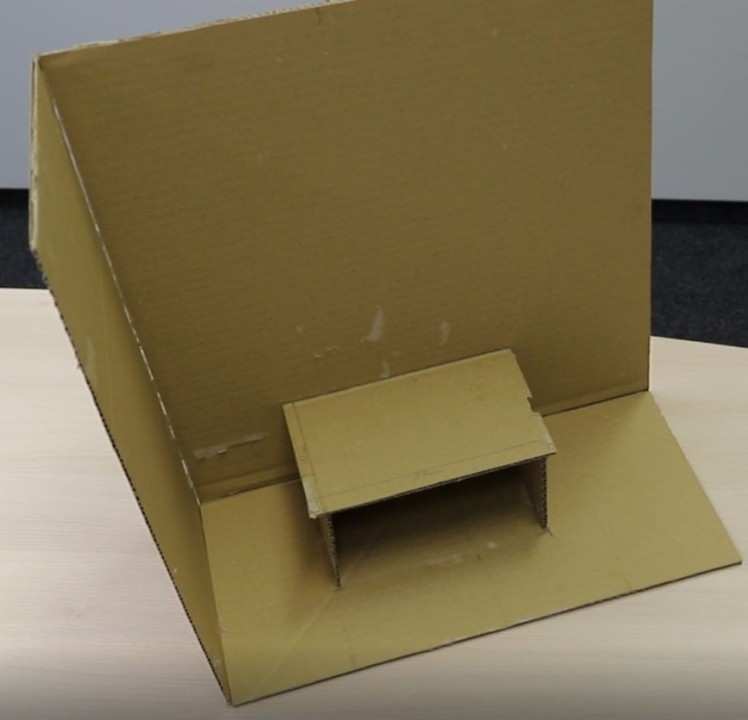
Before gluing the parts together, I'll point out the main function of this chocolate box. We want to push the chocolate bar from the box's backside to drop out at the front side. The following image shows how I placed the two 18cm x 30cm front/back-cardboards relative to the two 4cm x 30cm side-cardboards. (side view)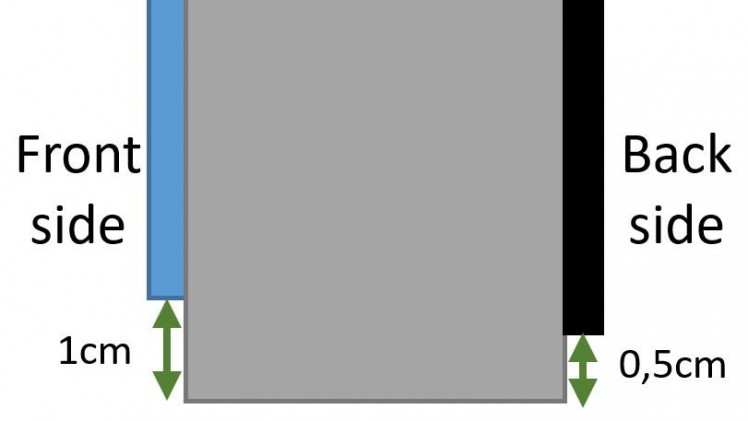
Fix the two 4cm x 30cm cardboards on the same level and glue the front side of one of the 18cm x 30cm higher than the backside one. The 1cm gap in the image above should be the thickness of the chocolate bar used. Lastly, glue the box on the edge of the base that was built in the previous step.
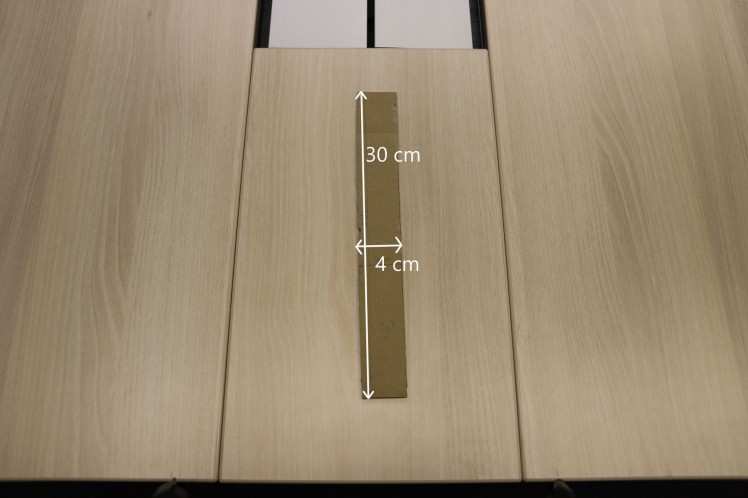
Step 3: Chocolate bar arm
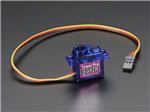
To push the chocolate bars out, I built an arm placed on a servo motor behind the chocolate box. Dimensions of the arm are shown in the following image.
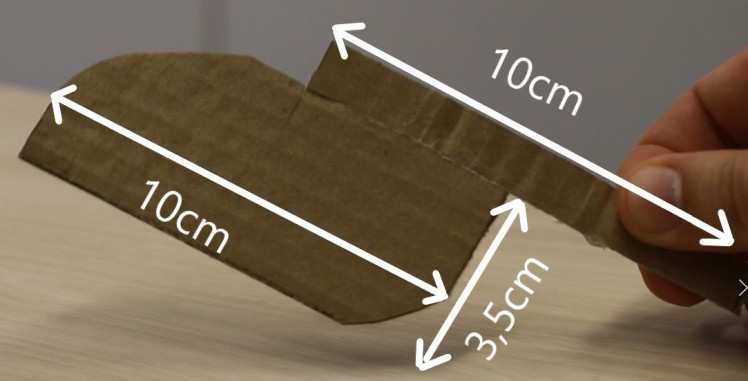
Following that, fix this cardboard arm on the servo motor and place it behind the chocolate box.
In the end, you should have the same working principle as in the next gif.
Step 4: Vending machine door ('mouth')
As the vending machine is designed to have its front door as a mouth, we'll take one of the remaining cardboard pieces of the 39cm x 39cm (Step 1) and will cut out the shape of the door. Make sure not to cut through the bottom border of the door.
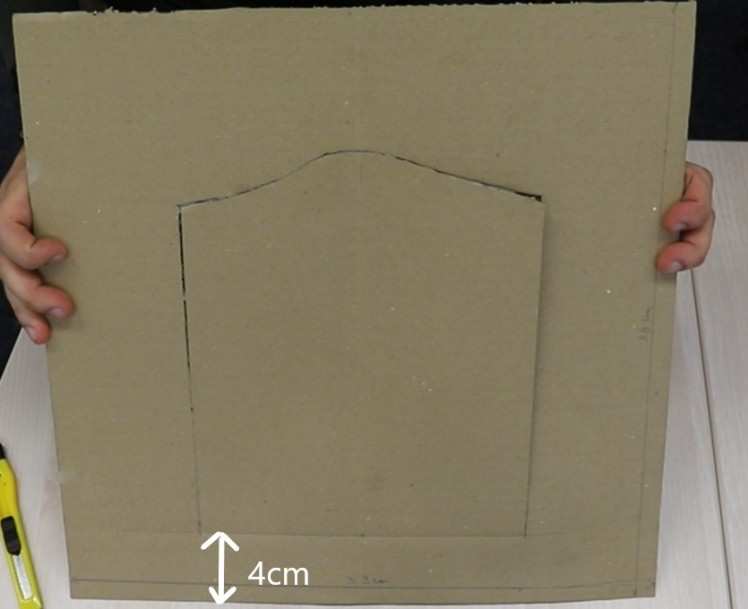
Finally, glue this piece to the front side of your vending machine.
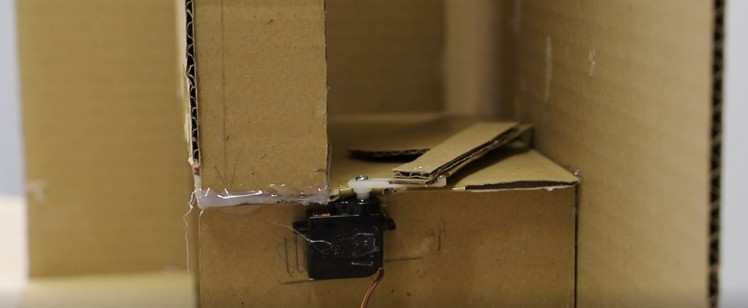
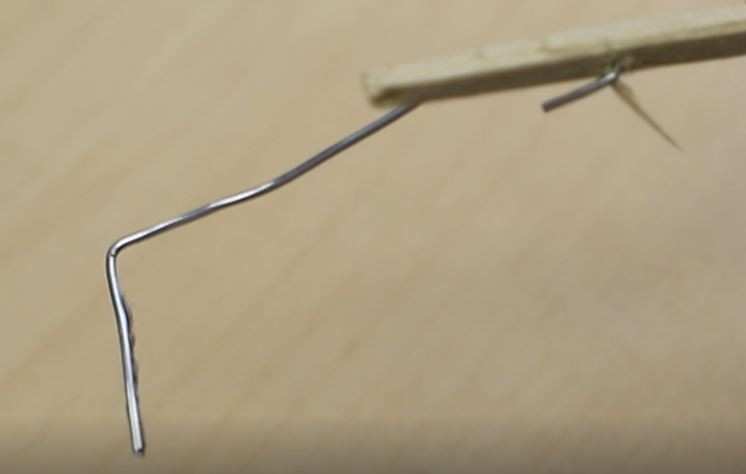
Step 5: Door mechanism ('mouth' opening)
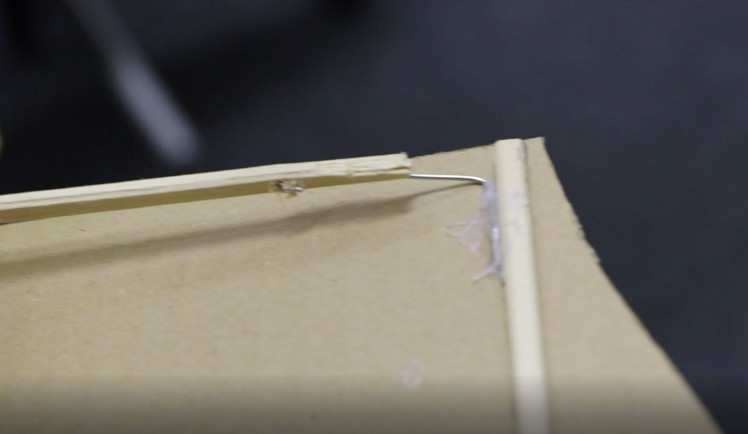
For this part, you'll need a chopstick and a paperclip. The paperclip needs to be formed into an 'L' shape on one end and as a hook on the other end. Drill a tiny hole into the top part of the chopstick and insert the paperclip into it.
Glue the other end of the chopstick to the stepper motor. Then fix the stepper motor near the door. I cut three cardboard pieces 4cm x 5cm and glued them together to fix the stepper motor.
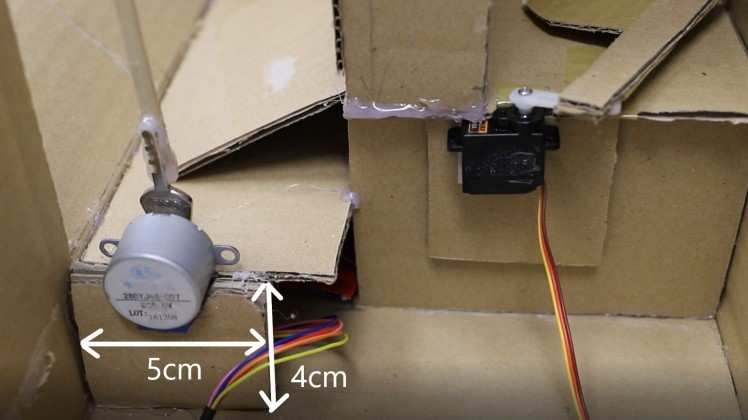
The final step is to fix the paperclip to the door.
Step 6: Hook up Arduino with Motors, button & buzzer
In case you want to buy all the parts separately instead of buying the Grove Starter Kit Plus, I've listed all the needed parts separately in the bill of materials (BOM).
Connect your Arduino board to all the components as the circuit schematic shown below.
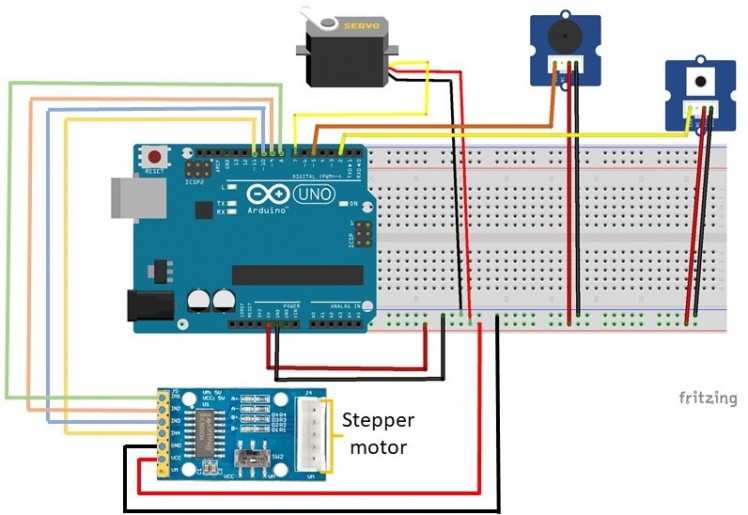
Stepper Motor Driver:
IN1 (green) -> Pin 8 (Arduino)
IN2 (orange) -> Pin 9 (Arduino)
IN3 (blue) -> Pin 10 (Arduino)
IN4 (yellow) -> Pin 11 (Arduino)
VCC (red) -> 5V (Arduino)
GND (black) -> GND (Arduino)
Servo Motor:
yellow -> Pin 7 (Arduino)
VCC (red) -> 5V (Arduino)
GND (black) -> GND (Arduino)
Button:
yellow -> Pin 5 (Arduino)
VCC (red) -> 5V (Arduino)
GND (black) -> GND (Arduino)
Buzzer:
orange -> Pin 2 (Arduino)
VCC (red) -> 5V (Arduino)
GND (black) -> GND (Arduino)
Step 7: Code
Flash the christmas_vending_machine.ino code to your Arduino board. You'll need to adjust the angles of the stepper & servo motor in the code, as this depends on how you fixed their position in the box.
The workflow is as follows: Whenever the button gets pressed, the door will open and close quickly (as if the machine is talking). The stepper motor will then open the door to 90° down, and the servo motor will push one chocolate bar out (moves 55°). Followed by the buzzer playing a randomly chosen Christmas song. The Christmas songs code is based on this project on the Arduino project hub. The only difference is that instead of using different buttons to play a song, our machine will play each time a randomly chosen song.
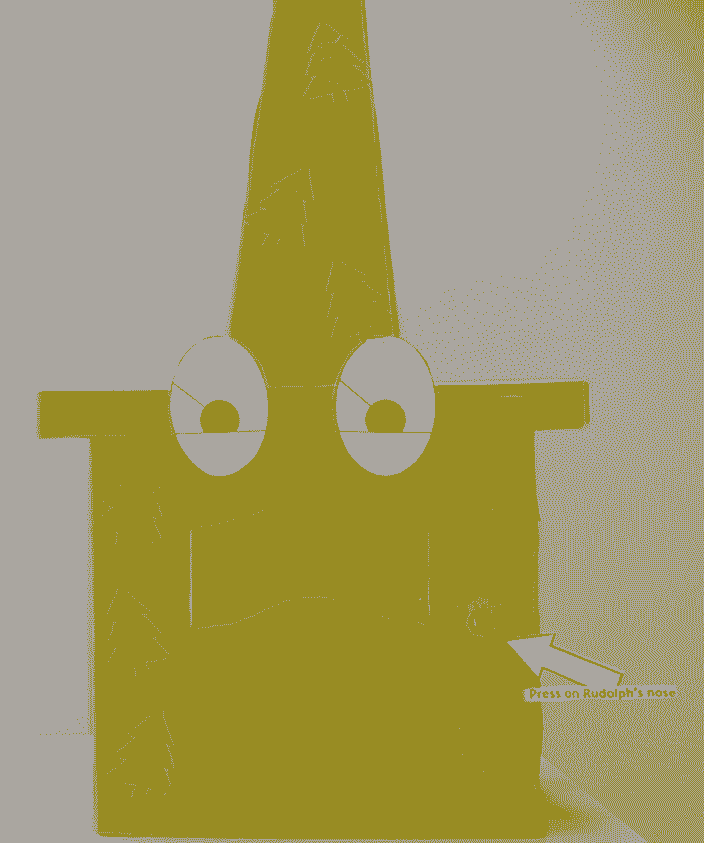
Step 8: Paint & decorate
As a final step, fix the last 20cm x 39cm piece of cardboard, which will close the vending machine housing. Now paint & decorate your vending machine. Get creative! I designed it like the toys machine from the cartoon 'The secret world of Santa Claus'.
Thank you for following this tutorial. I hope you liked this fun Christmas project!
Happy Holidays!
Author
Rafik Mitry joined Mouser in 2019 right after finishing his Master's degree in Electrical Engineering at the Technical University of Munich where he also worked in research in the field of energy harvesting for 3 years. As a Technical Marketing Engineer at Mouser, Rafik creates unique technical content that reflects current and future technology trends in the electronics industry. Besides keeping up with the latest technology trends, Rafik is an avid lover of aviation and tennis.
Schematics, diagrams and documents
Code
Credits
Mouser Electronics
Mouser Electronics is a worldwide leading authorized distributor of semiconductors and electronic components for over 1,100 manufacturer brands. We specialize in the rapid introduction of new products and technologies for design engineers and buyers. Our extensive product offering includes semiconductors, interconnects, passives, and electromechanical components.
Related products


Leave your feedback...