





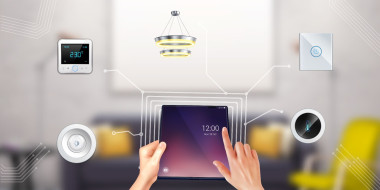
Case Study: Retrofitting Intelligence: Building A Smart Hvac

Made by chanchaldada / Home Automation
About the project
We recently wrapped up a project that felt like a throwback to classic embedded engineering. A client came to us with a common problem: they had a commercial office space with a legacy HVAC system. It was a workhorse—reliable, powerful—but dumb. It ran on a fixed schedule, ignored occupancy, and treated the entire 5,000 sq ft fl
Items used in this project
Hardware components


Story
The brief was simple: make it smart without replacing the expensive core units. They didn’t want a proprietary, locked-down commercial BMS (Building Management System) that required a certified technician to change a setpoint. They wanted something we could prototype, test, and deploy quickly.
Our answer was a custom smart HVAC control system built around the ESP32. It wasn't just about turning the unit on and off; it was about giving a legacy system situational awareness.
Step-by-Step Build Instructions
If you’re looking to replicate this, here is the logical flow we followed. It’s a solid template for any custom climate control project.
Step 1: The Sensor Network
We mounted the BME280s in strategic locations—away from direct sunlight and supply vents. We ran a 3.3V, GND, SDA, and SCL line to each sensor. Since the ESP32 has a strong internal pull-up, we had to be careful with long I2C runs; we ended up using a TCA9548A multiplexer to split the bus into four separate channels to avoid address conflicts and signal degradation.
Step 2: Wiring the Actuators
This is the critical part. We wired the ESP32 GPIO pins to the PCA9685 via I2C. The PWM outputs from the PCA9685 were filtered through a simple low-pass RC filter (1kΩ resistor and 10µF capacitor) to produce a smooth DC voltage. This fed directly into the VAV damper controller. The compressor relay was wired through the SSR, which was triggered by a single GPIO pin.
Step 3: Firmware Development
We started with the ESP-IDF MQTT example. We modified the main loop to read the sensors every 5 seconds and push the data to the MQTT topic `hvac/sensors`. The PID controller ran every 10 seconds, comparing the average temperature against the schedule setpoint. We implemented a "deadband" of 0.5°C to prevent the dampers from hunting back and forth.
Step 4: The Dashboard
We used Node-RED on the same Raspberry Pi to create a simple dashboard. This allowed the facility manager to change the schedule, view historical temperature trends, and manually override the system if a meeting room was booked unexpectedly.
Step 5: Testing & Validation
We ran the system in "parallel mode" for a week—our controller was reading data and simulating decisions, but the actual relays were still on the old system. This allowed us to tune the PID gains without risking the comfort of the occupants. After a week of stable data, we flipped the switch.
The Advantages We Saw
The results were immediate and measurable. We saw a 22% reduction in HVAC runtime within the first month, simply because the system stopped conditioning empty rooms.
- Adaptive Scheduling: The old system ran from 8 AM to 6 PM regardless. Our system uses a "learning" algorithm (a simple lookup table based on historical PIR data) to delay the start time of the HVAC by 20 minutes if no one is detected in the building yet.
- Zone Control: By using the muxed sensors, we could control the VAV dampers individually. The server room, which generates a lot of heat, gets priority cooling, while the conference rooms get a temperature setback when they are unoccupied.
- Fault Detection: The ESP32 monitors the current draw on the compressor relay. If the compressor draws too much current (indicating a mechanical issue) or too little (indicating a refrigerant leak), the system sends an alert via MQTT. This predictive maintenance feature is a huge win for facility managers.
Final Thoughts
This project proved that you don't need a "smart" HVAC unit to have a Smart HVAC control system. By retrofitting the control layer with an ESP32, we gave a legacy system a new brain. It’s cost-effective, open-source compatible, and—most importantly—it works.
If you have a similar piece of equipment that needs a connectivity upgrade, or if you need help moving from a breadboard prototype to a manufacturable PCB design for a product like this, our team is ready to help. We handle everything from the KiCad layout to the Zephyr RTOS firmware and shipping you a fully tested prototype.
Schematics, diagrams and documents
Credits
chanchaldada
Chanchal Dada is an IoT developer at DigitalMonk, focused on building smart embedded systems using Arduino and ESP32. She specializes in IoT-based automation, smart monitoring solutions, and real-world hardware-software integration for practical applications.
Related products





Leave your feedback...